Table des Matières
Publicité
Les langues disponibles
Les langues disponibles
Liens rapides
Frei stehende Versionen und Einbauversionen.
Versiónes de unidad libre y versiónes de unidad empotrada
207.5907.08
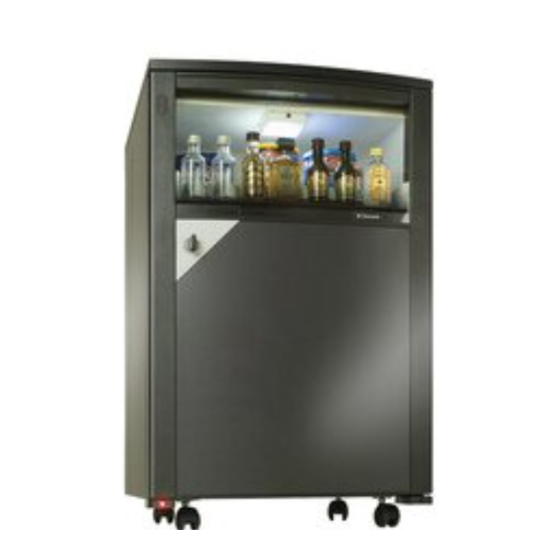
miniBar
RH 456LDE
Type: MB20-60
Free-standing and Built-in versions
Version pose libre et version encastrable.
Versione normale e versione da incasso.
Vrijstaand model en inbouw model.
Versão isolada e Versão incorporada.
RH 456LD
Operating Instructions
Bedienungsanleitung
Mode d'emploi
Istruzioni per l'uso
Handleiding
Manual de Instrucciones
Instruções de Utilização
GB
DE
BE
IT
NL
ES
PT
Publicité
Chapitres
Table des Matières

Manuels Connexes pour Dometic miniBar


Sommaire des Matières pour Dometic miniBar
- Page 1 RH 456LDE RH 456LD Type: MB20-60 Free-standing and Built-in versions Frei stehende Versionen und Einbauversionen. Version pose libre et version encastrable. Versione normale e versione da incasso. Vrijstaand model en inbouw model. Versiónes de unidad libre y versiónes de unidad empotrada Versão isolada e Versão incorporada.
- Page 2 Please read these operating instructions carefully before putting the refrigeration unit into operation. If you later sell or dispose of it, please ensure that the new owner receives these operating instructions. Please follow the installation details below carefully. Guarantee is valid for products installed as described only.
-
Page 3: Table Des Matières
Warranty arrangements are in accordance with EC Directive 44/1999/CE and the normal conditions applicable in the country concerned. For warranty or other servicing, such as spare-parts, please contact our Dometic Service Network. The warranty does not cover any damage due to improper use. -
Page 4: Unpacking
15. ADC optional (red LED) 7. Evaporator cover 16. Top 8. Evaporator sensor (behind evaporator) YOUR REFRIGERATOR IS EQUIPPED WITH LOCK, DOMETIC Zrt. DO NOT ACCEPT LIABILITY FOR LOSS OR DAMAGE OF KEYS. HOWEVER A COMPLETE LOCK CAN BE SUPPLIED FROM DOMETIC'S SERVICE. -
Page 5: Built-In Version
4.1.1. Built-in version This version is planned for building-in purposes. The miniBar can be screwed to the furniture using the fittings at the bottom. Drive in the screws (figure 2). The built-in version differs from the freestanding version by not having the wooden lid and by having 12 miniCool mm high feet instead of castors. -
Page 6: Using The Appliance
It is possible to modify the preset temperature value by using the remote control device. Please open the door and hold the remote control close to the door opening sensor (Fig. 6. B) of the minibar. Choose the desired temperature level by pressing miniCool miniBar either the yellow button for 3°C, or the blue button... -
Page 7: Defrosting, Cleaning And Maintenance
(uncooled compartment) maintenance The interior light (C) of the upper / uncooled This miniBar is fitted with an automatic defrost system compartment can be permanently switched (D) on / off Automatic defrost function with the switch that is accessible when the door of the The first defrosting phase commences 39 hours after appliance is opened. -
Page 8: Replacing The Decorative Door Panel
9. Replacing the decorativ door panel (Fig. 10-12.) Disconnect the mains, and lay the appliance on its back. Remove the four screws (1) from the lower hinge of the door. Remove the door downwards from the upper hinge bolt.(2-3) Remove screws (4) and pull off the frame edge (5). Slide the decorative panel (6) out of the door frame Figure 11. -
Page 9: Putting Into Operation
Dometic refrigerators bear this symbol on the specifications plate (data plate) to be found in the Green and Yellow: Earth interior of the unit. - Page 10 Bitte lesen Sie diese Anleitung sorgfältig, bevor Sie das Gerät einsetzen. Sollten Sie das Gerät weiter verkaufen oder entsorgen, übergeben Sie bitte diese Anleitung dem neuen Besitzer. Bitte beachten folgenden Installationsanweisungen genau. Garantieleistungen können nur in Anspruch genommen werden, wenn die Installation gemäß...
- Page 11 Die Garantie erlischt, wenn das Gerät nicht gemäß den Anweisungen installiert und benutzt wird. Nennen Sie bitte das Modell sowie die Produkt- und die Seriennummer des Geräts, wenn Sie sich mit dem Dometic Servicenetzwerk in Verbindung setzen. Diese Informationen finden Sie auf dem Typenschild im Innern des Kühlgerätes.
-
Page 12: Auspacken Des Geräts
7. Vorplatte Verdampfer 15. ADC optional (rote LED) 8. Verdampfersensor (hinter dem Verdampfer) 16. Deckplatte FALLS IHR KÜHLGERÄT MIT EINEM TÜRSCHLOSS AUSGESTATTET IST, ÜBERNIMMT DOMETIC ZRT KEINE HAFTUNG FÜR VERLOREN GEGANGENE ODER BESCHÄDIGTE SCHLÜSSEL. SCHLÖSSER SIND ALS KOMPLETTE EINHEIT ALS ERSATZTEIL ERHÄLTLICH. -
Page 13: Reinigung
Das Kühlgerät arbeitet mit einem elektrisch beheizten Absorptionskühler und ist extrem leise im Betrieb. 4.1.1. Einbauversionen Diese Versionen sind als Einbaugeräte konzipiert. Die miniBar kann mit den am Boden vorgesehenen miniBar miniBar Halterungen in einem Schrank verschraubt werden. Setzen Sie dazu die Schrauben ein (Abbildung 2). -
Page 14: Frei Stehende Version
Wird ein Fehler erkannt, beginnt die LED permanent zu blinken. In diesem Fall benachrichtigen Sie bitte Ihren zuständigen Kundendienst. 5.2. Temperaturregelung Die miniBar ist mit einem vollautomatischen mind. 60 mm Temperaturregler versehen. Es ist nicht nötig, die miniBar miniCool Temperatur des Faches zur Aufbewahrung manuell einzustellen. -
Page 15: Eiswürfel
Die rote LED Lampe (Abbildung 8 A) ist in einem der vorderen Beinen (rechts oder links) integriert, die die Tatsache zeigt, dass die Tür des Geräts geöffnet wurde. In diesem Fall: 1. Öffnen Sie die miniBar, prüfen Sie den Inhalt und füllen Sie bei Bedarf nach. Abbildung 5. -
Page 16: Auswechseln Der Türblende
2. Setzen Sie anschließend das Türsignal zurück, indem Sie die Fernbedienung (Abb. 9.) auf den Türsensor richten und die rote Taste drücken (Abb. 6 B). 3. Schließen Sie die miniBar. Abbildung 10. Abbildung 8. Gelb 3 °C Blau 5 °C schwarz Reset Kühl-... -
Page 17: Kundendienst
Haushaltsabfall entsorgt werden. Das Gerät darf nur mit der auf dem Typenschild angegebenen Spannung betrieben werden. Der Kühlschränke von Dometic enthalten das Symbol Netzstecker des Geräts darf nur an eine geerdete auf dem Datenschild (Typenschild) im Inneren des und den örtlichen Vorschriften entsprechende Steckdose Gerätes. - Page 18 Veuillez bien lire attentivement ce mode d'emploi avant de mettre cet appareil en service. Si vous deviez vendre ou céder l'appareil ultérieurement, veuillez bien remettre ce mode d'emploi à son nouveau propriétaire. Veillez à respecter scrupuleusement les directives suivantes d'installation. Au cas où vous n'auriez pas installé...
- Page 19 Les dommages résultant d'un usage inapproprié de l'appareil ne sont pas couverts par la garantie. Les modifications apportées à l'appareil ou l'utilisation de pièces de rechange qui ne sont pas d'origine Dometic, ne sont pas couvertes par la garantie. Le non-respect des instructions d'installation ou du mode d'emploi, entraîne l'extinction totale de cette garantie.
-
Page 20: Déballage De L'appareil
15. ADC optionnel (LED rouge) 8. Capteur de l'évaporateur (derrière l'évaporateur) 16. Toit AU CAS OÙ LE RÉFRIGÉRATEUR EST ÉQUIPÉ D'UNE SERRURE, DOMETIC ZRT N'ASSUME AUCUNE GARANTIE POUR DES CLÉS PERDUES OU ENDOMMAGÉES. VOUS POURREZ COMMANDER UNE NOUVELLE SERRURE SOUS FORME D'UNITÉ COMPLÈTE. -
Page 21: Nettoyage
200 cm². Ces appareils ont été conçus pour être encastrés. Vous pourrez visser le miniBar dans un meuble, en utilisant les dispositifs de fixation, prévus à cet effet, situés au fond de l'appareil. Ce qui se fera en utilisant... -
Page 22: Version Pose Libre
En cas de reconnaissance d'une défaillance, la lampe LED clignotera en permanence. Il vous faudra alors en aviser votre service après Figure 3 vente. 5.2. Réglage de la température Le miniBar est équipé d'un régulateur de température automatique. n'est nécessaire régler manuellement température du compartiment de rangement. -
Page 23: Glaçons
être des différences indésirables de température à l'intérieur de l'appareil. 8. Dégivrage, nettoyage et entretien Figure 6. Le miniBar est équipé d'un système de dégivrage 8.1.2. Eclairage LED intérieur automatique. (compartiment non réfrigéré) Degivrage automatique (Fig. 7) La première phase de dégivrage commencera... -
Page 24: Contrôle Automatique De La Porte (Adc), En Option (Led Rouge)
(gauche ou droit) et indique que la avec les quatre vis (11). porte du réfrigérateur est ouverte. Dans ce cas : 1. Ouvrez le miniBar, vérifiez-en le contenu, remplissez-le en cas de besoin. 2. Remettez ensuite le signal de la porte à zéro en dirigeant la télécommande (Figure 9) vers le... -
Page 25: Service Après-Vente
10. Service après-vente Veuillez bien contrôler d'abord les points suivants avant de contacter notre service après-vente : Problème Raison possible Solution La performance frigorifique de Le compartiment refroidisseur contient une Réduire volume l'appareil est insuffisante. trop grande quantité d'aliments chauds. denrées stockées. -
Page 26: Recyclage
électriques électroniques. Il est interdit de jeter ce produit dans les ordures ménagères. Sur les réfrigérateurs Dometic, le symbole figure sur la plaque des caractéristiques (plaque signalétique) apposée à l'intérieur de l'appareil. Cet appareil est conforme aux directives CEE suivantes :... - Page 27 Leggere attentamente le presenti istruzioni per l'uso prima di mettere in funzione il refrigeratore. Nel caso di eventuale rivendita o smaltimento del frigorifero, il presente manuale d'uso dovrà essere consegnato al nuovo proprietario. Seguire attentamente le istruzioni d'installazione qui elencate: La garanzia è valida esclusivamente nel caso in cui il prodotto venga installato come specificato qui di seguito.
- Page 28 La garanzia decade in caso di inosservanza delle istruzioni di installazione e uso. Nel contattare Dometic Service Network occorre segnalare il modello, il codice prodotto e il numero di serie. Queste informazioni sono riportate sulla targhetta identificativa applicata all'interno del frigorifero.
-
Page 29: Rimozione Dell'imballaggio
6. Scompartimento di deposito (non raffreddato) 16. Coperchio 7. Riparo dell'evaporatore 8. Sensore dell'evaporatore (situato dietro l'evaporatore) SE IL FRIGORIFERO FOSSE DOTATO DI SERRATURA, DOMETIC ZRT. NON È RESPONSABILE DELL'EVENTUALE PERDITA O DANNEGGIAMENTO DELLE RELATIVE CHIAVI. TUTTAVIA POTRÀ ESSERE FORNITA UNA SERRATURA DI RICAMBIO COMPLETA. -
Page 30: Pulizia
7. Le eventuali griglie di aerazione utilizzate refrigerante assorbimento riscaldato devono avere una superficie di apertura elettricamente garantisce minima di 200 cm² ciascuna. funzionamento estremamente silenzioso. 4.1.1. Versione da incasso Questa versione è stata progettata per essere incassata. Il miniBar può essere fissato al mobile... -
Page 31: Versione Normale
Contattare in questo caso il vostro Centro di assistenza autorizzato. 5.2. Regolazione della min. 60 mm temperatura miniBar miniCool Il miniBar è dotato di un regolatore di temperatura automatico. deve aggiustare temperatura dello scompartimento a mano. Il sistema di comando... -
Page 32: Controllo Del Gruppo Refrigerante (Cooling Unit Control, Cuc)
8. Sbrinamento, pulizia e refrigerante (Cooling Unit manutenzione Control, CUC) Il miniBar è dotato di un sistema di sbrinamento automatico. Il sistema di comando controlla il funzionamiento dopo ogni periodo di sbrinamento (la prima fase di Funzione de sbrinamento automatico... -
Page 33: Illuminazione
Reset ento Figura 6. 8.1.2. Illuminazione LED interna Figura 9. (scompartimento non 5. Collegare il miniBar alla rete elettrica. Dopo raffreddato) (fig. 7) l'apertura della porta il LED rosso deve essere acceso. Si può accendere / spegnere (D) l'illuminaziona interna (C) dello scompartimento superiore/non 6. -
Page 34: Assistenza Clienti
Figura 11. Figura 12. 10. Assistenza Clienti Prima di chiamare l'Assistenza tecnica, effettuare un semplice controllo dei seguenti punti: Problema Causa possibile Soluzione L'apparecchio non raffredda in Il frigo è stato caricato con troppi cibi e/o Caricare il frigo con meno cibi modo sufficiente. -
Page 35: Messa In Servizio
Il simbolo si trova sulla targhetta dei dati tecnici dei frigoriferi Dometic (targhetta del modello) 12. Informazioni per la all'interno dell'apparecchio. protezione dell'ambiente Il frigorifero non contiene CFC/HCFC. -
Page 36: Norme Di Garanzia
NORME DI GARANZIA Il periodo di garanzia per i nostri prodotti è di un anno dalla data di vendita. Durante il periodo di garanzia la Società si impegna a sostituire gratuitamente tutte le parti Che presentassero difetti di fabbricazione esclusi i pezzi ad usura. Le riparazioni in garanzia si intendono franco Electrolux Commerciale S.r.l. - Page 37 Lees de gebruiksaanwijzing aandachtig door voordat u het apparaat in gebruik neemt. Als u het apparaat verkoopt of weggeeft, zorg er dan voor dat de nieuwe eigenaar de gebruiksaanwijzing krijgt. Neem aanwijzingen uit de handleiding zorgvuldig in acht. Garantie geldt alleen voor apparaten welke conform de hier beschreven aanwijzingen zijn geinstalleerd.
- Page 38 Voor vragen over garantie, klantenservice en onderdelen kunt u contact opnemen met Dometic servicedienst. Schade veroorzaakt door verkeerd gebruik, valt niet onder de garantie. Schade als gevolg van modificaties of gebruik van onjuiste onderdelen valt niet onder de garantie.
-
Page 39: Afbeelding Van De Koelkast
6. Opslagdeel (ongekoeld) 14. Deurvakken 7. Verdamperdeksel 15. ADC optioneel (rode LED) 8. Verdampervoeler (achter verdamper) 16. Bovenkant WANNEER U EEN KOELKAST MET SLOT HEEFT, IS DOMETIC NIET AANSPRAKELIJK VOOR VERLIES OF BESCHADIGING VAN SLEUTELS. SLOTEN KUNNEN ALS COMPLEET ONDERDEEL WORDEN VERVANGEN. -
Page 40: Plaatsing Van De Koelkast
4.1.1. Inbouwmodel Deze modellen zijn ontworpen als inbouwapparaten. De miniBar wordt in tegenstelling tot vrijstaande modellen zonder vloerframe, koelunit-afdekking, deurpaneel en paneel voor bedieningsunit geleverd (afbeelding 2.) De ingebouwde versie verschilt in zoverre van het... -
Page 41: Vrijstaand Model
(Afb. 6. B). Kies het gewenste temperatuurniveau door op de gele knop Lucht in Lucht in voor 3°C of op de blauwe knop voor 5°C te drukken. -
Page 42: Nuttige Tips
Laat de geval is: deur van de koelkast openstaan. Nadat het toestel 1. open dan de miniBar, controleer de inhoud van ontdooit is moet u de binnenkant van de koelkast met de koelkast en vul bij wat er ontbreekt. -
Page 43: Klantenservice
geel 3 °C blauw 5 °C zwart rood reset deursignaal- koel- reset systeem Afbeelding 9. Afbeelding 10. 9. Verwisselen van het deurpaneel (Afb. 10-12) Schakel het toestel van de stroomvoorziening af en leg het op zijn achterkant. Verwijder de vier schroeven (1) van het onderste deurscharnier. -
Page 44: Inwerkingstelling
Ze mogen niet via het gewone huisafval worden weggegooid. Controleer of de aanwezige stroomspanning overeenkomt met de gegevens op het typeplaatje. Bij koelkasten van Dometic staat het symbool op het typeplaatje aan de binnenkant van het 12. Informatie omtrent apparaat. - Page 45 Lea atentamente este Manual de Instrucciones antes de poner este aparato en marcha. Si en el futuro Ud. lo vende o se deshace de él, asegúrese entonces de que el nuevo propietario reciba también este Manual de Instrucciones. Le rogamos seguir atentamente los detalles de instalación que presentamos a continuación.
- Page 46 Indique por favor el nombre del modelo así como el número del producto y su número de serie al comunicarse con la Red de Servicio de Dometic. Hallará estos datos en la placa de características técnicas situada en el...
-
Page 47: Componentes Del Aparato
8. Sensor del evaporador (detrás del evaporador) EN EL CASO DE QUE SU REFRIGERADOR ESTÉ EQUIPADO CON UNA CERRADURA, DOMETIC ZRT NO ACEPTA NINGUNA RESPONSABILIDAD POR LA PÉRDIDA O EL DAÑO DE LAS LLAVES. SE PUEDE SUMINISTRAR UNA CERRADURA COMPLETA. -
Page 48: Ubicación Del Aparato
200 cm² como mínimo Esta versión está diseñada para que el aparato quede empotrado en la pared. El miniBar puede sujetarse con tornillos al mueble usando los accesorios de soporte en su parte inferior. Para... -
Page 49: Versión De Unidad Libre
Si esto llegase a ocurrir, por favor acuda a un centro de Servicio al Cliente. 5.2. Regulación de la temperatura El miniBar está equipado de un regulador de temperatura automático. No es necesario ajustar la temperatura del compartimiento de minimo... -
Page 50: Cubitos De Hielo
8. Descongelación, limpieza y mantenimiento miniBar está equipado de un sistiema de descongelamiento automático. Función de descongelación automática La primera fase de descongelación se inicia 39 Figura 6. horas después de la operación inicial y dura dos 8.1.2. -
Page 51: Control De Puerta Automático (Adc) Opcional (Led Rojo)
(11). para indicar que la puerta del aparato está abierta, y en ese caso: 1. Abra el miniBar, revise el contenido y, si lo desea, añada algún otro alimento o bebida. 2. Reponga seguidamente la señal de control de la puerta a su estado anterior dirigiendo el mando a distancia (Fig. -
Page 52: Servicio Al Cliente
10. Servicio al cliente Antes de avisar al Servicio al Cliente, compruebe lo siguiente: Problema Posible causa Solución El aparato no enfría lo suficiente introdujeron demasiados Reduzca la cantidad de alimentos alimentos en su interior. en el interior del refrigerador. La puerta no se cerró... -
Page 53: Reciclaje
Este producto no debe desecharse en la basura doméstica convencional. Los refrigeradores de Dometic llevan el símbolo en la placa de datos (placa indicadora) situada en el interior del aparato. Este unidad cumple con las siguientes directivas de la EEC: Directiva LVD 73/23/EEC, con la modificación... - Page 54 Antes de utilizar esta unidade de refrigeração leia atentamente este manual de instruções. Caso, mais tarde queira vende-lo ou reciclá-lo, assegure que o novo proprietário receba este manual de instruções. Por favor siga os seguintes detalhes de instalação com cuidado. A garantia é...
- Page 55 A garantia não será aplicada, se as instruções de instalação e funcionamento não forem seguidas. Ao contactar o Serviço de Rede Dometic, mencione por favor, o modelo, número do produto e número de série. Encontrará esta informação na placa de dados, colocada na parte interior da geladeira.
- Page 56 16. Coberta 7. Tampa do evaporador 8. Sensor do evaporador (atrás do evaporador) EM CASO DA SUA MINIBAR SE ENCONTRAR EQUIPADA COM FECHAUDA, A DOMETIC ZRT NÃO SE RESPONSABILIZA POR PERDA OU DANOS DE CHAVES. PODE SER FORNECIDO UM FECHADURA COMPLETA.
-
Page 57: Colocação Do Aparelho
é válida para os produtos instalados OBTER SINAIS DE CONGELAMENTO segundo o descrito. Durante o processo de refrigeração o 1. O MINIBAR tem de estar nivelada em aparelho emite calor do condensador (por ambas as direcções baixo da parte superior da cobertura traseira) para 2. -
Page 58: Utilização Do Aparelho
5.2. Regulação da temperatura 60 mm no m nimo mínimo O miniBar está equipado com um regulador de miniCool miniBar temperatura automático. Não é necessário regular a temperatura do compartimento manualmente. - Page 59 O LED vermelho (Fig. 8 A) está incorporado no pé anterior (esquerdo ou direito) e marca que a porta do refrigerador está aberta. Caso afirmativo: 1. Abra o miniBar e verifique o conteúdo no compartimento e se necessário reabasteça- Figura 5. 8.1. LED 8.1.1.
- Page 60 2. Reinicialize o sinal de controlo da porta ao segurar o telecomando (Fig. 9) contra o sensor de abertura da porta e carregue no botão "vermelho" (Fig. 6 B) 3. Feche o miniBar. Figura 10. Figura 8. Azul 5 °C Amarelo 3 °C...
-
Page 61: Pôr Em Funcionamento
(por exemplo connessione duma lâmpada). Se, após verificar todos os pontos acima mencionados e, mesmo assim, o miniBar continua a não funcionar satisfatoriamente, contacte um serviço técnico Dometic. Mencione o problema, modelo, produto e número de série. (Detalhes do modelo, produto e número de série,... - Page 62 Este aparelho não deve ser jogado fora junto com o lixo doméstico normal! Os frigoríficos da Dometic levam um símbolo na placa de características técnicas (placa do tipo) no interior do aparelho. Este aparelho está de acordo com as...