Table des Matières
Publicité
Les langues disponibles
Les langues disponibles
Liens rapides
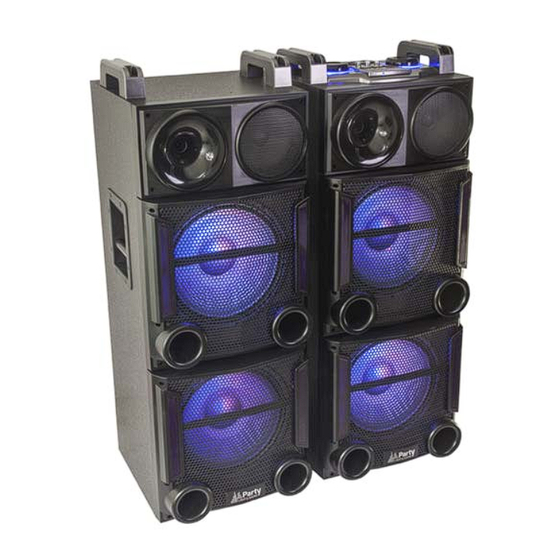
SPEAKER SYSTEM WITH BLUETOOTH, USB, SD & LED ILLUMINATION
SYSTEME DE SONORISATION AVEC BLUETOOTH, USB, SD & ANIMATION LUMINEUSE
LAUTSPRECHERSYSTEM MIT BLUETOOTH, USB, SD & LED LEUCHTFLÄCHE
SISTEMA DE SONORIZACION CON BLUETOOTH, USB, SD Y ANIMACION LUMINOSA
SISTEM DE SONORIZARE CU BLUETOOTH, USB, SD & ANIMATIE LUMINOASA
Imported from China by LOTRONIC SA – Av. Z. Gramme 9 – B‐1480 Saintes
©Copyright LOTRONIC 2018
LUIDSPREKERSYSTEEM MET BLUETOOTH, USB, SD & LED PANEEL
GB ‐ INSTRUCTION MANUAL
F ‐ MODE D'EMPLOI
D ‐ BEDIENUNGSANLEITUNG
ES – MANUAL DE INSTRUCCIONES
RO – MANUAL DE UTILIZARE
PARTY‐BOX412
NL – HANDLEIDING
PARTY‐BOX412
1
Publicité
Table des Matières

Manuels Connexes pour Party Light & Sound PARTY-BOX412


Sommaire des Matières pour Party Light & Sound PARTY-BOX412
- Page 1 SPEAKER SYSTEM WITH BLUETOOTH, USB, SD & LED ILLUMINATION SYSTEME DE SONORISATION AVEC BLUETOOTH, USB, SD & ANIMATION LUMINEUSE LAUTSPRECHERSYSTEM MIT BLUETOOTH, USB, SD & LED LEUCHTFLÄCHE LUIDSPREKERSYSTEEM MET BLUETOOTH, USB, SD & LED PANEEL SISTEMA DE SONORIZACION CON BLUETOOTH, USB, SD Y ANIMACION LUMINOSA SISTEM DE SONORIZARE CU BLUETOOTH, USB, SD & ANIMATIE LUMINOASA PARTY‐BOX412 GB ‐ INSTRUCTION MANUAL F ‐ MODE D’EMPLOI D ‐ BEDIENUNGSANLEITUNG NL – HANDLEIDING ES – MANUAL DE INSTRUCCIONES RO – MANUAL DE UTILIZARE Imported from China by LOTRONIC SA – Av. Z. Gramme 9 – B‐1480 Saintes ©Copyright LOTRONIC 2018 ...
- Page 2 GB Please read the manual carefully and keep it for future reference. The lightning flash with arrowhead symbol, within an equilateral Triangle, is intended to alert the user to the presence of not insulated dangerous voltages within the product’s enclosure that may be of sufficient magnitude to constitute a risk of electric shock to persons. The exclamation point within an equilateral triangle is intended to alert the user to the presence of important operating and maintenance (servicing) instructions in the literature accompanying the appliance. CAUTION: 1. Do not place any recipients filled with liquids, such as glasses or vases, on top of or directly next to the appliance. They could fall over, causing water to enter the appliance. Never pour out liquids over the appliance. Do not place small objects, such as coins or paper clips, on the appliance since they could fall inside the appliance and cause fire or a shock hazard! If any liquid or objects enter the appliance, pull immediately the mains plug out of the socket and contact a specialist. 2. 0nly pull the mains plug out of the socket by the intended gripping surface. Do not pull it by the cable. 3. Never plug the mains plug in or out with damp or wet hands 4. Electrical appliances must be kept out of the reach of children. Be particularly careful if children are present. Children are not aware of the hazards involved in handing electrical appliances ...
- Page 3 Description of the top panel 1. 3 Inputs for wired mics (not supplied) 2. SD card input 3. USB stick input 4. Microphone volume control 5. Master volume control 6. LED display 7. In USB/SD/Bluetooth mode: press to go back to the previous track. 8. Play/pause in USB/SD/Bluetooth mode. 9. In USB/SD/Bluetooth mode: press to go to the next track. 10. Echo control for the microphone 11. BASS control: Adjustment of low frequencies 12. TREBLE control: Adjustment of high frequencies 13. REC button: Press this button to record the sound of the wired or wireless mic on the USB or SD. 14. REPEAT (in USB/SD mode): Press to toggle between repeating the current track or repeating all tracks. 15. MODE: Press this button to switch between the various inputs (LINE, USB, SD, Bluetooth) 16. Equalizer (in USB/SD mode): Press to cycle through various styles (rock, pop, etc.) Description of the remote control ...
-
Page 4: Bluetooth Operation
Description of the back panel 1. Speaker output connector to the passive box: Connect the RCA cable from the passive box to this RCA input 2. Light output connector to the passive box: Connect the DC plug from the passive box to this connector 3. LINE input via RCA connectors 4. AC input connector 5. ON/OFF switch of the system 6. Switches the LED on the woofer on /off CONNECTION OF A WIRED MICROPHONE (not included) Connect the microphone to one of the MIC sockets and switch it on. Note: If you are playing music from any other input, connecting the microphone will not mute the sound output. KARAOKE Function This feature is available with any input. Play a track through LINE/USB/SD/Bluetooth, connect a microphone and sing along. Built‐in REC function 1. Plug a microphone into one of the MIC inputs. 2. Insert a USB/SD card into the corresponding port. Press MODE button and select USB/SD mode. 3. If the USB/SD card is plugged into the speaker for the first time, the system will automatically create a folder named ‘JL_REC to save the recorded files. 4. When you are ready to record, press REC button to record the sound of the microphone. ... - Page 5 Problem Possible cause Solution No sound when power 1. No input source 1. Connect an LINE signal on 2. Volume down 2. Adjust volume No sound from the 1. Bad mic connection 1. Plug in the mic properly microphone 2. Mic not switched on 2. Switch mic on 3. Mic volume down 3. Increase mic volume No sound after inserting 1. Incorrect file format 1. File format should be MP3 USB/SD card 2. Bad connection of USB/SD card 2. Plug in USB/SD card properly If Speaker makes loud 1. Microphone switched on but 1. Keep the microphone 2m away noises may be too close to the speaker from the speaker 2. Microphone switched on but is 2. Turn off microphone if not in use. not being used. 3. Adjust microphone volume to 3. Microphone volume may be lower mode too loud 4. Keep mobile away from the 4. Mobile phone is being used too speaker whilst attending a call. close to the speaker 5. Keep the speaker away from ...
-
Page 6: Entrées Micro
7. Remplacer les câbles secteur défectueux uniquement par un spécialiste. Risque d’électrocution! 8. Si vous n’êtes pas sûr de la bonne connexion ou si vous avez des questions auxquelles le mode d’emploi ne répond pas, n’hésitez pas à demander conseil à un spécialiste ou votre revendeur. 9. Débranchez l’adaptateur et éteignez l’appareil en cas d’une non‐utilisation prolongée afin d’éviter des dommages causés par des surtensions. Utilisation de la Télécommande Utilisez la télécommande à une distance maximale de 6m et un rayon de 30° par rapport à l’appareil. Pointez la télécommande en direction du capteur. Il ne doit pas y avoir d’obstacle entre la télécommande et le capteur. La télécommande risque de ne pas fonctionner lorsque le capteur est soumis à une forte lumière. Si la télécommande ne fonctionne pas, vérifiez les piles Installation des Piles Retirez le couvercle du compartiment à piles au dos de la télécommande et insérez 2 piles AAA (LR3) en respectant la bonne polarité. Description des contrôles sur le dessus 1. 3 Entrées micro 2. Branchement d’une carte SD 3. Branchement d’une clé USB 4. Contrôle de volume micro 5. Contrôle de volume général 6. Afficheur à LED 7. Retour vers le titre précédent. 8. Lecture/pause. 9. Aller au titre suivant. 10. -
Page 7: Branchement D'un Microphone
Description de la télécommande 1. Mise en veille 2. Mode: Pression courte pour passer dans les modes Bluetooth/LINE IN/USB/SD 3. Touches numériques En mode USB/SD: accédez directement au titre en saisissant son numéro 4. Lecture de fichiers enregistrés sur le support USB/SD 5. Enregistrement 6. MUTE: Coupe le son. Appuyez à nouveau pour remettre le son. 7. Réglage de volume 8. Commute en mode USB/SD. En mode USB/SD : lecture du titre. 9. Pause/Lecture En mode USB/SD/Bluetooth, cette touche a la fonction pause/lecture. En mode LIGNE, cette touche n’a pas de fonction Précédent En mode USB/SD/Bluetooth: pression courteTitre précédent; En mode USB/SD: pression longueretour rapide. En mode LIGNE: aucune fonction Suivant En mode USB/SD/Bluetooth: pression courteTitre suivant; Pression En mode USB/SD: longue de plus de 3 secondesavance rapide. En mode LIGNE: aucune fonction 10. Répétition (en mode USB/SD): Unique – tout – quitter la répétition. Maintenir appuyé pendant plus de 3 secondes pour revenir aux réglages d’usine. 11. CH+ : pas de fonction 12. CH‐ : pas de fonction 13. - Page 8 USB/carte SD. L’enceinte devrait refonctionner normalement. La taille maximale admise des sources USB et SD est de 32 Go. Fichiers de musique compatibles: MP3, WMA SYNCHRONISATION BLUETOOTH 1. Mettez l’appareil sous tension et appuyez sur la touche MODE pour sélectionner la fonction BLUETOOTH. 2. Activez la fonction Bluetooth sur l’appareil externe à synchroniser. 3. Lancez la recherche d’appareil. L’enceinte s’affiche sous le nom "PARTY‐BXOX412". 4. Appuyez sur la touche pour commencer la lecture. Sélectionnez les titres avec les touches et . Diagnostic de défaillance En cas de problème, suivez les instructions ci‐dessous. Si le problème persiste, contactez votre revendeur. Problème Cause possible Solution Pas de son lorsque le 1. Absence de source d’entrée 1. Branchez une source d’entrée système est mis sous 2. Volume réglé au minimum 2. Réglez le volume sur un niveau tension approprié Pas de son du 1. Le microphone est mal branché 1. Branchez fermement le micro microphone 2. Le micro n’est pas allumé 2. Allumez le micro 3. Volume micro réglé au minimum 3. Augmentez le volume du micro Pas de son de la 1. Mauvais format de fichier 1. Transformez les fichiers en MP3 source USB/SD 2. Source USB/SD mal branchée 2. Branchez correctement la source USB/SD ...
-
Page 9: Sicherheitshinweise
D Anleitung vor Inbetriebnahme genau durchlesen und für spätere Bezugnahme aufbewahren. Der Blitz im Dreieck weist den Bediener auf gefährliche, nicht isolierte Spannungen im Gehäuseinneren hin, die stark genug sind, um einen elektrischen Schlag zu verursachen. Das Ausrufezeichen im Dreieck weist den Benutzer auf wichtige Hinweise in der Betriebsanleitung hin. SICHERHEITSHINWEISE 1. Keine mit Flüssigkeit gefüllten Behälter wie Gläser oder Vasen auf oder direkt neben das Gerät stellen. Sie können umfallen und Wasser kann ins Gerät dringen. Niemals Flüssigkeiten über dem Gerät einschenken. Keine Kleinteile wie Münzen oder Briefklammern aufs Gerät legen. Sie können ins Gehäuse dringen. Es besteht Feuer‐ und Stromschlaggefahr! Falls doch einmal Flüssigkeiten oder Gegenstände ins Gerät dringen sollten, ziehen Sie sofort den Netzstecker ab und benachrichtigen Sie einen Fachmann. 2. Beim Abziehen des Netzsteckers immer an der dafür vorgesehenen Stelle anfassen. Niemals am Kabel ziehen. 3. Niemals den Netzstecker mit nassen oder feuchten Händen anfassen 4. Elektrogeräte außerhalb der Reichweite von Kindern aufbewahren. In Anwesenheit von Kindern besonders vorsichtig sein. Kinder sind sich der Gefahren bei falscher Handhabung von Elektrogeräten nicht bewusst. Sie könnten versuchen, Gegenstände ins Gerät zu stecken und einen ... - Page 10 Beschreibung der Bedienelemente auf der Oberseite 1. 3 Mikrofonbuchsen 2. Anschluss für eine SD Karte 3. Anschluss für einen USB Stick 4. Mikrofonlautstärkeregler 5. Hauptlautstärkeregler 6. LED Display 7. Zurück zum vorigen Titel. 8. Play/Pause. 9. Weiter zum nächsten Titel 10. Echo Regler vom Mikrofon 11. BASS Regler 12. TREBLE Regler 13. Nimmt das Signal vom Mikrofon auf einem USB Stick oder einer SD Karte auf. 14. Im USB/SD Betrieb: Wiederholung eines oder aller Titel. 15. MODE Eingangswahlschalter: Drücken, um die gewünschte Eingangsquelle zu wählen (LINE, USB, SD, Bluetooth) 16. Equalizer (nur USB/SD): Wahl zwischen Rock, Pop, usw. Beschreibung der Fernbedienung 1. Standby Taste 2.
-
Page 11: Anschluss Eines Mikrofons
13. Play/Pause im USB/SD/BT Betrieb 14. EQ im USB/SD Betrieb: Änderung des Musikstils in Klassik, Rock, Vocal, Pop, usw. Beschreibung der Rückseite 1. Cinch Ausgang zur passiven Box: Das Cinch Kabel von der passiven Box an diesen Verbinder anschließen. 2. 12Vac Speisung für die LED Beleuchtung. Das Kabel mit dem DC Stecker von der passiven Box an diesen Verbinder anschließen. 3. LINE Eingang über Cinch Verbinder 4. AC Netzanschlussbuchse 5. Ein/Aus Schalter der Anlage 6. Ein/Ausschalten der LED Beleuchtung des Woofers ANSCHLUSS EINES MIKROFONS Mikrofon an eine der 3 MIC Buchsen anschließen und einschalten. Hinweis: Die Musik wird weiter abgespielt, wenn ein Mikrofon angeschlossen wird. KARAOKE Funktion Diese Funktion ist mit jeder Eingangsquelle kompatibel. Spielen Sie einen Song ab, schließen Sie das Mikrofon an und singen Sie zur Musik. Eingebaute Aufnahmefunktion 1. Mikrofon an eine MIC Buchse anschließen. 2. Die USB/SD Karte einstecken und die Taste MODE drücken, um USB oder SD Betrieb zu wählen. 3. Wenn die USB/SD Karte zum ersten Mal an dieses Gerät angeschlossen wird, wird ein Ordner mit dem Namen JL_REC erstellt und die Aufnahmen werden automatisch in diesem Ordner gespeichert. ... - Page 12 Fehlerdiagnose Im Problemfall die Anweisungen in der nachstehenden Tabelle befolgen. Wenn das Problem weiterhin besteht, nehmen Sie Verbindung mit Ihrem Fachhändler auf. Problem Mögliche Ursache Lösung Kein Ton nach dem 1. Keine Eingangsquelle 1. Eingangsquelle anschließen Einschalten 2. Lautstärke aufs Minimum eingestellt 2. Lautstärke einstellen Kein Ton vom Mikrofon 1. Loser Anschluss 1. Mikrofon fest einstecken 2. Mikrofon ist ausgeschaltet 2. Mikrofon einschalten 3. Mikrofonlautstärke ist aufs 3. Mikrofonlautstärke erhöhen Minimum eingestellt Kein Ton von der MP3 1. Falsches Dateiformat 1. In MP3 Format umwandeln Datei 2. USB/SD Medium nicht eingesteckt 2. USB/SD Medium fest einstecken Lautsprecher macht 1. Mikrofon ist zu dicht am 1. Mikrofon mindestens 2m vom Geräusche Lautsprecher. Gerät entfernen 2. Mikrofon ist eingeschaltet, wird 2. Bei Nichtgebrauch Mikrofon aber nicht benutzt. ausschalten 3. Mikrofonlautstärke zu hoch 3. Mikrofonlautstärke verringern 4. Handy wird in Lautsprechernähe 4. Handy bei Anrufen vom Gerät benutzt ...
- Page 13 elektrische apparaten. Kinderen kunnen proberen voorwerpen in het apparaat te stekken. Er is een levensbedreigend gevaar van stroomslag. 5. Plaats het apparaat nooit op een instabiele of beweegbare ondergrond. Mensen kunnen gewond raken of het apparaat wordt beschadigd door het vallen. 6. Alle personen die dit apparaat gebruiken, installeren of onderhouden moeten gekwalificeerd zijn en deze gebruiksaanwijzing naleven. 7. Defecte stroomkabels mogen enkel vervangen worden door specialisten. Gevaar van elektrische schok! 8. Als u niet zeker bent over de correcte aansluiting of als er vragen zijn die niet worden beantwoord door de gebruiksaanwijzing, contacteer een specialist. Raadpleeg een specialist indien u twijfel heeft aan het werkingsprincipe of de veiligheid van het product. 9. Adapter afkoppelen en toestel uitschakelen als het voor langere tijd niet wordt gebruikt om beschadiging door overspanningen te vermijden. ADVIES VOOR HET GEBRUIK VAN DE AFSTANDSBEDIENING De afstandsbediening heeft een bereik van 6m in een hoek van 30° ten opzichte van de ontvanger en moet altijd precies op de ontvanger worden gericht. Nooit voorwerpen tussen de ontvanger en de afstandsbediening plaatsen. Wanneer de ontvanger of de afstandsbediening onder een sterke lichtbron staan, kan de transmissie verstoord worden. Als de transmissie niet langer goed is, de batterij vervangen. Batterijen plaatsen Verwijder het deksel van het batterij vak en plaats 2 AAA batterijen met de juiste poling in het vak. Omschrijving van des controles en connectoren op het bovenpaneel 1. Connectoren voor microfoons 2. SD kaartje ingang 3. USB stick ingang 4.
-
Page 14: Aansluiting Van Een Microfoon
Omschrijving van het achterpaneel 1. Luidspreker uitgangsconnector naar de passieve box: Sluit de tulp connector van de kabel van de passieve box hier aan. 2. 12Vac uitgang voor de verlichting van de passieve box: Sluit de DC kabel van de passieve box hier aan. 3. LINE ingang via tulp connectoren 4. AC ingangsconnector 5. Aan/uit schakelen van het systeem 6. Aan/uit schakelen van de led verlichting van de woofer Omschrijving van de afstandsbediening 1. Standby toets 2. Mode: kort drukken om Bluetooth/LINE IN/USB/SD modus te kiezen 3. Nummer toetsen In USB/SD modus: directe toegang naar de track In alle andere modi hebben deze toetsen geen functie. 4. Afspelen van de opgeslagen bestanden op de USB/SD media 5. Record functie 6. MUTE: Stopt het geluid. Druk opnieuw om het geluid weer in te schakelen. 7. Volume instelling 8. Schakelt in USB/SD modus. In USB/SD modus: track afspelen. 9. Pauze/Play In USB/SD/Bluetooth modus schakelt deze knop tussen afspelen en pauze om In LINE modus heft deze knop geen functie Terug ... -
Page 15: Bluetooth Verbinding
2. Sluit een USB‐stick/SD‐kaart aan en druk de toets 13 om USB/SD te kiezen 3. Als de USB‐stick/SD‐kaart voor de eerste maal worden gebruikt met deze speaker maakt het systeem een bestand aan met de naam JL_REC. 4. Als u voor de opname klaar bent druk de opnametoets. Nu kunt u spreken of zingen in de microfoon. USB‐/SD‐poorten Tegen hitte, sterke magneetvelden en storingen beschermen. Als de luidspreker niet werkt, schakel hem uit en aan of ontkoppel de USB/SD kaartje en sluit ze weer aan. De luidspreker zou normaal werken. De speaker is geschikt voor MP3, WMA. De maximale capaciteit van een USB/SD medium is 32Gb. BLUETOOTH VERBINDING 1. Schakel het apparaat in en druk op de knop (13) om de Bluetooth‐functie te selecteren. 2. Activeer de Bluetooth‐functie op het externe apparaat. 3. Starten een zoekopdracht naar apparaten. Het apparaat verschijnt als "PARTY‐BOX412". 4. Druk op de toets om te beginnen met spelen, en de toetsen en voor de selectie van songs. FOUTDIAGNOSE In het geval van een probleem, de richtlijnen in onderstaande tabel volgen. Als het probleem aanhoudt, uw verkoper contacteren. Probleem Mogelijke oorzaak Oplossing Geen geluid 1. Geen bron aangesloten. 1. Aansluiten op een audiobron 2. Het volume staat op het laagste niveau 2. Het volume verhogen Geen geluid van 1. Microfoon is niet vast aangesloten 1. Microfoon vast aansluiten de microfoon 2. Microfoon is uitgeschakeld 2. Microfoon aanschakelen 3. Microfoon volume is op het minimum 3. Microfoon volume verhogen ingesteld ... - Page 16 ES Lea atentamente el manual y conserverlo para futuras consultas. El rayo dentro del triángulo, llama la atención sobre un daño físico (Como una electrocución, por ejemplo). El signo de exclamación dentro del triángulo, indica un riesgo en la manipulación o utilización del equipo. ATENCION: 1. No coloque pequeños objetos encima o cerca del equipo. Corre el riesgo de que se introduzcan dentro del equipo y puede producir daños al equipo y riego de descarga eléctrica a personas. 2. Para desconectar el enchufe, estire siempre de la clavija, jamás del cable. 3. Jamás enchufe o desenchufe el conector de corriente con las manos húmedas. 4. Mantener los equipos eléctricos como este fuera del alcance de los niños. Sea particularmente atento en presencia de niños, ya que estos no son conscientes de los peligros de un aparato eléctrico y puede intentar introducir objetos en el interior con el consecuente peligro de electrocución, por ejemplo. 5. Jamás coloque el equipo en una superficie inestable o móvil. El equipo sufre riego de caerse y dañar a una persona o/y al propio equipo. 6. Todo usuario del equipo ha de conocer todas estas normas de seguridad del equipo y respetarlas. 7. Para cambiar los cables de corriente defectuoso, solo lo puede hacer un especialista ya que tiene riesgo de electrocución. 8. Si usted no sabe conectarlo o hacerlo funcionar, pida ayuda a un profesional. 9. Desenchufe el adaptador y apague el equipo en caso de no utilización prolongada con el fin de de daños producidos por sobretensiones. Utilización del mando a distancia Utilice el mando a distancia a una distancia máxima de 6m y un ángulo de 30° en relación al equipo. Apunte el mando a distancia en dirección al captor. No debe de haber ningún obstáculo entre el mando a distancia y el captador. El mando a distancia, puede no funcionar si hay una fuerte luz sobre el captador. ...
- Page 17 10. Control del Eco del micrófono 11. BASS: Ajuste de los Graves 12. TREBLE: Ajuste de los Agudos 13. REC: Apriete para grabar el sonido del micro en una tarjeta SD o un Pen USB. 14. USB/SD: Apriete para repetir el título en curso o todos los títulos. 15. MODE: Apriete para seleccionar una de las fuentes de entrada (LINE, USB, SD, Bluetooth) 16. EQ para USB/SD: Apriete para seleccionar un estilo de sonido Controles traseros 1. Salida RCA hacía el altavoz pasivo: Conecte el cable RCA del altavoz pasivo a esta clavija 2. Alimentación 12Vac del juego de luz: Conecte el cable equipado con una clavija DC del altavoz pasivo, en esta clavija 3. Entrada LINE por clavijas RCA 4. Conector de alimentación AC 5. ON/OFF del equipo 6. ON/OFF de los LED del Woofer Descripción del mando 1. Puesta en espera 2. Modo: Presión corta para pasar por los modos Bluetooth/LINE IN/USB/SD 3.
-
Page 18: Conexion De Un Microfono
CONEXION DE UN MICROFONO Conecte el micrófono en la toma MIC IN y enciéndalo. Nota: El hecho de conectar un micrófono no corta el sonido de la fuente en curso de lectura. Función KARAOKE Esta función se puede utilizar con todas las fuentes de entrada. Conecte un micrófono y cante encima de la música que está reproduciéndose en la entrada LINE/USB/SD/ Bluetooth. Grabación 1. Conecte un micrófono en la entrada MIC IN. 2. Conecte un Pen USB/tarjeta SD en la entrada apropiada. Apriete la tecla 9 y seleccione USB/SD. 3. Si conecta el Pen USB/tarjeta SD por primera vez en este altavoz, el equipo, creara una carpeta con el nombre JL_REC. Todas las grabaciones serán automáticamente guardadas en esta carpeta. 4. Cuándo esté listo para la grabación, apriete en la tecla REC. Uso de la entrada USB/ mini SD Mantener protegido del calor, de los campos magnéticos potentes y de equipos que puedan provocar interferencias. Si el equipo no funciona, desenchufe y vuelva a enchufar el Pen USB/Tarjeta SD. El altavoz deberá volver a funcionar normalmente. La capacidad máxima admitida para las fuentes USB y SD es de 32 Gb. Ficheros de música compatibles: MP3, WMA SINCRONIZACION BLUETOOTH 1. Encienda el equipo y apriete la tecla MODE para seleccionar la fuente BLUETOOTH. 2. Active la función Bluetooth en el equipo externo a sincronizar. 3. Comience la búsqueda del equipo. El bafle se muestra como "PARTY‐BOX412". 4. Apriete la tecla para iniciar la lectura. Seleccione los títulos con las teclas y. Diagnóstico de fallo En caso de problema, revise las instrucciones siguientes. Si el problema persiste, contacte con su vendedor. Problema Causa posible Solución NO hay sonido 1. Ausencia de fuente de entrada 1. Conecte una fuente de entrada ... - Page 19 RO Vă rugăm să citiți cu atenție manualul de utilizare și să îl păstrați pentru consultări ulterioare. Simbolul unui fulger cu cap de săgeată, în cadrul unui triunghi echilateral, are rolul de a avertiza utilizatorul asupra tensiunilor periculoase care nu sunt izolate, în interiorul produsului și care ar putea avea o magnitudine suficientă pentru a constitui un risc de șoc electric pentru persoane. Semnul exclamării în cadrul unui trunghi echilateral, are rolul de a avertiza utilizatorul asupra prezenței unor instrucțiuni de funcționare și întreținere (service) din manualul de instrucțiuni al aparatului. ATENȚIE: 1. Nu puneți nici un recipient umplut cu lichide, cum ar fi pahare sau vaze, pe sau în apropierea aparatului. Acestea ar putea să cadă iar apa ar putea intra în aparat. Nu vărsați niciodată lichide pe aparat. Nu puneți obiecte mici, cum ar fi monede sau clame de hârtie, pe aparat deoarece ar putea cădea în aparat și ar putea cauza incendii sau șocuri electrice! Dacă vreun lichid sau obiect intră în aparat, deconectați imediat aparatul de la priză și contactați un service autorizat. Trageți de ștecher când scoateți aparatul din priză, nu trageți de cablu. 3. Nu conectați sau deconectați aparatul cu mâinile ude sau umede. 4. Produsele electrice nu trebuie lăsate la îndemâna copiilor. Acordați o atenție sporită dacă sunt copii în jurul aparatului. Copiii nu sunt conștienți de pericolele care pot apărea dacă manipulează ...
- Page 20 Descrierea panoului de sus 1. 3 intrări pentru microfoane cu fir (nu sunt incluse) 2. Intrare card SD 3. Slot USB 4. Control volum microfon 5. Control volum principal 6. Ecran LED 7. În modul USB/SD/Bluetooth: apăsați pentru a merge la piesa anterioară 8. Redare/pauză în modul USB/SD/Bluetooth. 9. In modul USB/SD/Bluetooth: apăsați pentru a merge la piesa următoare 10. Control ecou pentru microfon 11. Control BASS: reglarea frecvențelor joase 12. Control TREBLE: reglarea frecvențelor înalte 13. Buton REC: Apăsați acest buton pentru a înregistra sunetul de la microfon (cu fir sau wireless) pe un USB sau card SD. 14. REPETARE: Apăsați pentru a comuta între repetarea piesei curente și repetarea tuturor pieselor (modul USB/SD). 15. MOD: Apăsați acest buton pentru a comuta între diferitele intrări (LINE, USB, SD, Bluetooth) 16. Egalizator (modul USB/SD): Apăsați pentru a alege între diferitele stiluri (rock, pop, etc.) ...
- Page 21 Descrierea panoului din spate 1. Conector de ieșire a difuzorului la boxa pasivă: conectați cablul RCA al boxei pasive la acestă intrare RCA 2. Conector de ieșire lumină la boxa pasivă: conectați mufa DC de la boxa pasivă la acest conector. 3. Intrare LINE prin conectori RCA 4. Conector intrare AC 5. Comutator pornire/oprire sistem 6. Pornește/oprește LED‐ul de pe woofer CONECTAREA UNUI MICROFON CU FIR (nu este inclus) Conectați microfonul la una din intrările pentru microfon și porniți‐l. Notă: Dacă redați muzică de la o altă intrare, conectarea microfonului nu va opri sunetul. Funcția KARAOKE Această caracteristică este disponibilă la orice intrare. Redați o piesă prin AUC/USB/SD/Bluetooth, conectați un microfon și începeți să cântați. Funcția REC încorporată 1. Conectați un microfon la una din intrările pentru microfon. 2. Introduceți un USB/card SD în port‐ul corespunzător. Apăsați butonul MOD și selectați modul USB/SD. 3. Dacă USB‐ul/cardul SD este conectat la difuzor pentru prima dată, sistemul va crea automat un dosar numit ‘JL‐REC pentru a salva fișierele înregistrate. 4. Când sunteți pregătit să înregistrați, apăsați butonul REC pentru a înregistra sunetul de la microfon. Funcționare USB/SD ...
- Page 22 Problemă Cauză posibilă Soluție Niciun sunet la pornire 1. Nici o sursă de intrare 1. Conectați o sursă LINE 2. Volum scăzut 2. Reglați volumul Nu se aude niciun 1. Conexiune nereușită a 1. Conectați microfonul corect sunet de la microfon microfonului 2. Microfonul nu este pornit 2. Porniți microfonul 3. Volumul microfonului este la 3. Creșteți volumul microfonului minim Niciun sunet după 1.Format fișiere incorect 1. Formatul fișierelor trebuie să fie introducerea USB‐ MP3 ului/cardului SD 2. Conexiune nereușită a USB‐ 2. Conectați USB‐ul/cardul SD corect ului/cardului SD Dacă difuzorul emite 1. Microfonul este pornit dar este 1. Țineți microfonul la 2 m distanță zgomote puternice prea aproape de difuzor față de difuzor 2. Microfonul este pornit dar nu 2.Opriți microfonul dacă nu este este utilizat utilizat 3. Volumul microfonului poate fi ...
-
Page 23: Eu Declaration Of Conformity
PARTY LIGHT & SOUND Product name: SOUND SYSTEM WITH USB, SD & BLUETOOTH 2 x 12”/30cm Type or model: PARTY-BOX412 conforms with the essential requirements of: RED directive 2014/53/EU – LVD directive 2014/35/EU – EMC directive 2014/30/EU – ROHS directive 2011/65/EU... -
Page 24: Déclaration Ue De Conformité
SYSTEME DE SONORISATION AVEC USB, SD & BLUETOOTH 2 x 12”/30cm Type ou modèle: PARTY-BOX412 Auxquels se réfère cette déclaration sont conformes aux exigences essentielles et de : RED directive 2014/53/EU – LVD directive 2014/35/EU – EMC directive 2014/30/EU – ROHS directive 2011/65/EU Basés sur les standards appliqués :...