Table des Matières
Publicité
Les langues disponibles
Les langues disponibles
Liens rapides
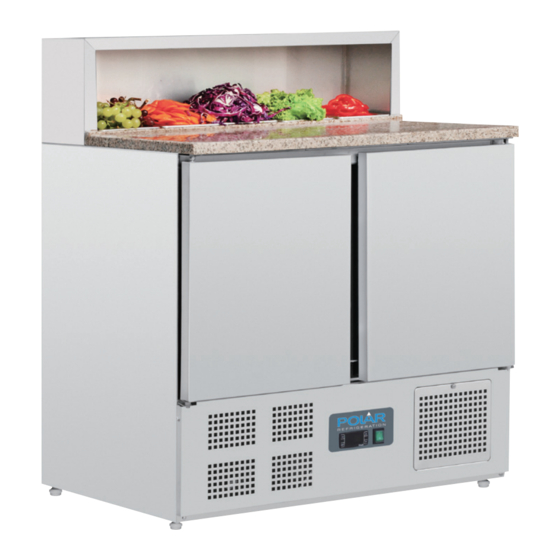
RVS voorbereidingstafels
NL
voor pizza's en salads
Handleiding
Comptoirs de préparation
FR
de pizzas / salades
réfrigérés inox
Mode d'emploi
Edelstahl-Kühltische für
DE
Pizza/Salat
Bedienungsanleitung
Model • Modèle • Modell • Modello • Modelo • Malli:
G603_CN267_ML_A5_v9_171215.indb 1
Stainless Steel
Refrigerated Pizza/Salad
Prep Counters
Instruction manual
9
IT
16
ES
23
PT
G603 / CN267 (AB090 & CN402)
Banchi refrigerati per
preparazione pizza/insalate
in acciaio inossidabile
Manuale di istruzioni
Frigoríficos para mostrador
de Preparados de Ensalada /
Pizzas de acero inoxidable
Manual de instrucciones
Bancadas refrigeradas
pizza/saladette em aço
inoxidável
Manual de instruções
30
37
44
2017/12/15 17:47
Publicité
Table des Matières
Dépannage

Manuels Connexes pour Polar Refrigeration G603


Sommaire des Matières pour Polar Refrigeration G603
- Page 1 Pizzas de acero inoxidable Mode d'emploi Manual de instrucciones Edelstahl-Kühltische für Bancadas refrigeradas Pizza/Salat pizza/saladette em aço Bedienungsanleitung inoxidável Manual de instruções Model • Modèle • Modell • Modello • Modelo • Malli: G603 / CN267 (AB090 & CN402) G603_CN267_ML_A5_v9_171215.indb 1 2017/12/15 17:47...
-
Page 2: Safety Tips
Safety Tips • Position on a flat, stable surface. • A service agent/qualified technician should carry out installation and any repairs if required. Do not remove any components or service panels on this product. • Consult Local and National Standards to comply with the following: - Health and Safety at Work Legislation - BS EN Codes of Practice... -
Page 3: Product Description
Product Description G603 - POLAR 2 Door Refrigerated Pizza/Salad Preparation Counter CN267 (CN402 & AB090) - POLAR 3 Door Refrigerated Pizza Preparation Counter Introduction Please take a few moments to carefully read through this manual. Correct maintenance and operation of this machine will provide the best possible performance from your POLAR product. - Page 4 Fitting the Shelves & Floor Guards • Collars x 6 • Brackets x 7 1. Place one set of shelf guides on either side of • Grub screws x 7 the cabinet at the desired height. • Screws x 12 2.
-
Page 5: Storing Food
Fit Glass Panels AB090 (CN267 Bracket Only) 1. Screw the collars to the rim of the appliance. Glass Panel Note: Ensure the hole in the Bolt Assembly collar for the grub screw faces inwards. Plug 2. Slot the two side panels into the collars, with the holes in the glass at the top. -
Page 6: Manual Defrost
Set the Operating Temperature • A POLAR agent or qualified technician must carry out repairs if required. 1. Press the SET button. The display will flash. 2. Press the buttons to display the Marble Care required temperature. • Do not use abrasive materials or detergents 3. -
Page 7: Technical Specifications
Technical Specifications Temperature Dimensions Weight Model Voltage Power Current Refrigerant Range H x W x D mm (kg) G603 230V 50Hz 230W 1.6A 2°C - 8°C R600a 70g 1100 x 900 x 700 CN267 230V 50Hz 230W 1.6A 2°C - 8°C... -
Page 8: Electrical Wiring
Electrical Wiring POLAR appliances are supplied with a 3 pin, moulded, BS1363 plug and lead, with a 13 amp fuse as standard. The plug is to be connected to a suitable mains socket. POLAR appliances are wired as follows: • Live wire (coloured brown) to terminal marked L •... - Page 9 Veiligheidstips • Plaatsen op een vlakke en stabiele ondergrond. • De installatie en eventuele reparaties zijn door een servicetechnicus/vaktechnicus uit te voeren. Verwijder geen componenten of servicepanelen van dit product. • Raadpleeg en volg de plaatselijke en nationale regelgeving op m.b.t.
-
Page 10: Productbeschrijving
Productbeschrijving G603 - POLAR 2 deurs gekoelde voorbereidingstafel voor pizza’s/salades CN267 (CN402 & AB090) - POLAR gekoelde voorbereidingstafel voor pizza’s met 3 deuren Inleiding Neem de tijd en lees deze handleiding aandachtig door. Een correct gebruik en onderhoud van deze machine waarborgt de beste prestatie van uw POLAR product. -
Page 11: Installatie
Het plaatsen van de lades & • Tussendelen x 6 • Beugels x 7 vloerplinten • Fixeerschroeven x 7 1. Plaats één set van de ladegeleiders aan beide • Schroeven x 12 zijden van de kast en op de gewenste hoogte. •... -
Page 12: Opslag Van Levensmiddelen
Plaatsen van de glaspanelen AB090 Beugel (uitsluitend CN267) 1. Schroef de tussendelen vast aan de rand van Glaspaneel het product. Boutunit Opmerking: zorg dat het gat in het tussendeel voor de fixeerschroeven naar binnen is Plug gericht. 2. Schuif de twee zijpanelen in de tussendelen Boutunit met de gaten in het glas naar boven gericht. -
Page 13: Reiniging, Zorg & Onderhoud
Werktemperatuur instellen • Eventuele reparaties moeten door een POLAR technicus of een vaktechnicus worden 1. Druk op dee SET knop. Het display knippert. uitgevoerd. 2. Druk op de knoppen om de vereiste temperatuur weer te geven. Marmerenzorg 3. Druk op de SET knop om de temperatuurwaarde op te slaan. -
Page 14: Technische Specificaties
Temperatuur- Koel- Afmetingen Gewicht Model Voltage Vermogen Stroom bereik middel h x b x d mm (Kg) G603 230V 50Hz 230W 1,6A 2°C - 8°C R600a 70g 1100 x 900 x 700 CN267 230V 50Hz 230W 1,6A 2°C - 8°C... -
Page 15: Elektrische Bedrading
Elektrische bedrading Men dient de steker op een geschikt stopcontact aan te sluiten. De bedrading van dit apparaat is als volgt: • Stroomkabel (bruin) naar de aansluitklem gemarkeerd met L • Neutraalkabel (blauw) naar de aansluitklem gemarkeerd met N • Aardekabel (groen/geel) naar de aansluitklem gemarkeerd met E Dit apparaat moet worden geaard. -
Page 16: Conseils De Sécurité
Conseils de sécurité • Placez l’appareil sur une surface plane, stable. • L’installation et les éventuelles réparations doivent être confiées à un dépanneur / technicien qualifié. Ne retirez aucun composant ou cache de ce produit. • Consultez les normes locales et nationales pour vous conformer aux : - lois sur l’hygiène et la sécurité... -
Page 17: Attention Risque D' Incendie
Description du produit G603 - Comptoir réfrigéré de préparation de pizzas / salades, deux portes, POLAR CN267 (CN402 & AB090) - Comptoir réfrigéré de préparation de pizzas, trois portes, POLAR Introduction Nous vous invitons à... -
Page 18: Installation Des Clayettes Et Des Caches Inférieurs
Installation des clayettes et des • 6 colliers • 7 pattes de fixation caches inférieurs • 7 vis sans tête 1. Placez une paire de supports de clayettes de • 12 vis part et d’autre de l’armoire, à la hauteur voulue. •... -
Page 19: Fonctionnement
Installation des parois de verre Patte de fixation AB090 (CN267 uniquement) 1. Vissez les colliers sur le bord de l’appareil. Paroi en verre Remarque : Veillez à ce que le Ensemble de boulonnage trou du collier prévu pour la vis sans tête soit tourné vers l’intérieur. -
Page 20: Nettoyage, Entretien Et Maintenance
Réglez la température de • Soyez prudent quand vous nettoyez l’arrière de l’appareil. Les bords effilés peuvent couper. fonctionnement • Toute réparation doit être confiée à un agent 1. Appuie sur le bouton SET. L’affichage clignote. POLAR ou à un technicien qualifié. 2. -
Page 21: Spécifications Techniques
Plage de Dimensions Poids Modèle Tension Puissance Courant Réfrigérant température h x l x p mm (kg) G603 230V 50Hz 230W 1,6A 2°C - 8°C R600a 70g 1100 x 900 x 700 CN267 230V 50Hz 230W 1,6A 2°C - 8°C... -
Page 22: Raccordement Électrique
Raccordement électrique La prise doit être reliée à la prise secteur qui convient. Cet appareil est câblé comme suit : • Fil conducteur (brun) à la borne marquée L • Fil neutre (bleu) à la borne marquée N • Fil de terre (vert / jaune) à la borne marquée E Cet appareil doit être mis à... -
Page 23: Sicherheitshinweise
Sicherheitshinweise • Auf eine flache, stabile Fläche stellen. • Alle erforderlichen Montage- und Reparaturarbeiten sollten von Wartungspersonal oder einem qualifizierten Techniker durchgeführt werden. Keine Bauteile oder Bedienflächen von diesem Produkt entfernen. • Für folgende Normen und Vorschriften sind die lokalen und nationalen Normen heranzuziehen: - Arbeitsschutzvorschriften - BS EN Verhaltenspraktiken... -
Page 24: Lieferumfang
Lebensmittellagerraumes betreiben, sofern sie nicht der Typ, der vom Hersteller empfohlen wird. Produktbeschreibung G603 - POLAR 2-türiger Pizza-/Salat-Kühltisch CN267 (CN402 & AB090) - POLAR 3-türiger Pizza-Kühltisch Einführung Bitte nehmen Sie sich einige Minuten Zeit und lesen Sie dieses Handbuch sorgfältig durch. Nur bei korrekter Wartung und vorschriftsgemäßem Betrieb kann Ihr POLAR-Produkt optimale Leistung erzielen. -
Page 25: Montage
Befestigen der Ablagen und • 6 Halterungen • 7 Klammern Bodenschoner • 7 Gewindestifte 1. Einen Satz Ablageschienen auf beiden • 12 Schrauben Schrankseiten in der gewünschten Höhe • 14 Stopfen platzieren. • Gastronorm-Adapterstangen 2. Die Ablage einschieben. • 4 Regulierbare Füße 3. -
Page 26: Lagerung Von Nahrungsmitteln
Gläser einsetzen AB090 (nur Klammer CN267) 1. Die Halterungen an den Rand des Geräts Glasplatte anschrauben. Hinweis: Darauf achten, dass Schraube die Bohrung in der Halterung für die Gewindestifte nach innen weist. Plug 2. Die beiden seitlichen Glasplatten in die Halterungen schieben. -
Page 27: Betriebstemperatur Einstellen
Betriebstemperatur einstellen Techniker ausgeführt werden. 1. Die SET-Taste drücken. Die Anzeige blinkt auf. Marmorpflege 2. Drücken Sie die Taste oder , um die • Arbeitsfläche nicht mit schmirgelnden Stoffen benötigte Temperatur aufzurufen. oder Reinigungsmitteln säubern. Mit einer 3. Zum Speichern der Temperatur drücken Sie die warmen Seifenlauge waschen. -
Page 28: Technische Spezifikationen
Strom- Temperatur- Abmessungen Gewicht Modell Spannung Leistung Kühlmittel stärke bereich h x b x t mm (kg) G603 230V 50Hz 230W 1,6A 2°C - 8°C R600a 70g 1100 x 900 x 700 CN267 230V 50Hz 230W 1,6A 2°C - 8°C... -
Page 29: Elektroanschlüsse
Elektroanschlüsse Der Stecker muss in eine geeignete Steckdose gesteckt werden. Das Gerät ist wie folgt verdrahtet: • Stromführender Leiter (braun) an Klemme L • Neutralleiter (blau) an Klemme N • Erdleiter (grün/gelb) an Klemme E Dieses Gerät muss geerdet sein. Bei Fragen wenden Sie sich bitte an einen qualifizierten Elektriker. -
Page 30: Suggerimenti Per La Sicurezza
Suggerimenti per la sicurezza • Posizionare su una superficie piana e stabile. • L’installazione e le eventuali riparazioni devono venire eseguite da un agente/tecnico qualificato. Non rimuovere i componenti o i pannelli di accesso dell’apparecchio. • Verificare la conformità alle normative locali e nazionali di quanto segue: - Normativa antinfortunistica sul lavoro - Linee guida BS EN... -
Page 31: Descrizione Dei Prodotti
Descrizione dei prodotti G603 - Banco refrigerato per preparazione pizza/insalate a 2 portelli POLAR CN267 (CN402 & AB090) - Banco refrigerato pizzeria a 3 portelli POLAR Introduzione Leggere con attenzione il presente manuale. - Page 32 Montaggio dei ripiani e delle • Collari 6x • Staffe 7x protezioni pavimento • Gambi filettati 7x 1. Posizionare un set di guide su ogni lato • Viti 12x dell’armadio all’altezza desiderata. • Tappi 14x 2. Fare scivolare in posizione il ripiano. •...
- Page 33 Montaggio dei pannelli in vetro Staffa AB090 (solo CN267) 1. Avvitare i collari al bordo dell’apparecchio. Pannello di vetro Note: assicurarsi che il foro nel Montaggio a bullone collare per il gambo filettato sia rivolto verso l’interno. 2. Inserire i due pannelli laterali nei collari, con i Tappo fori del vetro rivolti verso l’alto.
-
Page 34: Impostazione Della Temperatura Di Esercizio
Impostazione della temperatura di parte posteriore dell’apparecchio. Gli attrezzi con bordi taglienti possono provocare tagli. esercizio • Le riparazioni devono venire eseguite da un 1. Premere il pulsante SET. Il display lampeggia. tecnico qualificato o da un agente POLAR. 2. Premere i pulsanti per visualizzare la temperatura richiesta. -
Page 35: Specifiche Tecniche
Intervallo Dimensioni Peso Modello Tensione Alimentazio Corrente di tempera- Refrigerante h x l x p mm (Kg) tura G603 230V 50Hz 230W 1,6A 2°C - 8°C R600a 70g 1100 x 900 x 700 CN267 230V 50Hz 230W 1,6A 2°C - 8°C... -
Page 36: Cablaggi Elettrici
Cablaggi elettrici Questa apparecchiatura deve essere collegata a terra. L’apparecchio ha i seguenti cablaggi: • Filo sotto tensione (colore marrone) a terminale L • Filo del neutro (colore blu) a terminale N • Filo di terra (colore verde/giallo) a terminale E L’apparecchio deve avere un circuito dedicato di messa a terra. -
Page 37: Consejos De Seguridad
Consejos de Seguridad • Colóquela sobre una superficie plana, estable. • Un agente de servicio / técnico cualificado debería llevar a cabo la instalación y cualquier reparación si se precisa. No retire ningún componente ni panel de servicio de este producto. •... -
Page 38: Descripción Del Producto
Descripción del Producto Frigorífico para mostrador de preparados de Ensalada / Pizzas de 2 Puertas POLAR - G603 Frigorífico para Mostrador de Preparados de Pizza de 3 Puertas POLAR - CN267 (CN402 & AB090) Introducción... - Page 39 Montaje de las Protecciones de • Casquillos x 6 • Soportes x 7 Suelo y los Estantes • Tornillos de cabeza hendida x 7 1. Coloque un juego de guías de estante a cada • Tornillos x 12 lado de la cabina a la altura deseada. •...
- Page 40 Montaje de los Paneles de Cristal Soporte AB090 (Sólo en los modelos CN267) 1. Enrosque los casquillos al armazón del aparato. Panel de Cristal Nota: asegure el agujero en Unidad de Perno el casquillo de modo que las superficies de los tornillos de cabeza hendida miren hacia dentro.
-
Page 41: Ajuste De La Temperatura De Funcionamiento
Ajuste de la Temperatura de • Vaya con cuidado al limpiar la parte trasera del aparato. Los bordes afilados pueden cortar. Funcionamiento • Un técnico cualificado o un agente de POLAR 1. Pulse el botón SET. El visualizador se enciende. debe llevar a cabo las reparaciones en caso de 2. -
Page 42: Especificaciones Técnicas
Margen de Dimensiones Peso Modelo Tensión Potencia Potencia Tempera- Refrigerante a x a x p mm (Kg) turas G603 230V 50Hz 230W 1,6A 2°C - 8°C R600a 70g 1100 x 900 x 700 CN267 230V 50Hz 230W 1,6A 2°C - 8°C... -
Page 43: Cableado Eléctrico
Cableado Eléctrico El enchufe tiene que conectarse a una toma eléctrica adecuada. Este aparato debe conectarse a una toma de tierra. • Cable cargado (de color marrón) al terminal marcado como L • Cable neutro (de color azul) al terminal marcado como N •... -
Page 44: Conselhos De Segurança
Conselhos de segurança • Colocar numa superfície plana e estável. • Um agente de serviço/técnico qualificado deverá efectuar a instalação e quaisquer reparações, caso necessário. Não retirar qualquer componente ou painéis de serviço deste produto. • Consultar e cumprir os regulamentos locais e nacionais no que diz respeito à: - Legislação de saúde e segurança no local de trabalho - Códigos de trabalho... -
Page 45: Descrição Do Produto
Descrição do produto G603 - POLAR Bancada refrigerada de preparação de pizzas/saladas com 2 portas CN267 (CN402 & AB090) - POLAR Bancada refrigerada de preparação de pizzas com 3 portas Introdução... -
Page 46: Instalação
Colocar as prateleiras & rodapés • Peças de fixação x 6 • Suportes x 7 1. Coloque um par de suportes de prateleiras • Parafusos de fixação x 7 em ambos os lados do interior do produto e à • Parafusos x 12 altura desejada. -
Page 47: Armazenamento De Produtos Alimentares
Colocar o tampo refrigerado AB090 Suporte (apenas CN267) 1. Aparafuse as peças de fixação ao encaixe do Painel de vidro produto. Unidade completa Nota: certifique-se de que o de fixação orifício da peça de fixação para os parafusos de fixação aponta para dentro. -
Page 48: Limpeza, Cuidados & Manutenção
Seleccionar a temperatura de • Um agente da POLAR ou técnico qualificado deverá efectuar quaisquer reparações, caso funcionamento necessário. 1. Carregue no botão SET O visor começará a piscar. Cuidados com o mármore 2. Carregue no botão para aparecer • Não utilize materiais abrasivos ou produtos de no visor a temperatura desejada. -
Page 49: Especificações Técnicas
Líquido de Dimensões Peso Modelo Voltagem Corrente tação temperatura refrigeração a x l x p mm (kg) G603 230V 50Hz 230W 1,6A 2°C - 8°C R600a 70g 1100 x 900 x 700 CN267 230V 50Hz 230W 1,6A 2°C - 8°C... -
Page 50: Cablagem Eléctrica
Cablagem eléctrica Deve-se utilizar tomadas adequadas para ligar a ficha do aparelho. O esquema de electricidade deste aparelho é o seguinte: • Cabo eléctrico (castanho) para o terminal marcado L • Cabo neutro (azul) para o terminal marcado N • Cabo terra (verde/amarelo) para o terminal marcado com E Este aparelho tem de estar ligado à... - Page 51 0845 146 2887 0800 – 29 1 29 040 – 2628080 0800 - 29 2 29 01 60 34 28 80 0800 – 1860806 901-100 133 901-100 133 G603_CN267_ML_A5_v9_171215.indb 51 2017/12/15 17:47...
- Page 52 G603_CN267_ML_A5_v9_171215.indb 52 2017/12/15 17:47...
- Page 53 G603_CN267_ML_A5_v9_171215.indb 53 2017/12/15 17:47...
- Page 54 G603_CN267_ML_A5_v9_171215.indb 54 2017/12/15 17:47...
- Page 55 G603_CN267_ML_A5_v9_171215.indb 55 2017/12/15 17:47...
- Page 56 http://www.polar-refrigerator.com/ G603_CN267_ML_A5_v9_171215 G603_CN267_ML_A5_v9_171215.indb 56 2017/12/15 17:47...