Table des Matières
Publicité
Les langues disponibles
Les langues disponibles
Liens rapides
(GB)
INSTRUCTIONS FOR THE INSTALLATION, MAINTENANCE
AND USE OF FIXED HOBS WITH GAS OR MIXED SUPPLY
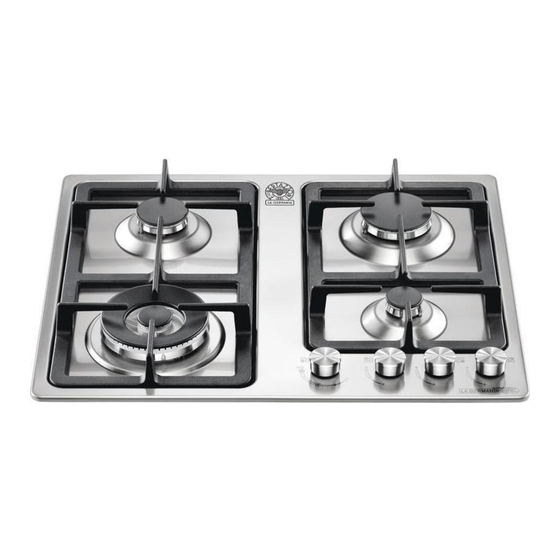
59X50 cm (TYPE P61/P61V)
86X50 cm (TYPE P91/P91V)
(FR)
INSTRUCTIONS POUR L'INSTALLATION, L'ENTRETIEN ET
L'UTILISATION DES TABLES DE CUISSON ENCASTRABLES
GAZ ET MIXTES
59X50 cm (MODELE P61/P61V)
86X50 cm (MODELE P91/P91V)
310605
Publicité
Table des Matières

Sommaire des Matières pour Bertazzoni P91
- Page 1 (GB) INSTRUCTIONS FOR THE INSTALLATION, MAINTENANCE AND USE OF FIXED HOBS WITH GAS OR MIXED SUPPLY 59X50 cm (TYPE P61/P61V) 86X50 cm (TYPE P91/P91V) (FR) INSTRUCTIONS POUR L'INSTALLATION, L'ENTRETIEN ET L'UTILISATION DES TABLES DE CUISSON ENCASTRABLES GAZ ET MIXTES 59X50 cm (MODELE P61/P61V)
- Page 2 Taking into consideration the specific dimensions of the appliance (see table N°1), make an opening in the work surface (see figure): Hobs type P61/P61V (59x50 cm) P91/P91V (86x50 cm) with right angle corner Fig. 1. using the measurements indicated in table N°.1 The appliance must be classified in class 3 and thus it is subject to all the regulations indicated by the norms regarding these appliances.
- Page 3 IMPORTANT INFORMATION CONCERNING THE INSTALLATION OF THE APPLIANCE We inform the installer that this hob is of the Y type and thus it can be installed by itself, in an isolated position or inserted between two kitchen units or between one kitchen unit and a wall. Furthermore the back wall and surrounding surfaces must resist a temperature of 65 K.
- Page 4 CONNECTION OF THE APPLIANCE TO THE ELECTRICITY SUPPLY: Connection to the electricity supply must be carried out according to the norms and indications of the law in force. Before carrying out the connection check that: - The electric charge of the system and the sockets are suitable for the maximum power of the appliance ( see label on the lower part of the case ).
- Page 5 USE AND MAINTENANCE MANUAL DESCRIPTION OF HOBS GAS HOB TYPE P680, see Fig. 12 - Electrical Diagram A GAS HOB TYPE P910, see Fig. 13 - Electrical Diagram B GAS HOB TYPE P960, see Fig. 14 - Electrical Diagram B---- DESCRIPTIVE CAPTION FOR HOB CAPTION FOR ELECTRICAL DIAGRAM (Figs.
- Page 6 Cleaning of the stainless steel parts: Clean the parts with soapy water and then dry them with a soft cloth. The shininess is maintained by periodically cleaning with the special products normally available on the market. Never use abrasive powders. Cleaning of the burner flame dividers: as they are not fixed, the flame dividers can be cleaned by simply removing them and cleaning with soapy water.
-
Page 7: Table Des Matières
En tenant compte des dimensions de la table (cfr. tableau N°1), pratiquez une ouverture dans la table (cfr. dessins) : Tables modèle P61/P61V (59x50 cm) P91/P91V (86x50 cm) à angle droit FIG. 1A. en vous basant sur les mesures reportées dans le tableau N°1 La table doit se classer en 3 et elle est donc soumise à... -
Page 8: Ventilation Et Aération De La Pièce - Raccordement Au Réseau Du Gaz
La table n'est pas branchée à des dispositifs d'évacuation des produits de la combustion. Elle devra donc l'être conformément à la réglementation d'installation citée ci-dessus. Une attention particulière doit être prêtée aux consignes en matière de ventilation décrites ci-dessous. VENTILATION DE LA PIECE Pour garantir un bon fonctionnement de la table, il faut que la pièce où... -
Page 9: Branchement Électrique
BRANCHEMENT ELECTRIQUE DE LA TABLE: Le branchement électrique doit être exécuté conformément aux normes et à la législation en vigueur. Avant d'effectuer le branchement, vérifiez si : - Le débit électrique de l'installation et des prises de courant est adapté à la puissance maximale de la table (cfr. la plaquette d'identification appliquée au bas du caisson). -
Page 10: Notice De Mode D'emploi Et D'entretien
MODE D'EMPLOI ET ENTRETIEN DESCRIPTION DES TABLES DE CUISSON TABLE DE CUISSON AU GAZ MODELE P680, cfr. FIG.12 - Schéma Electrique A TABLE DE CUISSON AU GAZ MODELE P910, cfr. FIG.13 - Schéma Electrique B TABLE DE CUISSON AU GAZ MODELE P960, cfr. -
Page 11: Nettoyage De La Table
NETTOYAGE DE LA TABLE Avant toute opération de nettoyage, débranchez la table du réseau d'alimentation électrique et fermez le robinet d'arrivée du gaz. Nettoyage de la table de cuisson : nettoyez régulièrement les têtes des brûleurs, les grilles en acier émaillé, les couvercles émaillés et les chapeaux avec de l'eau tiède savonneuse. -
Page 12: Dessins
Fig.1 Fig.2 Fig.3 Fig.4 Fig.5A Fig.5B Fig.6A Fig.6B Fig.7 Fig. 8 Fig. 9... -
Page 13: Schéma Electrique
Fig.10 Fig.11 Fig.12 Fig.13 Fig.14 Fig.15 Fig.16...
