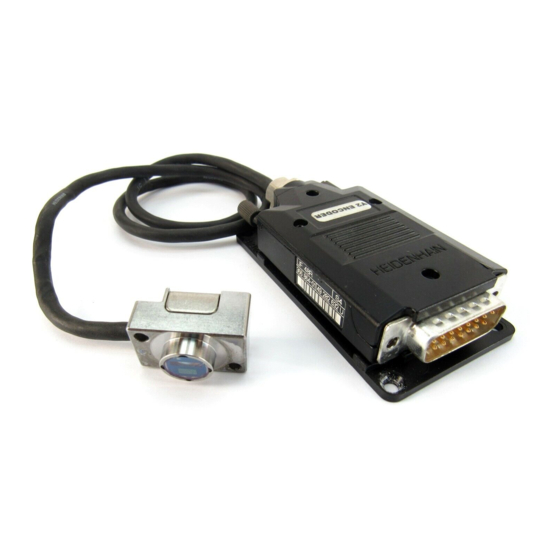
HEIDENHAIN LIF 48R Instructions De Montage
Masquer les pouces
Voir aussi pour LIF 48R:
- Instructions de montage (20 pages) ,
- Instructions de montage (20 pages)
Publicité
Liens rapides
For scale mounting, please refer to the separate Instructions.
Für Montage des Maßstabes bitte separate Anleitung beachten.
Pour le montage de la règle, veuillez tenir compte des instructions distinctes.
Per il montaggio del nastro graduato fare riferimento al relativo manuale.
Tener en cuenta las instrucciones suministradas por separado para el montaje de la regla.
Mounting Instructions
Montageanleitung
Instructions de montage
Istruzioni di montaggio
Instrucciones de montaje
LIF 48 R
Scanning head
Abtastkopf
Tête captrice
Testina di scansione
Cabezal captador
10/2014
Publicité

Sommaire des Matières pour HEIDENHAIN LIF 48R
- Page 1 Mounting Instructions Montageanleitung Instructions de montage Istruzioni di montaggio Instrucciones de montaje LIF 48 R Scanning head For scale mounting, please refer to the separate Instructions. Abtastkopf Für Montage des Maßstabes bitte separate Anleitung beachten. Tête captrice Pour le montage de la règle, veuillez tenir compte des instructions distinctes. Testina di scansione Per il montaggio del nastro graduato fare riferimento al relativo manuale.
- Page 2 Contents Page Seite Inhalt Warnings Warnhinweise Sommaire Items Supplied Lieferumfang Indice Mounting Procedure Hinweise zur Montage Mounting Montage Indice Adjusting the scanning head Justage des Abtastkopfes 10 Adjusting the Reference Marks 10 Referenzmarken justieren 11 Fine Adjustment of Signals 11 Feinabgleich Signale 12 Final Steps 12 Abschließende Arbeiten 13 Mounting the Limit Plates...
- Page 3 Warnings Warnhinweise Recommandations Avvertenze Advertencias Note: Mounting and commissioning is to be conducted by a qualified specialist under compliance with local safety regulations. Do not engage or disengage any connections while under power. The system must be disconnected from power. Achtung: Die Montage und Inbetriebnahme ist von einer qualifizierten Fachkraft unter Beachtung der örtlichen Sicherheitsvorschriften vorzunehmen.
- Page 4 Items Supplied Lieferumfang Contenu de la fourniture Standard di formitura Suministro Mounting Instructions Montageanleitung Instructions de montage Istruzioni di montaggio Instrucciones de montaje LIF 48 R IF 40 xxxxxxxxxxxxxxxxxxxxxxxxxxxxxxxxxxxxxxxxxxxxxxxx xxx xxxx xxxx xxxxxxxxxxxxxxxxxxxxxxxxxxxxxxxxxxxxxxxxxxxxx xxxxxxxxxxxxxxxx LIF 48 R scanning head, spacer foil, limit plates xxxxxxxxxxxxxxxxxxxxxxxxxxxxxxxxxxxxxxxx xxxxxxxxx xxxxxxxxxxxxxxxxxxxxxxxxxxxxxxxxxxxxxxxxxxxxxxxx...
- Page 5 Mounting Procedure Hinweise zur Montage Procédure de montage Avvertenze per il montaggio Indicaciones para el montaje The protective film of the linear scale must have been removed. If necessary, clean the graduation of the scale and scanning head with a lint-free cloth and distilled spirit or isopropyl alcohol.
- Page 6 Mounting Montage Montage Montaggi Montaje Mounting tolerances À = Mounting clearance Anbautoleranzen À = Montageabstand Tolérances de montage À = Distance de montage Tolleranze di montaggio À = Distanza di montaggio Tolerancias de montaje À = Distancia de montaje Use the spacer foil to set the mounting clearance to 1 mm. Lightly screw on the scanning head.
- Page 7 Adjusting the scanning head Justage des Abtastkopfes Ajustement de la tête captrice Taratura della testina Ajuste del cabezal captador Equipment required for adjustment: a) Oscilloscope b) PWM 9 with slot for 1 V c) Adapter cable Do not engage connectors while unit is under power! Benötigte Messmittel zur Justage: a) Oszilloskop b) PWM 9 mit Einschub für 1 V...
- Page 8 To check the output signals, move over the entire measuring length. (v = max. 0.4 m/s) Zur Prüfung der Ausgangssignale über die gesamte Messlänge verfahren. (v = max. 0.4 m/s) Parcourir toute la longueur de mesure pour vérifier les signaux de sortie. (v = max.
- Page 9 Ass, Bss: Amplitudes of the incremental signals Amplitude ratio PHA: Phase angle TV1, TV2: On-off ratio SYM.A, SYM.B: Asymmetry If the specified signal values are not met, check the mounting tolerances again. Ass, Bss: Amplituden der Inkrementalsignale Amplitudenverhältnis PHA: Phasenwinkel TV1, TV2: Tastverhältnisse SYM.A, SYM.B: Symmetrieabweichungen...
- Page 10 Adjusting the Reference Marks Referenzmarken justieren Réglage marques de référence Taratura indice di riferimento Ajuste de las marcas de referencia Lightly tap to adjust the reference mark signal. The peak of the reference mark signal should be level with the peak of the sum signal. To fasten the scanning head, tighten the screws (0.65 Nm).
- Page 11 Fine Adjustment of Signals Feinabgleich Signale Alignement précis des signaux Segnali di taratura Ajuste fino de las señales If necessary, you can optimize the signals with a potentiometer. Adjust the reference mark signals to 360° ± 30° with the potentiometer P2. Only use flat-tip screwdrivers S to adjust the potentiometers, not Phillips screwdrivers.
- Page 12 Final Steps Abschließende Arbeiten Opérations finales Operazioni finali Trabajos finales Check the resistance between the connector housing and the machine. Desired value: 1 max. Elektrischen Widerstand zwischen Steckergehäuse und Maschine prüfen. Sollwert: 1 max. Tester la résistance électrique entre le carter de la prise et la machine. Valeur nominale: 1 ...
- Page 13 Mounting the Limit Plates Montage der Limitblenden Montage des plaques de limite Montaggio dei fine corsa Montaje de los fines de carrera Limit plate Homing Reference mark Hole for glue Limitblende Homing Referenzmarke Bohrung für Klebstoff Plaque de limite Homing Marque de référence Trou pour colle Finecorsa...
- Page 14 Set the desired switching point. Press the limit plate onto the scale and secure it in the provided hole. Use only a small amount of glue (Araldit AW 136 epoxy metal adhesive). Gewünschten Schaltpunkt einstellen. Limitblende an Maßstab andrücken und in vorgesehener Bohrung sichern. Nur geringe Klebermenge Araldit AW 136 (Epoxy) notwendig.
- Page 15 Reference mark position Referenzmarken-Lage Marque de référence Indici di riferimento Marca de referencia Begin. of meas. length ML Beginn der Messlänge ML Début longueur utile ML Inizio lunghezza di misura ML Comienzo longitud útil ML Limit mark, can be moved Limitmarke, verstellbar Marque limite, décalable Indice limite, regolabile...
- Page 16 DR. JOHANNES HEIDENHAIN GmbH Dr.-Johannes-Heidenhain-Straße 5 83301 Traunreut, Germany { +49 8669 31-0 | +49 8669 32-5061 E-mail: info@heidenhain.de Technical support | +49 8669 32-1000 Measuring systems { +49 8669 31-3104 E-mail: service.ms-support@heidenhain.de TNC support { +49 8669 31-3101 E-mail: service.nc-support@heidenhain.de...


