
Manuels Connexes pour geo-FENNEL Selection PRO FL 40-PowerCross Plus SP


Sommaire des Matières pour geo-FENNEL Selection PRO FL 40-PowerCross Plus SP
- Page 1 DE | EN | FR FL 40-PowerCross Plus SP / FLG 40-PowerCross GREEN Plus SP BEDIENUNGSANLEITUNG USER MANUAL MODE D‘EMPLOI www.geo-fennel.com...
-
Page 2: Table Des Matières
Sehr geehrter Kunde, vielen Dank für das Vertrauen, welches Sie uns beim Erwerb Ihres neuen geo-FENNEL-Gerätes der „Selection Pro“-Reihe entgegengebracht haben. Dieses hochwertige Qualitätsprodukt wurde mit größter Sorgfalt produziert und quali- tätsgeprüft. Im Vergleich zur bisher anerkannten guten Qualität unserer Produkte zeichnet sich die „Selection Pro“-Reihe u.a. - Page 3 Technische Daten Selbstnivellierbereich ± 3° Nivelliergenauigkeit ± 3 mm / 10 m Arbeitsbereich • ohne Empfänger 30 m* (Radius) • mit Empfänger (optional) 80 m (Radius) Winkelbereich Hz-Linie 135° Winkelbereich V-Linie 150° Stromversorgung 4 x AA Alkaline-Batterien Betriebsdauer (alle Linien geschaltet) Staub- /Wasserschutz (Schutzklase) IP 54 Laserklasse...
-
Page 4: Bedienelemente
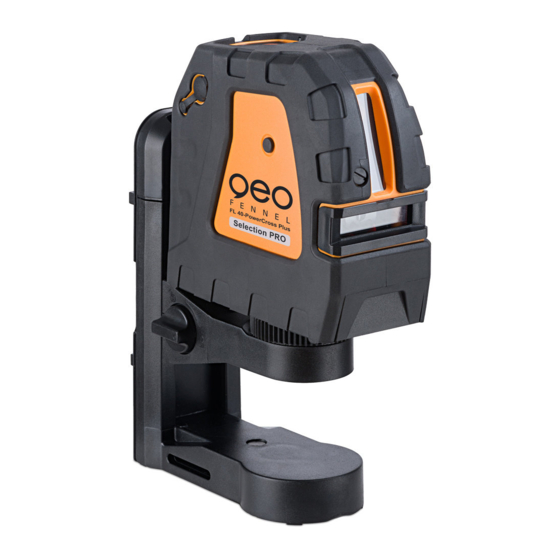
BEDIENELEMENTE Bedienfeld Laseraustrittsfenster 1/4“-Gewinde für Stativ Batteriefach Öffnung zum Aufhängen Schlitze für Befestigungsriemen Arretierung zur Höhenverstellung der Konsole 5/8“-Gewinde für Stativ 1/4“-Adapter 10. Magnete 11. AN-/AUS-Schalter und Transportsicherung Operation keypad aser output window On/off -calibration rture 1/4″screw thread hole Battery cover External power socket... -
Page 5: Bedienfeld
BEDIENFELD AN/AUS-LED AN/AUS vertikale Laserlinie V / horizontale Laserlinie H Manuell-LED AN/AUS Manuell-Funktion / Empfängerfunktion LED Empfängerfunktion STROMVERSORGUNG 4 x AA Alkalinebatterien in das Batteriefach einlegen (Polarität beachten) und Bat- teriefach wieder verschließen. Battery polarity sign... -
Page 6: Bedienung
BEDIENUNG Das Gerät auf den 1/4“-Adapter der multifunktionalen Halterung aufschrauben. Durch Lösen des Knopfes (7) kann das Gerät auf auf der Halterung nach oben und unten bewegt werden. Einsatz des Lasers auf dem Stativ. Einsatz des Lasers mit Magneten. Einsatz des Lasers mit Befestigungsriemen. AN-/AUS-Schalter in Position „ON“... - Page 7 MANUELLFUNKTION Das Gerät ist ausgeschaltet (OFF-Zustand). Taste MANUELLFUNKTION (4) drücken, um die MANUELL -Funktion einzuschal- ten. Die MANUELL-LED (3) leuchtet. Nun können die gewünschten Laserlinien geschaltet und das Gerät in Schrägposition eingesetzt werden. EMPFÄNGERBETRIEB Der Laser kann zur Verlängerung des Arbeitsbereiches oder bei Einsatz unter ungünstigen Lichtverhältnissen mit den Empfängern FR 75-MM, FR 55 oder FR 55-M eingesetzt werden.
-
Page 8: Sicherheitshinweise
SICHERHEITSHINWEISE BESTIMMUNGSGEMÄSSE VERWENDUNG Das Gerät sendet einen sichtbaren Laserstrahl aus, um z.B. folgende Messaufgaben durchzuführen: Ermittlung von Höhen; rechten Winkeln, Ausrichtung von horizontalen und vertikalen Bezugsebenen sowie Lotpunkten (je nach Gerät). UMGANG UND PFLEGE Messinstrumente generell sorgsam behandeln. Nach Benutzung mit weichem Tuch reinigen (ggfs. Tuch in etwas Wasser tränken). -
Page 9: Warn- Und Sicherheitshinweise
Das Gerät entspricht der Lasersicherheitsklasse 2 gemäss der Norm DIN EN 60825-1:2014. Das Gerät darf ohne weitere Sicherheitsmassnahmen eingesetzt werden. Das Auge ist bei zufälligem, kurzzeiti- gem Hineinsehen in den Laserstrahl durch den Lidschlussreflex geschützt. Laserwarnschilder der Klasse 2 sind gut sichtbar am Gerät angebracht. www.geo-fennel.de www.geo-fennel.de G ERMA NY GERM ANY Laser... - Page 10 Dear customer, Thank you for your confidence having purchased a geo-FENNEL instrument of „Selection Pro“ series. This high-quality product was produced and tested with due prudence. Among others „Selection Pro“ is defined by even clearer visible lines which you are originally used to from our standard range of instruments.
- Page 11 Technical Specifications Self-levelling range ± 3° Levelling accuracy ± 3 mm / 10 m Working range • without receiver 30 m* (radius) • with receiver (optional) 80 m (radius) Fan angle horizontal 135° Fan angle vertical 150° Power supply (all lines illuminated) 4 x AA Alkaline batteries Operating time Dust / water protection...
-
Page 12: Operational Elements
OPERATIONAL ELEMENTS Keypad Laser emitting windows 1/4“ thread for tripod Battery case Hanging hole Belt slot Interlock for height adjustment of elevator table 5/8“ thread for tripod 1/4“ adapter 10. Magnets 11. ON/OFF knob / transport lock Operation keypad aser output window On/off -calibration... -
Page 13: Keypad
KEYPAD ON/OFF LED instrument ON/OFF vertical laser line V / horizontal laser line H MANUAL LED ON/OFF MANUAL function / receiver function LED receiver function POWER SUPPLY Insert 4 x AA Alkaline batteries into the battery case (4) (take care to correct polarity) and close battery compartment. -
Page 14: Operation
OPERATION Fix the instrument on the multi-functional mount by using the 1/4“ adapter. To move the instrument up or down on the mount declamp the knob (7). For locking the desired position of the instrument tighten the knob again. Use of the laser on a tripod. Use of the laser with the magnets. - Page 15 MANUAL FUNCTION) The instrument is powerd off (OFF position). Press the button MANUAL FUNCTION (4) to enter into the MANUAL function. The MANUAL LED (3) is illuminated. Now the required laser lines can be swit- ched and the instrument can be used in slope position. USE WITH RECEIVER To extend the working range or for use in unfavourable light conditions the Laser can be used with receivers FR 75-MM, FR 55 or FR 55-M.
-
Page 16: Safety Notes
SAFETY NOTES INTENDED USE OF INSTRUMENT The instrument emits a visible laser beam in order to carry out the following measuring tasks (de- pending on instrument): Setting up heights, horizontal and vertical planes, right angles and plumbing points. CARE AND CLEANING Handle measuring instruments with care. -
Page 17: Safety Instructions
It is allowed to use the unit without further safety precautions. The eye protection is normally secured by aversion responses and the blink reflex. The laser instrument is marked with class 2 warning labels. www.geo-fennel.de www.geo-fennel.de G E RMAN Y... -
Page 18: Inclus Dans Le Coffret
Cher client, Nous tenons à vous remercier pour la confiance que vous nous avez témoignée, par l‘acquisition de votre nouvel instrument geo-FENNEL de la série „Selection PRO“ . Ce produit de qualité haut de gamme a été fabriqué et contrôlé... -
Page 19: Alimentation
Caractéristiques techniques Plage d‘auto nivellement ± 3° Précision ± 3 mm / 10 m Portée • sans cellule 30 m* (rayon) • avec cellule 80 m (rayon) Ouverture angle horizontal 135° Ouverture angle vertical 150° Alimentation 4 x AA piles d‘alcaline Autonomie du laser (toutes lignes allumées) Étanchéité... - Page 20 DESCRIPTION Clavier Vitres protection du laser Filetage 1/4“ Compartiment piles Fixation au mur avec une vis Fixation avec des lanières Bouton rotatif pour mouvement de la console Filetage 5/8“ Vis de serrage 1/4“ 10. Aimants 11. Bouton ON/OFF / verouillage pour transport Operation keypad aser output...
-
Page 21: Clavier Du Laser
CLAVIER DU LASER Diode ON/OFF du laser Bouton ON/OFF de la verticale V / de l‘horizontale H Diode du mode MANUEL ON/OFF mode MANUEL / fonction réception Diode du mode réception BATTERIE Mettre 4 x AA piles alcalines dans le compartiment de piles (4) (attention à la polarité) et fermer le compartiment. -
Page 22: Toutes Les Lignes Ci Dessous Peuvent Être Projétées
OPÉRATION Fixer l‘instrument sur le support multi-fonctions avec l‘adaptateur 1/4“ . En desserant le bouton rotatif (7) pour mouvement de la console, l‘instrument peut être décalé vers le haut et vers le bas Fixez le laser sur un trépied. Fixez le laser avec ses aimants. Fixez le laser avec sa sangle. -
Page 23: Mode Manuel
MODE MANUEL L ‘instrument es en position OFF . Presser le bouton de MODE MANUEL (4) pour enclencher la fonction manuelle. La diode à côté du picto manuel (3) doit être maintenant allumée. Les lignes peu- vent être allumées et le laser peut travaillver dans toutes les positions. MARCHE EN MODE RÉCEPTEUR Pour l’allongement de la plage de travail ou pour l’emploi dans des conditions de luminosité... -
Page 24: Utilisation Conforme Aux Prescriptions
NOTICES DE SECURITÉ UTILISATION CONFORME AUX PRESCRIPTIONS Le niveau projette un faisceau laser visible, pour effectuer p. ex. les travaux de mesures suivants: détermination de hauteurs, tracé d’angles droits, pointage de plans de référence horizontaux et verti- caux ainsi qu’obtention de points d’aplomb (dépendant de l‘instrument). NETTOYAGE / REMISAGE (à... -
Page 25: Exclusion De La Responsabilité
Les pictogrammes de danger de la classe 2 www.geo-fennel.de www.geo-fennel.de GERM ANY GER MA NY sont bien visibles sur l‘appareil. - Page 26 ZUBEHÖR / ACCESSORIES / ACCESSOIRES FS 10 FS 30-L ARTIKEL-NR. / REFENCE NO. / RÉFÉRENCE 302000 ARTIKEL-NR. / REFENCE NO. / RÉFÉRENCE 156 Kurbelstativ / elevating tripod / trépied à colonne Kurbelstativ / elevating tripod / trépied à colonne drehbarer Stativkopf / rotating head / Tête de trépied drehbarer Stativkopf / rotating head / Tête de trépied rotative rotative...
- Page 27 Einteilung / graduation / graduation: cm/inch Adapter / adapter / filetage: 5/8“ & 1/4“ für alle geo-FENNEL Laser / for all geo-FENNEL laser Max. Länge / maximal length / longueur max.: 3,40 m / pour tous les lasers geo-FENNEL...
- Page 28 GmbH Technische Änderungen vorbehalten. All instruments subject to technical changes. Kupferstraße 6 Sous réserve de modifications techniques. D-34225 Baunatal Tel. +49 561 / 49 21 45 +49 561 / 49 72 34 09/2018 info@geo-fennel.de Precision by tradition. www.geo-fennel.de...