Publicité
Liens rapides
WVTA APPROVED - WVTA GENEHMIGT - APPROUVE WVTA - WVTA GOEDGEKEURD
PARTNUMBER:
KIT CONTENT - STÜCKLISTE - CONTENU - KIT INHOUD
PZ402-14452-60
A
D
M6 x 25
INSTALLATION MANUAL - ANBAU ANLEITUNG - MANUEL D´INSTALLATION - MONTAGE HANDLEIDING
PZ402-14453-AB
Issue 01
TOYOTA
PZ402 - 14453 - AB
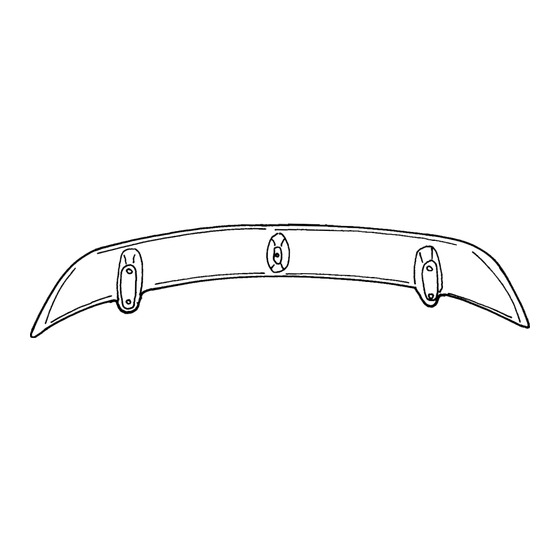
REARSPOILER
HECKSPOILER
SPOILER ARRIERE
ACHTER-SPOILER
LHS 68960-20240
5x
1x
M6
B
1x
4x
C
M6 x 20
Weight:
Installation time:
Gewicht:
Anbauzeit:
Poids:
Temps d´installation:
Gewicht:
Installatie tijd:
LIFTBACK
RHS 68950-20420
M6
4x
G
Ø6,4
1x
H
4x
4,0
kg
35 minutes
4,0
kg
35 minuten
4,0
kg
35 minutes
4,0
kg
35 minuten
F
1x
L
R
E
Page :
1/11
Date : 05. April 01
Publicité

Sommaire des Matières pour Toyota CELICA
- Page 1 TOYOTA LIFTBACK WVTA APPROVED - WVTA GENEHMIGT - APPROUVE WVTA - WVTA GOEDGEKEURD PARTNUMBER: PZ402 - 14453 - AB REARSPOILER HECKSPOILER SPOILER ARRIERE ACHTER-SPOILER KIT CONTENT - STÜCKLISTE - CONTENU - KIT INHOUD PZ402-14452-60 LHS 68960-20240 RHS 68950-20420 Ø6,4 M6 x 25...
- Page 2 PARTNAME : REARSPOILER PARTNUMBER : PZ402 - 14453 - AB APPLICATION / ANWENDUNG / APPLICATIE ZZT23**-BLF**W MODELCODE : J J J J J L L L L L VEHICLE OPTION / FAHRZEUG OPTION/OPTION VEHICULE / VOERTUIG OPTIE ACCESSORY / ZUBEHÖR / ACCESSOIRE SAFETY PRECAUTION / SICHERHEITSMASSNAHME / PRECAUTIONS DE SECURITE / VEILIGHEIDVOORZIENINGEN Step/Punkt/Point/Stap Step/Punkt/Point/Stap...
-
Page 3: Operator Safety
1 2 3 4 5 6 7 1 2 3 4 5 6 7 Clean the mounting surfaces on tailgate. 1 2 3 4 5 6 7 1 2 3 4 5 6 7 Auflageflächen an der Heckklappe reinigen. 1 2 3 4 5 6 7 1 2 3 4 5 6 7 Nettoyer les surfaces d’appui sur hayon. - Page 4 1 2 3 4 5 6 1 2 3 4 5 6 Rearspoiler has to be positionned in center- line 1 2 3 4 5 6 1 2 3 4 5 6 1 2 3 4 5 6 of rear gate. 1 2 3 4 5 6 Spoiler mittig auf Heckklappe positionieren.
- Page 5 1 2 3 4 5 6 7 1 2 3 4 5 6 7 Fit the trunk spoiler into place on the trunk lid and 1 2 3 4 5 6 7 1 2 3 4 5 6 7 hold it firmly against the trunk lid. Check that the 1 2 3 4 5 6 7 1 2 3 4 5 6 7 template is attached to the trunk lid securely, then...
- Page 6 1 2 3 4 5 6 1 2 3 4 5 6 Clean the mounting surfaces on rearspoiler. 1 2 3 4 5 6 1 2 3 4 5 6 1 2 3 4 5 6 Remove protective foil from seals and paste up on 1 2 3 4 5 6 rearspoiler.
- Page 7 13a. Remove original screw. (1x) Originalschraube entfernen. (1x) Enlever les vis d'origine. (1x) Originele schroef(ven) verwijderen. (1x) 13b. Remove original screw. (2x) Originalschraube entfernen. (2x) Enlever les vis d'origine. (2x) Originele schroef(ven) verwijderen. (2x) Positioning of the damper. Teleskopdämpfer positionieren. Positionner le vérin dans la position correcte.
- Page 8 Fix damper with original screws (2x) with torque of 8,3 Nm. Teleskopdämpfer mit Originalschraube befestigen. (2x) Schrauben (2x) mit 8,3 Nm anziehen. Fixer le vérin avec les vis d'origine (2x). Appliquez un couple de 8,3 Nm. De demper bevestigen aan de hand van de originele bouten (2x).
- Page 9 ATTENTION ATTENCION ACHTUNG ATTENTIE ATTENTION ATTENZIONE Nous attirons votre attention sur le fait que toute réclamation ou demande de Atención! Pretensiones de garantia o reclamaciones de indemnización por dommage et intérêt ne pourrait être formulée tant que le montage aura été daños y perjuicios de toda clase sólo se aceptarán en caso de un montaje fait suivant les instructions techniques prévues pour notre produit.
- Page 10 PZ402-14453-AB Page : 10/11 Issue 01 Date : 05. APRIL 01...
- Page 11 PZ402-14453-AB Page : 11/11 Issue 01 Date : 05. April 01...


