
Manuels Connexes pour Evolite Diamond 19x15 Z


Sommaire des Matières pour Evolite Diamond 19x15 Z
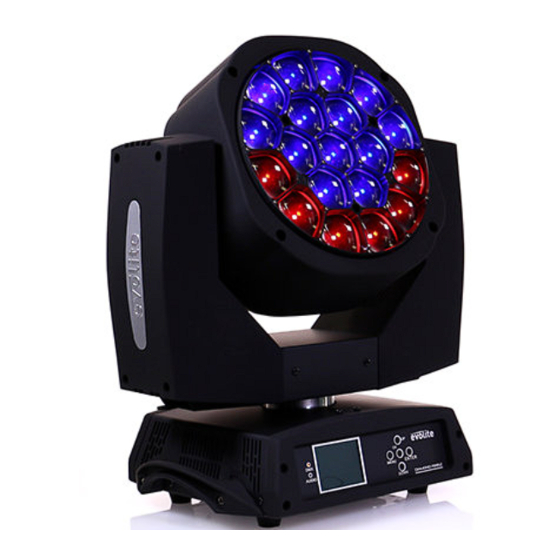
- Page 1 Diamond 19x15z 19 X 15W RGBW Osram LED with Zoom And Multibeam effect User manual / Mode d’emploi Diamond 19x15z Manual Ver. 1.00 Page...
- Page 2 ATTENTION ! Avant d’utiliser votre matériel, nous vous recommandons de lire l’ensemble des instructions de ce manuel. ATTENTION ! Cet appareil produit une lumière intense et puissante. Risque pour les yeux. Ne regardez pas directement dans le faisceau. DANGER ! Risque de chocs électriques.
- Page 3 Cet appareil présente des risques importants de blessures. Il est important de manipuler et d’utiliser cet appareil de façon professionnelle. Cet appareil evolite doit être installé avec des crochets solides et de dimension adéquate au poids supporté. L’appareil doit être vissé aux crochets et serré convenablement afin d’éviter toute chute due aux vibrations produites par la machine en fonctionnement.
-
Page 4: Table Des Matières
Table des matières Français………………………………………………………………………………………….…. 5 Introduction…………………………………………………………..5 Description du produit…………………………………………………...5 Installation…………………………………………………………………… 5 o Accroche………………………………………………………………………….. 5 o Connexion DMX……………………………………………………….………. 6 Configuration…………………………………………………………………. 6 o Panneau de contrôle / Navigation dans les menus……………. 6 o Protocol DMX…………………………………………………………………… 7 o Mode DMX……………………………………………………………………….11 o Mode Automatique…………………………………………………………. -
Page 5: Introduction
Installation o Accroche Ce projecteur asservi evolite doit être installé avec des crochets solides et de dimension adéquate au poids supporté. L’appareil doit être vissé aux crochets et serré convenablement afin d’éviter toute chute due aux vibrations produites par la machine en fonctionnement. -
Page 6: Connexion Dmx
o Connexion DMX Il est fortement conseillé d’utiliser des câbles DMX de bonne qualité. Utiliser du câble torsadé blindé. o Connexion du câble d’alimentation secteur La terre ou « Earth » doit toujours être connectée .Les câble d’alimentation doivent être homologués et conformes au Standard IEC. -
Page 7: Protocole Dmx 23 Canaux
Extended (78CH) Extended RGBW (97CH) FULL (92CH) Total Test Pan & Tilt Minuteur 02-60s Ecran 180° OUI/NON Normal Inverse Normal Parametres Tilt Inverse English Language Français Signal DMX Total (Heures) Durees util. Lampe (Heures) Info Actuel (Heures) Version log. Reset Redemarrage Protocole DMX 23 canaux Canal... -
Page 8: Protocole Dmx 21 Canaux
Vert Bleu Blanc Couleu Macro Selection Figure Vitesse animation Anim. Fondu Figure LED Rouges Figure LED Vertes Figure LED Bleues Figure LED Blanches Couleur de fond Redémarrage Protocole DMX 21 canaux Channel Channel mode Rouge Rouge précis Vert Vert précis Bleu Bleu précis Blanc... -
Page 9: Protocole Dmx 35 Canaux
Protocole DMX 35 canaux Channel Channel mode Rouge Rouge précis Vert Vert précis Bleu Bleu précis Blanc Blanc précis Linear CTO Couleur Macro Strobe Dimmer Dimmer précis Pan précis Tilt Tilt précis Fonction Reset Zoom Rotation Zoom Selection Figure Vitesse Figure Anim. -
Page 10: Protocole Dmx 97 Canaux
Blanc précis Linear CTO Macro Color Strobe Dimmer Dimmer précis Pan précis Tilt Tilt précis Fonction Reset Zoom Rotation Zoom Rouge LED1 Vert LED1 Bleu LED1 ..Rouge LED2..Vert LED2..Bleu LED2... Rouge LED19 Vert LED19 Bleu LED19 Protocole DMX 97 canaux Channel Channel mode... -
Page 11: Mode Dmx
Bleu LED1 Blanc LED1..…..…. Rouge LED19 Vert LED19 Bleu LED19 Blanc LED19 o Mode Automatique Sélection du Mode AUTO Appuyez sur la touche Menu jusqu’à l’affichage de Mode, puis appuyez sur ENTER pour valider ce choix. Sélectionnez le mode parmi Auto1, Auto2. Appuyez sur ENTER pour valider. Sélection du Mode AUTO à... -
Page 12: Maintenance
Vérifiez le mode de fonctionnement choisi o Vérifiez qu’il n’y a pas de câble DMX branché sur DMX IN o Tapotez directement sur le microphone pour tester sa réactivité. Caractéristiques techniques Modèle Diamond 19x15 Z Voltage 110V- 250V / 50-60Hz Consommation: 300W... - Page 13 WARNING ! Before use, and before installing this fixture, read carefully user manual, and follow the safety precautions listed on this page. WARNING ! Very high level light output. DO NOT LOOK INTO THE BEAM. DANGER ! Hazardous voltage. Risk of electric shock! ALWAYS disconnect the fixture from power for servicing, for cleaning or installing.
- Page 14 DANGER ! Safety Hazard.Risk of injury. This evolite unit must be installed by professional people. If suspended, make sure the structure and the hardware used for this suspension is secured. This Hardware must support at least 10 times the weight of the device suspended.
-
Page 15: Introduction
Introduction Thank you for selecting this professional fixture from evolite This new intelligent Moving Wash will provide you reliability, latest features, and professional lighting effects for a long period of time. This evolite fixture is complying with European standards: EN60598-1:2008+A11:2009 EN60598-2- 17:1989+A2:1991 et RoHs. -
Page 16: Dmx Connection
o DMX 512 Connection The wires must not come into contact with each other, otherwise the fixture will not work at all or properly. Please note the starting address depends upon which controller is being used. Only use a DMX cable and 3-pin XLR-plugs and connectors in order to connect the controller with the fixture or one fixture to another Connection with the mains. - Page 17 Diamond 19x15z Manual Ver. 1.00 Page...
-
Page 18: Auto Mode
o Auto Mode/Sound Mode Press the MENU until it shows RUN. Auto1 / Auto2 Use the UP/DOWN buttons to set to , Press ENTER to confirm. o DMX Mode DMX mode is selected in the main menu. You can control the projectors individually via your DMX-controller Just select the fixture address, knowing that this address will be the start address. - Page 19 Shape W Background Dimmer Reset 21 Ch an n e ls m o d e Channel Channel mode Red Fine Green Green Fine Blue Blue Fine White White Fine Linear CTO Macro Color Strobe Dimmer Dimmer Fine Pan Fine Tilt Tilt Fine Function Reset...
- Page 20 Zoom Rotation Shape Selection Shape Speed Shape Fade Shape R Shape G Shape B Shape W Shape Dimmer Background Dimmer Shape Transition Shape Offset Foreground Strobe (reserved) Background Strobe (reserved) Background Select (reserved) 78 Ch an n e ls m o d e Channel Channel mode Red Fine...
-
Page 21: Master/Slave Mode
97 Ch an n e ls m o d e Channel Channel mode Red Fine Green Green Fine Blue Blue Fine White White Fine Linear CTO Macro Color Strobe Dimmer Dimmer Fine Pan Fine Tilt Tilt Fine Function Reset Zoom Zoom Rotation Red LED1 Green LED1... -
Page 22: Troubleshooting
Make sure the fixture does not receive DMX signal. Check microphone to see if it is good by tapping the microphone. Technical Specifications Model Diamond 19x15 Z Voltage 110V- 250V / 50-60Hz Power consumption: 300W 19 pcs 15 Watts RGBW 4 in 1 OSRAM Gross Weight 15.55 kg... - Page 23 Importé par / Imported by EVOLITE – MSC 7 avenue du 1er Mai 91120 Palaiseau / FRANCE infos@msc-distribution.com Tel : +33 1 69 34 80 62 Diamond 19x15z Manual Ver. 1.00 Page...