
Manuels Connexes pour Chicco KeyFit Caddy


Sommaire des Matières pour Chicco KeyFit Caddy
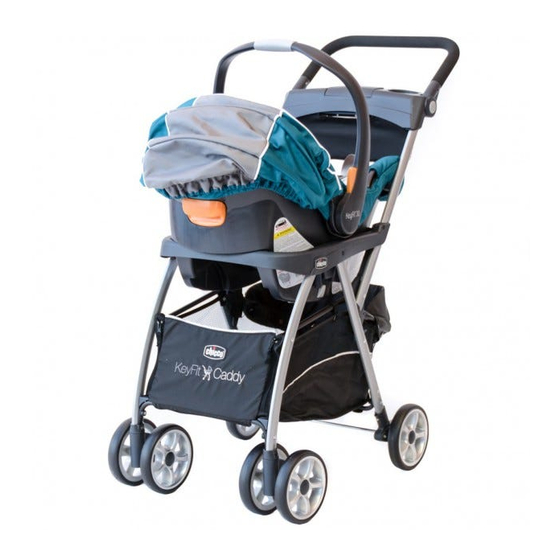
- Page 1 KeyFit® Caddy Owner's Manual Manual del propietario • Manuel du propriétaire IS0045.5ESF ©2011 Artsana USA, INC. 05/11...
- Page 2 WARNING Failure to follow these warnings and the assembly instructions could result in serious injury or death • PLEASE SAVE OWNER'S MANUAL • TO PREVENT A HAZARDOUS, FOR FUTURE USE. UNSTABLE CONDITION, never • ADULT ASSEMBLY REQUIRED. place purses, shopping bags, •...
- Page 3 WARNING Failure to follow these warnings and the assembly instructions could result in serious injury or death Using Chicco Infant Carrier with caddy: • ONLY USE this product with the Chicco KeyFit®/KeyFit® 30 infant car seat. Do not use any other manufacturer's infant car seat.
- Page 4 ADVERTENCIA El incumplimiento de estas advertencias e instrucciones de armado puede ocasionar lesiones graves o la muerte. • CONSERVE EL MANUAL DE • PARA EVITAR QUEMADURAS, PROPIETARIO PARA USO FUTURO. nunca coloque líquidos calientes • SE REQUIERE EL ARMADO DE UN sobre la bandeja para padres.
- Page 5 • Lea el manual incluido con el escalón o cordón de vereda. portabebés Chicco antes de usarlo en su carrito. Uso del portabebés Chicco en el carrito: • Use solamente el portabebés Chicco KeyFit® con este sistema de viaje.
- Page 6 MISE EN GARDE Ne pas se conformer à toutes les mises en garde et directives de montage peut causer des blessures graves ou même la mort. • PRIÈRE DE CONSERVER CE • AFIN DE PRÉVENIR LES RISQUES MANUEL D’UTILISATION POUR DE BASCULEMENT, ne pas placer ÉVENTUELLEMENT S'Y RÉFÉRER.
- Page 7 DANS DES ESCALIERS fixes ou • Lire le manuel de l'utilisateur fourni roulants. Il y a danger de perdre avec le porte-bébé Chicco avant de la maîtrise de la chariot et que l’utiliser avec cette chariot. l’enfant en tombe. Faire également...
- Page 8 Parts List Lista de las piezas Liste des pièces A. - Caddy frame A. - Estructura del carrito A. - Cadre de chariot B. - Front swivel wheels B. - Ruedas delanteras giratorias B. - Roulettes pivotantes avant C. - Rear wheels C.
- Page 9 Parts List Lista de las piezas Liste des pièces D. - Armbar D. - Barra apoyabrazos D. - Accoudoir E. - Parent Tray E. - Bandeja Para Padre E. - Plateau Pour Adulte F. - Basket Brace F. - El soporte del cestillo F.
- Page 10 How To Attach Basket Brace Cómo colocar el soporte del cestillo Fixation de l’armature du porte-bagages 1. Insert Basket Brace (F) through Basket Brace Sleeve and snap securely onto rear frame tube. 1. Inserte el soporte de cestillo (F) a través de la manga del soporte del cestillo y cierre bien sujeto en el tubo del marco trasero.
- Page 11 Attach Rear Wheels Conectar las ruedas traseras Fixer les roulettes arrière 2. Attach Rear Wheels (C) to the Caddy Frame as shown. The wheels should click into place. Pull on each wheel to make sure the wheel assembly is securely attached to the frame.
- Page 12 How to Open Caddy Cómo abrir el carrito Comment ouvrir la chariot 3A. Locate the storage basket frame (painted metal bar) on the Caddy Frame (A) and flip it open as shown. 3A. Ubique la estructura del cestillo portaobjetos (barra de metal pintada) en la estructura de la silla de carrito (A) y despliéguela como se muestra.
- Page 13 How to Open Caddy Cómo abrir el carrito Comment ouvrir la chariot “CLICK!” “CLIC” « CLIC » 3B. Locate the storage basket brace. Flip the brace over and snap it into position, attaching it onto the basket frame. 3B. Coloque el soporte del cestillo portaobjetos.
- Page 14 How to Open Caddy Cómo abrir el carrito Comment ouvrir la chariot 3C. Locate the foam Caddy Handle. Pull up on the foam Caddy Handle to lock it into the first position. 3C. Ubique la manija gomaespuma de la silla de paseo. Tire de ella hacia arriba para trabarla en la primera posición.
- Page 15 How to Open Caddy Cómo abrir el carrito Comment ouvrir la chariot 4. Using the foam Caddy Handle, stand the caddy up so that it is resting on the caddy basket frame. 4. Tire de la manija gomaespuma para colocar la silla de carrito en posición vertical y que quede firme sobre la estructura del cestillo portaobjetos.
- Page 16 How to Open Caddy Cómo abrir el carrito Comment ouvrir la chariot 5A. With the caddy in an upright position rotate the Release Handle towards the foam Caddy Handle. Push on the Release Handle (5B) until you hear an audible click. Note: It is necessary for this Release Handle to be locked into this position for the caddy to open and close properly - Once this...
- Page 17 Assemble Parent Tray Armar la bandeja para padre Monter le plateau pour adulte ADVERTENCIA MISE EN GARDE WARNING Para evitar que el carrito se Afin de prévenir les risques de To prevent tipping, do not incline, no cargue más de 2 basculement, ne pas placer plus place more than 2lbs (0.9 kg) lb (0,9 kg) en la bandeja para...
- Page 18 How to Open Caddy Cómo abrir el carrito Comment ouvrir la chariot 7A. Stand behind the caddy. Place one hand on the foam Caddy Handle and one hand on the Release Handle. Lean the caddy forward and pull up on the Release Handle to open the caddy.
-
Page 19: Attach Armbar Fije La Barra Protectora Apoyabrazos Fixer L'accoudoir
Attach Armbar Fije la barra protectora apoyabrazos Fixer l’accoudoir 8. Attach Armbar (D) to the frame as shown. You will hear an audible click when Armbar is in place. Gently lift up on both sides of Armbar to make sure it is secure. “CLICK!”... - Page 20 Attach Front Swivel Wheels Conectar las ruedas delanteras giratorias Fixer les roulettes pivotantes avant 9. Attach Front Swivel Wheels (B) to the caddy frame as shown. The wheels should click into place. Pull down on each wheel to make sure the wheel assembly is securely attached to the frame.
- Page 21 Assemble Storage Basket Armar el cestillo portaobjetos Monter le porte-bagage Snap button Botón de broche Bouton de verrouillage 10A. Pull both sides of storage basket fabric up and wrap it around the basket frame. 10A. Tire los lados del cestillo portaobjetos hacia arriba y colóquelo sobre la estructura del cestillo.
- Page 22 Assemble Storage Basket Armar el cestillo portaobjetos Monter le porte-bagage 10B. Snap the 6 buttons into place as shown. 10B. Abroche los 6 botones en su lugar como se muestra. 10B. Attacher les 6 boutons-pression, tel qu’illustré. “CLICK!” “CLIC” « CLIC »...
- Page 23 Storage Basket Access Armar el cestillo portaobjetos Monter le porte-bagage 11. To access the storage basket from the front. Unzip both zippers located on each side of the front of the basket. 11. Para acceder al cestillo portaobjetos desde el frente. Baje los cierres ubicados a cada lado del frente del cestillo.
- Page 24 Storage Basket Access Armar el cestillo portaobjetos Monter le porte-bagage 12. Extend the storage capacity of the basket from the rear. Locate the edge of the extension flap, which is tucked inside the rear basket edge. Flip the extension flap up. 12.
- Page 25 Adjust Caddy Handle Ajustar la manija del carrito Ajuster la poignée de la chariot 13. The foam Caddy Handle height can be “CLICK!” adjusted for comfort. To adjust the foam “CLIC” « CLIC » Caddy Handle position, push in on both buttons (as shown) and rotate the foam Caddy Handle up or down.
- Page 26 How to Use Brakes Cómo utilizar los frenos Comment utiliser les freins MISE EN GARDE WARNING ADVERTENCIA Toujours appliquer les freins Always apply both brakes Recuerde siempre accionar los lorsque la chariot est arrêtée. whenever the caddy is frenos cuando el carrito esté Ne jamais laisser la chariot sur stationary.
- Page 27 Keyfit® o Keyfit® 30 de infant car seat. Use of de retenue pour enfant KeyFit® Chicco. El uso de este producto this product with other ou KeyFit® 30 de Chicco. Tout con asientos para automóvil...
- Page 28 How to Attach KeyFit® Infant Carrier Cómo colocar el portabebés KeyFit® Comment installer le porte-bébé KeyFit® 15. Place the KeyFit® infant carrier into the caddy frame (15A). The infant carrier will click into the attachment points (15B). Note: Pull up on the infant carrier to make sure it is securely attached to the caddy frame.
- Page 29 How to Remove KeyFit® Infant Carrier Cómo quitar el portabebés KeyFit® Comment retirer le porte-bébé KeyFit® 16. To remove the KeyFit® infant carrier, squeeze the release handle on the back of the infant carrier and lift up on the carrying handle.
- Page 30 How to Fold Caddy Cómo plegar el carrito Comment replier la chariot WARNING ADVERTENCIA MISE EN GARDE When folding the caddy, make Al plegar el carrito, asegúrese En refermant la chariot, sure that your child and other de que su hijo y otros niños s'assurer que votre enfant ou children are at a safe se encuentren a una distancia...
- Page 31 How to Fold Caddy Cómo plegar el carrito Comment replier la chariot 17B. While pulling up on the Release Handle push down on the Storage Basket with your foot. The Caddy will automatically fold, latch and stand on its own. To make the caddy more compact, fold the foam Caddy Handle by pushing in on both buttons (as shown) and rotating the foam Caddy Handle down into the storage position (17C).
-
Page 32: Cleaning And Maintenance
Replace or repair the parts as needed. Use only Chicco replacement parts. To avoid friction that may prevent the correct operation of the caddy, ensure that all the movable plastic parts placed along the metal frame are clean of dust, dirt or sand. -
Page 33: Limpieza Y Mantenimiento
Reemplace o repare las piezas en caso de que sea necesario. Sólo utilice piezas de repuesto de Chicco. Para evitar que la fricción impida el correcto funcionamiento del carrito, asegúrese de que todas las piezas plásticas móviles que se encuentren en la estructura de metal estén libres de polvo, suciedad o arena. -
Page 34: Entretien Et Nettoyage
Remplacer ou réparer ces pièces au besoin. Utiliser uniquement des pièces de rechange Chicco. Afin d’éviter la friction susceptible de nuire au fonctionnement de la chariot, s’assurer que toutes les pièces mobiles en plastique sont libres de toute trace de poussière, terre ou sable. - Page 35 For More Information Más información Pour plus d’information If you have any questions or comments about this product, or are missing any of the parts, please contact us in one of the following ways: Si tiene preguntas o comentarios sobre este producto o le falta alguna de las partes, comuníquese con nosotros por alguno de los siguientes medios: Si vous avez des questions ou commentaires, au sujet de ce produit, ou si certaines pièces sont manquantes, veuillez communiquer avec nous de l’une...
- Page 36 www.chiccousa.com...