Table des Matières
Publicité
Les langues disponibles
Les langues disponibles
Liens rapides
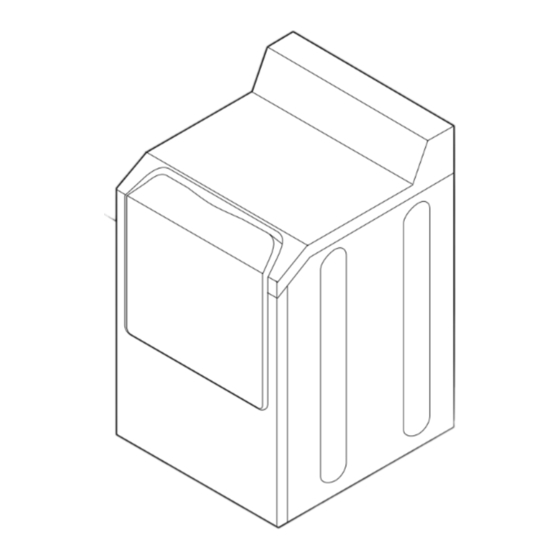
Automatic
Dryer
Sécheuse automatique/Secadora automática
Installation Instructions/Instructions d'installation/Instrucciones de
Instalación.
Features vary by model.
Les caractéristiques et le style
varient selon le modèle.
Las características y los estilos
varían según el modelo.
Printed in USA
©2005 Maytag Corporation
2204560
Publicité
Table des Matières

Manuels Connexes pour Maytag NDG6800AWW


Sommaire des Matières pour Maytag NDG6800AWW
- Page 1 Automatic Dryer Sécheuse automatique/Secadora automática Installation Instructions/Instructions d’installation/Instrucciones de Instalación. Features vary by model. Les caractéristiques et le style varient selon le modèle. Las características y los estilos varían según el modelo. Printed in USA ©2005 Maytag Corporation 2204560...
-
Page 2: Location Considerations
Automatic Dryer Instructions Important to Installer • PLEASE READ THE FOLLOWING INSTRUCTIONS CAREFULLY BEFORE STARTING TO INSTALL THE DRYER. THESE INSTRUCTIONS SHOULD BE RETAINED FOR FUTURE REFERENCE. • REMOVE THE DOOR FROM ALL DISCARDED APPLIANCES TO AVOID THE DANGER OF A CHILD SUFFOCATING. - Page 3 ALCOVE OR CLOSET INSTALLATION An appliance installed in a closet shall have no other fuel-burning appliance installed in the same closet. Each opening area in the door must have a minimum of 36 square inches. These openings must not be obstructed. (Louvered door with equivalent air openings is acceptable.) W A R N I N G THE DRYER MUST BE EXHAUSTED TO THE...
- Page 4 EXHAUST CONTINUED Never install any type of flexible duct in walls, ceilings or other W A R N I N G concealed spaces. Keep exhaust duct as straight and short as possible. Exhaust systems longer than recommended can extend THE DRYER MUST BE EXHAUSTED TO THE drying times, affect machine operation and may collect lint.
-
Page 5: Gas Requirements
Conversion kits from NATURAL to LP, or LP to NATURAL are reduced to connect to the 3/8”(1.0 cm) gas line on the dryer. available through your local Maytag dealer (see Accessories). If other conversions are required, check with the local gas utility for The National Fuel Gas Code requires that an accessible, approved specific information concerning conversion requirements. -
Page 6: Gas Models
ELECTRICAL REQUIREMENTS NOTE: Wiring diagram is located inside the control console. Export models (not U.S. or Canada): See Additional Instructions for Export Models. W A R N I N G TO PREVENT UNNECESSARY RISK OF FIRE, ELECTRICAL SHOCK OR PERSONAL INJURY, ALL WIRING AND GROUNDING MUST BE DONE IN ACCORDANCE WITH LOCAL CODES, OR IN THE ABSENCE OF LOCAL CODES, WITH THE NATIONAL ELECTRICAL CODE, ANSI/NFPA, NO. -
Page 7: Replacement Parts And Accessories
ADDITIONAL INFORMATION FOR INTERNATIONAL USE (not U.S. or Canada) Maytag dryer models manufactured for operation on 60 Hz AC are not designed for use on 50 Hz AC electrical service and conversion of the product from 60 to 50 Hz operation is not recommended. For additional information on 50 Hz products, contact Maytag International. -
Page 8: Sécheuse Automatique
Sécheuse automatique Instructions Message important pour l’installateur • VEUILLEZ LIRE ATTENTIVEMENT LES INSTRUCTIONS SUIVANTES AVANT DE DÉBUTER L’INSTALLATION DE LA SÉCHEUSE. CES INSTRUCTIONS DOIVENT ÊTRE CONSERVÉES POUR VOUS Y REPORTER ULTÉRIEUREMENT. • ENLEVEZ LA PORTE DE TOUT APPAREIL MIS AU REBUT POUR ÉVITER LE RISQUE D’ASPHYXIE CHEZ LES ENFANTS. -
Page 10: Évacuation (Suite)
ÉVACUATION (SUITE) Un blocage sérieux pourrait survenir si le conduit de métal flexible ADVERTISSEMENT est trop plié. N’installez aucun type de conduit flexible dans les Conduit flexible à parois rigides d’un murs, plafonds ou autres endroits fermés. Assurez-vous que le L’ÉVACUATION DE LA SÉCHEUSE DOIT SE FAIRE À... -
Page 11: Allumage Au Gaz
GAZ NATUREL sont disponibles chez votre marchand local conduite de gaz de 1cm (3/8 po) de la sécheuse. Maytag (voyez la section Accessoires). Si vous devez effectuer un autre type de conversion, adressez-vous au service de distribution Le National Fuel Gas Code requiert l’utilisation d’un robinet de gaz local pour obtenir de l’information spécifique concernant les... -
Page 12: Modèles À Gaz
EXIGENCES ÉLECTRIQUES REMARQUE : Le schéma de câblage est situé à l’intérieur de la console de commande. Modèles d’exportation (non destinés au US ou au Canada) : Voyez les instructions supplémentaires concernant les modèles d’exportation. ADVERTISSEMENT AFIN DE PRÉVENIR LES RISQUES INUTILES D’INCENDIE, DE CHOC ÉLECTRIQUE OU DE BLESSURE, TOUS LES TRAVAUX DE CÂBLAGE ET DE MISE À... -
Page 13: Raccordement Électrique (Suite)
INFORMATIONS SUPPLÉMENTAIRES POUR USAGE INTERNATIONAL (non destiné aux États-Unis ou au Canada) Les modèles de sécheuses Maytag fabriqués pour fonctionner avec une alimentation de 60 Hz CA ne sont pas conçus pour une alimentation électrique de 50 Hz CA. La conversion du produit de 60 à 50 Hz n’est pas recommandée. Pour plus de renseignements concernant les produits de 50 Hz, communiquez avec Maytag International. - Page 14 Secadora automática Instrucciones Nota importante para el instalador • POR FAVOR LEA CUIDADOSAMENTE LAS SIGUIENTES INSTRUCCIONES ANTES DE COMENZAR A INSTALAR LA SECADORA. CONSERVE ESTAS INSTRUCCIONES PARA REFERENCIA FUTURA. • RETIRE LA PUERTA DE TODOS LOS ELECTRODOMÉSTICOS DE DESECHO PARA EVITAR LA ASFIXIA DE LOS NIÑOS.
- Page 16 Inspeccione y limpie el interior o el sis ESCAPE (cont.) Desconecte el suministro eléctrico ante gas en las secadoras a gas cada vez qu No use conductos flexibles con paredes de aluminio delgado. ADVERTENCIA frecuencia para asegurarse de que la pe Pueden ocurrir bloqueos serios si el conducto de metal flexible se dobla demasiado.
- Page 17 (PARA CANADÁ). Puede adquirir kits de conversión de gas NATURAL a LP o LP a NATURAL de su distribuidor Maytag local (vea la sección de Se recomienda el uso de una tubería de suministro de gas de 1/2" accesorios). Si se requieren conversiones adicionales, consulte a su (1,27 cm), la cual debe ser reducida para conectarse a la tubería de...
-
Page 18: Modelos Eléctricos
REQUERIMIENTOS ELÉCTRICOS NOTA: El diagrama del cableado está ubicado dentro de la consola de control. Modelos de exportación (fuera de los EE.UU. o Canadá): Vea las instrucciones adicionales para los modelos de exportación A D V E R T E N C I A PARA EVITAR RIESGOS INNECESARIOS DE INCENDIO, CHOQUE ELÉCTRICO O LESIONES PERSONALES, TODO EL CABLEADO Y LA PUESTA A TIERRA DEBEN SER LLEVADAS A CABO DE ACUERDO CON LOS CÓDIGOS LOCALES, O, EN AUSENCIA DE ELLOS, CON EL CÓDIGO NACIONAL DE ELECTRICIDAD, ANSI/NFPA NO. -
Page 19: Piezas De Repuesto Y Accesorios
INFORMACIÓN ADICIONAL PARA USO INTERNACIONAL (fuera de los EE.UU. o Canadá) Los modelos de las secadoras Maytag que fueron fabricados para funcionar en un circuito de 60 Hz CA no pueden ser usados con un suministro eléctrico de 50 Hz CA. No se recomienda realizar la conversión del producto de 60 Hz a 50 Hz. Para obtener información adicional sobre productos de 50 Hz, póngase en contacto con Maytag International. - Page 20 Joint Compound Pâte à joint Compuesto de conexión Duct Tape 5/16" Ruban adhésif en toile Electric (8mm) Cinta Gris para Tubos Only Plumber’s Tape 3/8" Deep Well Ruban de plombier (10mm) Douille profonde Cinta de plomero (10mm) Casquillo Profundo Tools needed./Outils nécessaires./Herramientas necesarias. Items Included/Articles inclus/Artículos Incluidos Nuts and washers for connecting electrical cord to machine./Écrous et...
- Page 21 Loosen leveling nuts and install vinyl feet./Desserrez les écrous de mise à niveau Gently return to upright position being careful to not damage exhaust duct or other et installez les pieds de vinyle./Afloje las tuercas de nivelación e instale las patas components;...
- Page 22 240v 3-Wire/240 V, 3 fils/Cable Trifilar para 240 V NEUTRAL NEUTRE NEUTRO 3/8" (10mm) Attach neutral wire to center post. (NOTE: Use deep well nut driver for all Insert cord connections through hole. (NOTE: Mark middle [Neutral] connection before inserting.)/Insérez les raccordements du cordon dans le connections to assure tight fit on all terminals.)/Raccordez le fil de neutre au goujon central.
- Page 23 240v 4-Wire/240 V, 4 fils/Cable Tetrafilar para 240 V 3/8" (10mm) 5/16" (8mm) Remove the ground strap screw from terminal block support. Fold the Insert cord connections through hole./Insérez les raccordements du cordon à ground strap over so both ends are attached to the center post of the travers le trou./Inserte las conexiones del cordón a través del agujero.
- Page 24 Go to step 7 on page 24. Rendez-vous à l’étape 7, page 24. Vaya al paso 7 en la página 24. 5/16" (8mm) Replace wire connections metal cover./Remettez le couvercle métallique./ Vuelva a colocar la cubierta metálica de las conexiones de los alambres. Gas Unit Hookup/Raccordement d’un appareil à...
- Page 25 Adjust legs until dryer is level side-to-side and front-to-back. Then lock the Carefully position dryer in final position./Déplacez soigneusement la nut to base./Réglez les pieds de la sécheuse jusqu’à ce qu’elle soit mise à sécheuse dans sa position définitive./Coloque con cuidado la secadora en su niveau.
- Page 26 Option/Option/Opción Reversing The Door/Inversion de la porte/Inversión de la puerta Remove door by lifting up then out to disengage hinges from dryer./Enlevez la porte en la Remove center screws from hinges./Retirez les vis centrales des soulevant, puis en la tirant vers vous pour la dégager des charnières de la sécheuse./ charnières./Remueva los tornillos centrales de las bisagras.
- Page 27 English/French/Spanish Insert the four color-matching screws on the opposite side./Insérez les quatre Replace hinges with careful attention to orientation using the four vis de couleur coordonnée sur l’autre côté./Inserte los cuatro tornillos de screws./Utilisez les quatre vis pour replacer les charnières, en prenant soin de colores en el lado opuesto.
- Page 28 Household Installation Accessories/Accessoires d’installation dans une maison/ Accesorios para instalación en el hogar • Vent hood/Hotte de sortie/Caperuza de salida – 4” (10.16 cm) opening – 059129 • Aluminum pipe/Tuyau en aluminium/Tubería de aluminio – 4” x 24” (10.16 cm x 60.96 cm) – 059130 •...