Table des Matières
Publicité
Les langues disponibles
Les langues disponibles
Liens rapides
Installation Guide
Guide d'installation
Montagehandleiding
Manual de instalación
Manuale di installazione
Montageanleitung
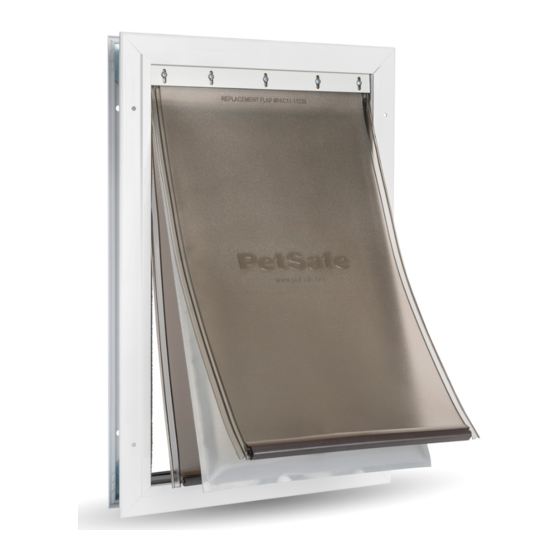
Extreme Weather Aluminum Pet Door
TM
Extreme Weather Aluminium Pet Door
Porte pour animaux en aluminium pour climat extrême
Aluminium huisdierluik voor extreem weer
Puerta de mascotas para clima extremo
Porta per animali domestici in
alluminio per condizioni climatiche estreme
Aluminium-Haustiertür für extremes Wetter
Please read this entire guide before beginning.
Veuillez lire l'intégralité de ce manuel avant de commencer.
Gelieve deze gids volledig door te lezen voordat u begint.
Lea por completo este manual antes de comenzar.
Si prega di leggere attentamente la guida al uso prima di utilizzare il collare.
Bitte lesen Sie vor der Verwendung die Betriebsanleitung vollständig durch.
Publicité
Chapitres
Table des Matières

Manuels Connexes pour Petsafe Pet Door


Sommaire des Matières pour Petsafe Pet Door
- Page 1 Guide d’installation Montagehandleiding Manual de instalación Manuale di installazione Montageanleitung Extreme Weather Aluminum Pet Door Extreme Weather Aluminium Pet Door Porte pour animaux en aluminium pour climat extrême Aluminium huisdierluik voor extreem weer Puerta de mascotas para clima extremo Porta per animali domestici in alluminio per condizioni climatiche estreme Aluminium-Haustiertür für extremes Wetter...
-
Page 2: Important Safety Instructions
It is important for the owner and contractor to consider any risks that may be present inside or outside of the pet door and any risks that may be created by subsequent changes to the property and how they may relate to the existence and use, including misuse, of the pet door. -
Page 3: Table Des Matières
• Keep these instructions, and ensure that they are transferred to any new owner of the property. • If the mounting surface (door, wall, etc.) is not level, the pet door must still be installed level to swing properly. • When applying the cutting template, there should be a minimum of 3 inches (8 centimetres) between the bottom and sides of the door and the outer edge of the template to maintain the structural integrity of the door. -
Page 4: Kit Includes
• Safety glasses NOTE: Although the instructions in this guide explain how to install the pet door in a door, it can also be installed in most walls; the installation procedure is the same. The pet door is not designed to be installed in glass. If installing the pet door in a door or wall with a thickness of: •... -
Page 5: Mark The Pet Door Location
Mark the pet door location 1. Measure and mark your pet’s shoulder height on the inside of the door where you will install the pet door (A). 2. Using a level, draw a vertical line where you want the center/centre of the pet door to be located (B). -
Page 6: Cut The Pet Door Opening
Cut the pet door opening NOTE: When drilling holes and cutting the opening for the pet door, wear safety glasses and make sure to hold the drill and jigsaw with both hands and at a 90-degree angle to the door. -
Page 7: Install The Pet Door
NOTE: If you purchased an Installation Adaptor, place the installation adaptor plates on the interior and exterior frames of the pet door before installation. The Installation Adaptor is necessary only if you are installing the pet door in a door less than 1 1/2 inches (38 millimetres) thick. For more details, please contact Customer Care. -
Page 8: Use The Closing Panel
Use the closing panel The closing panel is useful during inclement weather, or to prevent your pet from using the pet door at certain times. To use the closing panel, slide it into the grooves at each side of the pet door frame (L). -
Page 9: Terms Of Use And Limitation Of Liability
Radio Systems Corporation reserves the right to change the terms, conditions and notices governing this product from time to time. If such changes have been notified to you prior to your use of this product, they shall be binding on you as if incorporated herein. petsafe.com... -
Page 10: Warranty
Customer Care: United States/Canada: Radio Systems Corporation; 10427 PetSafe Way; Knoxville, TN 37932 USA Europe: Radio Systems PetSafe Europe Ltd.; 2nd Floor, Elgee Building, Market Square; Dundalk, Co. Louth, A91 YR9X Ireland Australia/New Zealand: In compliance with the Australian Consumer Law, Warranties Against Defects, effective January 1, 2012, warranty details of this Product are as follows: Radio Systems Australia Pty Ltd. -
Page 11: Instructions Importantes Sur La Sécurité
à la présence et à l'utilisation, y compris une utilisation inadéquate, de la porte pour animaux. • Lors de la découpe d'une surface métallique, faites attention aux bords coupants pour éviter toute blessure. petsafe.com... - Page 12 Découper l'ouverture de la porte pour animaux Percer les trous pour le cadre Installer la porte pour animaux Dresser votre animal de compagnie Utiliser le panneau de fermeture Ajuster ou remplacer les volets Conditions d’utilisation et limitation de responsabilité Garantie petsafe.com...
-
Page 13: Le Kit Contient
épaisseur de : • Plus de 51 millimètres, vous aurez besoin d'outils et de matétiel supplémentaires, par exemple un cadre en bois. • Moins de 38 millimètres, vous aurez besoin d'acheter un adaptateur de montage. Visitez www.petsafe.com ou contactez le service clientèle. -
Page 14: Marquer L'emplacement De La Porte Pour Animaux
6. Tracez le bord extérieur du gabarit de découpe en veillant à relier les coins. Retirez le gabarit de découpe et la bande de masquage ou le ruban adhésif de peintre en excès de la porte. petsafe.com... -
Page 15: Découper L'ouverture De La Porte Pour Animaux
10. Placez le cadre intérieur (le cadre avec un volet) dans l'ouverture et marquez les trous de vissage (quatre trous pour les portes pour animaux d'animaux de taille moyenne et grande, six troux pour la porte pour animaux de très grande taille) (H). 11. Retirez le cadre et percez des trous de 7 millimètres aux endroits marqués (I). petsafe.com... -
Page 16: Installer La Porte Pour Animaux
20. Une fois que votre animal de compagnie est passé quelques fois à travers la porte pour animaux, laissez les volets toucher le dos de votre animal de compagnie. Il deviendra ainsi à l'aise pour utiliser la porte pour animaux par lui-même. petsafe.com... -
Page 17: Utiliser Le Panneau De Fermeture
2. Retirez le volet en vinyle et l'attache du volet (O). Sur le cadre extérieur, l'attache isolante est attachée à l'attache du volet. 3. Insérez le nouveau volet en vinyle entre le cadre de la porte pour animaux et l'attache du volet. Le logo PetSafe doit pouvoir être lu sur le volet en vinyle. ®... -
Page 18: Conditions D'utilisation Et Limitation De Responsabilité
être consultées sur le site www.petsafe.com et/ou en contactant le service clientèle : États-Unis/Canada : Radio Systems Corporation ; 10427 PetSafe Way ; Knoxville, TN 37932 USA Europe : Radio Systems PetSafe Europe Ltd. ; 2nd Floor, Elgee Building, Market Square ; Dundalk, Co. Louth, A91 YR9X Ireland petsafe.com... -
Page 19: Belangrijke Veiligheidsinstructies
• Als u in een metalen oppervlak snijdt, dient u uit te kijken voor scherpe randen om zo letsel te voorkomen. petsafe.com... - Page 20 De locatie van het huisdierluik markeren Het luik voorbereiden De opening voor het huisdierluik zagen Gaten boren voor het frame Het huisdierluik installeren Uw huisdier trainen Het sluitingspaneel gebruiken De flappen aanpassen of vervangen Gebruiksvoorwaarden en beperking van aansprakelijkheid Garantie petsafe.com...
-
Page 21: Inbegrepen In De Kit
Als u het huisdierluik installeert in een deur of muur met een dikte van: • Meer dan 51 millimeter hebt u mogelijk aanvullende gereedschappen en materialen nodig, zoals een houten geraamte. • Minder dan 38 millimeter moet u een installatie-adapter kopen. Ga naar www.petsafe.com of neem contact op met de klantenservice. petsafe.com... -
Page 22: De Locatie Van Het Huisdierluik Markeren
6. Teken langs de omtrek van de sjabloon, waarbij u ervoor zorgt dat u de hoeken met elkaar verbindt. Verwijder de sjabloon en tape van de deur. petsafe.com... -
Page 23: De Opening Voor Het Huisdierluik Zagen
10. Plaats het binnenframe (het frame met één flap) in de opening en markeer de schroefgaten (vier gaten voor middelgrote en grote huisdierluiken, zes gaten voor het extra grote luik) (H). 11. Verwijder het frame en boor gaten van 7 millimeter op de gemarkeerde locaties (I). petsafe.com... -
Page 24: Het Huisdierluik Installeren
Duw uw huisdier niet door het huisdierluik. 20. Nadat uw huisdier enkele malen door het luik is gelopen, zorgt u dat de flappen de rug van uw huisdier raken, zodat hij eraan gewend raakt het luik in zijn eentje te gebruiken. petsafe.com... -
Page 25: Het Sluitingspaneel Gebruiken
2. Verwijder de vinyl flap en de flapklem (O). De geïsoleerde flap aan het buitenframe is bevestigd aan de flapklem. 3. Plaats de nieuwe vinyl flap tussen het frame van het huisdierluik en de flapklem. Het PetSafe -logo op de vinyl ®... -
Page 26: Gebruiksvoorwaarden En Beperking Van Aansprakelijkheid
Verenigde Staten/Canada: Radio Systems Corporation, 10427 PetSafe Way, Knoxville, TN 37932, VS Europa: Radio Systems PetSafe Europe Ltd., 2nd Floor, Elgee Building, Market Square, Dundalk, Co. Louth, A91 YR9X Ierland... -
Page 27: Instrucciones De Seguridad Importantes
• Si corta una superficie de metal, tenga en cuenta los bordes afilados para evitar lesiones. petsafe.com... - Page 28 Cortar la abertura de la puerta para mascotas Taladrar los agujeros para el marco Instalar la puerta para mascotas Entrene a su mascota Utilizar la placa de cierre Ajustar o sustituir los batientes Términos de uso y limitación de responsabilidad Garantía petsafe.com...
-
Page 29: El Kit Incluye
• Más de 51 milímetros, es posible que necesite herramientas y materiales adicionales, como marcos de madera. • Menos de 38 milímetros, deberá comprar un adaptador de instalación. Visite www.petsafe.com o póngase en contacto con Atención al cliente. -
Page 30: Marque La Ubicación De La Puerta Para Mascotas
6. Trace el borde exterior de la plantilla para el corte, asegurándose de conectar las esquinas. Retire la plantilla para el corte y cualquier resto de cinta de la puerta. petsafe.com... -
Page 31: Cortar La Abertura De La Puerta Para Mascotas
10. Coloque el marco interior (el marco con un batiente) en la abertura y marque los orificios para los tornillos (cuatro orificios para las puertas para mascotas mediana y grande, seis para la extragrande) (H). 11. Retire el marco y taladre agujeros de 7 milímetros en las ubicaciones marcadas (I). petsafe.com... -
Page 32: Instalar La Puerta Para Mascotas
20. Una vez que su mascota haya pasado por la puerta para mascotas varias veces, permita que los batientes toquen la espalda de su mascota para que se sienta cómoda usando la puerta para mascotas por su cuenta. petsafe.com... -
Page 33: Utilizar La Placa De Cierre
2. Retire el batiente de vinilo y la abrazadera del batiente (O). En el marco exterior, el batiente aislado está unido a la abrazadera del batiente. 3. Inserte el nuevo batiente de vinilo entre el marco de la puerta para mascotas y la abrazadera del batiente. El logotipo de PetSafe debe poder leerse en el batiente de vinilo. ®... -
Page 34: Términos De Uso Y Limitación De Responsabilidad
Atención al cliente. Estados Unidos/Canadá: Radio Systems Corporation; 10427 PetSafe Way; Knoxville, TN 37932 Estados Unidos Europa: Radio Systems PetSafe Europe Ltd.; 2nd Floor, Elgee Building, Market Square; Dundalk, Co. Louth, A91 YR9X Irlanda petsafe.com... -
Page 35: Importanti Istruzioni Per La Sicurezza
• Se tagli una superficie in metallo, stai attento ai margini taglienti per evitare lesioni. petsafe.com... - Page 36 Incidi l'apertura della porta per animali domestici Esegui i fori con il trapano per la struttura Installare la porta per animali domestici Addestra il tuo animale domestico Usa il pannello di chiusura Sistema o sostituisci le gattaiole Limitazione di responsabilità e condizioni di utilizzo Garanzia petsafe.com...
-
Page 37: Il Kit Include
• Oltre 51 millimetri, potresti avere bisogno di strumenti e materiali aggiuntivi, come ad esempio una cornice in legno. • Meno di 38 millimetri, potresti avere bisogno di acquistare un adattatore per l'installazione. Visita www.petsafe.com o contatta l'Assistenza clienti. petsafe.com... -
Page 38: Segna L'ubicazione Della Porta Per Animali Domestici
6. Ricalca il margine esterno della sagoma per il taglio, facendo attenzione a unire gli angoli. Rimuovi la sagoma per il taglio e il nastro adesivo in eccesso dalla porta. petsafe.com... -
Page 39: Incidi L'apertura Della Porta Per Animali Domestici
10. Colloca la struttura interna (con una sola gattaiola) nell'apertura e segna i fori per le viti (quattro fori per le porte per animali domestici medie e grandi, sei fori per la extra large) (H). 11. Rimuovi la struttura ed esegui i fori da 7 millimetri con il trapano nei punti segnati (I). petsafe.com... -
Page 40: Installare La Porta Per Animali Domestici
20. Dopo che il tuo animale domestico è passato attraverso la porta per animali domestici per alcune volte, lascia che la gattaiola tocchi la sua schiena in modo che inizi a sentirsi a suo agio nell'usarla da solo. petsafe.com... -
Page 41: Usa Il Pannello Di Chiusura
2. Rimuovi la gattaiola in vinile e il suo morsetto (O). Sulla struttura esterna, la gattaiola isolante è attaccata al morsetto. 3. Inserisci la nuova gattaiola in vinile tra la struttura della porta per animali domestici e il morsetto della gattaiola. Il logo PetSafe deve essere leggibile sulla gattaiola in vinile. ®... -
Page 42: Limitazione Di Responsabilità E Condizioni Di Utilizzo
Web www.petsafe.com e/o possono essere richieste contattando l'Assistenza clienti: Stati Uniti/Canada: Radio Systems Corporation; 10427 PetSafe Way; Knoxville, TN 37932 USA Europa: Radio Systems PetSafe Europe Ltd.; 2nd Floor, Elgee Building, Market Square; Dundalk, Co. Louth, A91 YR9X Ireland petsafe.com... -
Page 43: Wichtige Sicherheitshinweise
Haustiertür bestehen können, auch jegliche Gefahren einbeziehen, die durch nachträgliche Veränderungen der Bausubstanz entstehen können, und berücksichtigen, in welchem Zusammenhang diese möglicherweise mit dem Vorhandensein und der Nutzung der Haustiertür, einschließlich deren Zweckentfremdung stehen. • Beim Schneiden von Metall auf scharfe Kanten achten, um Verletzungen zu vermeiden. petsafe.com... - Page 44 Haustiertür führen. GEBRAUCHSANWEISUNG BITTE AUFBEWAHREN Inhalt Inhalt des Sets Erforderliches Werkzeug Position der Haustiertür markieren Tür vorbereiten Öffnung für Haustiertür ausschneiden Löcher für Rahmen bohren Haustiertür einbauen Ihr Haustier trainieren Verschlussplatte einsetzen Klappen einstellen oder auswechseln Nutzungsbedingungen und Haftungsbeschränkung Garantie petsafe.com...
-
Page 45: Inhalt Des Sets
Dicke von: • Über 51 mm kann zusätzliches Werkzeug und Material, z. B. ein Holzrahmen, erforderlich sein; • Unter 38 mm ist ein Einbauadapter erforderlich (separat erhältlich). Weitere Informationen erhalten Sie unter www.petsafe.com oder bei der Kundenbetreuung. petsafe.com... -
Page 46: Position Der Haustiertür Markieren
Mindestabstand von 8 cm einzuhalten, um die strukturelle Integrität der Tür aufrechtzuerhalten. 6. Ziehen Sie mit dem Bleistift die Außenränder der Schneideschablone nach. Achten Sie darauf, die Ecken genau einzuzeichnen. Entfernen Sie die Schneideschablone und jegliches Klebeband von der Tür. petsafe.com... -
Page 47: Öffnung Für Haustiertür Ausschneiden
10. Platzieren Sie den Innenrahmen (den Rahmen ohne Klappe) in der Öffnung, und markieren Sie die Schraubenlöcher (vier Bohrungen für die mittlere und große Haustiertür, sechs Bohrungen für die sehr große Haustiertür) (H). 11. Entfernen Sie den Rahmen, und bohren Sie an den markierten Stellen mit dem 7 mm großen Bohrer Löcher (I). petsafe.com... -
Page 48: Haustiertür Einbauen
Ihr Haustier mit Zwang durch die Haustier Tür zu bewegen. 20. Nachdem Ihr Haustier mehrmals durch die Haustiertür gegangen ist, lassen Sie die Klappen sanft den Rücken Ihres Haustiers berühren, damit es sich an das Gefühl gewöhnt, die Haustiertür eigenständig zu nutzen. petsafe.com... -
Page 49: Verschlussplatte Einsetzen
2. Entfernen Sie die Vinylklappe und die Klappenhalterung (O). Die isolierte Klappe am Außenrahmen ist mit der Klappenhalterung verbunden. 3. Setzen Sie die neue Vinylklappe zwischen dem Haustier-Türrahmen und der Klappenhalterung ein. Das PetSafe -Logo sollte auf der Vinylklappe lesbar sein. ®... -
Page 50: Nutzungsbedingungen Und Haftungsbeschränkung
Garantie und ihren Bestimmungen erhalten Sie unter www.petsafe.com und/oder bei der Kundenbetreuung: USA/Kanada: Radio Systems Corporation; 10427 PetSafe Way; Knoxville, TN 37932 USA Europa: Radio Systems PetSafe Europe Ltd.; 2nd Floor, Elgee Building, Market Square; Dundalk, Co. Louth, A91 YR9X Irland... - Page 52 • Pet Doors Les produits PetSafe sont conçus pour améliorer votre relation avec votre animal ® de compagnie. Visitez www.petsafe.com pour en savoir plus sur notre large gamme de produits. • Santé et bien-être • Systèmes anti-fugue et de prévention •...