Table des Matières
Publicité
Les langues disponibles
Les langues disponibles
Liens rapides
Publicité
Table des Matières

Manuels Connexes pour LAVAZZA CLASSY MINI


Sommaire des Matières pour LAVAZZA CLASSY MINI
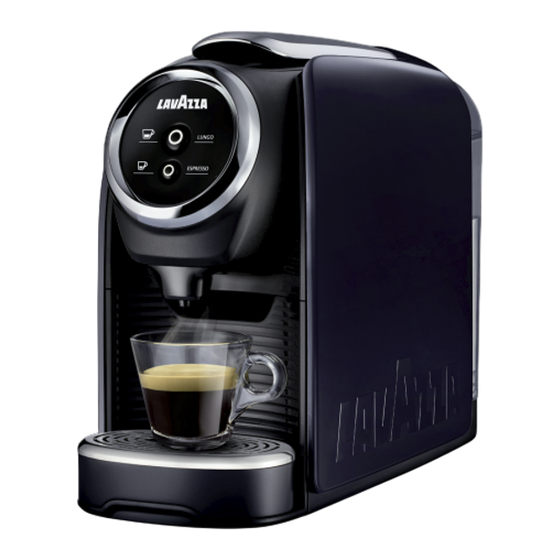
- Page 1 CLASSY Instructions Mode d’emploi Instrucciones de empleo MINI...
- Page 2 Félicitations! Cher Client, nous vous félicitons pour l’achat de la machine Expresso LAVAZZA CLASSY Mini et nous vous remercions de la confiance que vous nous avez accordée. Avant de faire fonctionner la machine, nous vous conseillons de lire attentivement le mode d’emploi qui explique comment l’utiliser, la nettoyer et la maintenir en excellent...
-
Page 3: Important Safeguards
23. To disconnect, turn the machine to stand- Contact Lavazza Customer Service to re- by status and then remove the plug from port any malfunction of or damage to the the wall outlet system. - Page 4 CAUTION: There are sharp needles that puncture the Lavazza CLASSY Mini located above the Lavazza CLASSY Mini Holder and in the bottom of the Lavazza CLASSY Mini Holder. To avoid risk of injury, do not put your fingers in the Lavazza CLASSY Mini Assembly Housing.
-
Page 5: Components And Controls
COMPONENTS AND CONTROLS Water tank Capsule loading lever cover Water tank Control unit Coffee dispenser Used capsule drawer Power supply cable Mug/cup rest grid Drip tray drawer CONTROL UNIT LUNGO supply button (120 ml)(4,057oz) ESPRESSO supply button (40 ml)(1,35 oz) -
Page 6: Preparing The Machine
PREPARING THE MACHINE We are not liable for any damages in case of: The water level should never exceed the MAX indication and it must always be maintained • incorrect use and other uses than the above MIN. Only use non-carbonated fresh intended purposes;... -
Page 7: Stand-By Function
PREPARING THE MACHINE PREPARATION FOR COFFEE BREWING Place a glass below the dispensing spout. Press the LUNGO supply button and wait for The coffee machine features two positions for water to be supplied. preparing the coffee: espresso cup/mug or glass. Place the cup or small cup under the coffee dis- penser, if you wish to have traditional espresso cof- fee. -
Page 8: Preparing The Coffee
PREPARING THE COFFEE ESPRESSO DELIVERY Put a Lavazza capsule into the capsule fitting compartment. Make sure that the switch-on/supply buttons lights up to a steady white light. Single-dose capsules are prepared to dis- pense one coffee/product. DO NOT use the... - Page 9 PREPARING THE COFFEE LUNGO DELIVERY Press the ESPRESSO button to start delivery. The machine will stop delivery automatically when Do steps: in paragraph the programmed measure is reached (40 ml) ESPRESSO DELIVERY . (1,35 oz). LUNGO Press the button to start delivery. The machine will stop delivery automatically when the programmed measure is reached (120 ml) (4,057oz).
-
Page 10: Coffee Dose Programming
BREWING). Lift the capsule loading lever until it locks into po- sition to open the pod fitting compartment. Put a Lavazza capsule into the capsule fitting compartment. Once the desired amount of coffee has been ob- tained, stop supply by releasing the button. -
Page 11: Maintenance And Cleaning
MAINTENANCE AND CLEANING Never use solvents, alcohol or other aggressive Clean the components with cold or lukewarm wa- substances or ovens for drying the coffee ma- ter, then dry it and refit it correctly. chine components. Wash machine components (electric components excluded) with cold/luke- warm water and nonabrasive clothes/sponges. - Page 12 MAINTENANCE AND CLEANING DESCALING Power the machine ON and place a suitable con- tainer under the spout. Lime-scale normally builds up with extended use of the appliance; the machine needs descaling Press the LUNGO button and supply two cups every 2 months and/or whenever a reduction in (approximately 120 ml each).
-
Page 13: Possible Causes
Top up the tank with fresh 4 - No water in the tank. drinking water. Non-OK: go to step 5 OK: call solved. Insert Lavazza 5 - Capsule not present. capsule or compatible. Non-OK: machine being serviced Press one of the buttons and check the operation of the OK: call solved. - Page 14 Coffee is dispensed too fast and, therefore, it is not so 2 - Insertion of a soluble OK: call solved. creamy. Use a Lavazza coffee pod product pod instead of a (or any one compatible pod). Non-OK: machine being serviced coffee one.
-
Page 15: Technical Specifications
As regards the faults not covered by the above table, or if the suggested actions do not remedy the faults, contact the nearest Lavazza Authorized Service Centre. TECHNICAL SPECIFICATIONS • Materials used for the body: thermoplastic •... - Page 16 NOTE...
-
Page 17: Consignes De Sécurité Importantes
23. Pour débrancher l’appareil, le mettre en conque de l’appareil. Contacter le service veille, puis retirer la fiche de la prise murale. clientèle de Lavazza pour signaler tout dys- 24. Utiliser uniquement des capsules destinées fonctionnement ou tout endommagement de à... - Page 18 NE PAS permettre aux enfants d’utiliser l’ a ppareil sauf s’ils sont supervisés par un adulte. L’ a ppareil distribue de l’eau très chaude. ATTENTION : des aiguilles pointues traversent la Lavazza CLASSY Mini en haut et en bas du support Lavazza CLASSY Mini. Pour éviter tout risque de blessure, ne pas introduire les doigts dans le boîtier Lavazza CLASSY Mini.
-
Page 19: Unité De Commandes
COMPOSANTS DE LA MACHINE Couvercle réservoir eau Levier de chargement des capsules Réservoir eau Unité de commandes Bec de distribution Bac à capsules usagées Câble d’alimentation Grille repose-tasses Bac récolte gouttes UNITÉ DE COMMANDES Bouton d’allumage LUNGO (120 ml) Bouton d’allumage ESPRESSO (40 ml) -
Page 20: Préparation De La Machine
PRÉPARATION DE LA MACHINE Nous déclinons toute responsabilité pour Le niveau d’eau ne doit jamais outrepasser le d’éventuels dommages en cas de: niveau MAX, et doit toujours être maintenu • utilisation non conforme; au-dessus du niveau MIN. Utiliser exclusive- • réparations exécutées auprès des centres ment de l’eau fraiche potable non gazeuse. -
Page 21: Fonction Stand-By
PRÉPARATION DE LA MACHINE DISPOSITION POUR LA PRÉPARATION Mettre un verre sous le bec de distribution. En- DU CAFÉ foncer le bouton de distribution LUNGO puis attendre que l’eau sorte. La machine dispose de deux positions pour la pré- paration du café: bol/tasse grande ou verre. Positionner la tasse sous le distributeur café... -
Page 22: Préparation Du Café
PRÉPARATION DU CAFÉ DISTRIBUTION ESPRESSO Insérer une capsule Lavazza dans le logement à capsules. S’assurer que les boutons d’allumage/distribution ils sont allumés fixe en blanc. Les capsules mono-dose sont préparées pour distribuer un seul café/produit. NE PAS réutili- DIS- Placer la petite tasse comme indiqué (voir ser les capsules après leur emploi. - Page 23 PRÉPARATION DU CAFÉ DISTRIBUTION LUNGO Appuyer sur la touche ESPRESSO pour lancer la préparation. La machine s’arrêtera automatique- Exécuter les opérations: du pa- ment une fois que la dose de café programmée ragraphe DISTRIBUTION ESPRESSO. aura été atteinte (30 ml). LUNGO Appuyer sur la touche pour lancer la...
-
Page 24: Programmation Des Doses De Café
DU CAFÉ). Soulever le levier de chargement des capsules jusqu’en butée pour ouvrir le logement à capsules. Insérer une capsule Lavazza dans le logement à capsules. Quand la quantité de café voulue est atteinte, re- lâcher le bouton pour interrompre la distribution. -
Page 25: Entretien Et Nettoyage
ENTRETIEN ET NETTOYAGE Laver tous les composants sous l’eau froide ou Ne jamais utiliser de solvants, alcools ou subs- tiède, les sécher et les remonter correctement. tances agressives pour le séchage des compo- sants de la machine. Laver les composants (sauf ceux électriques) à... -
Page 26: Détartrage
ENTRETIEN ET NETTOYAGE DÉTARTRAGE Allumer la machine et placer un récipient sous le distributeur. La formation de calcaire est une conséquence normale de l’utilisation de la machine; le détar- Enfoncer le bouton LUNGO et verser 2 tasses trage est nécessaire tous les 2 mois d’utilisation de (chacune de 120 ml environ). -
Page 27: Solutions Aux Problèmes Les Plus Communs
Faire l’ a ppoint d’ e au fraîche réservoir. potable. Négatif: passer au point 5 Positif: appel résolu. Insérer une capsule Lavazza ou 5 - Il n’y a pas la capsule. compatible. Négatif: machine en assistance. Enfoncer l’un des boutons, vérifier 1 - ... - Page 28 Négatif: passer au point 4 secteur et enlever manuellement la capsule du conduit. Positif: appel résolu. 4 - La capsule il n’ e st pas Utilisez capsules Lavazza ou compatible. compatible. Négatif: machine en assistance. Positif: appel résolu. 1 - Réservoir non inséré...
-
Page 29: Caractéristiques Techniques
Pour les pannes qui ne sont pas énumérées dans le tableau ci-dessus ou si les remèdes suggérés ne résolvent pas le problème, s’adresser aux Centres d’ A ssistance Autorisés Lavazza. CARACTÉRISTIQUES TECHNIQUES • Matériaux utilisés pour la carrosserie: thermoplastique •... - Page 30 NOTES...
-
Page 31: Salvaguardias Importantes
ños resultantes de trabajos no realizados por na manera. Ponerse en contacto con el Servicio profesionales. al cliente de Lavazza para informar sobre cual- 23. Para desconectar, poner la máquina en estado quier mal funcionamiento o daño en el sistema. - Page 32 Lavazza CLASSY Mini en la parte inferior del recipiente del Lavazza CLASSY Mini para evitar el riesgo de lesiones, no poner los dedos sobre la cubierta del Lavazza CLASSY Mini. PRECAUCIÓN: Hay agua extremadamente caliente en el recipiente del Lavazza CLASSY Mini durante el proceso de elaboración.
-
Page 33: Componentes De La Máquina
COMPONENTES DE LA MÁQUINA Tapa del depósito de agua Palanca de carga de cápsulas Depósito de agua Unidad de control Boquilla de suministro Cajón de recogida de Cable de las cápsulas usadas alimentación Rejilla para apoyar taza/taza grande Cajón de recogida de gotas UNIDAD DE CONTROL Pulsador erogación LUNGO (120 ml) Pulsador erogación ESPRESSO (40 ml) -
Page 34: Preparación De La Máquina
PREPARACIÓN DE LA MÁQUINA Lavazza declina cualquier responsabilidad en El nivel del agua nunca debe exceder la indica- caso de que se produzcan daños a causa de: ción MAX y siempre debe mantenerse por • uso indebido de la máquina y utilización encima de MIN. - Page 35 PREPARACIÓN DE LA MÁQUINA PROCEDIMIENTOS ANTES DE PREPA- Colocar un vaso bajo la boquilla de suministro. RAR UM CAFÉ LUNGO Presionar el botón de erogación y es- La máquina dispone de dos posiciones para la perar a que salga el agua. preparación del café: tacita/taza grande o copa.
-
Page 36: Preparación De Café
PREPARACIÓN DE CAFÉ EROGACIÓN ESPRESSO Introducir una cápsula Lavazza en el comparti- miento de introducción de cápsulas. Asegurarse de que los pulsadores de encendido/ suministro son encendido con luz fija blanca. Las cápsulas monodosis han sido diseñadas para ofrecer un único café/bebida. NO reutili- zar las cápsulas tras su uso. - Page 37 PREPARACIÓN DE CAFÉ EROGACIÓN LUNGO Presionar la tecla ESPRESSO para iniciar el su- ministro. La máquina finaliza el suministro una vez Llevar a cabo los pasos: obtenida la dosis de café programada (40 ml). párrafo EROGACIÓN EXPRESSO. LUNGO Presionar el botón para iniciar la ero- gación.
-
Page 38: Programación De La Dosis De Café
Levantar la palanca de carga de cápsulas hasta que se bloquee para abrir el compartimiento de introducción de cápsulas. Introducir una cápsula Lavazza en el comparti- miento de introducción de cápsulas. Una vez obtenida la cantidad de café deseada, soltar la tecla para interrumpir el suministro de café. -
Page 39: Mantenimiento Y Limpieza
MANTENIMIENTO Y LIMPIEZA Lavar todos los componentes con agua fría o tibia, Nunca utilice disolventes, alcohol, sustancias enjugar i remontar correctamente. agresivas u hornos para secar los componentes de la máquina. Lave los componentes (excepto los eléctricos) con agua fría/templada y paños o esponjas no abrasivos. -
Page 40: Descalcificación
MANTENIMIENTO Y LIMPIEZA DESCALCIFICACIÓN Encienda la máquina y coloque un recipiente de- bajo del surtidor. La formación de cal es una consecuencia normal del uso de la máquina. Es necesario realizar una LUNGO Presionar el botón y llenar 2 tazas (apro- descalcificación después de cada 2 meses de uso ximadamente 120 ml cada una). -
Page 41: Resolución De Los Problemas Más Comunes
Rellene el depósito con agua fresca 4 - Falta agua en el depósito. y potable. Negativo: pasar al punto 5 Positivo: orden resuelta. I ntroducir una cápsula Lavazza o 5 - Cápsula no introducida. compatible. Negativo: máquina en asistencia. Presionar uno de los pulsadores y comprobar que funcione el testigo Positivo: orden resuelta. - Page 42 Negativo: pasar al punto 4 de la red eléctrica y retirar con la mano la cápsula del conducto. Positivo: orden resuelta. Utilizar cápsulas Lavazza o 4 - Cápsula no apta. compatibles. Negativo: máquina en asistencia. Positivo: orden resuelta.
-
Page 43: Características Técnicas
Para las averías no contempladas en esta tabla o en caso de no ser resueltas con las soluciones sugeridas, dirigirse a los Centros de Asistencia Autorizados Lavazza CARACTERÍSTICAS TÉCNICAS • Fuente de alimentación: 120V / 60Hz •... - Page 44 NOTAS...
- Page 48 Luigi Lavazza S.p.A. - Via Bologna 32, 10152 Torino - Italia LB 300 USA - Code 18000254 - Rev. 01 - Ed. 2018-12...