KERN CXB Serie Mode D'emploi
Masquer les pouces
Voir aussi pour CXB Serie:
- Mode d'emploi (55 pages) ,
- Notice d'utilisation (52 pages) ,
- Mode d'emploi (158 pages)
Publicité
Les langues disponibles
Les langues disponibles
Liens rapides
Betriebsanleitung
Zählwaagen
KERN CXB/CXP
Version 1.2
07/2008
D
All manuals and user guides at all-guides.com
KERN & Sohn GmbH
Ziegelei 1
D-72336 Balingen
E-Mail: info@kern-sohn.com
Tel: +49-[0]7433- 9933-0
Fax: +49-[0]7433-9933-149
Internet: www.kern-sohn.com
CXB/CXP-BA-d-0812
Publicité

Manuels Connexes pour KERN CXB Serie


Sommaire des Matières pour KERN CXB Serie
- Page 1 All manuals and user guides at all-guides.com KERN & Sohn GmbH Ziegelei 1 Tel: +49-[0]7433- 9933-0 D-72336 Balingen Fax: +49-[0]7433-9933-149 E-Mail: info@kern-sohn.com Internet: www.kern-sohn.com Betriebsanleitung Zählwaagen KERN CXB/CXP Version 1.2 07/2008 CXB/CXP-BA-d-0812...
- Page 2 All manuals and user guides at all-guides.com KERN CXB/CXP Version 1.2 07/2008 Betriebsanleitung Zählwaagen Inhaltsverzeichnis Technische Daten _______________________________________________ 4 Konformitätserklärung ___________________________________________ 7 Geräteübersicht ________________________________________________ 8 Anzeigenübersicht _______________________________________________ 10 3.1.1 Anzeige Gewicht______________________________________________________ 11 3.1.2 Anzeige Referenzgewicht_______________________________________________ 11 3.1.3 Anzeige Stückzahl ____________________________________________________ 11 3.1.4...
- Page 3 All manuals and user guides at all-guides.com Stückzählen ___________________________________________________ 21 Ermittlung des Referenzgewichts durch Wägung______________________ 21 Numerische Eingabe des Referenzgewichts __________________________ 22 Automatische Referenzoptimierung _________________________________ 22 Referenzgewicht speichern/aufrufen ________________________________ 23 8.4.1 Speichern ___________________________________________________________ 23 8.4.2 Aufrufen ____________________________________________________________ 24 Zählen mit Toleranzkontrolle – Fill to target __________________________ 24 8.5.1 Toleranzwert für Zielstückzahl setzen _____________________________________ 24 8.5.2...
- Page 4 All manuals and user guides at all-guides.com 1 Technische Daten Modelle CXB: KERN CXB 3K0.2 CXB 6K0.5 CXB 15K1 CXB 30 K2 Ablesbarkeit (d) 0,2 g 0,5 g Wägebereich (Max) 3 kg 6 kg 15 kg 30 kg Reproduzierbarkeit 0,2 g 0,5 g Linearität...
- Page 5 All manuals and user guides at all-guides.com KERN 6K2M 15K5M 30K10M 3K1M Ablesbarkeit (d) 10 g Wägebereich (Max) 3 kg 6 kg 15 kg 30 kg Reproduzierbarkeit 10 g Linearität 10 g 20 kg Eichklasse Einschwingzeit 2 sec. 2 sec.
- Page 6 All manuals and user guides at all-guides.com Modelle CXP: KERN CXP 30K2 CXP 75K5 CXP 150K10 Ablesbarkeit (d) 10 g Wägebereich (Max) 30 kg 75 kg 150 kg Reproduzierbarkeit 10 g Linearität ± 4 g ± 10 g ± 20 g...
- Page 7 EU Directive Standards 89/336/EEC EMC EN 55011 EN 61000-3-2 EN 61000-3-3 EN 61000-6-2 73/23/EEC Low Voltage EN 60950 Date: 27.12.2006 Signature: Gottl. KERN & Sohn GmbH Management Gottl. KERN & Sohn GmbH, Ziegelei 1, D-72336 Balingen, Tel. +49-[0]7433/9933-0,Fax +49-[0]7433/9933-149 CXB/CXP-BA-d-0812...
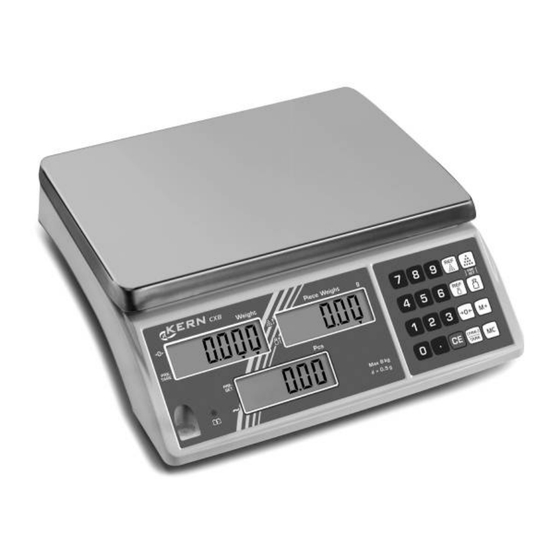
- Page 8 All manuals and user guides at all-guides.com 3 Geräteübersicht Modelle CXB: Libelle Akkufach Anschluss Netzkabel Ein/Ausschalter CXB/CXP-BA-d-0812...
- Page 9 All manuals and user guides at all-guides.com Modelle CXP: 1. Ein/Ausschalter 2. Anschluss Netzkabel 3. RS 232 Schnittstelle 4. Libelle CXB/CXP-BA-d-0812...
- Page 10 All manuals and user guides at all-guides.com 3.1 Anzeigenübersicht Modelle CXB: Gewicht Referenzgewicht Ladestandsanzeige Stückzahl Modelle CXP: Gewicht Referenzgewicht Stückzahl Ladestandsanzeige CXB/CXP-BA-d-0812...
- Page 11 All manuals and user guides at all-guides.com 3.1.1 Anzeige Gewicht Hier wird das Gewicht Ihres Wägeguts angezeigt. Das eingeblendete zeigt an: Nullstellanzeige PRE- Tarawert in Speicher TARE Kapazität des Akkus bald erschöpft 3.1.2 Anzeige Referenzgewicht Hier wird das Referenzgewicht einer Probe angezeigt. Dieser Wert wird entweder durch den Benutzer eingegeben oder durch die Waage berechnet.
- Page 12 All manuals and user guides at all-guides.com 3.2 Tastaturübersicht Modelle CXB: Modelle CXP: CXB/CXP-BA-d-0812...
- Page 13 All manuals and user guides at all-guides.com Auswahl Funktion • Zifferntasten • Lösch-Taste • Aufruf Zählen mit Toleranzkontrolle • Speichern von Referenzgewichten in Speicher • Aufruf gespeicherter Referenzgewichte • Addition in Summenspeicher • Aufruf Summenspeicher • Löschen Summenspeicher • Eingabe Referenzgewicht durch Wägung •...
- Page 14 Die Waage darf nicht konstruktiv verändert werden. Dies kann zu falschen Wäger- gebnissen, sicherheitstechnischen Mängeln sowie der Zerstörung der Waage führen. Die Waage darf nur gemäß den beschriebenen Vorgaben eingesetzt werden. Abwei- chende Einsatzbereiche/Anwendungsgebiete sind von KERN schriftlich freizugeben. 4.3 Gewährleistung Gewährleistung erlischt bei •...
- Page 15 5.1 Hinweise in der Betriebsanleitung beachten Lesen Sie diese Betriebsanleitung vor der Aufstellung und Inbetriebnahme sorgfältig durch, selbst dann, wenn Sie bereits über Erfahrungen mit KERN- Waagen verfügen. 5.2 Ausbildung des Personals Das Gerät darf nur von geschulten Mitarbeitern bedient und gepflegt werden.
- Page 16 All manuals and user guides at all-guides.com 7 Auspacken, Aufstellung und Inbetriebnahme 7.1 Aufstellort, Einsatzort Die Waagen sind so konstruiert, dass unter den üblichen Einsatzbedingungen zuver- lässige Wägeergebnisse erzielt werden. Exakt und schnell arbeiten Sie, wenn Sie den richtigen Standort für Ihre Waage wäh- len.
- Page 17 All manuals and user guides at all-guides.com 7.2.1 Aufstellen Die Waage mit Fußschrauben nivellieren, bis sich die Luftblase in der Libelle im vor- geschriebenen Kreis befindet. Modelle CXP: Wägeplatte Plattform Träger Anzeigeteil Schrauben (2 Stck.) 8 Halterung Feder Schrauben (4 Stck.) Unterbau Inbusschlüssel A) Schraube (3) in die Öse der Feder (4) stecken und...
- Page 18 7.3 Netzanschluss Die Stromversorgung erfolgt über das externe Netzgerät. Der aufgedruckte Span- nungswert muss mit der örtlichen Spannung übereinstimmen. Verwenden Sie nur KERN- Originalnetzgeräte. Die Verwendung anderer Fabrikate bedarf der Zustimmung von KERN. 7.4 Akkubetrieb Der interne Akku wird über das mitgelieferte Netzteil geladen.
- Page 19 All manuals and user guides at all-guides.com 7.5.1 Einschalten Waage mit dem ON/OFF-Schalter (links) einschalten. Die Waage führt einen Selbsttest durch. Sobald die Gewichtsanzeige „0" in allen drei Anzeigefenstern erscheint, ist Ihre Waage wägebereit. Bei Modellen CXP (mit RS 232) erscheint zuerst eine interne Nummer, bevor die Waage nach kurzer Zeit auf Null zurückzählt.
- Page 20 Daten“) durchgeführt werden. Die Justierung ist aber auch mit Gewichten anderer Nennwerte möglich, messtechnisch aber nicht optimal. Infos zu Justiergewichten finden Sie im Internet unter: http://www.kern-sohn.com Hinweis Mit der - Taste kann der Justiermodus verlassen werden. Die Waage kehrt in den Wägemodus zurück.
- Page 21 All manuals and user guides at all-guides.com 8 Stückzählen Bei der Stückzählung können Sie entweder Teile in einen Behälter einzählen oder Teile aus einem Behälter herauszählen. Um eine größere Menge von Teilen zählen zu können, muss mit einer kleinen Menge (Referenzstückzahl) das durchschnittliche Gewicht pro Teil ermittelt werden.
- Page 22 All manuals and user guides at all-guides.com 8.2 Numerische Eingabe des Referenzgewichts Ist Ihnen das Referenzgewicht/Stück bekannt können Sie dieses über die Zifferntas- ten eingeben. Referenzgewicht über die Zifferntasten eingeben 1. 8 33 PRE- TARE Mit der -Taste bestätigen 1. 8 33 PRE- TARE Referenzgewicht...
- Page 23 All manuals and user guides at all-guides.com 8.4 Referenzgewicht speichern/aufrufen Es stehen 10 Speicherplätze (belegt über die Zifferntasten 0 -9) zur Verfügung. 8.4.1 Speichern Geben Sie das zu speichernde Referenzgewicht ein 0. 0 PRE- TARE -Taste drücken PlSET PRE- TARE -Taste drücken PlSET PRE-...
- Page 24 All manuals and user guides at all-guides.com 8.4.2 Aufrufen Wird das Referenzgewicht zu einem späteren Zeitpunkt benötigt, kann es mit der -Taste und der entsprechenden Speicherplatznummer wieder aufgerufen werden. -Taste drücken PlSET PRE- TARE Speicherplatz (0 – 9) über die Zifferntasten eingeben, das gespeicherte Referenzge- wicht erscheint 0.
- Page 25 All manuals and user guides at all-guides.com -Taste drücken ----- PRE- TARE -Taste drücken 0. 0 PRE- TARE 8.5.2 Toleranzwert für Zielgewicht setzen Bei Erreichen des Zielwerts ertönt ein akustisches Signal und im Referenzgewichts- fenster erscheint blinkend [-efPST-]. -Taste drücken ----- PRE- TARE...
- Page 26 All manuals and user guides at all-guides.com 9 Tarieren Das Eigengewicht beliebiger Wägebehälter lässt sich auf Knopfdruck wegtarieren, damit bei nachfolgenden Wägungen das Nettogewicht des Wägegutes angezeigt wird. 9.1 Ermittlung des Taragewichts durch Wägung Leeren Tarabehälter auf die Wägeplatte stellen. Das Gesamtgewicht des aufgelegten Behälters wird angezeigt.
- Page 27 All manuals and user guides at all-guides.com 9.2 Numerische Eingabe des Taragewichts (PRE-TARE) Voreinstellung des PRE-TARE-Modus -Taste drücken, in der Referenzgewichtsanzeige erscheint [ CEnTR] ------ CEnTR ------ Während dieser Anzeige die -Taste drücken USER -Taste drücken USER PTTXP Mit den Tasten oder gewünschte Einstellung auswählen: PRE-TARE Einstellung „0“= Kein Eingabe des Taragewichts bei belasteter...
- Page 28 All manuals and user guides at all-guides.com Hinweis: Zum Löschen des gespeicherten Tarawertes entlasten Sie die Wägeplatte und drücken anschließend die TARE -Taste, die [ ] Anzeige neben „PRE-TARE“ er- lischt. PRE-TARE Einstellung „0“: Alle Gegenstände von der Wägeplatte entfernen. PRE- TARE TARE-Taste drücken...
- Page 29 All manuals and user guides at all-guides.com 10 Summieren Die Waage verfügt über einen Zählsummenspeicher zum Aufsummieren von glei- chen Zählteilen in Gesamtstück und Gesamtgewicht. 10.1 Summieren „Anzahl Teile“ Bei gewähltem Referenzgewicht die Anzahl Teile für die erste Wägung auflegen 118.
- Page 30 All manuals and user guides at all-guides.com 10.2 Summieren „Gewicht“ Gewicht auf die Wägeplatte stellen 118. 3 PRE- TARE Der Anzeigewert wird mit der -Taste in den Summenspeicher addiert. ----- ----- PRE- TARE Die [ ] Anzeige neben „M+“ signalisiert den gespeicherten Wert. Nach erfolgter Still- standskontrolle kehrt die Waage automatisch in den Zählmodus zurück 118.
- Page 31 All manuals and user guides at all-guides.com 10.3 Löschen der gespeicherten Werte Waage entlasten und -Taste drücken. Die gespeicherten Werte, Gesamtgewicht, Gesamtstückzahl und Anzahl Wägungen werden auf Null gesetzt. . Die [ ] Anzeige neben „M+“ erlischt. 11 Applikationsmenü Im Applikationsmenü können die Einstellungen der Waage geändert werden, um die Waage an individuelle Wägebedürfnisse anzupassen 11.1 Navigation im Menü...
- Page 32 All manuals and user guides at all-guides.com 11.2 Menü-Übersicht [USER] Funktion Auswahl Parame- teraus- Funktionsbeschreibung wahl Taste Anzeige Taste Wägedaten werden nach Drücken der -Taste 3 sec. lang eingeblendet Anzeige Wä- Wägedaten werden nach Drücken der gedaten im -Taste solange eingeblendet, bis die Summen- nnPLU - Taste betätigt wird...
- Page 33 All manuals and user guides at all-guides.com 12 Konfigurationsmenü 12.1.1 Hinterleuchtung der Anzeige Die Hinterleuchtung der Anzeige lässt sich wie folgt einstellen: Einstellung Funktion Die Anzeige wird bei ei- Auto -Taste drücken, in der Referenz- nem Gewichtswert > 10 d Backlight gewichtsanzeige erscheint [ CEnTR].
- Page 34 All manuals and user guides at all-guides.com 12.1.2 Einstellung der Anzeigegeschwindigkeit Für die Anzeigegeschwindigkeit kann ein Wert zwischen 01 und 15 eingestellt wer- den: 01 = langsam und empfindlich (Werkseinstellung = 01) 15 = schnell und unempfindlich Einstellung -Taste drücken, in der Referenzgewichtsanzeige erscheint [ CEnTR]. Während die- ser Anzeige die -Taste drücken.
- Page 35 All manuals and user guides at all-guides.com 13 Datenausgang (nur Modelle CXP) Die Waage ist serienmäßig mit einer RS 232C Schnittstelle ausgerüstet. 13.1 RS 232C Schnittstelle Mit der RS 232C Schnittstelle kann ein bidirektionaler Datenaustausch von der Waa- ge zu externen Geräten erfolgen. Die Datenübertragung erfolgt asynchron im ASCII - Code.
- Page 36 All manuals and user guides at all-guides.com 13.2 Schnittstellenbeschreibung Durch die Wahl einer bestimmten Betriebsart lassen sich das Ausgabeformat, die Ausgabesteuerung, die Übertragungsgeschwindigkeit und das Paritätsbit einstellen. Navigation im Menü: -Taste drücken, in der Referenzgewichtsanzeige erscheint [ CEnTR]. Während dieser Anzeige die -Taste drücken, in der Gewichtsanzeige erscheint [FVnCT].
- Page 37 All manuals and user guides at all-guides.com Anzahl Ausgabewerte STl XX X: 0 – F (0-15) Die Einstellung X mit der -Taste bestätigen, danach die Einstellungen nach Tab. 2 vornehmen. Siehe auch Darstellung 1 (Eingabebeispiel) XXXXXX Art der Ausgabewerte STl XX 40 XX K0SET Nicht dokumentiert...
- Page 38 All manuals and user guides at all-guides.com Tabelle 1: Code Bedeutung Ausgabe nach Drücken von M+ Ausdruck Kopfzeile Ausdruck letzte Zeile Tabelle 2: Pre -character Code Beschreibung End -character code code Brutto Tare Netto Referenzgewicht Wägeeinheit Speicher # Stückzahl Stabilitätsanzeige None Benutzerdefinierte Eingabe im ASCII Cod#1 Benutzerdefinierte Eingabe im ASCII Cod#2...
- Page 39 All manuals and user guides at all-guides.com Darstellung 1: Anzahl Positionen (max. 15) 0 : 1.- 4. Position 1 : 5. - 8. Position Code (Tab. 1) 2 : 9.- 12. Position 3 :13.-15. Position Netto (Tab. 2) Brutto Stückzahl Referenzgewicht ( Codes siehe Tab.
- Page 40 All manuals and user guides at all-guides.com 13.2.1 Beispiel: Einstellung eines Ausgabeformats Funktion aufrufen Stückzahl Gewicht Referenzgewicht STl XX Mit den Zifferntasten gewünschten Code (XX, siehe Tab. 1) aus- wählen. Beispiel 00 = Ausgabe nach Drücken von M+ STl 00 Die Einstellung mit der -Taste bestätigen, die Referenzgewichtsanzeige blinkt.
- Page 41 Lose Probenreste/Pulver können vorsichtig mit einem Pinsel oder Handstaubsauger entfernt werden. Verschüttetes Wägegut sofort entfernen. 14.2 Wartung, Instandhaltung Das Gerät darf nur von geschulten und von KERN autorisierten Servicetechnikern geöffnet werden. Vor dem Öffnen vom Netz trennen. 14.3 Entsorgung Die Entsorgung von Verpackung und Gerät ist vom Betreiber nach gültigem nationa- lem oder regionalem Recht des Benutzerortes durchzuführen.
- Page 42 All manuals and user guides at all-guides.com 15 Kleine Pannenhilfe Bei einer Störung im Programmablauf sollte die Waage kurz ausgeschaltet und vom Netz getrennt werden. Der Wägevorgang muss dann wieder von vorne begonnen werden. Störung Mögliche Ursache • Die Waage ist nicht eingeschaltet. Die Gewichtsanzeige leuchtet nicht.
- Page 43 All manuals and user guides at all-guides.com 16 Anhang ASCII CODE Tabelle symbol symbol (NULL) Ctrl 2 & & Ctrl A Ctrl B Ctrl C Ctrl D Ctrl E Ctrl F Ctrl G Backspace Ctrl J Ctrl K Ctrl L Enter Ctrl N Ctrl O...
- Page 44 All manuals and user guides at all-guides.com symbol symbol ¦ ¦ Δ Ctrl ← Ç Alt 128 ü Alt 129 é Alt 130 â Alt 131 ä Alt 132 à Alt 133 å Alt 134 ç Alt 135 ê Alt 136 ë...
- Page 45 All manuals and user guides at all-guides.com symbol HEX symbol ─ £ Alt 156 Alt 196 ┼ ¥ Alt 157 Alt 197 ╞ Alt 158 Alt 198 ╟ ƒ Alt 159 Alt 199 ╚ á Alt 160 Alt 200 ╔ í...
- Page 46 All manuals and user guides at all-guides.com symbol symbol Alt 236 ÷ Alt 246 Alt 237 ˜ Alt 247 Alt 238 º Alt 248 Alt 239 • Alt 249 Alt 240 · Alt 250 ± Alt 241 Alt 251 Alt 242 Alt 252 Alt 243 ²...
- Page 47 All manuals and user guides at all-guides.com KERN & Sohn GmbH Ziegelei 1 Tel: +49-[0]7433- 9933-0 D-72336 Balingen Fax: +49-[0]7433-9933-149 E-Mail: info@kern-sohn.com Internet: www.kern-sohn.com Operating instruction Counting scales KERN CXB/CXP Version 1.2 07/2008 CXB/CXP-BA-e-0812...
- Page 48 All manuals and user guides at all-guides.com KERN CXB/CXP Version 1.2 07/2008 Operating instruction Counting scales Table of Contents Technical data __________________________________________________ 4 Declaration of conformity ________________________________________ 7 Appliance overview _____________________________________________ 8 Overview of display ______________________________________________ 10 3.1.1 Display weight _______________________________________________________ 11 3.1.2...
- Page 49 All manuals and user guides at all-guides.com Parts counting_________________________________________________ 21 Determination of the reference weight by weighing ____________________ 21 Numeric entering of the reference weight ____________________________ 22 Automatic reference optimization___________________________________ 22 Store/call reference weight ________________________________________ 23 8.4.1 Save _______________________________________________________________ 23 8.4.2 Call-up _____________________________________________________________ 24 Count with tolerance control - Fill to target ___________________________ 24...
- Page 50 All manuals and user guides at all-guides.com 1 Technical data CXB models: KERN CXB 3K0.2 CXB 6K0.5 CXB 15K1 CXB 30 K2 Readability (d) 0.2 g 0.5 g Weighing range (max) 3 kg 6 kg 15 kg 30 kg Reproducibility 0.2 g...
- Page 51 All manuals and user guides at all-guides.com KERN 6K2M 15K5M 30K10M 3K1M Readability (d) 10 g Weighing range (Max) 3 kg 6 kg 15 kg 30 kg Reproducibility 10 g Linearity 10 g 20 g Verification class Stabilization time 2 sec.
- Page 52 All manuals and user guides at all-guides.com CXP models: KERN CXP 30K2 CXP 75K5 CXP 150K10 Readability (d) 10 g Weighing range (max) 30 kg 75 kg 150 kg Reproducibility 10 g Linearity ± 4 g ± 10 g ± 20 g Stabilization time 2 sec.
- Page 53 EU Directive Standards 89/336/EEC EMC EN 55011 EN 61000-3-2 EN 61000-3-3 EN 61000-6-2 73/23/EEC Low Voltage EN 60950 Date: 27.12.2006 Signature: Gottl. KERN & Sohn GmbH Management Gottl. KERN & Sohn GmbH, Ziegelei 1, D-72336 Balingen, Tel. +49-[0]7433/9933-0,Fax +49-[0]7433/9933-149 CXB/CXP-BA-e-0812...
- Page 54 All manuals and user guides at all-guides.com 3 Appliance overview CXB models: 1. Bubble level 2. Battery compartment 3. Mains cable connection 4. ON/OFF switch CXB/CXP-BA-e-0812...
- Page 55 All manuals and user guides at all-guides.com CXP models: 1. ON/OFF switch 2. Mains cable connection 3. RS 232 interface 4. Bubble level CXB/CXP-BA-e-0812...
- Page 56 All manuals and user guides at all-guides.com 3.1 Overview of display CXB models: Weight Reference weight Loading status display Pieces CXP models: Weight Reference weight Pieces Loading status display CXB/CXP-BA-e-0812...
- Page 57 All manuals and user guides at all-guides.com 3.1.1 Display weight Here, the weight of your goods is displayed. Overlay indicates: Zeroing display PRE- Tare in memory TARE Battery very low 3.1.2 Display reference weight The reference weight of a sample is shown here. This value is either entered by user of calculated by balance.
- Page 58 All manuals and user guides at all-guides.com 3.2 Keyboard overview CXB models: CXP models: CXB/CXP-BA-e-0812...
- Page 59 All manuals and user guides at all-guides.com Choice Function • Number keys • Delete key • Call counting with tolerance control • Store reference weights in memory • Call stored reference weights • Addition in total memory • Call up total memory •...
- Page 60 The balance may only be used according to the described conditions. Other areas of use must be released by KERN in writing. 4.3 Warranty Warranty claims shall be voided in case •...
- Page 61 Infor- mation is available on KERN’s home page (www.kern-sohn.com with regard to the monitoring of balance test substances and the test weights required for this. In KERN’s accredited DKD calibration laboratory test weights and balances may be...
- Page 62 All manuals and user guides at all-guides.com 7 Unpacking, Setup and Commissioning 7.1 Installation Site, Location of Use The balances are designed in a way that reliable weighing results are achieved in common conditions of use. You will work accurately and fast, if you select the right location for your balance. Therefore, observe the following for the installation site: •...
- Page 63 All manuals and user guides at all-guides.com 7.2.1 Setup Level balance with foot screws until the air bubble of the water balance is in the pre- scribed circle. Models CXP: Weighing plate Platform Cantilever Display part Screws (x 2) Support Spring Screws (x 4) Substructure...
- Page 64 7.3 Mains connection Power is supplied via the external mains adapter. The stated voltage value must be the same as the local voltage. Only use original KERN mains adapters. Using other makes requires consent by KERN. 7.4 Battery power supply The optionally supplied battery is charged with the supplied power supply.
- Page 65 All manuals and user guides at all-guides.com 7.5.1 Start-up Turn on scales with ON/OFF switch (left). The balance will carry out a self-test As soon as the weight display shows "0" in all the three display windows your balance is ready to weigh. On CXP models (with RS 232) an internal number appears before the balance counts down to zero.
- Page 66 * The adjustment should be made with the recommended adjustment weight (see chap. 1 "Technical data"). Weights of different nominal values may be used for ad- justment but are not optimal for technical measuring. Info about adjustment weights can be found on the Internet at: http://www.kern- sohn.com Note Use the key to exit adjustment mode.
- Page 67 All manuals and user guides at all-guides.com 8 Parts counting With parts counting you can either count parts into a container or remove parts from a container. To count a greater number of parts the average weight per part has to be determined with a small quantity (reference quantity).
- Page 68 All manuals and user guides at all-guides.com 8.2 Numeric entering of the reference weight If you know the reference weight/piece you can enter this via number keys. Enter reference weight via number keys 1. 8 33 PRE- TARE Confirm with 1.
- Page 69 All manuals and user guides at all-guides.com 8.4 Store/call reference weight There are 10 memory locations at your disposal (occupied via number keys 0 -9). 8.4.1 Save Enter the reference weight to be stored 0. 0 PRE- TARE Press button PlSET PRE- TARE...
- Page 70 All manuals and user guides at all-guides.com 8.4.2 Call-up When the reference weight is required at a later point in time it can be called by pressing the key and entering the relevant storage location number. Press button PlSET PRE- TARE Enter memory location (0 - 9) via number keys and the stored reference weight will appear.
- Page 71 All manuals and user guides at all-guides.com Press button ----- PRE- TARE Press button 0. 0 PRE- TARE 8.5.2 Set tolerance value for target weight Reaching the target value will be indicated by an audio signal and [-efPST-] will be flashing in the reference window Press button...
- Page 72 All manuals and user guides at all-guides.com 9 Taring The dead weight of any weighing container may be tared away by pressing a button, so that the following weighings show the net weight of the goods to be weighed. 9.1 Determination of the tare weight by weighing Place empty tare container on the weighing plate.
- Page 73 All manuals and user guides at all-guides.com 9.2 Numerical input of tare (PRE-TARE) Pre-setting PRE-TARE mode Press key, [CEnTR] appears on the weight display. ------ CEnTR ------ Press the key during this display USER Press button USER PTTXP Use the keys to select the desired setting: PRE-TARE setting "0"...
- Page 74 All manuals and user guides at all-guides.com Information: To delete the stored tare, unload the weighing plate and then press the TARE key; the [ ] display next to "PRE-TARE" disappears. PRE-TARE setting „0“: Remove all objects from weighing plate. PRE- TARE Press TARE key...
- Page 75 All manuals and user guides at all-guides.com 10 Add up The balance is equipped with a summation memory used for adding up of identical counted parts to total quantity and total weight. 10.1 Add up “number parts" Select reference weight and place number of parts for first weighing. 118.
- Page 76 All manuals and user guides at all-guides.com 10.2 Add up “weight" Place weight on weighing plate. 118. 3 PRE- TARE The display value is added to the summation memory by pressing the key. ----- ----- PRE- TARE The [ ] display next to "M+" indicates the stored value. After dead stop control was carried out the balance will return automatically to counting mode.
- Page 77 All manuals and user guides at all-guides.com 10.3 Delete stored values Unload balance and press the key. Stored values, total weight, total number of pieces and number of weighings will be set to zero. The [ ] display next to "M+" disappears.
- Page 78 All manuals and user guides at all-guides.com 11.2 Menu overview [USER] Function Choice Parame- ter selec- Description of function tion Display Weighing data pop up for 3 sec. after key was pressed Display Weighing data remain popped up after weighing data in key was pressed until key is op-...
- Page 79 All manuals and user guides at all-guides.com 12 Configurations menu 12.1.1 Display background illumination The back light for the display can be adjusted as follows: Adjustment Function This display will appear Auto back- Press key, [CEnTR] appears on the backlit for weight value light weight display Press the key during...
- Page 80 All manuals and user guides at all-guides.com 12.1.2 Setting the display speed You may set values ranging from 01 to 15 as a display speed: 01 = slow and sensitive 15 = fast and insensitive Adjustment Press key, [CEnTR] appears on the weight display. Press the key during this display.
- Page 81 All manuals and user guides at all-guides.com 13 Data output (CXP models only) The balance is typically equipped with a RS 232C interface. 13.1 RS 232C interface The RS 232C interface allows a bi-directional data exchange from the balance to ex- ternal devices.
- Page 82 All manuals and user guides at all-guides.com 13.2 Description of interface The selection of a certain operating mode allows you to set the output format, the output control, the transmission speed and the parity bit. Navigation in the menu: Press key, [CEnTR] appears on the reference weight display.
- Page 83 All manuals and user guides at all-guides.com Number of output values STl XX X: 0 – F (0-15) Confirm setting X by pressing the key, then enter settings according to table 2. See also delineation 1 (example for input) XXXXXX Type of output values STl XX 40 XX...
- Page 84 All manuals and user guides at all-guides.com Table 1: Code Significance Output after pressing M+ Printout header line Printout last line Table 2: Pre -character Code Description End -character code code Gross Tare Reference weight Weighing unit Memory # Pieces Stability display None User defined input in ASCII Cod#1...
- Page 85 All manuals and user guides at all-guides.com Delineation 1: Number of positions (max. 15) 0 : 1.- 4. Position 1 : 5. - 8. Position Code (Tab. 1) 2 : 9.- 12. Position 3 :13.-15. Position Net (Tab. 2) Gross Piece number Reference weight ( For codes see table 2)
- Page 86 All manuals and user guides at all-guides.com 13.2.1 Example: Setting an output format Call up function Piece number Weight Reference weight STl XX Use number keys to select desired code (XX, see table 1). Example 00 = Output after pressing M+ STl 00 Confirm setting by pressing the key, reference display is flashing.
- Page 87 Spilled weighing goods must be removed immediately. 14.2 Service, maintenance The appliance may only be opened by trained service technicians who are authorized by KERN. Before opening, disconnect from power supply. 14.3 Disposal Disposal of packaging and appliance must be carried out by operator according to valid national or regional law of the location where the appliance is used.
- Page 88 All manuals and user guides at all-guides.com 15 Instant help In case of an error in the program process, briefly turn off the balance and disconnect from power supply. The weighing process must then be restarted from the beginning. Fault Possible cause •...
- Page 89 All manuals and user guides at all-guides.com 16 Appendix ASCII CODE table symbol symbol (ZERO) Ctrl 2 & & Ctrl A Ctrl B Ctrl C Ctrl D Ctrl E Ctrl F Ctrl G Backspace Ctrl J Ctrl K Ctrl L Enter Ctrl N Ctrl O...
- Page 90 All manuals and user guides at all-guides.com symbol symbol ¦ ¦ Δ Ctrl ← Ç Alt 128 ü Alt 129 é Alt 130 â Alt 131 ä Alt 132 à Alt 133 å Alt 134 ç Alt 135 ê Alt 136 ë...
- Page 91 All manuals and user guides at all-guides.com symbol HEX symbol ─ £ Alt 156 Alt 196 ┼ ¥ Alt 157 Alt 197 ╞ Alt 158 Alt 198 ╟ ƒ Alt 159 Alt 199 ╚ á Alt 160 Alt 200 ╔ í...
- Page 92 All manuals and user guides at all-guides.com symbol symbol Alt 236 ÷ Alt 246 Alt 237 ˜ Alt 247 Alt 238 º Alt 248 Alt 239 • Alt 249 Alt 240 · Alt 250 ± Alt 241 Alt 251 Alt 242 Alt 252 Alt 243 ²...
- Page 93 All manuals and user guides at all-guides.com KERN & Sohn GmbH Ziegelei 1 Tel: +49-[0]7433- 9933-0 D-72336 Balingen Fax: +49-[0]7433-9933-149 E-Mail: info@kern-sohn.com Internet: www.kern-sohn.com Mode d’emploi Balances compteuses KERN CXB/CXP Version 1.2 07/2008 CXB/CXP-BA-f-0812...
- Page 94 All manuals and user guides at all-guides.com KERN CXB/CXP Version 1.2 07/2008 Mode d'emploi Balances compteuses Sommaire Caractéristiques techniques ______________________________________ 4 Déclaration de conformité ________________________________________ 7 Aperçu de l’appareil _____________________________________________ 8 Vue d’ensemble des affichages ____________________________________ 10 3.1.1 Affichage poids _______________________________________________________ 11 3.1.2...
- Page 95 All manuals and user guides at all-guides.com Comptage de pièces ____________________________________________ 21 Détermination du poids de référence par pesée _______________________ 21 Mémorisation numérique du poids de référence_______________________ 22 Optimisation de référence automatique ______________________________ 22 Mémoriser / appeler le poids de référence____________________________ 23 8.4.1 Enregistrer __________________________________________________________ 23 8.4.2...
- Page 96 All manuals and user guides at all-guides.com 1 Caractéristiques techniques Modèles CXB : KERN CXB 3K0.2 CXB 6K0.5 CXB 15K1 CXB 30 K2 Lisibilité (d) 0,2 g 0,5 g Plage de pesée (max) 3 kg 6 kg 15 kg 30 kg Reproductibilité...
- Page 97 All manuals and user guides at all-guides.com KERN 6K2M 15K5M 30K10M 3K1M Lisibilité (d) 10 g Plage de pesée (Max) 3 kg 6 kg 15 kg 30 kg Reproductibilité 10 g Linéarité 10 g 20 g Classe d’étalonnage Temps de stabilisation 2 sec.
- Page 98 All manuals and user guides at all-guides.com Modèles CXP: KERN CXP 30K2 CXP 75K5 CXP 150K10 Lisibilité (d) 10 g Plage de pesée (max) 30 kg 75 kg 150 kg Reproductibilité 10 g Linéarité ± 4 g ± 10 g ±...
- Page 99 EU Directive Standards 89/336/EEC EMC EN 55011 EN 61000-3-2 EN 61000-3-3 EN 61000-6-2 73/23/EEC Low Voltage EN 60950 Date: 27.12.2006 Signature: Gottl. KERN & Sohn GmbH Management Gottl. KERN & Sohn GmbH, Ziegelei 1, D-72336 Balingen, Tel. +49-[0]7433/9933-0,Fax +49-[0]7433/9933-149 CXB/CXP-BA-f-0812...
- Page 100 All manuals and user guides at all-guides.com 3 Aperçu de l’appareil Modèles CXB : 1. Bulle d’air 2. Compartiment accumulateur 3. Branchement du câble d’alimentation secteur 4. Interrupteur marche / arrêt CXB/CXP-BA-f-0812...
- Page 101 All manuals and user guides at all-guides.com Modèles CXP: 1. Interrupteur marche / arrêt 2. Branchement du câble d’alimentation secteur 3. Interface RS 232 4. Bulle d’air CXB/CXP-BA-f-0812...
- Page 102 All manuals and user guides at all-guides.com 3.1 Vue d’ensemble des affichages Modèles CXB : Poids Poids de référence Affichage de l’état de Nombre de pièces charge Modèles CXP: Poids Poids de référence Nombre de pièces Affichage de l’état de charge CXB/CXP-BA-f-0812...
- Page 103 All manuals and user guides at all-guides.com 3.1.1 Affichage poids Ici s’affichera le poids du produit pesé. En surincrusté apparaît affiche: Affichage de la position zéro PRE- Valeur tare en mémoire TARE La capacité de l’accumulateur sera bientôt épuisée 3.1.2 Affichage poids de référence C’est ici que s’affiche le poids de référence d’un échantillon.
- Page 104 All manuals and user guides at all-guides.com 3.2 Vue d’ensemble du clavier Modèles CXB : Modèles CXP: CXB/CXP-BA-f-0812...
- Page 105 All manuals and user guides at all-guides.com Sélection Fonction • Touches numériques • Touche d’effacement • Appel comptage avec contrôle de la tolérance • Mémorisation dans la mémoire des poids de référence • Appel des poids de référence mémorisés • Addition dans la mémoire de sommes •...
- Page 106 La balance ne doit être utilisée que selon les prescriptions indiquées. Les domaines d´utilisation/d´application dérogeant à ces dernières doivent faire l´objet d´une autori- sation écrite délivrée par KERN. 4.3 Garantie La garantie n´est plus valable en cas •...
- Page 107 5.1 Observez les indications du mode d´emploi Lisez attentivement la totalité de ce mode d´emploi avant l´installation et la mise en service de la balance, et ce même si vous avez déjà utilisé des balances KERN. 5.2 Formation du personnel L´appareil ne doit être utilisé...
- Page 108 All manuals and user guides at all-guides.com 7 Déballage, installation et mise en service 7.1 Lieu d´installation, lieu d´utilisation La balance a été construite de manière à pouvoir obtenir des résultats de pesée fia- bles dans les conditions d´utilisation d´usage. Vous pouvez travailler rapidement et avec précision à...
- Page 109 All manuals and user guides at all-guides.com 7.2.1 Implantation Procéder à la mise à niveau de la balance à l´aide des vis des pieds, jusqu´à ce que la bulle d´air du niveau se trouve dans le cercle prescrit. Modèles CXP: Plateau de pesée Plate-forme Support...
- Page 110 L´alimentation en courant s´effectue au moyen du bloc externe d´alimentation sec- teur. La valeur de tension imprimée sur l´appareil doit concorder avec la tension lo- cale. N´utilisez que des blocs d´alimentation secteur livrés par KERN. L´utilisation d´autres marques n´est possible qu´avec l´autorisation de KERN.
- Page 111 All manuals and user guides at all-guides.com 7.5.1 Mise en marche Mettez la balance en marche sur la touche ON/OFF (à gauche). La balance effectue un contrôle automatique. Dès que les trois fenêtres d’affichage affichent la valeur “0“, votre balance est prête à peser. Sur les modèles CXP (avec RS 232) apparaît d’abord un numéro interne, avant que la balance ne commence après un bref laps de temps seulement le comptage à...
- Page 112 "Données techniques"). L’ajustage peut également être réalisé avec des poids d’autres valeurs nominales, mais n’est pas optimal au point de vue métrologique. Vous trouverez de plus amples informations sur les poids d’ajustage sur le site inter- net: http://www.kern-sohn.com Remarque Vous pouvez quitter le mode d’ajustage sur la touche .
- Page 113 All manuals and user guides at all-guides.com 8 Comptage de pièces Lors du comptage de pièces, il vous est possible, soit d’additionner le nombre de pièces placées dans un récipient, soit de soustraire le nombre de pièces retirées d’un récipient. Afin de pouvoir compter une quantité importante de pièces, le poids moyen par pièce doit être déterminé...
- Page 114 All manuals and user guides at all-guides.com 8.2 Mémorisation numérique du poids de référence Si vous connaissez le poids de référence/ pièces, vous pouvez l’entrer moyennant les touches numériques. Mémoriser le poids de référence par l’intermédiaire des touches numériques 1. 8 33 PRE- TARE Confirmez sur la touche...
- Page 115 All manuals and user guides at all-guides.com 8.4 Mémoriser / appeler le poids de référence 10 espaces de mémoire (associés aux touches à chiffres 0 -9) sont disponibles. 8.4.1 Enregistrer Saisissez le poids de référence à mémoriser 0. 0 PRE- TARE Appuyer touche PlSET...
- Page 116 All manuals and user guides at all-guides.com 8.4.2 Appel Si le poids de référence doit être disponible à une date ultérieure, il peut de nouveau être rappelé sur la touche et le numéro d’espace de mémoire qui lui est attribué. Appuyer touche PlSET PRE-...
- Page 117 All manuals and user guides at all-guides.com Appuyer touche ----- PRE- TARE Appuyer touche 0. 0 PRE- TARE 8.5.2 Poser la valeur de tolérance pour le poids ciblé Lorsque cette valeur ciblée est atteinte retentit un signal acoustique et s’allume en clignotant un signal optique dans la fenêtre du poids de référence [-efPST-].
- Page 118 All manuals and user guides at all-guides.com 9 Tarage Le poids propre d’un quelconque récipient de pesage peut être saisi par la tare sur simple pression d’un bouton, afin que le pesage consécutif affiche le poids net de l’objet pesé. 9.1 Détermination du poids de tare par pesée Poser le récipient à...
- Page 119 All manuals and user guides at all-guides.com 9.2 Saisie numérique du poids d’ajustage (PRE-TARE) Préréglage du mode PRE-TARE dans laquelle apparaît l’affichage du poids [ CEnTR]. Appuyer sur la touche ------ CEnTR ------ Appuyez sur la touche pendant cet affichage USER Appuyer touche USER...
- Page 120 All manuals and user guides at all-guides.com Nota: Pour effacer la valeur de tare enregistrée, videz le plateau de pesée et appuyez ensuite sur la touche TARE, l’affichage [ ] à côté de "PRE-TARE" s’éteint. Réglage PRE-TARE "0": Ôtez tous les objets du plateau de pesée. PRE- TARE Appuyez sur la touche TARE...
- Page 121 All manuals and user guides at all-guides.com 10 Totalisation La balance dispose d’une mémoire de comptage totalisatrice pour l’addition de mê- mes pièces de comptage en total des pièces et en poids total. 10.1 Totalisation "nombre de pièces" Pour un poids de référence donné déposez le nombre de pièces pour la première pesée 118.
- Page 122 All manuals and user guides at all-guides.com 10.2 Totalisation "poids" Déposez le poids sur le plateau de pesée 118. 3 PRE- TARE La valeur d’affichage est ajoutée à la mémoire de somme au moyen de la touche ----- ----- PRE- TARE L’affichage [ ] à...
- Page 123 All manuals and user guides at all-guides.com 10.3 Effacement des valeurs mémorisées Déchargez la balance et appuyez sur la touche . Les valeurs mémorisées, le poids total, le total des pièces ainsi que le nombre de pesées sont remises à zéro. . L’affichage [ ] à...
- Page 124 All manuals and user guides at all-guides.com 11.2 Aperçu du menu [USER] Fonction Sélection Sélection des pa- Description de fonctionnement ramètres Appe- Affi- Appelez lez la chage la touche tou- Les données de la pesée apparaissent 3 sec après appel de la touche Affichage Les donnés de la pesée sont incrustées données de...
- Page 125 All manuals and user guides at all-guides.com 12 Menu de configuration 12.1.1 Eclairage du fond de l’écran d’affichage L’éclairage du fond de l’écran d’affichage se règle de la façon suivante: Réglage Fonction L’affichage pour lequel le Auto Bac- Appuyer sur la touche dans laquelle poids de pesée est >...
- Page 126 All manuals and user guides at all-guides.com 12.1.2 Réglage de la vitesse d’affichage Une valeur entre 01 et 15 peut être réglée pour la vitesse d’affichage: 01 = lente et sensible 15 = rapide et insensible Réglage Appuyer sur la touche dans laquelle apparaît l’affichage du poids [CEnTR].
- Page 127 All manuals and user guides at all-guides.com 13 Sortie des données (uniquement sur les modèles CXP) La balance est fournie en série avec une sortie de données RS 232C. 13.1 Interface RS 232C L’interface RS 232C permet de réaliser des échanges de données bidirectionnels entre la balance et des appareils externes.
- Page 128 All manuals and user guides at all-guides.com 13.2 Description des interfaces Le choix d’un type de fonctionnement déterminé permet de régler le format de sortie, la commande de sortie, la vitesse de transmission et le bit de parité. Navigation dans le menu : Appuyer sur la touche dans laquelle apparaît l’affichage du poids [CEnTR].
- Page 129 All manuals and user guides at all-guides.com Nombre des valeurs à éditer STl XX X: 0 – F (0-15) Confirmez le réglage X puis confirmez sur la touche , procédez en- suite aux réglages d’après le tab. 2 . Voir également l’illustration 1 (exemple de saisie) XXXXXX Type de valeur d’édition...
- Page 130 All manuals and user guides at all-guides.com Tableau 1: Code Signification Edition après appel de M+ Edition de l’en-tête Édition de la dernière ligne Tableau 2: Pre -character Code Description End -character code code Brut Tare Poids de référence Unité de pesée Memoire # Nombre de pièces Affichage de la stabilité...
- Page 131 All manuals and user guides at all-guides.com Illustration 1: Nombre de positions (max. 15) 0 : 1.- 4. Position 1 : 5. - 8. Position Code (Tab. 1) 2 : 9.- 12. Position 3 :13.-15. Position Net (Tab. 2) Brut Nombre de pièces Poids de référence ( Codes voir tab.
- Page 132 All manuals and user guides at all-guides.com 13.2.1 Exemple: Réglage d’un format de sortie Appeler fonction Nombre de pièces Poids Poids de référence STl XX Sur les touches à chiffres , choisir code voulu (XX, voir tab. 1). Exemple 00 = édition après appel de M+ STl 00 Confirmez le réglage sur la touche , l’affichage du poids de référence clignote.
- Page 133 Retirer immédiatement les matières à peser renversées sur la balance. 14.2 Maintenance, entretien L´appareil ne doit être ouvert que par des dépanneurs formés à cette fin et ayant re- çu l´autorisation de KERN. Avant d´ouvrir l´appareil, couper ce dernier du secteur. 14.3 Elimination L´élimination de l´emballage et de l´appareil doit être effectuée par l´utilisateur selon...
- Page 134 All manuals and user guides at all-guides.com 15 Aide succincte en cas de panne En cas d´anomalie dans le déroulement du programme, la balance doit être arrêtée pendant un court laps de temps et coupée du secteur. Le processus de pesée doit alors être recommencé...
- Page 135 All manuals and user guides at all-guides.com 16 Annexe Tableau CODE ASCII symbol symbol (ZERO) Ctrl 2 & & Ctrl A Ctrl B Ctrl C Ctrl D Ctrl E Ctrl F Ctrl G Backspace Ctrl J Ctrl K Ctrl L Enter Ctrl N Ctrl O...
- Page 136 All manuals and user guides at all-guides.com symbol symbol ¦ ¦ Δ Ctrl ← Ç Alt 128 ü Alt 129 é Alt 130 â Alt 131 ä Alt 132 à Alt 133 å Alt 134 ç Alt 135 ê Alt 136 ë...
- Page 137 All manuals and user guides at all-guides.com symbol HEX symbol ─ £ Alt 156 Alt 196 ┼ ¥ Alt 157 Alt 197 ╞ Alt 158 Alt 198 ╟ ƒ Alt 159 Alt 199 ╚ á Alt 160 Alt 200 ╔ í...
- Page 138 All manuals and user guides at all-guides.com symbol symbol Alt 236 ÷ Alt 246 Alt 237 ˜ Alt 247 Alt 238 º Alt 248 Alt 239 • Alt 249 Alt 240 · Alt 250 ± Alt 241 Alt 251 Alt 242 Alt 252 Alt 243 ²...
- Page 139 All manuals and user guides at all-guides.com KERN & Sohn GmbH Ziegelei 1 Tel: +49-[0]7433- 9933-0 D-72336 Balingen Fax: +49-[0]7433-9933-149 E-Mail: info@kern-sohn.com Internet: www.kern-sohn.com Provozní manuál Váhy pro počítání kusů KERN CXB/CXP Verze 1.2 07/2008 CXB/CXP-BA-cz-0812...
- Page 140 All manuals and user guides at all-guides.com KERN CXB/CXP Verze 1.2 07/2008 Provozní manuál Váhy pro počítání kusů Obsah Technické údaje ________________________________________________ 4 Prohlášení o shode______________________________________________ 7 Přehled zařízení_________________________________________________ 8 Přehled zobrazovaných parametrů __________________________________ 10 3.1.1 Zobrazení váhy_______________________________________________________ 11 3.1.2 Zobrazení...
- Page 141 All manuals and user guides at all-guides.com Počítání kusů__________________________________________________ 21 Stanovení referenční váhy vážením _________________________________ 21 Numerické zadání referenční váhy __________________________________ 22 Automatická referenční optimalizace ________________________________ 22 Uložení/vyvolání referenční váhy ___________________________________ 23 8.4.1 Uložit_______________________________________________________________ 23 8.4.2 Vyvolání ____________________________________________________________ 24 Počítání s kontrolou tolerance – Doplnit do cílové hodnoty _____________ 24 8.5.1 Stanovit hodnotu tolerance propočítání...
- Page 142 All manuals and user guides at all-guides.com 1 Technické údaje Modely CXB: KERN CXB 3K0.2 CXB 6K0.5 CXB 15K1 CXB 30 K2 Přesnost vážení (d) 0,2 g 0,5 g Rozsah vážení (Max) 3 kg 6 kg 15 kg 30 kg...
- Page 143 All manuals and user guides at all-guides.com KERN 6K2M 15K5M 30K10M 3K1M Přesnost vážení (d) 10 g Rozsah vážení (Max) 3 kg 6 kg 15 kg 30 kg Reprodukovatelnost 10 g Linearita 10 g 20 g Třída cejchování Čas nabíhání...
- Page 144 All manuals and user guides at all-guides.com Modely CXP: KERN CXP 30K2 CXP 75K5 CXP 150K10 Přesnost vážení (d) 10 g Rozsah vážení (Max) 30 kg 75 kg 150 kg Reprodukovatelnost 10 g Linearita ± 4 g ± 10 g ±...
- Page 145 EU Directive Standards 89/336/EEC EMC EN 55011 EN 61000-3-2 EN 61000-3-3 EN 61000-6-2 73/23/EEC Low Voltage EN 60950 Date: 27.12.2006 Signature: Gottl. KERN & Sohn GmbH Management Gottl. KERN & Sohn GmbH, Ziegelei 1, D-72336 Balingen, Tel. +49-[0]7433/9933-0,Fax +49-[0]7433/9933-149 CXB/CXP-BA-cz-0812...
- Page 146 All manuals and user guides at all-guides.com 3 Přehled zařízení Modely CXB: 1. Vodováha 2. Přihrádka akumulátoru 3. Přípojka síťového kabelu 4. Zapínání/vypínání CXB/CXP-BA-cz-0812...
- Page 147 All manuals and user guides at all-guides.com Modely CXP: 1. Zapínání/vypínání 2. Přípojka síťového kabelu 3. Rozhraní RS 232 4. Vodováha CXB/CXP-BA-cz-0812...
- Page 148 All manuals and user guides at all-guides.com 3.1 Přehled zobrazovaných parametrů Modely CXB: Hmotnost Referenční závaží Zobrazení stavu nabití Počet Modely CXP: Hmotnost Referenční závaží Počet Zobrazení stavu nabití CXB/CXP-BA-cz-0812...
- Page 149 All manuals and user guides at all-guides.com 3.1.1 Zobrazení váhy Zde se zobrazí váha vašeho zboží. Zadaná zobrazuje se: Zobrazení nulování PRE- Hodnota obalu v paměti TARE Kapacita akumulátoru se brzy vyčerpá 3.1.2 Zobrazení referenční váhy Zde se zobrazuje referenční váha vzorku. Tuto hodnotu buď zadává uživatel, nebo ji vypočítává...
- Page 150 All manuals and user guides at all-guides.com 3.2 Přehled kláves Modely CXB: Modely CXP: CXB/CXP-BA-cz-0812...
- Page 151 All manuals and user guides at all-guides.com Výběr Funkce • Číslicová tlačítka • Vymazávací tlačítko • Vyvolání čísel s kontrolou tolerance • Uložení referenčních vah do paměti • Vyvolání uložených referenčních vah z paměti • Připočítávání do sumovaní paměti • Vyvolávání ze sumovaní paměti •...
- Page 152 Konstrukce váhy se nesmí měnit. Mohlo by to vést k nesprávným výsledkům vážení, narušení bezpečnosti váhy, ba dokonce ke zničení váhy. Váha se smí používat pouze v souladu s popsanými úlohami. Jiné oblasti použití musí firma KERN písemně povolit. 4.3 Záruka Záruka zaniká v případě...
- Page 153 KERN-Homepage (www.kern-sohn.com). V DKD akreditované laboratoři firmy KERN lze rychle a cenově výhodně dát okalibrovat testovací závaží a váhy (návrat k národnímu normálu). 5 Zásadní bezpečnostní pokyny 5.1 Pokyny, jichž si třeba všimnout v návodu k použití Přečtěte si před instalací a před uvedením do provozu pečlivě návod k použití, a to i tehdy, jestliže už...
- Page 154 All manuals and user guides at all-guides.com 7 Vybalování, instalace a uvedení do provozu 7.1 Místo instalace, místo použití Váhy jsou konstruovány tak, že za normálních podmínek použití se dosahují spolehlivé výsledky vážení. Vaše práce je přesná a rychlá,jestliže pro svou váhu zvolíte správné stanoviště. Při volbě...
- Page 155 All manuals and user guides at all-guides.com 7.2.1 Usazení Vyrovnat váhu nivelačními šrouby, dokud se vzduchová bublina vodováhy nedostane do předkresleného kroužku. Modely CXP: Deska váhy Plošina Nosič Zobrazovací jednotka Šrouby (2 kusy) Držák Pružina Šrouby (4 kusy) Podstavec Šestihranný násuvný...
- Page 156 7.3 Síťová přípojka Napájení elektrickým proudem se uskutečňuje z vnější síťové jednotky. Vyražená hodnota napětí musí souhlasit s místním napětím. Používat pouze originální síťové jednotky firmy KERN. Použití jiných výrobků musí být schváleno firmou KERN. 7.4 Provoz na akumulátor Vnitřní akumulátor se nabíjí prostřednictvím dodané síťové jednotky.
- Page 157 All manuals and user guides at all-guides.com 7.5.1 Zapnout Váhu zapínat spínačem ON/OFF (vlevo). Váha provádí test zobrazovací jednotky. Jakmile se objeví "0" ve všech třech zobrazovacích oknech, je vaše váha připravena k vážení. V případě modelů CXP (s RS 232) se objeví nejprve vnitřní číslo, předtím, než váha po krátkém čase začne odpočítávat čas k nule.
- Page 158 * Seřizování by se mělo provádět s doporučeným seřizovacím závažím (viz Kap. 1 "Technické údaje "). Seřizování je však možné i se závažím jiných nominálních hodnot, z měřického hlediska však není optimální. Informace ohledně seřizovacího závaží najdete na internetu pod: http://www.kern- sohn.com Upozornění...
- Page 159 All manuals and user guides at all-guides.com 8 Počítání kusů V případě počítání kusů se mohou počítat buď díly v jedné nádobě, nebo se odpočítávat díly n jaké nádoby. Aby se mohlo spočítat větší množství dílů, musí se pomocí menšího množství (referenčního počtu kusů) stanovit průměrná váha jednoho dílu.
- Page 160 All manuals and user guides at all-guides.com 8.2 Numerické zadání referenční váhy Jestliže je referenční váha na jeden kus známa, můžete je zadat z číselné klávesnice. Zadat referenční váhu z číselné klávesnice. 1. 8 33 PRE- TARE Potvrdit pomocí tlačítka 1.
- Page 161 All manuals and user guides at all-guides.com 8.4 Uložení/vyvolání referenční váhy K dispozici je 10 paměťových míst (obsazovaných tlačítky 0 -9). 8.4.1 Uložit Zadejte referenční hodnotu, která se má uložit. 0. 0 PRE- TARE Stlačit tlačítko PlSET PRE- TARE Stlačit tlačítko PlSET PRE- TARE...
- Page 162 All manuals and user guides at all-guides.com 8.4.2 Vyvolání Jestliže bude referenční váha později potřebná, může se opět vyvolat pomocí tlačítka a příslušného čísla paměťového místa. Stlačit tlačítko PlSET PRE- TARE Z číselné klávesnice (0 - 9) zadat paměťové místo a na displeji se objeví příslušná uložená...
- Page 163 All manuals and user guides at all-guides.com Stlačit tlačítko ----- PRE- TARE Stlačit tlačítko 0. 0 PRE- TARE 8.5.2 Stanovit hodnotu tolerance pro cílovou váhu Při dosažení cílové hodnoty zazní akustický signál a v okénku referenční váhy se objeví blikající [-efPST-]. Stlačit tlačítko ----- PRE-...
- Page 164 All manuals and user guides at all-guides.com 9 Tárování Vlastní váha jakékoliv vážní nádoby se vytáruje stlačením tlačítka, aby při následujících váženích se zobrazovala netto váha váženého zboží. 9.1 Stanovení váhy obalu vážením Na desku váhy položit prázdný obal, který se má vytárovat. Zobrazí se celková váha položené...
- Page 165 All manuals and user guides at all-guides.com 9.2 Numerické zadání váhy obalu (PRE-TARE) Přednastavení režimu PRE-TARE Stlačit tlačítko , na displeji referenční váhy se objeví [ CEnTR] ------ CEnTR ------ Během tohoto zobrazení stlačit tlačítko USER Stlačit tlačítko USER PTTXP Tlačítkem nebo zvolit požadované...
- Page 166 All manuals and user guides at all-guides.com Upozornění: Za účelem vymazání uložené váhy obalu se deska váhy odlehčí a potom se stlačí tlačítko TARE, zobrazení [ ] vedle "PRE-TARE" zhasne. Nastavení PRE-TARE "0": Odstranit všechny předměty z desky váhy . PRE- TARE Stlačit tlačítko TARE...
- Page 167 All manuals and user guides at all-guides.com 10 Sumovat Váha má jednu paměť pro počítání sumy pro sumování stejného počtu počítaných dílů, v celkovém počtu a v celkové váze. 10.1 Sumování "Počet dílů" Při zvolené referenční váze se položí počet dílů pro první vážení. 118.
- Page 168 All manuals and user guides at all-guides.com 10.2 Sumování "Váha" Položit závaží na desku váhy 118. 3 PRE- TARE Zobrazená hodnota se připočítá k sumovaní paměti tlačítkem ----- ----- PRE- TARE Zobrazení [ ] vedle "M+" signalizuje uloženou hodnotu. Po uskutečnění kontroly, zda je váha v klidu, se váha automaticky přepne do režimu počítání.
- Page 169 All manuals and user guides at all-guides.com 10.3 Vymazání uložených hodnot Odlehčit váhu a stlačit tlačítko . Uložené hodnoty, celková váha, celkový počet kusů a počet vážení se nastaví na nulu. . Zobrazení [ ] vedle "M+" zhasne. 11 Aplikační menu V aplikačním menu se mohou měnit nastavení...
- Page 170 All manuals and user guides at all-guides.com 11.2 Přehled menu [USER] Funkce Výběr Výběr parametr Popis funkce ů Tlačít Údaje Tlačítko Vážní data se na 3 sekundy zobrazí po stlačení tlačítka Zobrazení vážních Vážní data se po stlačení tlačítka údajů zobrazí...
- Page 171 All manuals and user guides at all-guides.com 12 Konfigurační menu 12.1.1 Podsvícení zobrazení Podsvícení zobrazení se dá nastavit následovně: Nastavení Funkce Zobrazení se podsvítí při Automatické Stlačit tlačítko , na displeji hodnotě váhy > 10 d nebo podsvícení referenční váhy se objeví [ CEnTR]. po stlačení...
- Page 172 All manuals and user guides at all-guides.com 12.1.2 Nastavení rychlosti zobrazování Za účelem různě rychlého zobrazování se může nastavit hodnota mezi 01 a 15: 01 = pomalé a citlivé (nastavení ve výrobním závodě = 01) 15 = rychlé a necitlivé Nastavení...
- Page 173 All manuals and user guides at all-guides.com 13 Výstup dat (jen modely CXP) Váha se sériově vybavuje rozhraním RS 232C. 13.1 Rozhraní RS 232C Pomocí rozhraní RS 232C se může dosáhnout obousměrná výměna dat z váhy k externím zařízením. Přenos dat se uskutečňuje asynchronně v kódu ASCII. Obsazení...
- Page 174 All manuals and user guides at all-guides.com 13.2 Popis rozhraní Volbou určitého provozního režimu se dá nastavit výstupní formát, ovládání výstupu, rychlost přenosu a bit parity. Navigace v menu: Stlačit tlačítko , na displeji referenční váhy se objeví [ CEnTR]. Během platnosti tohoto zobrazení...
- Page 175 All manuals and user guides at all-guides.com Počet výstupních hodnot STl XX X: 0 – F (0-15) Nastavení X potvrdit tlačítkem , potom provést nastavení v souladu 2 . Viz i znázornění 1 (příklad zadávání) XXXXXX Druh výstupních hodnot STl XX 40 XX K0SET nedokumentováno...
- Page 176 All manuals and user guides at all-guides.com tabulka 1: Code Význam Výstup po stlačení M+ Vytištění hlavičky Vytištění posledního řádku tabulka 2: Pre -character Kód Popis End -character code code Brutto Tare Netto Referenční závaží Váhová jednotka Paměť # Počet Stabilita zobrazení...
- Page 177 All manuals and user guides at all-guides.com Znázornění 1: Počet položek (max. 15) 0 : 1.- 4. položka 1 : 5. - 8. položka Kód (Tab. 1) 2 : 9.- 12. položka 3 :13.-15. položka Netto (Tab. 2) Brutto Počet Referenční...
- Page 178 All manuals and user guides at all-guides.com 13.2.1 Příklad: Nastavení výstupního formátu Vyvolát funkce Počet Hmotnost Referenční závaží STl XX Volit číselnými tlačítky , požadovaný kód (XX, viz Tab. 1). Příklad 00 = výstup po stlačení M+ STl 00 Nastavení potvrdit tlačítkem , zobrazení...
- Page 179 Volné zbytky vzorku /prášku se mohou opatrně odstranit štětcem nebo příručním vysavačem. Rozsypané navažované zboží okamžitě odstranit. 14.2 Údržba a opravy Zařízení smí otvírat jen školení, a firmou KERN autorizovaní servisní technici. Před otevřením odpojit od sítě. 14.3 Likvidace Likvidaci obalu a samotného zařízení musí provozovatel provádět v souladu s národním nebo regionálním právem planým na místě...
- Page 180 All manuals and user guides at all-guides.com 15 Malá pomoc při likvidaci závad V případě poruchy v průběhu programu by se váha měla na krátký čas vypnout a odpojit od sítě. Proces vážení se potom musí začít od začátku. Porucha Možná...
- Page 181 All manuals and user guides at all-guides.com 16 Příloha – tabulka kódu ASCII symbol symbol (NULL) Ctrl 2 & & Ctrl A Ctrl B Ctrl C Ctrl D Ctrl E Ctrl F Ctrl G Backspace Ctrl J Ctrl K Ctrl L Enter Ctrl N Ctrl O...
- Page 182 All manuals and user guides at all-guides.com symbol symbol ¦ ¦ Δ Ctrl ← Ç Alt 128 ü Alt 129 é Alt 130 â Alt 131 ä Alt 132 à Alt 133 å Alt 134 ç Alt 135 ê Alt 136 ë...
- Page 183 All manuals and user guides at all-guides.com symbol HEX symbol £ Alt 156 ─ Alt 196 ¥ Alt 157 ┼ Alt 197 Alt 158 ╞ Alt 198 Alt 159 ╟ Alt 199 ƒ á Alt 160 ╚ Alt 200 ╔ í...
- Page 184 All manuals and user guides at all-guides.com symbol symbol Alt 236 ÷ Alt 246 Alt 237 Alt 247 ˜ Alt 238 º Alt 248 Alt 239 • Alt 249 Alt 240 · Alt 250 Alt 241 Alt 251 ± Alt 242 Alt 252 Alt 243 ²...
- Page 185 All manuals and user guides at all-guides.com KERN & Sohn GmbH Ziegelei 1 Tel: +49-[0]7433- 9933-0 D-72336 Balingen Fax: +49-[0]7433-9933-149 E-Mail: info@kern-sohn.com Internet: www.kern-sohn.com Istruzioni d'uso Bilance contapezzi KERN CXB/CXP Versione 1.2 07/2008 CXB/CXP-BA-i-0812...
- Page 186 All manuals and user guides at all-guides.com KERN CXB/CXP Versione 1.2 07/2008 Istruzioni d'uso Bilance contapezzi Indice Dati tecnici_____________________________________________________ 4 Dichiarazione di conformità_______________________________________ 7 Panoramica dell’apparecchio _____________________________________ 8 Descrizione del display ___________________________________________ 10 3.1.1 Indicazione peso______________________________________________________ 11 3.1.2 Indicazione del peso di riferimento ________________________________________ 11 3.1.3...
- Page 187 All manuals and user guides at all-guides.com Conteggio pezzi _______________________________________________ 21 Calcolo del peso di riferimento per pesatura__________________________ 21 Assegnazione numerica del peso di riferimento _______________________ 22 Ottimizzazione automatica del riferimento____________________________ 22 Memorizzare / richiamare peso di riferimento _________________________ 23 8.4.1 Memorizzare_________________________________________________________ 23 8.4.2...
- Page 188 All manuals and user guides at all-guides.com 1 Dati tecnici Modelli CXB: KERN CXB 3K0.2 CXB 6K0.5 CXB 15K1 CXB 30 K2 Leggibilità (d) 0,2 g 0,5 g Portata (Max) 3 kg 6 kg 15 kg 30 kg Riproducibilità 0,2 g 0,5 g Linearità...
- Page 189 All manuals and user guides at all-guides.com KERN 6K2M 15K5M 30K10M 3K1M Leggibilità (d) 10 g Portata (Max) 3 kg 6 kg 15 kg 30 kg Riproducibilità 10 g Linearità 10 g 20 g Categoria di taratura Tempo di assestamento 2 sec.
- Page 190 All manuals and user guides at all-guides.com Modelli CXP: KERN CXP 30K2 CXP 75K5 CXP 150K10 Leggibilità (d) 10 g Portata (Max) 30 kg 75 kg 150 kg Riproducibilità 10 g Linearità ± 4 g ± 10 g ± 20 g...
- Page 191 EU Directive Standards 89/336/EEC EMC EN 55011 EN 61000-3-2 EN 61000-3-3 EN 61000-6-2 73/23/EEC Low Voltage EN 60950 Date: 27.12.2006 Signature: Gottl. KERN & Sohn GmbH Management Gottl. KERN & Sohn GmbH, Ziegelei 1, D-72336 Balingen, Tel. +49-[0]7433/9933-0,Fax +49-[0]7433/9933-149 CXB/CXP-BA-i-0812...
- Page 192 All manuals and user guides at all-guides.com 3 Panoramica dell’apparecchio Modelli CXB: 1. Livella 2. Compartimento batteria 3. Collegamento del cavo di rete 4. Connettore/interruttore CXB/CXP-BA-i-0812...
- Page 193 All manuals and user guides at all-guides.com Modelli CXP: 1. Connettore/interruttore 2. Collegamento del cavo di rete 3. Interfaccia RS 232 4. Livella CXB/CXP-BA-i-0812...
- Page 194 All manuals and user guides at all-guides.com 3.1 Descrizione del display Modelli CXB: Peso Peso di riferimento Display dello stato di carica Quantità Modelli CXP: Peso Peso di riferimento Quantità Indicatore stato di carica CXB/CXP-BA-i-0812...
- Page 195 All manuals and user guides at all-guides.com 3.1.1 Indicazione peso Qui viene indicato il peso del materiale. apparso indica: Indicazione di azzeramento PRE- Valore tara in memoria TARE Batteria bassa 3.1.2 Indicazione del peso di riferimento Indica il peso di riferimento di una dose di materiale. Questo valore viene inserito manualmente dall’utente o calcolato automaticamente dalla bilancia.
- Page 196 All manuals and user guides at all-guides.com 3.2 Descrizione della tastiera Modelli CXB: Modelli CXP: CXB/CXP-BA-i-0812...
- Page 197 All manuals and user guides at all-guides.com Selezione Funzionamento • Tasti numerici • Tasto di cancellazione • Richiamata conteggio con controllo tolleranza • Memorizzare i pesi di riferimento nella memoria • Richiamata di pesi di riferimento memorizzati • Addizione in memoria somme •...
- Page 198 Non si devono apportare modifiche costruttive alla bilancia. Ciò può comportare risul- tati di pesatura errati, rischi di sicurezza e la distruzione della bilancia. La bilancia deve essere impiegata soltanto secondo le indicazioni descritte. Usi di- vergenti necessitano dell’autorizzazione scritta di KERN. 4.3 Garanzia La garanzia decade quando •...
- Page 199 Internet di KERN (www.kern-sohn.com). Nel suo laboratorio DKD di cali- bratura accreditato della KERN si possono calibrare pesi di controllo e bilance rapi- damente e a basso costo (retroazione alla norma nazionale).
- Page 200 All manuals and user guides at all-guides.com 7 Disimballaggio, installazione e messa in servizio 7.1 Luogo d’installazione/ d’impiego La bilancia è costruita in modo tale da garantire risultati di pesatura affidabili in con- dizioni d’impiego consueti. Un lavoro esatto e veloce è garantito dalla scelta corretta del luogo d’installazione della bilancia.
- Page 201 All manuals and user guides at all-guides.com 7.2.1 Assemblaggio Livellare la bilancia con i piedi a vite, finché la bolla d’aria si trova nel cerchio prescrit- to all’interno della livella. Modelli CXP: Piatto di pesatura Piattaforma di cari- Supporto Unità schermo Viti (2 pz.) Fissaggio Molla...
- Page 202 L’alimentazione elettrica avviene tramite apparecchio esterno. Il valore di tensione sopraindicato deve corrispondere alla tensione locale. Usare solo apparecchi di collegamento alla rete KERN originali. L’uso di prodotti di fabbricazione diversa necessita dell’autorizzazione di Kern. 7.4 Regime ad alimentazione autonoma La batteria interna viene caricata mediante l’apposito alimentatore in dotazio-...
- Page 203 All manuals and user guides at all-guides.com 7.5.1 Accensione Accendere la bilancia con il tasto ON/OFF (sinistro). La bilancia esegue un test di auto controllo. non appena l’indicatore del peso mostra “0” in tutte e tre le caselle, la bilancia si trova pronta all’uso, Nei modelli CXP (con RS 232) appare primo un numero interno prima dell’azzeramento della bilancia dopo un breve tempo.
- Page 204 „Dati tecnici“). La calibratura è anche possibile con i pesi di altri valori nominali, ma non è ottimo secondo la tecnica di misurazione. Per ulteriori informazioni sui pesi di calibratura, visitare il nostro sito internet: http://www.kern-sohn.com Avvertenza Il tasto permette di uscire dal regime di calibratura. La bilancia rientra automati- camente in regime di pesatura con margini di tolleranza.
- Page 205 All manuals and user guides at all-guides.com 8 Conteggio pezzi Con la funzione del conteggio dei pezzi potrete calcolare le singole unità raccolte in un contenitore di pesatura, come pure conteggiare le unità al di fuori del contenitore stesso. Per poter conteggiare una grande quantità di singole parti, bisognerà prima determinare il peso medio di ogni singola parte con una piccola quantità...
- Page 206 All manuals and user guides at all-guides.com 8.2 Assegnazione numerica del peso di riferimento Se il peso/numero di riferimento è conosciuto, lo si può inserire manualmente dalla tastiera. Assegnazione del peso di riferimento dalla tastiera 1. 8 33 PRE- TARE Confermare con il tasto 1.
- Page 207 All manuals and user guides at all-guides.com 8.4 Memorizzare / richiamare peso di riferimento Ci sono disponibili 10 spazi in memoria (occupati tramite i tasti cifre 0 -9). 8.4.1 Memorizzare Immettere il peso di riferimento da memorizzare 0. 0 PRE- TARE Premere il tasto PlSET...
- Page 208 All manuals and user guides at all-guides.com 8.4.2 Richiamare Se il peso di riferimento è necessario per un momento posteriore, sarà possibile ri- chiamarlo tramite il tasto e con il corrispondente numero dello spazio in memoria. Premere il tasto PlSET PRE- TARE Immettere lo spazio in memoria (0 - 9) tramite i tasti cifre, appare il peso di riferimen-...
- Page 209 All manuals and user guides at all-guides.com Premere il tasto ----- PRE- TARE Premere il tasto 0. 0 PRE- TARE 8.5.2 Impostare il valore di tolleranza per peso d’arrivo Una volta raggiunto il valore d’arrivo, viene segnalato acusticamente e nella finestra del peso di riferimento lampeggia [-efPST-].
- Page 210 All manuals and user guides at all-guides.com 9 Tarare È possibile registrare il peso tara del piatto o contenitore impiegati per la pesatura direttamente dalla tastiera in modo da ottenere l’indicazione esatta del peso netto nelle pesature successive. 9.1 Calcolo della tara per pesatura Collocare sul piatto della bilancia un contenitore di pesatura vuoto.
- Page 211 All manuals and user guides at all-guides.com 9.2 Impostazione numerica del peso tara (PRE-TARE) Preimpostazione del regime PRE-TARE , nel display del peso appare [ CEnTR] Premere il tasto ------ CEnTR ------ Durante questa schermata, premere il tasto USER Premere il tasto USER PTTXP Selezionare l’impostazione desiderata tramite i tasti...
- Page 212 All manuals and user guides at all-guides.com Avvertimento: Per cancellare il valore relativo alla tara, svuotare il piatto di pesatura e premere successivamente il tasto TARE, l’indicatore [ ] al lato di "PRE-TARE" si spegne. Impostazione PRE-TARE "0": Togliere tutti gli oggetti dal piatto di pesatura. PRE- TARE Premere il tasto TARE...
- Page 213 All manuals and user guides at all-guides.com 10 Sommare La bilancia dispone di una memoria di conteggio di somme per sommare elementi di conteggio uguali in totale pezzi e peso totale. 10.1 Sommare "Quantità pezzi" Scegliere il peso di riferimento e collocare la quantità per la prima pesatura 118.
- Page 214 All manuals and user guides at all-guides.com 10.2 Sommare „peso“ Collocare il peso sul piatto di pesatura 118. 3 PRE- TARE Il valore indicato viene aggiunto nella memoria di somme tramite il tasto ----- ----- PRE- TARE l’indicatore [ ] al lato di "M+" segnala il valore memorizzato. A controllo di stabilità concluso, la bilancia rientra automaticamente in regime di conteggio.
- Page 215 All manuals and user guides at all-guides.com 10.3 Cancellare i valori memorizzati Scaricare la bilancia e premere il tasto . I valori memorizzati, il peso totale, la quantità totale e il numero di pesature sono azzerati. L’indicatore [ ] al lato di "M+" si spegne.
- Page 216 All manuals and user guides at all-guides.com 11.2 Panoramica dei menu [USER] Funziona- Selezione Selezio- mento ne para- Descrizione delle funzioni metri Tasto Indica- Tasto tore Premere il tasto i dati di pesatura vengono visualizzati 3 secondi Indicazione Premere il tasto ;...
- Page 217 All manuals and user guides at all-guides.com 12 Menu di configurazione 12.1.1 Illuminazione del display Regolare l’illuminazione di sfondo del display così: Regolazione Funzionamento Il display viene illuminato a Auto Premere il tasto , nel display del un valore di peso di > 10 d Backlight peso appare [ CEnTR] Durante questa o dopo aver premuto un...
- Page 218 All manuals and user guides at all-guides.com 12.1.2 Impostazione della velocità di indicazione Impostare la velocità del display tra 01 e 15: 01 = lento e sensibile 15 = rapido e insensibile Regolazione , nel display del peso appare [ CEnTR]. Durante questa schermata, Premere il tasto premere il tasto PRE-...
- Page 219 All manuals and user guides at all-guides.com 13 Emissione dati (solo modelli CXP) La bilancia è dotata di serie d’interfaccia RS 232C. 13.1 Interfaccia RS 232C L’interfaccia RS 232C permette effettuare uno scambio reciproco di dati dalla bilancia con apparecchiature periferiche. La trasmissione dati ha luogo in maniera asincrona ed in codice ASCII.
- Page 220 All manuals and user guides at all-guides.com 13.2 Descrizione interfaccia Il formato dell’emissione, il salvataggio dell’emissione, la velocità di trasmissione e il parity bit possono essere regolati tramite la selezione di una particolare modalità di funzionamento. Navigazione nel menu: Premere il tasto , nel display del peso di riferimento appare [CEnTR] Durante questa visualizzazione premere il tasto nell’indicatore peso appare [FVnCT].
- Page 221 All manuals and user guides at all-guides.com Quantità valori di emissione STl XX X: 0 – F (0-15) Confermare l’impostazione X tramite il tasto , dopo eseguire le impo- stazioni secondo tab. 2.Vedi anche raffigurazione 1 (Esempio di immis- sione) XXXXXX Tipo dei valori di immissione STl XX...
- Page 222 All manuals and user guides at all-guides.com Tabella 1: Codice Significato Emissione dopo aver premuto M+ Stampa riga testata Stampa ultima riga Tabella 2: Pre -character Codice Descrizione End -character code code Lordo Tara Netto Peso di riferimento Unità di pesatura Memoria # Quantità...
- Page 223 All manuals and user guides at all-guides.com Raffigurazione 1: Numero di posizioni (max. 15) 0 : 1. - 4. Posizione 1 : 5. - 8. Posizione Codice (Tab. 1) 2 : 9. - 12. Posizione 3 :13. -15. Posizione Netto (Tab. 2) Lordo Quantità...
- Page 224 All manuals and user guides at all-guides.com 13.2.1 Esempio: Impostazione del formato di emissione Chiamare funzione Quantità Peso Peso di riferimento STl XX Tramite i tasti cifre , selezionare il codice desiderato (XX, vedi tab. 1). Esempio 00 = emissione dopo aver premuto M+ STl 00 Confermare l’impostazione tramite il tasto , l’indicatore del peso di riferimento...
- Page 225 Polveri e resti di sostanze superficiali si possono rimuovere con un pennello o un pic- colo aspirapolvere. Rimuovere subito prodotti di pesatura versati. 14.2 Assistenza, manutenzione L’apparecchio deve essere aperto solo da tecnici specializzati e autorizzati di KERN. Prima dell’apertura sezionare dalla rete. 14.3 Smaltimento smaltimento dell’imballaggio...
- Page 226 All manuals and user guides at all-guides.com 15 Manualetto in caso di guasto In caso di guasto durante l’esercizio, la bilancia va spenta e sezionata dalla rete elet- trica. In seguito il processo di pesatura deve essere eseguito una seconda volta. Guasto Possibile causa •...
- Page 227 All manuals and user guides at all-guides.com 16 Appendice tabella CODICE ASCII symbol symbol (ZERO) Ctrl 2 & & Ctrl A Ctrl B Ctrl C Ctrl D Ctrl E Ctrl F Ctrl G Backspace Ctrl J Ctrl K Ctrl L Enter Ctrl N Ctrl O...
- Page 228 All manuals and user guides at all-guides.com symbol symbol ¦ ¦ Δ Ctrl ← Ç Alt 128 ü Alt 129 é Alt 130 â Alt 131 ä Alt 132 à Alt 133 å Alt 134 ç Alt 135 ê Alt 136 ë...
- Page 229 All manuals and user guides at all-guides.com symbol HEX symbol ─ £ Alt 156 Alt 196 ┼ ¥ Alt 157 Alt 197 ╞ Alt 158 Alt 198 ╟ ƒ Alt 159 Alt 199 ╚ á Alt 160 Alt 200 ╔ í...
- Page 230 All manuals and user guides at all-guides.com symbol symbol Alt 236 ÷ Alt 246 Alt 237 ˜ Alt 247 Alt 238 º Alt 248 Alt 239 • Alt 249 Alt 240 · Alt 250 ± Alt 241 Alt 251 Alt 242 Alt 252 Alt 243 ²...
- Page 231 All manuals and user guides at all-guides.com KERN & Sohn GmbH Ziegelei 1 Tel: +49-[0]7433- 9933-0 D-72336 Balingen Fax: +49-[0]7433-9933-149 E-mail: info@kern-sohn.com Internet: www.kern-sohn.com Gebruiksaanwijzing Telweegschalen KERN CXB/CXP Versie 1.2 07/2008 CXB/CXP-BA-nl-0812...
- Page 232 All manuals and user guides at all-guides.com KERN CXB/CXP Versie 1.2 07/2008 Gebruiksaanwijzing Telweegschalen Inhoudsopgave Technische gegevens____________________________________________ 4 Conformiteitverklaring ___________________________________________ 7 Overzicht van de apparaten _______________________________________ 8 Overzicht van de displays _________________________________________ 10 3.1.1 Weergave gewicht ____________________________________________________ 11 3.1.2 Weergave referentiegewicht_____________________________________________ 11 3.1.3...
- Page 233 All manuals and user guides at all-guides.com Hoeveelheden _________________________________________________ 21 Vaststelling van het referentiegewicht door weging____________________ 21 Numerieke invoer van het referentiegewicht __________________________ 22 Automatische referentieoptimalisatie________________________________ 22 Referentiegewicht opslaan/oproepen________________________________ 23 8.4.1 Opslaan ____________________________________________________________ 23 8.4.2 Oproepen ___________________________________________________________ 24 Tellen met controle van de toegestane afwijking – „Fill to target“ ________ 24 8.5.1 Tolerantiewaarde voor beoogd aantal stuks bepalen __________________________ 24 8.5.2...
- Page 234 All manuals and user guides at all-guides.com 1 Technische gegevens Modellen CXB: KERN CXB 3K0.2 CXB 6K0.5 CXB 15K1 CXB 30 K2 Afleesbaarheid (d) 0,2 g 0,5 g Weegbereik (max.) 3 kg 6 kg 15 kg 30 kg Reproduceerbaarheid 0,2 g...
- Page 235 All manuals and user guides at all-guides.com KERN 6K2M 15K5M 30K10M 3K1M Afleesbaarheid (d) 10 g Weegbereik (Max) 3 kg 6 kg 15 kg 30 kg Reproduceerbaarheid 10 g Lineariteit 10 g 20 g IJkklasse Insteltijd 2 sec. 2 sec.
- Page 236 All manuals and user guides at all-guides.com Modellen CXP: KERN CXP 30K2 CXP 75K5 CXP 150K10 Afleesbaarheid (d) 10 g Weegbereik (max.) 30 kg 75 kg 150 kg Reproduceerbaarheid 10 g Lineariteit ± 4 g ± 10 g ± 20 g...
- Page 237 EU Directive Standards 89/336/EEC EMC EN 55011 EN 61000-3-2 EN 61000-3-3 EN 61000-6-2 73/23/EEC Low Voltage EN 60950 Date: 27.12.2006 Signature: Gottl. KERN & Sohn GmbH Management Gottl. KERN & Sohn GmbH, Ziegelei 1, D-72336 Balingen, Tel. +49-[0]7433/9933-0,Fax +49-[0]7433/9933-149 CXB/CXP-BA-nl-0812...
- Page 238 All manuals and user guides at all-guides.com 3 Overzicht van de apparaten Modellen CXB: Luchtbelwaterpas Accuhouder Voedingskabel aansluiting Schakelaar “Aan / uit” CXB/CXP-BA-nl-0812...
- Page 239 All manuals and user guides at all-guides.com Modellen CXP: 1. Schakelaar “Aan / uit” 2. Voedingskabel aansluiting 3. RS 232 interface 4. Luchtbelwaterpas CXB/CXP-BA-nl-0812...
- Page 240 All manuals and user guides at all-guides.com 3.1 Overzicht van de displays Modellen CXB: Gewicht Referentiegewicht Weergave van de Aantal stuks laadtoestand Modellen CXP: Gewicht Referentiegewicht Aantal stuks Weergave van de laadtoestand CXB/CXP-BA-nl-0812...
- Page 241 All manuals and user guides at all-guides.com 3.1.1 Weergave gewicht Hier wordt het gewicht van het te wegen goed aangegeven. Het verschijnende geeft aan: display voor de nulstelling „PRE- Tarrawaarde in geheugen TARE“ Capaciteit van de accu weldra leeg 3.1.2 Weergave referentiegewicht Hier wordt het referentiegewicht van een monster aangegeven.
- Page 242 All manuals and user guides at all-guides.com 3.2 Toetsenbordoverzicht Modellen CXB: Modellen CXP: CXB/CXP-BA-nl-0812...
- Page 243 All manuals and user guides at all-guides.com Selectie Functie • Cijfertoetsen • Wistoets • Oproep tellen met controle van de toegestane afwijking • Opslaan van referentiegewichten in geheugen • Oproep opgeslagen referentiegewichten • Optelling in accumulatief geheugen • Oproep accumulatief geheugen •...
- Page 244 Afwijkende gebruiksmogelijkheden toepassingsgebieden dienen door de firma KERN schriftelijk goedgekeurd te worden. 4.3 Waarborg Garantie komt te vervallen bij • Veronachtzaming van onze in de gebruiksaanwijzing vooraf bepaalde gegevens • Gebruik buiten de beschreven toepassingen • Wijzigen of openen van het apparaat •...
- Page 245 5.1 Aanwijzingen in de gebruiksaanwijzing in acht nemen Neem deze gebruiksaanwijzing vóór de installatie en inbedrijfstelling zorgvuldig door, ook indien u met weegschalen van de firma KERN reeds ervaring opgedaan hebt. 5.2 Scholing van het personeel Het apparaat mag uitsluitend door geschoolde medewerkers bediend en onderhouden worden.
- Page 246 All manuals and user guides at all-guides.com 7 Uitpakken, installatie en inbedrijfstelling 7.1 Opstelplaats, inzetgebied De weegschalen zijn zodanig geconstrueerd, dat er in de gebruikelijke gebruiksomstandigheden betrouwbare weegresultaten behaald worden. Exact en snel werkt u indien u de juiste plaats van installatie voor uw weegschaal kiest.
- Page 247 All manuals and user guides at all-guides.com 7.2.1 Installeren De weegschaal met stelschroeven waterpas maken totdat de luchtbel in de luchtbelwaterpas zich in de voorgeschreven cirkel bevindt. Modellen CXP: Weegplaat Platform Draagbalk Displaygedeelte Schroeven (2 Houder stuks) Veer Schroeven (4 stuks) Onderbouw Inbussleutel...
- Page 248 De stroomvoorziening gebeurt door middel van het externe voedingsapparaat. De opgedrukte spanningswaarde moet met de lokale spanning overeenstemmen. Maak enkel gebruik van originele voedingsapparaten van de firma KERN. Het gebruik van andere fabrikaten vereist de toestemming van de firma KERN.
- Page 249 All manuals and user guides at all-guides.com 7.5.1 Inschakelen Weegschaal met de schakelaar ON/OFF inschakelen. De weegschaal voert een automatische test door. Zodra het gewichtsaanduiding "0" in al de drie displayvensters verschijnt, is uw weegschaal klaar om te wegen. Bij modellen CXP (met RS 232) verschijnt er allereerst een intern nummer voordat de weegschaal na een korte tijdspanne terug tot nul telt.
- Page 250 De justering is echter ook met gewichten van andere nominale waarden mogelijk, vanuit meettechnisch oogpunt echter niet optimaal. Informatie over justeergewichten vindt u op het Internet op: http://www.kern-sohn.com Aanwijzing Met de toets kan de justeermodus verlaten worden. De weegschaal keert terug naar de weegmodus.
- Page 251 All manuals and user guides at all-guides.com 8 Hoeveelheden Bij de telling van het aantal stuks kunt u ofwel stukken in een reservoir intellen of stukken uit een reservoir uittellen. Om een groteter aantal stukken te kunnen tellen, moet met een kleine hoeveelheid (aantal referentiestukken) het gemiddelde gewicht per stuk opgespoord worden.
- Page 252 All manuals and user guides at all-guides.com 8.2 Numerieke invoer van het referentiegewicht Indien u het referentiegewicht per stuk bekend is, kunt u dit door middel van de cijfertoetsen invoeren. Referentiegewicht door middel van de cijfertoetsen invoeren 1. 8 33 PRE- TARE Met de...
- Page 253 All manuals and user guides at all-guides.com 8.4 Referentiegewicht opslaan/oproepen Er staan 10 geheugenruimten (gereserveerd door middel van de cijfertoetsen 0 -9) ter beschikking. 8.4.1 Opslaan Voer het op te slagen referentiegewicht in 0. 0 PRE- TARE -toets indrukken PlSET PRE- TARE -toets indrukken...
- Page 254 All manuals and user guides at all-guides.com 8.4.2 Oproepen Indien het referentiegewicht op een later tijdstip benodigd wordt, kan het met de toets en het corresponderende nummer van de geheugenruimte terug opgeroepen worden. -toets indrukken PlSET PRE- TARE Geheugenruimte (0 - 9) door middel van de cijfertoetsen invoeren, het opgeslagen referentiegewicht verschijnt 0.
- Page 255 All manuals and user guides at all-guides.com -toets indrukken ----- PRE- TARE -toets indrukken 0. 0 PRE- TARE 8.5.2 Tolerantiewaarde voor beoogd gewicht bepalen Bij het bereiken van de beoogde waarde weerklinkt er een akoestisch signaal en in het venster Referentiegewicht verschijnt knipperend „[-efPST-]“. -toets indrukken ----- PRE-...
- Page 256 All manuals and user guides at all-guides.com 9 Tarreren Het eigen gewicht van willekeurige weegreservoirs kan met een druk op de knop weg getarreerd worden, opdat bij daaropvolgende wegingen het nettogewicht van het te wegen goed aangegeven wordt. 9.1 Vaststelling van het tarragewicht door weging Leeg tarrareservoir op de weegplaat zetten.
- Page 257 All manuals and user guides at all-guides.com 9.2 Numerieke invoer van het tarragewicht („PRE-TARE“) Voorafgaande instelling van de modus „PRE-TARE“ - toets indrukken, op het display „Referentiegewicht“ verschijnt „[ CEnTR]“ ------ CEnTR ------ Tijdens deze weergave de toets indrukken USER -toets indrukken USER PTTXP...
- Page 258 All manuals and user guides at all-guides.com Aanwijzing: Om de opgeslagen tarrawaarde te wissen, ontlast u de weegplaat en drukt u vervolgens de toets TARE in, de aanduiding [ ] naast PRE-TARE dooft. PRE-TARE-instelling "0": Alle voorwerpen van de weegplaat verwijderen. PRE- TARE Toets TARE indrukken...
- Page 259 All manuals and user guides at all-guides.com 10 Optellen De weegschaal beschikt over een geheugen met teltotalen voor de optelling van gelijke telstukken in totaal aantal stuks en totaalgewicht. 10.1 Optellen "Aantal stuks" Bij een gekozen referentiegewicht het aantal stukken voor de eerste weging opleggen 118.
- Page 260 All manuals and user guides at all-guides.com 10.2 Optellen "Gewicht" Gewicht op de weegplaat zetten 118. 3 PRE- TARE De aangegeven waarde wordt met de toets in het totaalgeheugen geaccumuleerd. ----- ----- PRE- TARE De aanduiding [ ] naast "M+" signaleert de opgeslagen waarde. Nadat de stilstand gecontroleerd werd, keert de weegschaal automatisch naar de telmodus terug 118.
- Page 261 All manuals and user guides at all-guides.com 10.3 Wissen van de opgeslagen waarden Weegschaal ontlasten en toets indrukken. De opgeslagen waarden, het totaalgewicht, het totale aantal stuks, en het aantal wegingen worden op nul gezet.. De aanduiding [ ] naast "M+" dooft. 11 Toepassingsmenu In het toepassingsmenu kunnen de instellingen van de weegschaal gewijzigd worden om de weegschaal aan individuele weegbehoeften aan te passen...
- Page 262 All manuals and user guides at all-guides.com 11.2 Menuoverzicht [„USER“] Functie Selectie Paramete Beschrijving van de werking rselectie Toets Weerga Toets Weeggegevens verschijnen na het indrukken van de toets 3 seconden lang Weergave weeggegeve Weeggegevens verschijnen na het ns in het totaalgeheug indrukken van de toets zolang totdat...
- Page 263 All manuals and user guides at all-guides.com 12 Configuratiemenu 12.1.1 Achtergrondverlichting van het display De achtergrondverlichting van het display kan als volgt ingesteld worden: Instelling Functie Het display krijgt bij een Automatisch -toets indrukken, op het display gewichtswaarde > 10 d of Backlight „Referentiegewicht“...
- Page 264 All manuals and user guides at all-guides.com 12.1.2 Instelling van de weergavesnelheid Voor de weergavesnelheid kan er een waarde tussen 01 en 15 ingesteld worden: 01 = langzaam en gevoelig (fabrieksinstelling = 01) 15 = snel en ongevoelig Instelling -toets indrukken, op het display „Referentiegewicht“ verschijnt [CEnTR]. Tijdens deze weergave de toets indrukken.
- Page 265 All manuals and user guides at all-guides.com 13 Gegevensuitgang (Uitsluitend modellen CXP) De weegschaal is standaard met een RS 232C interface uitgerust. 13.1 RS 232C interface Met het RS 232C interface kan er een bidirectionele gegevensuitwisseling van de weegschaal met externe apparaten plaatsvinden. De gegevensoverdracht gebeurt asynchroon in de ASCII - code.
- Page 266 All manuals and user guides at all-guides.com 13.2 Beschrijving van de interfaces Door de keuze van een bepaalde modus kunnen het uitvoerformaat, de uitvoersturing, de overdrachtsnelheid en de pariteitbit ingesteld worden. Navigatie in het menu: -toets indrukken, op het display Referentiegewicht verschijnt [CEnTR].
- Page 267 All manuals and user guides at all-guides.com Aantal uitvoerwaarden X: 0 - F (0-15) STl XX De instelling X met de toets bevestigen, daarna de instellingen in overeenstemming met tabel 2 doorvoeren. Zie ook afbeelding 1 (invoervoorbeeld) 40 XX XXXXXX Aard van de uitvoerwaarden STl XX K0SET...
- Page 268 All manuals and user guides at all-guides.com Tabel 1: Code Betekenis Uitvoer na het indrukken van M+ Afdruk kopregel Afdruk laatste regel Tabel 2: Pre -character Code Beschrijving End -character code code Brutto Tare Netto Referentiegewicht Weegeenheid Geheugen # Aantal stuks Weergave van de stabiliteit None Gebruikergedefinieerde invoer in ASCII Cod#1...
- Page 269 All manuals and user guides at all-guides.com Afbeelding 1: Aantal posities (max. 15) 0 : 1.- 4. Positie 1 : 5. - 8. Positie Code (tab. 1) 2 : 9.- 12. Positie 3 :13.-15. Positie Netto (tab. 2) Brutto Aantal stuks Referentiegewicht (Codes: zie tab.
- Page 270 All manuals and user guides at all-guides.com 13.2.1 Voorbeeld: Instelling van een uitvoerformaat Functie oproepen Aantal stuks Gewicht Referentiegewicht STl XX Met de cijfertoetsen gewenste code (XX, zie tab. 1) selecteren. Voorbeeld 00 = uitvoer na het indrukken van M+ STl 00 De instelling met de toets bevestigen, de weergave van het referentiegewicht...
- Page 271 All manuals and user guides at all-guides.com 14 Onderhoud, instandhouding, afvalverwerking 14.1 Reinigen Gelieve het apparaat vóór de reiniging van de bedrijfsspanning te verbreken. Gelieve geen agressieve reinigingsmiddelen (oplosmiddelen of dergelijke) te gebruiken, maar enkel een met mild zeepsop bevochtigd doekje. Gelieve erop te letten dat er geen vloeistof in het apparaat binnendringt en wrijf het met een droog, zacht doekje na.
- Page 272 All manuals and user guides at all-guides.com 15 Kleine hulp bij pannes In geval van een storing in het verloop van het programma dient de weegschaal even uitgeschakeld en van het stroomnet verbroken te worden. Met het weegprocédé moet men dan terug vanaf het begin van start gaan. Storing Mogelijke oorzaak •...
- Page 273 All manuals and user guides at all-guides.com 16 Bijlage ASCII CODE tabel symbol symbol (NULL) Ctrl 2 & & Ctrl A Ctrl B Ctrl C Ctrl D Ctrl E Ctrl F Ctrl G Backspace Ctrl J Ctrl K Ctrl L Enter Ctrl N Ctrl O...
- Page 274 All manuals and user guides at all-guides.com symbol symbol ¦ ¦ Δ Ctrl ← Ç Alt 128 ü Alt 129 é Alt 130 â Alt 131 ä Alt 132 à Alt 133 å Alt 134 ç Alt 135 ê Alt 136 ë...
- Page 275 All manuals and user guides at all-guides.com symbol HEX symbol ─ £ Alt 156 Alt 196 ┼ ¥ Alt 157 Alt 197 ╞ Alt 158 Alt 198 ╟ ƒ Alt 159 Alt 199 ╚ á Alt 160 Alt 200 ╔ í...
- Page 276 All manuals and user guides at all-guides.com symbol symbol Alt 236 ÷ Alt 246 Alt 237 ˜ Alt 247 Alt 238 º Alt 248 Alt 239 • Alt 249 Alt 240 · Alt 250 ± Alt 241 Alt 251 Alt 242 Alt 252 Alt 243 ²...
- Page 277 All manuals and user guides at all-guides.com KERN & Sohn GmbH Ziegelei 1 Tel: +49-[0]7433- 9933-0 D-72336 Balingen N° de fax: +49-[0]7433-9933- E-Mail: info@kern-sohn.com Internet: www.kern-sohn.com Instruções de utilização Balanças de contagem KERN CXB/CXP Versão 1.2 07/2008 CXB/CXP-BA-p-0812...
- Page 278 All manuals and user guides at all-guides.com KERN CXB/CXP Versão 1.2 07/2008 Instruções de utilização Balanças de contagem Indice Dados técnicos _________________________________________________ 4 Declaração de conformidade______________________________________ 7 Vista de conjunto do aparato______________________________________ 8 Resumo dos visores _____________________________________________ 10 3.1.1 Visor peso___________________________________________________________ 11 3.1.2...
- Page 279 All manuals and user guides at all-guides.com Contagem de peças ____________________________________________ 21 Averiguar o peso referencial mediante pesagem ______________________ 21 Entrada numérica do peso referencial _______________________________ 22 Optimização automática de referência _______________________________ 22 Memorizar/chamar o peso referencial _______________________________ 23 8.4.1 Memorizar___________________________________________________________ 23 8.4.2 Chamar_____________________________________________________________ 24...
- Page 280 All manuals and user guides at all-guides.com 1 Dados técnicos Modelos CXB: KERN CXB 3K0.2 CXB 6K0.5 CXB 15K1 CXB 30 K2 Leitura (d) 0,2 g 0,5 g Alcance de pesagem 3 kg 6 kg 15 kg 30 kg (max)
- Page 281 All manuals and user guides at all-guides.com KERN 6K2M 15K5M 30K10M 3K1M Leitura (d) 10 g Alcance de pesagem 3 kg 6 kg 15 kg 30 kg (Max) Reproduzibilidade 10 g Linearidade 10 g 20 g Classe de aferição Tempo de estabilização 2 sec.
- Page 282 All manuals and user guides at all-guides.com Modelos CXP: KERN CXP 30K2 CXP 75K5 CXP 150K10 Leitura (d) 10 g Alcance de pesagem 30 kg 75 kg 150 kg (max) Reproduzibilidade 10 g Linearidade ± 4 g ± 10 g ±...
- Page 283 EU Directive Standards 89/336/EEC EMC EN 55011 EN 61000-3-2 EN 61000-3-3 EN 61000-6-2 73/23/EEC Low Voltage EN 60950 Date: 27.12.2006 Signature: Gottl. KERN & Sohn GmbH Management Gottl. KERN & Sohn GmbH, Ziegelei 1, D-72336 Balingen, Tel. +49-[0]7433/9933-0,Fax +49-[0]7433/9933-149 CXB/CXP-BA-p-0812...
- Page 284 All manuals and user guides at all-guides.com 3 Vista de conjunto do aparato Modelos CXB: Bolha de ar Compartimento pilha recarregável Conexão do cabo de rede Interruptor ligar/desligar CXB/CXP-BA-p-0812...
- Page 285 All manuals and user guides at all-guides.com Modelos CXP: 1. Interruptor ligar/desligar 2. Conexão do cabo de rede 3. RS 232 interface 4. Bolha de ar CXB/CXP-BA-p-0812...
- Page 286 All manuals and user guides at all-guides.com 3.1 Resumo dos visores Modelos CXB: Peso Peso referencial Visor do estado de carga Quantidade peças Modelos CXP: Peso Peso referencial Quantidade peças Visor do estado de carga CXB/CXP-BA-p-0812...
- Page 287 All manuals and user guides at all-guides.com 3.1.1 Visor peso Aqui se indica o peso do vosso material a pesar. aparecido indica: Visor de posição zero PRE- Valor tara em memória TARE Capacidade da pilha recarregável esgotada dentro de breve tempo 3.1.2 Visor peso referencial Aquí...
- Page 288 All manuals and user guides at all-guides.com 3.2 Vista de conjunto do teclado Modelos CXB: Modelos CXP: CXB/CXP-BA-p-0812...
- Page 289 All manuals and user guides at all-guides.com Seleção Função • Teclas cifra • Tecla de anular • Chamada contar com controlo de tolerância • Memorizar pesos referenciais no armazém • Chamada de pesos referenciais memorizados • Adição no armazém de somas •...
- Page 290 A balança só se pode empregar em conformidade com as especificações descritas. Se deseja utilizar a balança noutras áreas de aplicação, se precisa duma autorização escrita de parte da empresa KERN. 4.3 Prestação de garantia O direito de garantia fica excluido nos seguintes casos: •...
- Page 291 KERN (www.kern-sohn.com). No seu laboratório de calibração acreditado DKD, a empresa KERN pode calibrar rápida e econômicamente os pesos de ensaio e as balanças (retorno ao normal nacional).
- Page 292 All manuals and user guides at all-guides.com 7 Desembalagem, implantação e acionamento 7.1 Lugar de implantação, lugar de emprego A balança foi construida de tal forma que sempre se obtêm resultados de pesagem fiáveis, sempre e quando a pesagem se realize sob condições de uso habituais. Você...
- Page 293 All manuals and user guides at all-guides.com 7.2.1 Colocação Nivelar a balança mediante os parafusos niveladores nos pies até o bolha de ar se encontrar dentro das respectivas marcas. Modelos CXP: Prato de pesagem Plataforma Suporte Ecran Parafusos (2 pcs.) Suporte Mola Parafusos (4 pcs.)
- Page 294 Use exclusivamente adaptadores de rede originais de KERN. Para o uso de outros modelos se precisa da autorização pela empresa KERN. 7.4 Funcionamento com pilha recarregável A pilha recarregável de série é...
- Page 295 All manuals and user guides at all-guides.com 7.5.1 Ligar Acender a balança com o interruptor ON/OFF (na esquerda). A balança executa um autoensaio. Logo que aparecer o visor de peso "0" em todos os três visores, a vossa balança está pronta para pesar. Nos modelos CXP (com RS 232) aparece primeiro um número interno antes de que a balança reconte a zero após breve tempo.
- Page 296 O ajuste é também possível com os pesos de outros valores nominais, mas não é óptimo para a técnica de medicão. Podem encontrar-se as informações sobre o peso de ajuste no internet em: http://www.kern-sohn.com Nota Mediante a tecla se pode sair do modo de ajuste. A balança regressa ao modo de pesagem.
- Page 297 All manuals and user guides at all-guides.com 8 Contagem de peças A contagem de peças significa que se podem acrescentar ou extrair peças dum recipiente conhecendo-se sempre a respectiva quantidade. Para poder contar uma quantidade de peças elevada, é necessário determinar primeiro o peso médio das peças a base duma quantidade pequena (número de peças de referência).
- Page 298 All manuals and user guides at all-guides.com 8.2 Entrada numérica do peso referencial Se conhece o peso referencial/peça, pode entrá-lo mediante as teclas numéricas. Entrar peso referencial através das teclas numéricas 1. 8 33 PRE- TARE Confirmar com a tecla 1.
- Page 299 All manuals and user guides at all-guides.com 8.4 Memorizar/chamar o peso referencial Ficam disponíveis 10 espaços de memória (ocupados mediante as teclas numéricas 0 -9). 8.4.1 Memorizar Entre o peso referencial que vai memorizar 0. 0 PRE- TARE Carregue na tecla PlSET PRE- TARE...
- Page 300 All manuals and user guides at all-guides.com 8.4.2 Chamar Se o peso referencial é necessário para outro momento, pode chamá-lo outra vez com a tecla e o respectivo número do espaço de memória. Carregue na tecla PlSET PRE- TARE Entrar o espaço de memória (0 - 9) através do teclado numérico, aparece o peso referencial memorizado 0.
- Page 301 All manuals and user guides at all-guides.com Carregue na tecla ----- PRE- TARE Carregue na tecla 0. 0 PRE- TARE 8.5.2 Estabelecer valor de tolerância para peso pretendido Quando se alcança o valor pretendido, ouve-se um sinal acústico e na janela do peso referencial aparece a piscar [-efPST-] Carregue na tecla -----...
- Page 302 All manuals and user guides at all-guides.com 9 Tarar O peso próprio de alguns recipientes de pesagem pode-se deduzir ao premer o botão para que nas pesagens seguintes se indique só o peso neto do material que vai pesar. 9.1 Averiguar o peso tara mediante pesagem Colocar o recipiente a tarar vazio sobre o prato de pesagem.
- Page 303 All manuals and user guides at all-guides.com 9.2 Entrada numérica do peso tara (PRE-TARE) Pré-regulagem do modo PRE-TARE Apertar tecla , no visor de peso referencial aparece [CEnTR] ------ CEnTR ------ Durante este visor apertar a tecla USER Carregue na tecla USER PTTXP Selecionar a regulagem desejada mediante as teclas...
- Page 304 All manuals and user guides at all-guides.com Nota: Para anular o valor de tara armazenado há que retirar o peso do prato de pesagem e depois premer a tecla TARE, o visor [ ] ao lado de "PRE-TARE" se apaga. Regulagem PRE-TARE "0": Retirar todos os objectos do prato de pesagem.
- Page 305 All manuals and user guides at all-guides.com 10 Totalizar A balança tem uma memória de somas contadas para somar elementos contados iguais em quantidade total e peso total. 10.1 Somar "Quantidade de peças" Com peso referencial eleito, colocar a quantidade de peças para a primeira pesagem 118.
- Page 306 All manuals and user guides at all-guides.com 10.2 Summieren „Gewicht“ Colocar o peso no prato de pesagem 118. 3 PRE- TARE O valor de visor é sumado na memória da somas com a tecla ----- ----- PRE- TARE O visor [ ] ao lado de "M+"...
- Page 307 All manuals and user guides at all-guides.com 10.3 Anular os valores memorizados Descarregar a balança e apertar a tecla . Os valores memorizados, o peso total, a quantidade total de peças e a quantidade de pesagens sao colocados em zero. . O visor [ ] ao lado de "M+"...
- Page 308 All manuals and user guides at all-guides.com 11.2 Vista de conjunto do menú [USER] Função Seleção Seleção Descrição do funcionamento parâmetr Tecla Visor Tecla Os dados de pesagem aparecem por 3 segundos depois de apertar a tecla Visor dados Os dados de pesagem restam de pesagem presentes depois de apertar a tecla na memória...
- Page 309 All manuals and user guides at all-guides.com 12 Menú de configuração 12.1.1 Iluminação de fundo do visor Pode regular-se a iluminação de fundo do visor assim: Ajuste Função O fundo do display é Auto Apertar tecla , no visor de peso iluminado com um valor de Backlight aparece [CEnTR] Durante este visor...
- Page 310 All manuals and user guides at all-guides.com 12.1.2 Regulagem da rapidez do visor Para a velocidade do visor pode regular-se um valor entre 01 e 15: 01 = lento e sensível (regulagem de oficina = 01) 15 = rápido e insensível Ajuste Apertar tecla , no visor de peso aparece [CEnTR] Durante este visor apertar a...
- Page 311 All manuals and user guides at all-guides.com 13 Saída de dados (só modelos CXP) A balança está equipada de série com uma interface RS 232C. 13.1 Interface RS 232C Mediante a interface RS 232C se pode realizar um intercâmbio bidirecional de dados desde a balanca aos equipamentos externos.
- Page 312 All manuals and user guides at all-guides.com 13.2 Descrição da interface Selecionando um determinado modo de serviço é possível determinar o formato de saida, o comando de saida, a velocidade de transmissão assim como o bit de paridade. Navegação no menu: •...
- Page 313 All manuals and user guides at all-guides.com Quantidade valores emitidos STl XX X: 0 – F (0-15) Confirmar a regulagem X com tecla , depois fazer as regulagems segundo a tab. 2. Ver também representação 1 (exemplo de entrada) XXXXXX Tipo dos valores de emissão STl XX 40 XX...
- Page 314 All manuals and user guides at all-guides.com Tabela 1: Código Significado Emissão depois de apertar M+ Impreso da linha cabeceira Impresso última linha Tabela 2: Pre -character Código Descrição End -character code code Brutto Tare Netto Peso referencial Unidade de pesagem Memória # Quantidade peças Visor de estabilidade...
- Page 315 All manuals and user guides at all-guides.com Representação 1: Número de posições (max. 15) 0 : 1.- 4. Posição 1 : 5. - 8. Posição Código (Tab. 1) 2 : 9.- 12. Posição 3 :13.-15. Posição Neto (Tab. 2) Bruto Quantidade peças Peso referencial (códigos ver tab.
- Page 316 All manuals and user guides at all-guides.com 13.2.1 Exemplo: Regulagem dum formato de emissão Chamar função Quantidade peças Peso Peso referencial STl XX Mediante as teclas numéricas, , escolher o código desejado (XX, ver tab. 1). Exemplo 00 = emissão depois de apertar M+ STl 00 Confirmar a regulagem com a tecla , o visor do peso referencial pisca.
- Page 317 Elimine restos de amostras o pós com cuidado utilizando um pincel ou uma aspiradora de mão. Eliminar de imediato o material de pesagem esvazado. 14.2 Manutenção, conservação Só técnicos de serviço capacitados e autorizados pela empresa KERN podem abrir o aparelho. Separar o aparelho da rede eléctrica antes de abri-lo. 14.3 Remoção O explotador tem que eliminar a embalagem e/ou a balança conforme as leis...
- Page 318 All manuals and user guides at all-guides.com 15 Pequeno serviço de auxílio Em caso de avería na sequência de programa, se tem que apagar a balança e desconectá-la da rede por uns segundos. Isto significa que se tem que voltar a efectuar o processo de pesagem desde o princípio.
- Page 319 All manuals and user guides at all-guides.com 16 Anexo Tabela CÓDIGO ASCII symbol symbol (NULL) Ctrl 2 & & Ctrl A Ctrl B Ctrl C Ctrl D Ctrl E Ctrl F Ctrl G Backspace Tab. Ctrl J Ctrl K Ctrl L Enter Ctrl N Ctrl O...
- Page 320 All manuals and user guides at all-guides.com symbol symbol ¦ ¦ Δ Ctrl ← Ç Alt 128 ü Alt 129 é Alt 130 â Alt 131 ä Alt 132 à Alt 133 å Alt 134 ç Alt 135 ê Alt 136 ë...
- Page 321 All manuals and user guides at all-guides.com symbol HEX symbol ─ £ Alt 156 Alt 196 ┼ ¥ Alt 157 Alt 197 ╞ Alt 158 Alt 198 ╟ ƒ Alt 159 Alt 199 ╚ á Alt 160 Alt 200 ╔ í...
- Page 322 All manuals and user guides at all-guides.com symbol symbol Alt 236 ÷ Alt 246 Alt 237 ˜ Alt 247 Alt 238 º Alt 248 Alt 239 • Alt 249 Alt 240 · Alt 250 ± Alt 241 Alt 251 Alt 242 Alt 252 Alt 243 ²...
- Page 323 All manuals and user guides at all-guides.com KERN & Sohn GmbH Ziegelei 1 Tel.: +49-[0]7433- 9933-0 D-72336 Balingen Faks: +49-[0]7433-9933-149 E-Mail: info@kern-sohn.com Internet: www.kern-sohn.com Instrukcja obsługi Waga do wyznaczania liczby sztuk KERN CXB/CXP Wersja 1.1 04/2007 CXB/CXP-BA-pl-0711...
- Page 324 All manuals and user guides at all-guides.com KERN CXB/CXP Wersja 1.1 04/2007 Instrukcja obsługi Waga do wyznaczania liczby sztuk Spis treści Dane techniczne ________________________________________________ 4 Deklaracja zgodności ____________________________________________ 6 Przegląd urządzeń ______________________________________________ 7 Przegląd wskaźników______________________________________________ 9 3.1.1 Wskaźnik masy_______________________________________________________ 10 3.1.2...
- Page 325 All manuals and user guides at all-guides.com Justowanie z odważnikiem zewnętrznym ____________________________ 19 Liczenie sztuk _________________________________________________ 20 Ustalenie masy referencyjnej za pomocą ważenia _____________________ 20 Numeryczne wprowadzenie masy referencyjnej _______________________ 21 Automatyczna optymalizacja referencji ______________________________ 21 Zapisanie w pamięci/ wywołanie masy referencyjnej ___________________ 22 8.4.1 Zapis_______________________________________________________________ 22 8.4.2...
- Page 326 All manuals and user guides at all-guides.com 1 Dane techniczne Modele CXB: KERN CXB 3K0.2 CXB 6K0.5 CXB 15K1 CXB 30 K2 Dokładność odczytu (d) 0,2 g 0,5 g Zakres ważenia (Max) 3 kg 6 kg 15 kg 30 kg Powtarzalność...
- Page 327 All manuals and user guides at all-guides.com Modele CXP: KERN CXP 30K2 CXP 75K5 CXP 150K10 Dokładność odczytu (d) 10 g Zakres ważenia (Max) 30 kg 75 kg 150 kg Powtarzalność 10 g Liniowość ± 4 g ± 10 g ±...
- Page 328 EU Directive Standards 89/336/EEC EMC EN 55011 EN 61000-3-2 EN 61000-3-3 EN 61000-6-2 73/23/EEC Low Voltage EN 60950 Date: 27.12.2006 Signature: Gottl. KERN & Sohn GmbH Management Gottl. KERN & Sohn GmbH, Ziegelei 1, D-72336 Balingen, Tel. +49-[0]7433/9933-0,Fax +49-[0]7433/9933-149 CXB/CXP-BA-pl-0711...
- Page 329 All manuals and user guides at all-guides.com 3 Przegląd urządzeń Modele CXB: Poziomica Przegródka na akumulator Podłączenie kabla sieciowego Włącznik /Wyłącznik CXB/CXP-BA-pl-0711...
- Page 330 All manuals and user guides at all-guides.com Modele CXP: 1. Włącznik /Wyłącznik 2. Podłączenie kabla sieciowego 3. Interfejs RS 232 4. Poziomica CXB/CXP-BA-pl-0711...
- Page 331 All manuals and user guides at all-guides.com 3.1 Przegląd wskaźników Modele CXB: Waga Masa referencyjna Wskaźnik naładowania Liczba sztuk Modele CXP: Waga Masa referencyjna Liczba sztuk Wskaźnik naładowania CXB/CXP-BA-pl-0711...
- Page 332 All manuals and user guides at all-guides.com 3.1.1 Wskaźnik masy Tutaj wyświetla się masa ważonego towaru. Wyświetlony wskazuje: Wskaźnik miejsca zerowego PRE- Wartość tary w pamięci TARE Pojemność akumulatora na wyczerpaniu 3.1.2 Wskaźnik masy referencyjnej Wyświetla się masa referencyjna próbki. Wartość wpisuje użytkownik, albo oblicza ją waga.
- Page 333 All manuals and user guides at all-guides.com 3.2 Przegląd klawiatur Modele CXB: Modele CXP: CXB/CXP-BA-pl-0711...
- Page 334 All manuals and user guides at all-guides.com Wybór Funkcjonowanie • klawisze cyfrowe • klawisz kasowania • wywołanie liczenia z kontrolą zakresu tolerancji • zapisanie w pamięci mas referencyjnych • wywołanie zapisanych w pamięci mas referencyjnych • zliczanie w pamięci sum •...
- Page 335 Wagę można używać tylko zgodnie z opisanym przeznaczeniem. Zakres użytkowania i stosowania wagi odbiegający od zakresu określonego przez producenta, musi pisemnie potwierdzić i zezwolić firma KERN. 4.3 Gwarancja Gwarancja wygasa w przypadku: • nieprzestrzegania naszych zaleceń podanych w instrukcji eksploatacji •...
- Page 336 KERN (www.kern-sohn.com). KERN w swoim akredytowanym laboratorium wzorcowania DKD może szybko i korzystnie cenowo przeprowadzić kalibrację wag i odważników wzorcowych (odwołując się do wzorca narodowego).
- Page 337 All manuals and user guides at all-guides.com 7 Rozpakowanie, montaż i uruchomienie 7.1 Miejsce ustawienia, miejsce użytkowania Wagi są tak skonstruowane, że w normalnych, zwyczajnych warunkach użytkowania osiąga się niezawodne wyniki pomiarowe. Mogą Państwo pracować dokładnie i szybko, pod warunkiem, że wybiorą Państwo właściwe miejsce ustawienia wagi.
- Page 338 All manuals and user guides at all-guides.com 7.2.1 Zmontowanie Zniwelować wagę śrubami od nóżek, aż pęcherzyk powietrza w poziomicy znajdzie się w określonym punkcie. Modele CXP: Płytka wagi Platforma Nosič Wyświetlacz Śruby (2 szt.) Podparcie (trzymak) Sprężyna Śruby (4 szt.) Konstrukcja Klucz trzpieniowy wspornikowa...
- Page 339 7.3 Podłączenie do sieci Waga jest zasilana zewnętrznym urządzeniem sieciowym. Wartość zasilania podana na etykiecie musi być zgodna z miejscowym napięciem. Używać tylko oryginalnych urządzeń sieciowych firmy KERN. Stosowanie innych produktów wymaga zgody firmy KERN. 7.4 Zasilanie akumulatorowe Akumulator wewnętrzny ładuje się za pomocą dostarczonego zasilacza.
- Page 340 All manuals and user guides at all-guides.com 7.5.1 Włączanie Włączyć wagę przyciskiem ON/OFF (z lewej strony). Waga przeprowadza samotest. Gdy tylko we wszystkich trzech oknach wyświetlacza pojawi się wskazanie masy "0", waga jest gotowa do ważenia. W przypadku modeli CXP (z RS 232) zanim waga po upływie krótkiego czasu powróci na zero, najpierw pojawi się...
- Page 341 (patrz: Rozdz. 1 "Dane techniczne"). Justować można również odważnikami o innych wartościach znamionowych, z punktu widzenia techniczno-pomiarowego nie jest to jednak optymalne. Informacje dotyczące odważników do justowania znajdują się na stronie internetowej: http://www.kern-sohn.com Wskazówka Za pomocą przycisku można wyjść z trybu justowania. Waga powraca do trybu ważenia.
- Page 342 All manuals and user guides at all-guides.com 8 Liczenie sztuk Przy liczeniu sztuk można liczyć części albo wkładając je do pojemnika albo wyjmując je z pojemnika. Aby możliwe było liczenie większych ilości elementów, trzeba ustalić za pomocą mniejszej ilości (referencyjna liczba sztuk) średnią masę elementów.
- Page 343 All manuals and user guides at all-guides.com 8.2 Numeryczne wprowadzenie masy referencyjnej Jeśli masa referencyjna /sztuki jest znana, można ją wpisać za pomocą przycisków cyfrowych. Wpisać masę referencyjną za pomocą przycisków cyfrowych. 1. 8 33 PRE- TARE Potwierdzić klawiszem 1. 8 33 PRE- Masa TARE...
- Page 344 All manuals and user guides at all-guides.com 8.4 Zapisanie w pamięci/ wywołanie masy referencyjnej Do dyspozycji jest 10 miejsc pamięci (zajęte za pomocą przycisków cyfrowych 0 -9). 8.4.1 Zapis Podaj masę referencyjną, którą chcesz zapisać. 0. 0 PRE- TARE Wcisnąć przycisk PlSET PRE- TARE...
- Page 345 All manuals and user guides at all-guides.com 8.4.2 Wywoływanie Jeśli masa referencyjną będzie później potrzebna, można ją wywołać za pomocą przycisku oraz odpowiedniego numeru miejsca pamięci. Wcisnąć przycisk PlSET PRE- TARE Wpisz miejsce pamięci (0 - 9) za pomocą przycisków cyfrowych, pojawi się zapisana masa referencyjna.
- Page 346 All manuals and user guides at all-guides.com Wcisnąć przycisk ----- PRE- TARE Wcisnąć przycisk 0. 0 PRE- TARE 8.5.2 Ustawienie wartości tolerancji dla masy docelowej Po osiągnięciu wartości docelowej zabrzmi akustyczny sygnał, a następnie w oknie masy referencyjnej pojawi się pulsując [-efPST-]. Wcisnąć...
- Page 347 All manuals and user guides at all-guides.com 9 Tarowanie Masę własną dowolnych pojemników do ważenia można odtarować wciskając przycisk w tym celu, aby przy kolejnych ważeniach wyświetlała się masa netto ważonego towaru. 9.1 Ustalenie masy tary za pomocą ważenia Ustawić na płytce wagi pusty pojemnik tary. Pojawi się całkowita masa nałożonego pojemnika.
- Page 348 All manuals and user guides at all-guides.com 9.2 Numeryczne wprowadzenie masy tary (PRE-TARE) Wstępne ustawienie trybu PRE-TARE Wcisnąć przycisk , na wyświetlaczu masy referencyjnej pojawi się [ CEnTR] ------ CEnTR ------ Podczas tego wskazania wcisnąć klawisz USER Wcisnąć przycisk USER PTTXP Za pomocą...
- Page 349 All manuals and user guides at all-guides.com Wskazówka: Aby skasować zapamiętaną wartość tary, należy odciążyć płytkę wagi a następnie wcisnąć przycisk TARE, zgaśnie wskaźnik [ ] znajdujący się obok symbolu "PRE-TARE". PRE-TARE Einstellung „0“: Zdjąć z płytki wagi wszystkie przedmioty. PRE- TARE Wcisnąć...
- Page 350 All manuals and user guides at all-guides.com 10 Sumowanie Waga posiada pamięć sum obliczeń do sumowania łącznej liczby sztuk oraz łącznej masy jednakowych części liczonych. 10.1 Sumowanie "Liczba części" Jeśli wybrano masę referencyjną, nałożyć ilość elementów do pierwszego ważenia 118. 3 1.
- Page 351 All manuals and user guides at all-guides.com 10.2 Sumowanie "Masa" Ustawić ciężar na płytce wagi 118. 3 PRE- TARE Wciśnięcie przycisku dodaje wartość wskazaną do pamięci sum. ----- ----- PRE- TARE Wskaźnik [ ] obok "M+" sygnalizuje zapisanie wartości w pamięci. Po wykonanej kontroli równomierności waga automatycznie powraca do trybu liczenia.
- Page 352 All manuals and user guides at all-guides.com 10.3 Kasowanie zapisanych w pamięci wartości Odciążyć wagę i wcisnąć przycisk . Zapamiętane wartości, masa całkowita, łączna liczba sztuk oraz ilość ważeń zostaną wyzerowane. Zgaśnie wskaźnik [ ] obok znaku "M+". 11 Menu aplikacji W menu aplikacji można zmienić...
- Page 353 All manuals and user guides at all-guides.com 11.2 Menu-Przegląd [USER] Funkcjonowa Wybór Wybór parametr Opis działania ów Przyci Wskaza Przycisk nie: Po wciśnięciu przycisku na 3 sek. wyświetlą się dane wagi Wskazanie Po wciśnięciu przycisku dane wagi danych wagi będą się wyświetlać dopóki nie zostanie w pamięci nnPLU wciśnięty klawisz...
- Page 354 All manuals and user guides at all-guides.com 12 Menu konfiguracji 12.1.1 Podświetlenie wyświetlacza Podświetlenie wyświetlacza można ustawić w następujący sposób: Ustawianie Funkcjonowanie Wskazanie podświetli się Auto Wcisnąć klawisz , na wyświetlaczu w przypadku wartości Backlight masy referencyjnej pojawi się [CEnTR]. wagowej >...
- Page 355 All manuals and user guides at all-guides.com 12.1.2 Ustawienie szybkości zobrazowania Dla szybkości wyświetlania można ustawić wartość od 01 do 15: 01 = powolny i czuły (ustawienie producenta = 01) 15 = szybki i nieczuły Ustawianie Wcisnąć klawisz , na wyświetlaczu masy referencyjnej pojawi się [ CEnTR]. W trakcie wyświetlania tego symbolu wcisnąć...
- Page 356 All manuals and user guides at all-guides.com 13 Wyjście danych (tylko modele CXP) Waga jest wyposażona w interfejs RS 232C stosownie do serii. 13.1 Interfejs RS 232C Interfejs RS 232C umożliwia dwukierunkową wymianę danych z wagi do urządzeń zewnętrznych. Transmisja danych przebiega asynchronicznie w kodzie ASCII. Rozmieszczenie wyprowadzeń...
- Page 357 All manuals and user guides at all-guides.com 13.2 Opis interfejsów Wybierając określony tryb eksploatacji można ustawić format wyjściowy, sterowanie wyjściem, szybkość transmisji oraz bit parzystości. Nawigacja w menu: • Wcisnąć klawisz , na wyświetlaczu masy referencyjnej pojawi się [ CEnTR]. W trakcie wyświetlania tego wskazania wcisnąć przycisk , na wyświetlaczu masy pojawi się...
- Page 358 All manuals and user guides at all-guides.com Liczba wartości wyjściowych STl XX X 0 - F (0-15) Potwierdzić ustawienie X klawiszem , następnie wykonać ustawienia według tab. 2. Zobacz też Opis 1 (przykład wprowadzania) STl XX XXXXXX Rodzaj wartości wyjściowych 40 XX K0SET Nie udokumentowana...
- Page 359 All manuals and user guides at all-guides.com Tabela 1: Znaczenie Wyprowadzenie po wciśnięciu M+ Wydruk wiersza nagłówka Wydruk ostatniego wiersza Tabela 2: Pre -character Opis End -character code code Brutto Tara Netto Masa referencyjna Jednostka wagowa Pamięć # Liczba sztuk Wskaźnik stabilności None Definiowane przez użytkownika wprowadzenie w...
- Page 360 All manuals and user guides at all-guides.com Opis 1: Ilość pozycji (max. 15) 0 : 1.- 4. Pozycja 1 : 5. - 8. Pozycja Kod (Tab. 1) 2 : 9.- 12. Pozycja 3 :13.-15. Pozycja Netto (Tab. 2) Brutto Liczba sztuk Masa referencyjna ( Kody: zobacz tab.
- Page 361 All manuals and user guides at all-guides.com 13.2.1 Przykład: Ustawianie formatu wyjściowego Przywołać funkcję Liczba sztuk Waga Masa referencyjna STl XX Klawiszami cyfrowymi , wybrać żądany kod (XX, patrz: tab. 1). Przykład 00 = wyprowadzenie po wciśnięciu M+ STl 00 Potwierdzić...
- Page 362 Luźne pozostałości próbek/ proszki usunąć ostrożnie za pomocą pędzelka albo ręcznego odkurzacza. Natychmiast usunąć rozlany, rozsypany towar. 14.2 Konserwacja, Utrzymanie w dobrym stanie Tylko wyszkoleni i autoryzowani przez firmę KERN technicy serwisowi mogą otworzyć urządzenie. Przed otworzeniem odłączyć urządzenie od sieci. 14.3 Utylizacja Chcąc zlikwidować...
- Page 363 All manuals and user guides at all-guides.com 15 Mała pomoc w przypadku awarii W przypadku zakłócenia w przebiegu programu wagę należy na chwilę wyłączyć i odłączyć ją od sieci. Proces ważenia trzeba potem zacząć od początku. ł Możliwa przyczyna ócenie •...
- Page 364 All manuals and user guides at all-guides.com 16 Załącznik ASCII CODE Tabela symbol symbol (NULL) Ctrl 2 & & Ctrl A Ctrl B Ctrl C Ctrl D Ctrl E Ctrl F Ctrl G Backspace Ctrl J Ctrl K Ctrl L Enter Ctrl N Ctrl O...
- Page 365 All manuals and user guides at all-guides.com symbol symbol ¦ ¦ Δ Ctrl ← Ç Alt 128 ü Alt 129 é Alt 130 â Alt 131 ä Alt 132 à Alt 133 å Alt 134 ç Alt 135 ê Alt 136 ë...
- Page 366 All manuals and user guides at all-guides.com symbol HEX symbol £ Alt 156 ─ Alt 196 ¥ Alt 157 ┼ Alt 197 Alt 158 ╞ Alt 198 ƒ Alt 159 ╟ Alt 199 á Alt 160 ╚ Alt 200 ╔ í...
- Page 367 All manuals and user guides at all-guides.com symbol symbol Alt 236 ÷ Alt 246 Alt 237 ˜ Alt 247 Alt 238 º Alt 248 Alt 239 • Alt 249 Alt 240 · Alt 250 ± Alt 241 Alt 251 Alt 242 Alt 252 Alt 243 ²...
- Page 368 All manuals and user guides at all-guides.com KERN & Sohn GmbH Ziegelei 1 Тел.: +49-[0]7433- 9933-0 D-72336 Balingen Факс: +49-[0]7433-9933-149 e-Mail: info@kern-sohn.com Интернет: www.kern- sohn.com Инструкция по эксплуатации СЧЕТНЫЕ ВЕСЫ KERN CXB/CXP Версия 1.2 07/2008 CXB/CXP-BA-rus-0812...
- Page 369 All manuals and user guides at all-guides.com KERN CXB/CXP Версия 1.2 07/2008 Инструкция по эксплуатации СЧЕТНЫЕ ВЕСЫ Содержание Технические данные____________________________________________ 4 Заявление о соответствии ____________________________________ 7 Обзор прибора ________________________________________________ 8 Обзор индикаторов _____________________________________________ 10 3.1.1 Индикатор веса ______________________________________________________ 11 3.1.2 Индикатор...
- Page 370 All manuals and user guides at all-guides.com Количества __________________________________________________ 21 Определение контрольного веса посредством взвешивания _________ 21 Цифровой ввод контрольного веса _______________________________ 22 Автоматическая контрольная оптимизация ________________________ 22 Сохранение/вызов контрольного веса_____________________________ 23 8.4.1 Сохранить __________________________________________________________ 23 8.4.2 Вызов ______________________________________________________________ 24 Подсчет...
- Page 371 All manuals and user guides at all-guides.com 1 Технические данные Модели CXB: KERN CXB 3K0.2 CXB 6K0.5 CXB 15K1 CXB 30 K2 Цена деления (d) 0,2 г 0,5 г 1 г 2 г Диапазон взвешивания 3 кг 6 кг 15 кг...
- Page 372 All manuals and user guides at all-guides.com KERN 6K2M 15K5M 30K10M 3K1M Цена деления (d) 1 г 2 г 5 г 10 г Диапазон взвешивания 3 кг 6 кг 15 кг 30 кг (Max) Воспроизводимость 1 г 2 г 5 г...
- Page 373 All manuals and user guides at all-guides.com Модели CXP: KERN CXP 30K2 CXP 75K5 CXP 150K10 Цена деления (d) 2 г 5 г 10 г Диапазон взвешивания 30 кг 75 кг 150 кг (макс) Воспроизводимость 2 г 5 г 10 г...
- Page 374 EU Directive Standards 89/336/EEC EMC EN 55011 EN 61000-3-2 EN 61000-3-3 EN 61000-6-2 73/23/EEC Low Voltage EN 60950 Date: 27.12.2006 Signature: Gottl. KERN & Sohn GmbH Management Gottl. KERN & Sohn GmbH, Ziegelei 1, D-72336 Balingen, Tel. +49-[0]7433/9933-0,Fax +49-[0]7433/9933-149 CXB/CXP-BA-rus-0812...
- Page 375 All manuals and user guides at all-guides.com 3 Обзор прибора Модели CXB: Уровень Отсек аккумулятора Подключение сетевого кабеля Выключатель CXB/CXP-BA-rus-0812...
- Page 376 All manuals and user guides at all-guides.com Модели CXP: 1. Выключатель 2. Подключение сетевого кабеля 3. Интерфейс RS 232 4. Уровень CXB/CXP-BA-rus-0812...
- Page 377 All manuals and user guides at all-guides.com 3.1 Обзор индикаторов Модели CXB: Вес Контрольный вес Индикация уровня Количество зарядки Модели CXP: Вес Контрольный вес Количество Индикация уровня зарядки CXB/CXP-BA-rus-0812...
- Page 378 All manuals and user guides at all-guides.com 3.1.1 Индикатор веса Здесь отображается вес взвешиваемого Вами материала. Подсвеченная указывает на: Индикация нуля PRE- Значение тары в памяти TARE Емкость аккумулятора почти исчерпана 3.1.2 Индикатор контрольного веса Здесь отображается контрольный вес пробы. Это значение либо вводится пользователем, либо...
- Page 379 All manuals and user guides at all-guides.com 3.2 Обзор клавиатуры Модели CXB: Модели CXP: CXB/CXP-BA-rus-0812...
- Page 380 All manuals and user guides at all-guides.com Выбор Функция • Цифровые клавиши • Клавиша стирания • Вызов подсчета с контролем допуска • Сохранение контрольных весов в памяти • Вызов сохраненных контрольных весов • Сложение в памяти суммы • Вызов памяти суммы •...
- Page 381 Весы можно использовать только в соответствии с описанными требованиями. Иные сферы применения/прикладные области требуют письменного разрешения от KERN. 4.3 Гарантия Гарантия прекращает свое действие в случае • несоблюдения требований нашей инструкции по эксплуатации • применения вне описанных приложений • изменение или вскрытие прибора • механическое...
- Page 382 интервал, а также вид и объем этой проверки. Информация о контроле средств проверки весов, а также о необходиымх для этого проверочных грузов доступна на сайте фирмы KERN ((www.kern-sohn.com). В своей аккредитованной калибровочной лаборатории DKD фирма KERN может быстро и недорого выполнить калибровку...
- Page 383 All manuals and user guides at all-guides.com 7 Снятие упаковки, установка и ввод в эксплуатацию 7.1 Место установки, место применения Весы сконструированы таким образом, что при обычных условиях применения достигаются надежные результаты взвешивания. Вы будете работать точно и быстро, если выберете правильное место установки...
- Page 384 All manuals and user guides at all-guides.com 7.2.1 Установка Выровняйте весы с помощью резьбовых опор, пока воздушный пузырек в уровне не окажется внутри предписанной окружности. Модели CXP: Платформа весов Платформа Несущие Индикаторный элементы блок Винты (2 шт.) Держатель Пружина Винты (2 шт.) (4шт.) Основание...
- Page 385 7.3 Подключение к электросети Электропитание осуществляется через внешний блок питания. Напечатанное на блоке значение напряжения должно соответствовать напряжению в местной сети. Используйте только оригинальные блоки питания KERN. Применение других фабрикатов возможно только по согласованию с KERN. 7.4 Работа от аккумулятора...
- Page 386 All manuals and user guides at all-guides.com 7.5.1 Bключение Включите весы с помощью выключа теля ВКЛ/ВЫКЛ (слева). Bесы производят самопроверку. Как только появится индикация веса "0" во всех трех окнах индикатора, Ваши весы готовы к взвешиванию. У моделей CXP (с RS 232) сначала появляется внутренний номер, прежде чем весы...
- Page 387 грузом (см. гл. 1 "Техн. данные"). Однако, возможна юстирование и с весами других номинальных значений, но это не оптимально с точки зрения техники измерения. Информация по юстировочным грузам находится в Интернете по адресу: http://www.kern-sohn.com Указание С помощью клавиши можно покинуть режим юстирования. Весы...
- Page 388 All manuals and user guides at all-guides.com 8 Количества При подсчете количества Вы можете либо суммировать детали в емкости, либо вычитать детали из емкости. Чтобы иметь возможность подсчета большего количества деталей, необходимо определить средний вес детали на меньшем количестве (контрольное количество деталей). Чем больше контрольное количество...
- Page 389 All manuals and user guides at all-guides.com 8.2 Цифровой ввод контрольного веса Если Вам известны значения контрольного веса/количества, то Вы можете ввести их с помощью цифровой клавиатуры. Ввод контрольного вес с помощью цифровой клавиатуры 1. 8 33 PRE- TARE Подтвердите кнопкой 1.
- Page 390 All manuals and user guides at all-guides.com 8.4 Сохранение/вызов контрольного веса Имеется 10 Ячеек памяти (выбираются с помощью цифровых клавиш 0 -9). 8.4.1 Сохранить Введите подлежащий сохранению контрольный вес 0. 0 PRE- TARE Нажмите кнопку PlSET PRE- TARE Нажмите кнопку PlSET PRE- TARE...
- Page 391 All manuals and user guides at all-guides.com 8.4.2 Вызов Если контрольный вес потребуется позднее, его можно вызвать с помощью клавиши и номера соответствующей ячейки памяти. -Нажмите кнопку PlSET PRE- TARE Введите номер ячейка памяти (0 - 9) с цифровой клавиатуры, на индикаторе появляется...
- Page 392 All manuals and user guides at all-guides.com -Нажмите кнопку ----- PRE- TARE -Нажмите кнопку 0. 0 PRE- TARE 8.5.2 Установка значения допуска для целевого веса При достижении целевого значения раздается звуковой сигнал и в окне контрольного веса появляется мигающее [-efPST-]. -Нажмите...
- Page 393 All manuals and user guides at all-guides.com 9 Тарировать Собственный вес произвольной емкости для взвешивания можно тарировать нажатием кнопки, чтобы при последующих взвешиваниях выводился вес нетто взвешиваемого материала. 9.1 Определение веса тары посредством взвешивания Пустую тарную емкость установите на платформу весов. Выводится общий вес установленной...
- Page 394 All manuals and user guides at all-guides.com 9.2 Цифровой ввод веса тары (PRE-TARE) Предварительная настройка режима PRE-TARE Нажмите клавишу , в индикаторе контрольного веса появляется [ CEnTR] ------ CEnTR ------ Во время этой индикации нажмите клавишу USER -Нажмите кнопку USER PTTXP Клавишами...
- Page 395 All manuals and user guides at all-guides.com Указание: Для стирания сохраненного значения тары разгрузите платформу весов и затем нажмите клавишу TARE, индикация [ ] рядом с "PRE-TARE" гаснет. Настройка PRE-TARE "0": Удалите с платформы весов все предметы. PRE- TARE Нажмите клавишу TARE PlETA 0.
- Page 396 All manuals and user guides at all-guides.com 10 Суммирование Весы имеют память суммируемых значений для суммирования одинаковых счетных частей по общему количеству деталей и общему весу. 10.1 Суммирование "Количество штук" При выбранном контрольном весе уложите количество штук для первого взвешивания 118.
- Page 397 All manuals and user guides at all-guides.com 10.2 Суммирование "Вес" Установите груз на платформу весов 118. 3 PRE- TARE Выводимое значение с помощью клавиши суммируется с памятью суммы. ----- ----- PRE- TARE Индикация [ ] рядом с "M+" сигнализирует о наличии сохраненного значения. После...
- Page 398 All manuals and user guides at all-guides.com 10.3 Стирание сохраненных значений Разгрузите весы и нажмите клавишу . Сохраненные значения, общий вес, общее количество деталей и количество взвешиваний сбрасываются на нуль. . Индикация [ ] рядом с "M+" гаснет. 11 Меню приложения В...
- Page 399 All manuals and user guides at all-guides.com 11.2 Обзор меню [USER] Функция Выбор Выбор парамет Описание работы ра Кнопк Индика Кнопка а ция Данные взвешивания после нажатия клавиши выводятся в течение 3 сек Индикация данных Данные взвешивания после нажатия взвешивани клавиши...
- Page 400 All manuals and user guides at all-guides.com 12 Меню конфигурации 12.1.1 Фоновая подсветка индикатора Фоновую подсветку индикатора можно настроить следующим образом: Настройка Функция Подсветка индикатора Auto Нажмите клавишу , в индикаторе появляется при значении Backlight контрольного веса появляется веса > 10 d или после нажатия...
- Page 401 All manuals and user guides at all-guides.com 12.1.2 Настройка скорости индикации Скорость индикации может настраиваться в диапазоне значений между 01 и 15: 01 = медленно и чувствительно (заводская настройка = 01) 15 = быстро и нечувствительно Настройка Нажмите клавишу , в индикаторе контрольного веса появляется [ CEnTR]. Во время...
- Page 402 All manuals and user guides at all-guides.com 13 Информационный выход (только модели CXP) Весы серийно оснащаются интерфейсом RS 232C. 13.1 Интерфейс RS 232C С помощью интерфейса RS 232C может производиться двунаправленный обмен данными между весами к внешними устройствами. Передача данных производится...
- Page 403 All manuals and user guides at all-guides.com 13.2 Описание интерфейсов Посредством выбора определенного режима работы можно настроить выходной формат, управление выводом, скорость передачи и бит четности. Навигация по меню: Нажмите клавишу , в индикаторе контрольного веса появляется [ CEnTR]. Во время этой индикации нажмите клавишу...
- Page 404 All manuals and user guides at all-guides.com Количество выходных данных STl XX X 0 – F (0-15) Подтвердите настройку X клавишей , затем настройки согласно табл. Предпринять 2. См. также представление 1 (пример ввода) STl XX XXXXXX Вид выходных данных 40 XX K0SET Не...
- Page 405 All manuals and user guides at all-guides.com Таблица 1: Kод Значение Вывод после нажатия M+ Распечатка заголовка Распечатка последней строки Tаблица 2: Pre -character Kод Описание End -character code code Brutto Tare Netto Контрольный вес Единица измерения веса Запоминающее устройство # Количество...
- Page 406 All manuals and user guides at all-guides.com Представление 1: Количество позиций (макс. 15) 0 : 1.- 4. Позиция 1 : 5. - 8. Позиция Код (табл. 1) 2 : 9.- 12. Позиция 3 :13.-15. Позиция Нетто (табл. 2) брутто Количество Контрольный...
- Page 407 All manuals and user guides at all-guides.com 13.2.1 Пример: Настройка выходного формата Вызов функции Количество Вес Контрольный вес STl XX Цифровыми клавишами , выберите нужный код (XX, см. табл. 1). Пример 00 = вывод после нажатия M+ STl 00 Подтвердите настройку клавишей , индикатор...
- Page 408 ручного пылесоса. Немедленно удаляйте просыпанный взвешиваемый материал. 14.2 Техническое обслуживание, содержание в исправности Прибор разрешается открывать только обученным и авторизованным фирмой KERN сервисным техникам. Перед вскрытием выключите прибор из электросети. 14.3 Утилизация Утилизация упаковки и прибора должна выполняться эксплуатирующей организацией согласно действующему национальному или региональному...
- Page 409 All manuals and user guides at all-guides.com 15 Устранение мелких неисправностей В случае сбоя в программе весы необходимо кратковременно выключить и отсоединить от электросети. После этого процедуру взвешивания необходимо начать с начала. Неполадка Возможная причина • Весы не включены. Индикатор веса не загорается. •...
- Page 410 All manuals and user guides at all-guides.com 16 Приложение Таблица ASCII-кодов symbol symbol (NULL) Ctrl 2 & & Ctrl A Ctrl B Ctrl C Ctrl D Ctrl E Ctrl F Ctrl G Backspace Ctrl J Ctrl K Ctrl L Enter Ctrl N Ctrl O Ctrl P...
- Page 411 All manuals and user guides at all-guides.com symbol symbol ¦ ¦ Δ Ctrl ← Ç Alt 128 ü Alt 129 é Alt 130 â Alt 131 ä Alt 132 à Alt 133 å Alt 134 ç Alt 135 ê Alt 136 ë...
- Page 412 All manuals and user guides at all-guides.com symbol HEX symbol £ Alt 156 ─ Alt 196 ¥ Alt 157 ┼ Alt 197 Alt 158 ╞ Alt 198 Alt 159 ╟ Alt 199 ƒ á Alt 160 ╚ Alt 200 ╔ í...
- Page 413 All manuals and user guides at all-guides.com symbol symbol Alt 236 ÷ Alt 246 Alt 237 Alt 247 ˜ Alt 238 º Alt 248 Alt 239 • Alt 249 Alt 240 · Alt 250 Alt 241 Alt 251 ± Alt 242 Alt 252 Alt 243 ²...
- Page 414 All manuals and user guides at all-guides.com KERN & Sohn GmbH Ziegelei 1 Tel: +49-[0]7433- 9933-0 D-72336 Balingen Fax: +49-[0]7433-9933-149 E-Mail: info@kern-sohn.com Internet: www.kern-sohn.com Manual de instrucciones Balanzas cuentapiezas KERN CXB/CXP Versión 1.2 07/2008 CXB/CXP-BA-s-0812...
- Page 415 All manuals and user guides at all-guides.com KERN CXB/CXP Versión 1.2 07/2008 Manual de instrucciones Balanzas cuentapiezas Índice Datos técnicos _________________________________________________ 4 Declaración de conformidad ______________________________________ 7 Vista de conjunto del aparato _____________________________________ 8 Resumen de las indicaciones ______________________________________ 10 3.1.1...
- Page 416 All manuals and user guides at all-guides.com Contaje de piezas ______________________________________________ 21 Averiguar el peso referencial mediante pesaje ________________________ 21 Entrada numérica del peso referencial_______________________________ 22 Optimización referencial automática ________________________________ 22 Memorizar/llamar el peso referencial ________________________________ 23 8.4.1 Memorizar___________________________________________________________ 23 8.4.2 Llamar______________________________________________________________ 24 Contar con control de tolerancia - Fill to target________________________ 24...
- Page 417 All manuals and user guides at all-guides.com 1 Datos técnicos Modelos CXB: KERN CXB 3K0.2 CXB 6K0.5 CXB 15K1 CXB 30 K2 Lectura (d) 0,2 g 0,5 g Gama de pesaje (max) 3 kg 6 kg 15 kg 30 kg...
- Page 418 All manuals and user guides at all-guides.com KERN 3K1M 6K2M 15K5M 30K10M Lectura (d) 10 g Gama de pesaje (max) 3 kg 6 kg 15 kg 30 kg Reproducibilidad 10 g Linearidad 10 g 20 g Clase de verificación Tiempo de estabilización 2 sec.
- Page 419 All manuals and user guides at all-guides.com Modelos CXP: KERN CXP 30K2 CXP 75K5 CXP 150K10 Lectura (d) 10 g Gama de pesaje (max) 30 kg 75 kg 150 kg Reproducibilidad 10 g Linearidad ± 4 g ± 10 g ±...
- Page 420 EU Directive Standards 89/336/EEC EMC EN 55011 EN 61000-3-2 EN 61000-3-3 EN 61000-6-2 73/23/EEC Low Voltage EN 60950 Date: 27.12.2006 Signature: Gottl. KERN & Sohn GmbH Management Gottl. KERN & Sohn GmbH, Ziegelei 1, D-72336 Balingen, Tel. +49-[0]7433/9933-0,Fax +49-[0]7433/9933-149 CXB/CXP-BA-s-0812...
- Page 421 All manuals and user guides at all-guides.com 3 Vista de conjunto del aparato Modelos CXB: 1. Nivel de burbuja 2. Compartimiento batería 3. Conexión del cable de red 4. Interruptor con./desc. CXB/CXP-BA-s-0812...
- Page 422 All manuals and user guides at all-guides.com Modelos CXP: 1. Interruptor con./desc. 2. Conexión del cable de red 3. RS 232 interfaz 4. Nivel de burbuja CXB/CXP-BA-s-0812...
- Page 423 All manuals and user guides at all-guides.com 3.1 Resumen de las indicaciones Modelos CXB: Peso Peso referencial Indicador del estado de Cantidad piezas carga Modelos CXP: Peso Peso referencial Cantidad piezas Indicador del estado de carga CXB/CXP-BA-s-0812...
- Page 424 All manuals and user guides at all-guides.com 3.1.1 Indicación peso Aquí se indica el peso de su material a pesar. aparecido indica: Indicación de posición cero PRE- Valor tara en memoria TARE Capacidad el acumulador agotada dentro de breve tiempo 3.1.2 Indicación peso referencial Aquí...
- Page 425 All manuals and user guides at all-guides.com 3.2 Vista general del teclado Modelos CXB: Modelos CXP: CXB/CXP-BA-s-0812...
- Page 426 All manuals and user guides at all-guides.com Selección Función • Teclas cifra • Tecla de borrar • Llamada contar con control de tolerancia • Memorizar pesos referenciales en almacén • Llamada de pesos referenciales memorizados • Adición en el almacén de sumas •...
- Page 427 La balanza sólo se debe utilizar en conformidad con las especificaciones descritas aquí. Si se desea utilizar la balanza en otros campos de aplicación, se requiere una autorización escrita de parte de la empresa KERN. 4.3 Garantía El derecho de garantía queda excluido en los siguientes casos: •...
- Page 428 KERN (www.kern-sohn.com). En el acreditado laboratorio de calibración DKD de la empresa KERN es posible calibrar balanzas y pesas de calibración de una manera rápida y rentable (aquí se realiza el ajuste a la medida normal válida a nivel nacional).
- Page 429 All manuals and user guides at all-guides.com 7 Desembalaje, emplazamiento y puesta en marcha 7.1 Lugar de emplazamiento, lugar de uso La balanza está construida de tal forma que siempre se obtendrá resultados de pesaje fiables, siempre y cuando el pesaje se realice bajo condiciones de uso habituales.
- Page 430 All manuals and user guides at all-guides.com 7.2.1 Emplazamiento Nivelar la balanza con ayuda de los tornillos nivelantes en los pies hasta que la burbuja de aire del nivel de burbuja se encuentre dentro de las respectivas marcas. Modelos CXP: Platillo de pesaje Plataforma Soporte...
- Page 431 Use exclusivamente adaptadores de red originales de KERN. Para el uso de otros modelos se requiere la autorización de parte de la empresa KERN.
- Page 432 All manuals and user guides at all-guides.com 7.5.1 Conectar Encender la balanza con el interruptor ON/OFF (a la izquierda). La balanza efectúa un autotest. Luego que aparece el indicador de peso "0" en todos los tres visores indicadores, su balanza está lista para pesar. En los modelos CXP (con RS 232) aparece primero un número interno antes de que la balanza recuente a cero después de breve tiempo.
- Page 433 Es ajuste es también posible con los pesos de otros valores nominales, pero no es óptimo para la técnica de medición. Se encuentran informaciones sobre el peso de ajuste en el internet bajo: http://www.kern-sohn.com Nota Mediante la tecla se puede salir del modo de ajuste. La balanza regresa al modo de pesaje.
- Page 434 All manuals and user guides at all-guides.com 8 Contaje de piezas Contaje de piezas significa que se pueden agregar o extraer piezas de un recipiente conociéndose siempre la respectiva cantidad. Para poder contar una cantidad de piezas elevada, es necesario determinar primero el peso medio de las piezas a base de una cantidad pequeña (número de piezas de referencia).
- Page 435 All manuals and user guides at all-guides.com 8.2 Entrada numérica del peso referencial Si le está conocido el peso referencial/pieza, lo puede entrar mediante las teclas numéricas. Entrar peso referencial a través de las teclas numéricas 1. 8 33 PRE- TARE Confirmar mediante la tecla 1.
- Page 436 All manuals and user guides at all-guides.com 8.4 Memorizar/llamar el peso referencial Están disponibles 10 plazas de memoria (ocupadas mediante las teclas numéricas 0 - 8.4.1 Memorizar Entre el peso referencial que se va a memorizar 0. 0 PRE- TARE Apretar tecla PlSET PRE-...
- Page 437 All manuals and user guides at all-guides.com 8.4.2 Llamar Si el peso referencial es necesario para otro momento, se lo puede llamar otra vez con la tecla y el respectivo número de la plaza de memoria. Apretar tecla PlSET PRE- TARE Entrar la plaza de memoria (0 - 9) a través del teclado numérico, aparece el peso referencial memorizado...
- Page 438 All manuals and user guides at all-guides.com Apretar tecla ----- PRE- TARE Apretar tecla 0. 0 PRE- TARE 8.5.2 Poner el valor de tolerancia para peso final Cuando se alcanza el valor final, suena una señal acústica y en la ventana del peso referencial aparece y centellea [-efPST-].
- Page 439 All manuals and user guides at all-guides.com 9 Taraje El peso propio de algunos recipientes de pesaje se puede deducir mediante apriete al botón para que en los pesajes siguientes se indique sólo el peso neto del material que se va a pesar. 9.1 Averiguar el peso tara mediante pesaje Colocar el recipiente a tarar vacío sobre el platillo de pesaje.
- Page 440 All manuals and user guides at all-guides.com 9.2 Entrada numérica del peso tara (PRE-TARE) Prerreglaje del modo PRE-TARE Apretar tecla , en la indicación de peso aparece [CEnTR] ------ CEnTR ------ Durante esta indicación apretar la tecla USER Apretar tecla USER PTTXP Seleccionar el reglaje deseado mediante las teclas...
- Page 441 All manuals and user guides at all-guides.com Nota: Para borrar el valor de tara almacenado se tiene que retirar el peso del platillo de pesaje y luego presionar la tecla TARE, la indicación [ ] al lado de "PRE- TARE" se apaga. Reglaje PRE-TARE "0": Quitar todos los objetos del platillo de pesaje.
- Page 442 All manuals and user guides at all-guides.com 10 Sumar La balanza tiene una memoria de sumas contadas para sumar elementos contados iguales en cantidad total y peso total. 10.1 Sumar "Cantidad de piezas" Con peso referencial elegido, poner la cantidad de piezas para el primer pesaje 118.
- Page 443 All manuals and user guides at all-guides.com 10.2 Sumar "Peso" Poner el peso en el platillo de pesaje 118. 3 PRE- TARE El valor indicado es sumado a la memoria de sumas con la tecla ----- ----- PRE- TARE La indicación [ ] al lado de „M+“...
- Page 444 All manuals and user guides at all-guides.com 10.3 Borrar los valores memorizados Descargar la balanza y apretar la tecla . Los valores memorizados, el peso total, la cantidad total de piezas y la cantidad de pesajes son puestos a cero. La indicación [ ] al lado de „M+“...
- Page 445 All manuals and user guides at all-guides.com 11.2 Vista de conjunto del menú [USER] Función Selección Selección Descripción del funcionamiento parámetro Tecla Indicación Tecla Los datos de pesaje aparecen por 3 segundos después de apretar la tecla Indicación datos de Los datos de pesaje quedan después pesaje en de apretar la tecla...
- Page 446 All manuals and user guides at all-guides.com 12 Menú de configuración 12.1.1 Iluminación del fondo de la indicación Puede reglarse la iluminación de fondo de la indicación así: Ajuste Función El fondo del display es Auto Apretar tecla , en la indicación de iluminado con un valor de Backlight peso aparece [CEnTR] Durante esta...
- Page 447 All manuals and user guides at all-guides.com 12.1.2 Ajuste de la velocidad de indicación Para la velocidad de indicación puede reglarse un valor entre 01 y 15: 01 = lento y sensible 15 = rápido e insensible Ajuste Apretar tecla , en la indicación de peso aparece [CEnTR].
- Page 448 All manuals and user guides at all-guides.com 13 Salida de datos (sólo modelos CXP) La balanza está equipada de serie con un interface RS 232C. 13.1 Interface RS 232C Mediante el interface RS 232C se puede realizar un intercambio bidireccional de datos desde la FEJ a los equipos externos.
- Page 449 All manuals and user guides at all-guides.com 13.2 Descripción del interface Seleccionando un determinado modo de servicio es posible ajustar el formato de salida, el mando de salida, la velocidad de transmisión así como el bit de paridad. Navegación en el menú Apretar tecla , en la indicación de peso aparece [CEnTR].
- Page 450 All manuals and user guides at all-guides.com Número valores editados STl XX X: 0 – F (0-15) Confirmar la configuración X con tecla , después poner los reglajes según tab. 2. Ver también representación 1 (ejemplo de entrada) XXXXXX Tipo de los valores de edición STl XX 40 XX K0SET...
- Page 451 All manuals and user guides at all-guides.com Tabla 1: Código Significado Edición después de apretar M+ Impreso del renglón cabezal Impreso último renglón Tabla 2: Pre -character Código Descripción End -character code code Bruto Tare Neto Peso referencial Unidad de pesaje Memoria # Cantidad piezas Indicación de estabilidad...
- Page 452 All manuals and user guides at all-guides.com Representación 1: Número de posiciones (max. 15) 0 : 1.- 4. Posición 1 : 5. - 8. Posición Código (Tab. 1) 2 : 9.- 12. Posición 3 :13.-15. Posición Neto (Tab. 2) Bruto Cantidad piezas Peso referencial (códigos ver tab.
- Page 453 All manuals and user guides at all-guides.com 13.2.1 Ejemplo: Reglaje de un formato de edición Llamar función Cantidad piezas Peso Peso referencial STl XX Mediante las teclas numéricas escoger el código desado (XX, ver tab. 1). Ejemplo 00 = edición después de apretar M+ STl 00 Confirmar el ajuste con la tecla , la indicación del peso referencial centellea.
- Page 454 Elimine restos de pruebas o polvos con cuidado utilizando un pincel o una aspiradora de mano. Eliminar de inmediato material de pesaje derramado. 14.2 Mantenimiento, conservación Sólo técnicos de servicio capacitados y autorizados por la empresa KERN deben abrir el aparato. Separar el aparato de la red eléctrica antes de abrirlo. 14.3 Remoción El explotador debe eliminar el embalaje y/o la balanza conforme a las leyes nacionales o regionales vigentes en el lugar de uso del aparato.
- Page 455 All manuals and user guides at all-guides.com 15 Pequeño servicio de auxilio En caso de avería en la secuencia de programa, se tiene que apagar la balanza y desconectarla de la red por unos segundos. Esto significa que se tiene que volver a efectuar el proceso de pesaje desde el principio.
- Page 456 All manuals and user guides at all-guides.com 16 Anexo Tabla CÓDIGO ASCII symbol symbol (CERO) Ctrl 2 & & Ctrl A Ctrl B Ctrl C Ctrl D Ctrl E Ctrl F Ctrl G Backspace Ctrl J Ctrl K Ctrl L Enter Ctrl N Ctrl O...
- Page 457 All manuals and user guides at all-guides.com symbol symbol ¦ ¦ Δ Ctrl ← Ç Alt 128 ü Alt 129 é Alt 130 â Alt 131 ä Alt 132 à Alt 133 å Alt 134 ç Alt 135 ê Alt 136 ë...
- Page 458 All manuals and user guides at all-guides.com symbol HEX symbol ─ £ Alt 156 Alt 196 ┼ ¥ Alt 157 Alt 197 ╞ Alt 158 Alt 198 ╟ ƒ Alt 159 Alt 199 ╚ á Alt 160 Alt 200 ╔ í...
- Page 459 All manuals and user guides at all-guides.com symbol symbol Alt 236 ÷ Alt 246 Alt 237 ˜ Alt 247 Alt 238 º Alt 248 Alt 239 • Alt 249 Alt 240 · Alt 250 ± Alt 241 Alt 251 Alt 242 Alt 252 Alt 243 ²...
- Page 460 All manuals and user guides at all-guides.com Side 1 af 2 KERN-KA-dk-0810 Kort driftsvejledning Elektroniske KERN vægte, undtaget kran- og hængevægte Version 1.0 06/2008 Detaljerede infos, se driftsvejledning på flere sprog (fx engelsk) online på www.kern-sohn.com/manuals. Vægten er beregnet til brug som „ikke-automatisk vægt“.
- Page 461 All manuals and user guides at all-guides.com Side 2 af 2 KERN-KA-dk-0810 Tilkobling Tarering 0.00 21.01 8.8.8.8.8 0.00 0.00 17.37 Frakobling 0.00 77.03 Vejning 0.00 -38.38 17.37 0.00...
- Page 462 All manuals and user guides at all-guides.com Lehekülg 1 / 2 KERN-KA-est-0810 Lühikäsitsemisjuhend Elektroonilised KERN kaalud, välja arvatud kraana- ja rippkaalud Versioon 1.0 06/2008 Detailset infot vaata kasutusjuhendist teistes (nt. inglise keel) internetiaadressilt www.kern-sohn.com/manuals. Kaal on ettenähtud kasutamiseks „mehaanilise“ kaaluna Mitte jätta püsikoormat kaaluplaadile.
- Page 463 All manuals and user guides at all-guides.com Lehekülg 2 / 2 KERN-KA-est-0810 Lülitage sisse Määratlema 0.00 21.01 8.8.8.8.8 0.00 0.00 17.37 Lülitage välja 0.00 77.03 Kaaluma -38.38 0.00 0.00 17.37...
- Page 464 All manuals and user guides at all-guides.com Sivu 1 / 2 KERN-KA-fin-0810 Lyhyt käsittelyohje Sähkökäyttöiset KERN vaa´at, pois lukien nosturi- ja riippuvaa´at Versio 1.0 06/2008 Yksityiskohtaisempaa tietoa löydät käyttöohjeesta muilla kielillä (esim. englannin kieli) internetsivuilta www.kern-sohn.com/manuals. Vaa´an tarkoitus on toimia "mekaanisena" vaa´ana Älä...
- Page 465 All manuals and user guides at all-guides.com Sivu 2 / 2 KERN-KA-fin-0810 Laitteen käynnistys Määritellä 0.00 21.01 8.8.8.8.8 0.00 0.00 17.37 Virran katkaiseminen 0.00 77.03 Painaa 0.00 -38.38 17.37 0.00...
- Page 466 All manuals and user guides at all-guides.com 1 / 2 oldal KERN-KA-h-0810 Rövid kezelési útmutató Elektronikus KERN mérlegek, kivéve a daru- és akasztós mérlegeket Változat: 1.0 06/2008 A részletes tudnivalókat a kezelési útmutató tartalmazza, más nyelveken is (például angolul), a következő címen: www.kern-sohn.com/manuals.
- Page 467 All manuals and user guides at all-guides.com 2 / 2 oldal KERN-KA-h-0810 Bekapcsolás Tárázás 0.00 21.01 8.8.8.8.8 0.00 0.00 17.37 Kikapcsolás 0.00 77.03 Mérés 0.00 -38.38 17.37 0.00...
- Page 468 All manuals and user guides at all-guides.com Side 1 av 2 KERN-KA-n-0810 Kortveiledning Elektronisk KERN vekt, unntatt kran- og hengevekt Versjon 1.0 06/2008 For detaljerte informasjoner, se bruksanvisningen på andre språk (f.eks. engelsk) online under www.kern-sohn.com/manuals. Vekten skal brukes som ”ikke-selvstendig vekt”.
- Page 469 All manuals and user guides at all-guides.com Side 2 av 2 KERN-KA-n-0810 Innkopling Tarere 0.00 21.01 8.8.8.8.8 0.00 0.00 17.37 Utkobling 0.00 77.03 Vekt 0.00 -38.38 17.37 0.00...
- Page 470 Kratka navodila za uporabo Elektronske KERN tehnice, razen žerjavskih in obešalnih tehtnic Verzija 1.0 06/2008 Za podrobnejše informacije glejte navodila za uporabo v drugih jezikih (npr. angleško) online na www.kern- sohn.com/manuals. Tehtnica je predvidena za uporabo kot „neavtomatična tehtnica“. Na tehtalni plošči ne puščajte trajne obremenitve.
- Page 471 All manuals and user guides at all-guides.com Stran 2 od 2 KERN-KA-slo-0810 Vklop Tariranje 0.00 21.01 8.8.8.8.8 0.00 0.00 17.37 Izklop 0.00 77.03 Tehtanje 0.00 -38.38 17.37 0.00...
- Page 472 All manuals and user guides at all-guides.com Sida 1 av 2 KERN-KA-swe-0810 Kortbruksanvisning Elektroniska KERN vågar, med undantag för kran- och hängvågar Version 1.0 06/2008 Detaljerad information se bruksanvisning i ytterligare språk (t.ex. engelska) online under www.kern-sohn.com/manuals. Vågen är avsedd som ”icke självständig våg”.
- Page 473 All manuals and user guides at all-guides.com Sida 2 av 2 KERN-KA-swe-0810 Påslagning Tarering 0.00 21.01 8.8.8.8.8 0.00 0.00 17.37 Avstängning 0.00 77.03 Vägning 0.00 -38.38 17.37 0.00...
- Page 474 Kısa İşletim Kılavuzu Elektronik KERN Tartıları (Vinç Tartıları ve Askılı Tartıları hariç) Versiyon 1.0 06/2008 Ayrıntılı bilgi için başka dillerde (örneğin İngilizce) hazırlanmış olan işletim kılavuzlarını www.kern- sohn.com/manuals adresinde online inceleyebilirsiniz. Tartı, „kendi kendine işlemeyen tartı“ olarak kullanım için öngörülmüştür.
- Page 475 All manuals and user guides at all-guides.com Sayfa 2 / 2 KERN-KA-tr-0810 Açma Dara alma 0.00 21.01 8.8.8.8.8 0.00 0.00 17.37 Kapatma 0.00 77.03 Tartma 0.00 -38.38 17.37 0.00...