Publicité
Les langues disponibles
Les langues disponibles
Liens rapides
Publicité

Manuels Connexes pour AGPtek MH3B


Sommaire des Matières pour AGPtek MH3B
- Page 1 All manuals and user guides at all-guides.com...
- Page 2 All manuals and user guides at all-guides.com CONTENTS English 01/10 Deutsch 11/23 Italiano 24/35 Español 36/47 Français 46/59 60/69 日本語...
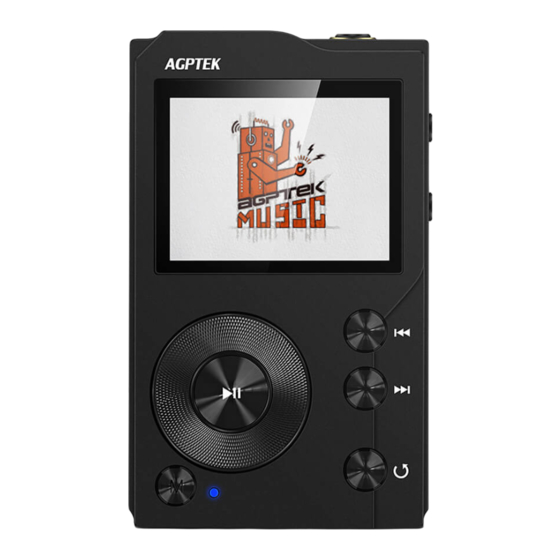
- Page 3 All manuals and user guides at all-guides.com Before Use Thank you for purchasing AGPTEK Music Player. Please read the manual carefully before using the product. Specifications are subject to change without prior notice. Buttons and Controls 1. Power button; Screen on/off Hold to Power on/off the player.
- Page 4 All manuals and user guides at all-guides.com Light up when powered on and go out when power off. 10/11. Volume button Press to increase/decrease volume. 12.Micro SD Card Slot 13.Earphone Jack 14.USB/OTG Port 15.Line-out Port Quick Guide 1. Charge the Player ...
- Page 5 All manuals and user guides at all-guides.com Connect the computer via the USB cable. Copy the music and other needed files in the computer, and then paste in the player, or just drag and drop the files directly when connect to computer. 6.
- Page 6 All manuals and user guides at all-guides.com favorites” song list. Play mode: Set the order in which the songs are played(in order/repeat all/repeat 1/shuffle). EQ: Equalizer. Choose the music playing style you like: Rock/ Classical/Jazz/Pop/Dance/Customize, etc. Bluetooth: Turn on/off the Bluetooth function. ...
- Page 7 All manuals and user guides at all-guides.com operations that are directly related to music playing, including: Music scan, Equalizer, Play mode, Gain settings, Replay gain, Balance control, Album cover, Wallpaper, Display Lyric, Gapless playback, Memory playback, Volume settings, Customize powered-on volume. Scroll the wheel or press to select the setting items, then press button...
- Page 8 All manuals and user guides at all-guides.com 7. Gapless playback. Choose whether to reduce the time interval while switching one song to another. The default is “Off.” 8. Memory playback. Set the way to continue playing the music. The available options are: Back to last song (Play from last song from its beginning), Back to last point(Resume playing from the last position of the last song), Close(Disable memory playback function).
- Page 9 “My favorites”, etc. Note: Check website https://www.agptek.com/blog/agptek-h3-usb-dac-windo ws-driver-download-installation for the details about HiBy Link. HiByLink function currently only support Android system(4.1 and above) smart phone. Does not support iOS system.
- Page 10 DAC. In DAC mode, the player can be used as USB-DAC. For the first time, you need to install USB-DAC driver software to use this function. Check website https://www.agptek.com/blog/agptek-h3-usb-dac-wi ndows-driver-download-installation for the details about the USB-DAC driver software) Note: Mac system computers can directly identify the device without having to install the software.
- Page 11 All manuals and user guides at all-guides.com Note: To view files on OTG device you need to connect OTG device to the player first. You cannot add song to “my favorite” in OTG device. Line Out The player can support analog audio output (LINE OUT). Connect one end of the standard 3.5mm audio cable to the Line-out port of your player and the other end to the external audio playback device.
- Page 12 All manuals and user guides at all-guides.com Specifications Item Name AGPTEK Portable HiFi Music Player Dimension 94*57*15mm Weight 108g Display 2.0 inches TFT Display (320*240) 1500mA/3.7V Lithium Battery Power Input: 5V/1A (Micro USB) Charging 5V/500~1000mA Power APE (192KHz/24 bit) WAV (192KHz/32bit)
- Page 13 All manuals and user guides at all-guides.com Vor Gebrauch Sehr danke, dass Sie den AGPTEK Musik Player gekauft haben. Bitte lesen Sie die Bedienungsanleitung sorgfältig durch, bevor Sie das Produkt verwenden. Spezifikationen können ohne vorherige Ankündigung geändert werden. Tasten und Steuerelemente 1.
- Page 14 All manuals and user guides at all-guides.com Menü; Auf der Playlist-Schnittstelle "Songs", drücken Sie lange auf "Song", um das Ziel-Lied schnell zu suchen. Taste Geh zurück; Drücken Sie an anderen Schnittstellen lange auf die Taste, um zur Hauptmenü zurückzukehren. Drücken Sie auf der Hauptschnittstelle, um zur Musikwiedergabe-Schnittstelle zurückzukehren, wenn im Hintergrund Musik wiedergegeben/ angehalten wird.
- Page 15 All manuals and user guides at all-guides.com halten Sie den Ein/ Ausschalten 8 Sekunden lang gedrückt, um den Player erneu zu starten. 3. Bildschirm ein / aus Drücken Sie kurz den Ein/ Aus Schalter, um den Bildschirm ein- oder auszuschalten. Wenn der Bildschirm ausgeschaltet ist, sind...
- Page 16 All manuals and user guides at all-guides.com 1.Grundlegende Operationen Drücken Sie um die Musik abzuspielen / anzuhalten. Drücken Sie die beiden seitlichen Tasten auf der rechten Seite, um die Lautstärke einzustellen. Kurz drücken um zum nächsten / vorherigen Song zu gehen.
- Page 17 All manuals and user guides at all-guides.com aus. Hintergrundbild: Wählen Sie, ob das Hintergrundbild angezeigt oder ausgeschaltet werden soll. Kategorie Nach dem Scannen von Musik von einer Micro SD-Karte können Sie ähnliche Musikdateien sortiert nach verschiedenen Klassifizierungskriterien in "Kategorie" sehen, darunter "Songs",...
- Page 18 All manuals and user guides at all-guides.com Wenn Sie "Aufzeichnung löschen" wählen, werden alle Datensätze in "Zuletzt gespielte Lieder" gelöscht. Musik-Einstellungen In den "Musikeinstellungen" führen Sie Einstellungen und Vorgänge durch, die in direktem Zusammenhang mit der Musikwiedergabe stehen: Musik-Aktualisieren, Equalizer, Wiedergabemodus, Gain-Einstellungen, Wiedergabeverstärkung,...
- Page 19 All manuals and user guides at all-guides.com und die Einstellleiste wird angezeigt. Scrollen Sie das Rad oder drücken Sie um die Balance zwischen dem rechten und dem linken Kanal einzustellen. 5. Album-Bild/ Lyrik anzeigen. Drücken Sie die Taste um auszuwählen, ob Album-Bild/ Lyrik angezeigt werden soll.
- Page 20 All manuals and user guides at all-guides.com Schnittstelle und drücken Sie die Taste um die Lautstärkeregelungsleiste aufzurufen. Standardwert ist 20. Systemeinstellungen Auf der Systemeinstellung-Schnittstellen scrollen Sie mit dem Rad oder drücken Sie um die Eintrag auszuwählen. Einschließlich: Sprache, Themenauswahl, Bildschirmeinstellungen, Bluetooth-Einstellungen, USB-Modus, Schriftgröße,...
- Page 21 Playlist bearbeiten, Songs zu "Meine Favoriten" hinzufügen usw. Hinweis: Schauen sich unsere Website https://www.agptek.com/blog/agptek-h3-usb-dac-windo ws-driver-download-installation für Details über HiBy Link. Der HiBy Link unterstützt nur Android System(4.1 oder höher). Hohe Klangqualität. Schalten Sie "Hohe Klangqualität" für die verlustfreie Übertragung der Klangqualität ein.
- Page 22 USB-DAC-Treibersoftware installieren, diese Funktion nutzen zu können. Weitere Informationen zur USB-DAC-Treibersoftware schauen Sie sich unsere : Website https://www.agptek.com/blog/agptek-h3-usb-dac-wi ndows-driver-download-installation Hinweis: Mac-System-computer können das Gerät direkt identifizieren, ohne die Software installieren zu müssen. 6. Zurücksetzen. Die Auswahl "Format-Micro-SD-Karte" löscht alle Dateien Karte.
- Page 23 All manuals and user guides at all-guides.com 8. Über das Gerät. überprüfen Sie den belegten Speicherplatz, den verfügbaren Speicherplatz und die Firmwareversion. Musik-Bibliothek In "Musik-Bibliothek" können Sie alle Dateien auf der Micro SD-Karte oder dem OTG-Gerät überprüfen. Hinweis: Um Dateien auf dem OTG-Gerät überprüfen, müssen Sie zuerst das OTG-Gerät mit dem Player verbinden.
- Page 24 - Überprüfen Sie, ob die Micro SD-Karte in den Player eingelegt und vom Player erkannt oder beschädigt ist. - Überprüfen Sie, ob die Micro SD-Karte über genügend Speicherplatz verfügt. Spezifikationen Artikel Name AGPTEK Tragbarer HiFi-Musik-Player Größe 94*57*15mm Gewicht 108g Bildschirm 2.0 inches TFT Bildschirm (320*240)
- Page 25 Micro SD Card bis Slot zum 128G Arbeitstemperat 40℃ Windows XP / Vista / Win7 / 8.1 / Mac OS-System OS 10 / Linux 2.4.2 und höher Für weitere Fragen stehen wir Ihnen sehr gerne per Email zur Verfügung: support@agptek.com...
- Page 26 All manuals and user guides at all-guides.com Prima dell'uso Grazie per aver acquistato AGPTEK Music Player. Prima di utilizzare il prodotto, leggere attentamente il manuale. Le specifiche sono soggette a modifiche senza preavviso. Pulsanti e comandi 1. Pulsante di accensione; Schermo on / off Tenere premuto per accendere / spegnere il lettore.
- Page 27 All manuals and user guides at all-guides.com lungo il pulsante per tornare all'interfaccia principale. Sull'interfaccia principale, premere tornare all'interfaccia di riproduzione musicale quando c'è musica in riproduzione / in pausa sullo sfondo. 9. Indicatore di accensione Si accende quando acceso e si spegne quando si spegne. 10/11.
- Page 28 All manuals and user guides at all-guides.com ancora disponibili mentre suona musica in sottofondo. 4. Inserisci / rimuovi scheda Micro SD Inserire la scheda Micro SD nel relativo slot e il deck bloccherà automaticamente la scheda Micro SD. Quando rimuovi la scheda Micro SD, premi verso l'interno e poi rilascia, la scheda si aprirà...
- Page 29 All manuals and user guides at all-guides.com Sulla interfaccia principale, premere il pulsante tornare all'interfaccia di riproduzione musicale quando c'è musica in riproduzione / in pausa sullo sfondo. 2. Impostazioni di riproduzione Quando è attiva l'interfaccia di riproduzione musicale, premere il pulsante M per accedere rapidamente alle seguenti funzioni visualizzate sulla destra dello schermo, tra cui: Raccolta, Modalità...
- Page 30 All manuals and user guides at all-guides.com pulsante per confermare. 2. Aggiungi a playlist / Riproduzione centralizzata / Crea playlist / Aggiungi a playlist. Su qualsiasi interfaccia di elenco di brani ad eccezione degli elenchi in "Playlist", scegli il brano di destinazione, quindi premi il pulsante M e scegli "Aggiungi a playlist"...
- Page 31 All manuals and user guides at all-guides.com scansione manuale e quindi premere il pulsante M per scansionare i file musicali. Nota: Durante il processo di scansione, non premere il pulsante , altrimenti il processo verrà interrotto. 2. Ottieni impostazioni. La commutazione del guadagno "alto"...
- Page 32 All manuals and user guides at all-guides.com volume della riproduzione musicale ogni volta che si accende il lettore. Le opzioni disponibili sono: Memoria. Il valore del volume impostato l'ultima volta quando si utilizza il lettore. Predefinito. Il valore del volume predefinito è 30. ...
- Page 33 Nota: Consulta nostro sito all'indirizzo https://www.agptek.com/blog/agptek-h3-usb-dac-windo ws-driver-download-installation per i dettagli su HiBy Link.La funzione HiByLink attualmente supporta solo smartphone Android (4.1 e successivi). Alta qualità. Attiva "Alta qualità" per una trasmissione senza perdita di qualità del suono.
- Page 34 USB-DAC. Per la prima volta, è necessario installare il software del driver USB-DAC per utilizzare questa funzione. Consulta il nostro sito Web all'indirizzo https://www.agptek.com/blog/agptek-h3-usb-dac-wi ndows-driver-download-installation per i dettagli sul software del driver USB-DAC) Nota: i computer di sistema Mac possono identificare direttamente il dispositivo senza dover installare il software.
- Page 35 All manuals and user guides at all-guides.com 8. Informazioni sul lettore. Visualizza lo spazio utilizzato, lo spazio disponibile e la versione del firmware. Biblioteca musicale In "Biblioteca musicale" è possibile controllare tutti i file nella scheda Micro SD o nel dispositivo OTG. Nota: per visualizzare i file sul dispositivo OTG è...
- Page 36 - Controllare se la scheda Micro SD è inserita nel lettore e riconosciuta dal lettore, o danneggiata. - Controllare se la scheda Micro SD ha abbastanza spazio di archiviazione. Specificazioni Nome AGPTEK Portatile HiFi Lettore Musica Dimensione 94*57*15mm Peso 108g Display 2.0 inches TFT schermo (320*240)
- Page 37 Line 3.5mm Interfaccia Interfaccia USB2.0 dati Slot Micro SD Card fino a schede 128G Temperatura -5~ 40℃ di lavoro Windows XP/ Vista/ Win7/8.1/ Mac OS 10/Linux 2.4.2 e superiore Se avete domande su questo prodotto, si prega di contattare: support@agptek.com.
- Page 38 All manuals and user guides at all-guides.com Antes de usar Gracias por comprar AGPTEK Reproductor de Música. Por favor lea cuidadosamente el manual antes de usar el producto. Las especificaciones están sujetas a cambios sin previo aviso. Botones y Controles 1.
- Page 39 All manuals and user guides at all-guides.com sostenga para buscar rápidamente la canción de destino. 8. Botón Volver; en cualquier interfaz, pulse el botón para volver a la interfaz principal. En la interfaz principal, presione para volver a la interfaz de reproducción de música cuando hay reproducción de música/pausada en el fondo.
- Page 40 All manuals and user guides at all-guides.com Presione brevemente interruptor para encender/apagar la pantalla. Cuando la pantalla está apagada, botones volumen, botón reproducir/pausar botones canción anterior/siguiente aún están disponibles mientras hay música en fondo. 4. Inserte/Quite la tarjeta micro SD Inserte la tarjeta micro SD en su ranura.
- Page 41 All manuals and user guides at all-guides.com Pulse el botón para volver a la lista de reproducción. En las interfaz "Canciones", pulse el botón M para buscar rápidamente la canción de destino por orden alfabético. En el interfaz principal, presione el botón para volver a la interfaz de reproducir música.
- Page 42 All manuals and user guides at all-guides.com En cualquier interfaz de lista de canciones excepto "Mis favoritos", desplace la rueda o presione para elegir la canción de destino, luego presione el botón M y elija "Agregar a mis favoritos" con el botón para confirmar.
- Page 43 All manuals and user guides at all-guides.com para elejir. 1. Escanear música. Escanee datos desde la tarjeta de memoria Micro SD, identifique y clasifique la música, cree índices de música en "Categorías". Si elige "Automático", el sistema escaneará los archivos de música de la tarjeta Micro SD y los clasificará...
- Page 44 All manuals and user guides at all-guides.com El valor predeterminado es "Desactivado". 8. Modo de reproducción. Establezca el modo para seguir reproduciendo la música. Las opciones disponibles son: Volver a la última canción (Reproducir desde la última canción desde su comienzo), Volver al último punto (Reanudar la reproducción desde la última posición de la última canción), Cerrar (Desactivar la función de reproducción de la memoria).
- Page 45 "Mis favoritos", etc. Nota: Visite nuestro sitio https://www.agptek.com/blog/agptek-h3-usb-dac-windo ws-driver-download-installation para los detalles sobre HiBy Link. La función HiByLink actualmente solo es compatible con el teléfono inteligente del sistema Android (4.1 y superior). Alta calidad. Active "Alta calidad" para una...
- Page 46 DAC. En modo DAC, el reproductor se puede usar como USB-DAC. Por primera vez, debe instalar el software del controlador USB-DAC para usar esta función. Visite nuestro sitio web en https://www.agptek.com/blog/agptek-h3-usb-dac-wi ndows-driver-download-installation para obtener detalles sobre el software del controlador USB-DAC)
- Page 47 All manuals and user guides at all-guides.com (se conservarán los archivos en la tarjeta Micro SD). 7. Actualización de firmware. 1) Inserte la tarjeta TF en la ranura para tarjetas y conecte el dispositivo a la computadora a través del cable USB. 2) Formatee el dispositivo y configure el formato en FAT32 en la computadora y copie update.upt en el directorio raíz de la tarjeta TF.
- Page 48 - Verifique si la tarjeta Micro SD está insertada en el reproductor y reconocida por el reproductor, o si está dañada. - Compruebe si la tarjeta Micro SD tiene suficiente espacio de almacenamiento. Especificaciones Nombre AGPTEK Portátil HiFi Reproductr Música Dimensiones 94*57*15mm Peso 108g Pantalla 2.0 inches TFT Pantalla (320*240) 1500mA/3.7V Lithium Battery...
- Page 49 Line Out 3.5mm Output Interfaz de USB2.0 datos Interfaz Tarjeta de Micro SD Card hasta a memoria 128G Temperatura 40℃ Windows XP/ Vista/ Win7/8.1/ Mac OS 10/Linux 2.4.2 y superior Si usted tiene cualesquiera preguntas sobre este producto,póngase contacto con: support@agptek.com.
- Page 50 All manuals and user guides at all-guides.com Statement Merci pour l’achat de lecteur MP3 fabriqué par AGPTEK. Avant d'utiliser le lecteur, veuillez lire attentivement le manuel. Boutons et Contrôles 1. Bouton d'alimentation; Écran allumé / éteint Maintenez le bouton pour Mise sous / hors tension le lecteur.
- Page 51 All manuals and user guides at all-guides.com Menu; Sur l'interface de la playlist " Chansons", appuyez longuement sur le bouton M pour rechercher rapidement la chanson cible par ordre alphabétique. 8. Bouton Retour Retour; Sur toutes les autres interfaces, appuyez pour revenir à...
- Page 52 All manuals and user guides at all-guides.com pendant environ 3 secondes pour allumer / éteindre le lecteur. L'indicateur bleu s'allume lorsqu'il est en Mise sous tension et s'éteint lorsqu'il est en Mise hors tension. Remarque: Lorsque le système bloque ou n'a pas de réponse, maintenez le bouton d'alimentation pendant 8 secondes pour redémarrer le lecteur.
- Page 53 All manuals and user guides at all-guides.com molette ou appuyez sur pour naviguer et appuyez sur pour entrer dans l'interface de lecture musicale: 1. Opérations de base Appuyez sur pour lire / mettre en pause la musique. Appuyez sur les deux boutons latéraux sur la droite pour régler le volume.
- Page 54 All manuals and user guides at all-guides.com Fond d'écran: Choisissez d'afficher ou d'éteindre le fond d'écran. Catégorie Après avoir scanné de la musique à partir d'une carte Micro SD, vous pouvez voir les fichiers musicaux triés selon différents critères de classification dans la “Catégorie”...
- Page 55 All manuals and user guides at all-guides.com réglages et les opérations directement liés à la musique, tels que: Scannage de musique, Equaliseur, Mode de lecture, Paramètre de gain, Replay gain, Balance, Couverture de l’album, Fond d’écran, Lyrique, Lecture continue, Lecture en mémoire, Volume du démarrage, Volume personnalisé.
- Page 56 All manuals and user guides at all-guides.com stocker le fichier de la couverture de l'album / lyric et le fichier musical dans le même dossier; le format de couverture de l'album supporte: JPG; le format de lyrique supporte: LRC; le nom du fichier de la couverture de l'album / lyric doit être le même que celui du fichier musical associé.
- Page 57 All manuals and user guides at all-guides.com pour d'autres opérations et appuyez sur le bouton pour revenir. 1. La Langue/Sélection du thème. Il y a 9 langues système disponibles interfaces thème optionnelles. 2. Taille de l’écriture. Définissez la taille de l’écriture système sur Grande/Moyenne/Petite.
- Page 58 à Remarque: Consultez notre Website l'adresse https://www.agptek.com/blog/agptek-h3-usb-dac-windo ws-driver-download-installation pour les détails sur HiBy Link. La fonction HiBy Link ne prend actuellement en charge que les téléphones intelligents Android (4.1 ou plus). Ne supporte pas le système iOS pour le moment.
- Page 59 All manuals and user guides at all-guides.com sur le logiciel du pilote USB-DAC)) Remarque: Les ordinateurs système Mac peuvent directement identifier l'appareil sans avoir à installer le logiciel. 6. Réinitialiser. Le choix "Formatage de la carte Micro SD" supprimera tous les fichiers de la carte. Si vous choisissez "Réglages d'usine", les paramètres système du lecteur seront rétablis aux valeurs par défaut (Les fichiers de la carte Micro SD seront conservés).
- Page 60 All manuals and user guides at all-guides.com ligne de votre lecteur et l'autre extrémité au périphérique de lecture audio externe. À ce moment, lorsqu'il y a de la musique sur le lecteur, le signal audio peut être transmis au périphérique audio externe. Aide et dépannage ...
- Page 61 Out) Interface de USB2.0 données Interface Carte Micro Slot de carte jusqu'à 128Go Température de 40℃ travail Windows XP/ Vista/ Win7/8.1/ Mac OS 10/Linux 2.4.2 et supérieur Si vous avez des questions sur ce produit, n'hésitez pas à contacter support@agptek.com.
- Page 62 All manuals and user guides at all-guides.com ご使用前に AGPtEK MP3 プレーヤーをお買い上げ頂きまして、ありがとうござ いました. 正しく安全にお使いいただくため、ご使用の前に必ず取 扱説明書をよくお読みください。仕様は予告なしに変更されること があります。 各部名前 1. 電源ボタン; 画面のオン/オフ 電源ボタンを長押すより、電源をオン/オフにします。電源ボタンを 押すより、本器の画面をオン/オフにします。 2. スクリーン 3. スクロールホイール スクロールホイールを回転して、メーニュー機能を選択します。 ボタン 確認ボタン、音楽を再生/一時停止ボタン 5/6. ボタン 上の選択肢/下の選択肢、前の曲へ/次の曲へ、巻き戻し/早送 り 7. M ボタン メニューボタン; 「すべての音楽」の音楽リスト画面で M ボタンを 長押すと、目標曲を早く検索できます。...
- Page 63 All manuals and user guides at all-guides.com ボタン 戻るボタン; 他の任意画面で、このボタンを長押すと、メインメー ニューに戻る可能です。 メインメーニューで、若し音楽が再生/一 時停止している場合は、このボタンを押すと、音楽再生画面に戻 る可能です。 9. 電源指示ライト 電源オンの場合は点灯します。電源オフの場合は消灯します。 10/11. 音量調整ボタン この二つのボタンを押して音量を調整可能です。 12.Micro SD カード端子 13.イヤホンジャック 14.USB/OTG 端子 15.ライン出力ポート 基本特徴 1. 充電について パソコンを使用して充電できます USB ケーブルを使用して、実行中のパソコンに本器を接続しま す。USB ケーブルは、データ転送と本器の充電にも使用できま す。 5V/500mA〜1000mA の充電器を使用して充電できま す。(充電器は別売です)。...
- Page 64 All manuals and user guides at all-guides.com Micro SD カードをスロットに挿入すると、Micro SD カードを自 動的にロックされます。 Micro SD カードを取り外すには、押し込 んでから手を離すと、カードが自動的にポップアップされます。 5. データ転送 本器をパソコンと接続した後、コピー&貼り付けまたはドラッグ& ドロップという方法で本機へ直接転送すればいいです。 6. メインメーニュー メインメーニューで音楽分類、音楽閲覧、音楽設定、システム設 定等の四つ機能があります。スクロールホイールを回転してまたは ボタンを押すより、各機能間に選択できます。 ボタン を押すより、その機能に入ります。 ご注意:他の任意画面で、 ボタンを長押すと、メインメーニュー に戻る可能です。 音楽再生中の画面 音楽ファイルは、「音楽分類」と「音楽閲覧」で見つけることができ ます。 音楽リスト画面でスクロールホイールを回転してまたは ボタンを押すより音楽を選択します。 ボタンを押すより、 音楽再生画面に入ります。 1. 基本操作 ボタンを押して音楽の再生/一時停止...
- Page 65 All manuals and user guides at all-guides.com スタマイズなど音楽スタイル間に選択できます。 ブルートゥース: ブルートゥースのオン/オフに選択します。 壁紙:壁紙の表示/非表示を選択します。 音楽分類 Micro SD カードから音楽を更新すると、「すべての音楽」、「お気 に入り」、「プレイリスト」、「最近再生した曲」、「アーティスト」、「ア ルバム」 、 「ジャンル」、最近再生したすべての履歴をクリアする には、 ボタンで「記録を削除」を選択します。 1. 「お気に入り」に追加します 「お気に入り」以外の曲リスト画面では、ホイールを回転してまた は / を押して目標曲を選択し、M ボタンを押して「お気に入 りに追加」を選択して ボタンで選択を確認します。 2. プレイリストに追加/集中再生/プレイリストを作成 プレイリストに追加します。 「プレイリスト」以外の曲リスト(例 えば:すべての音楽、最近再生した曲など)で、目標曲を 選択し、M ボタンを押して 「プレイリスト」を選択して ボタン...
- Page 66 All manuals and user guides at all-guides.com 更新後、音楽を識別して分類し、「音楽閲覧」で音楽インデック スを作成します。 「自動」を選択する場合は、本器は Micro SD カードから音楽フ ァイルを更新し、パソコンから切断後、追加された曲を自動的に 分類します。 手動で更新したい場合は「手動」を選択し、M ボタ ンを押すと音楽ファイルを更新します。 ご注意:更新中で、中断を防ぐように、任意のボタンを押さない でください。 2. 増幅設定. 「高」と「低」の切り替えを通して、プレーヤーの出 力を調整できます。異なるハードウェア(イヤホン、アンプなど)に 対応できます。 デフォルトは「低」です。 3. Replay Gain. 曲 に よ っ て 音 量 レ ベ ル が 違 い ま す 。 「Replay Gain」をオンにすると、音量レベルを自動的に調整で...
- Page 67 All manuals and user guides at all-guides.com 設定:電源起動状態の音楽の初期音量を設定します。ま ず、「音楽の初期音量設定」で「設定」の状態に切り替えま す。その後、「音楽の初期音量」を見つけて、 ボタンを押し て音量値の調整バーに入ります。 デフォルト値は 20 です。 システム設定 「システム設定」では、言語、テーマ選択、表示設定、ブルートゥ ース設定、USB モード、文字サイズ、リセット、ファームウェアのアッ プデート、本機情報等の選択肢があります。ホイールを回転して または を押して各子機能を選択し、 ボタンを押して再 選択できます。 ボタンを押して戻ります。 1.言語/テーマの選択:9 つの利用可能なシステム言語と 3 つ の利用可能なテーマがあります。 2.文字サイズ:表示された文字のサイズを選択します。(大/ 中/小) 3. 表示設定: バックライトタイム:設定した時間に達すると画面が消灯しま す(電源ボタンを押して画面をオンにします)。 最大値は 「30 分」です。 デフォルトは「1 分」です。 ...
- Page 68 All manuals and user guides at all-guides.com https://www.agptek.com/blog/agptek-h3-usb-dac-windo ws-driver-download-installation をご覧ください。 ご注意: 1)HiBy Link は iOS をサポートしていません。 2)HiByLink は現在、Android システム(4.1 または 4.1 以上)の携帯電話のみをサポートしています。 高音質:ロスレス音源を再生するために、 「高音質」をオン にしてください。 ブルートゥーススキャン: Bluetooth を開い、近くのデバイス を検索します。 検索されたデバイスは「使用可能なデバイ ス」に表示されます。 ペアデバイス:接続に成功したデバイス。 ホイールを回転し てまたは を押してペアしたデバイスから選択し、 ボ タンを押して接続/切断します。 M ボタンを押して「はい」を選...
- Page 69 All manuals and user guides at all-guides.com ます(Micro SD カード内のファイルは保留されます)。 7. ファームウェアのアップデート 1)TF カードをカードスロットに挿入し、USB ケーブルでパソコンに 接続します。 2)デバイスをフォーマットします、パソコンでフォーマットを FAT32 に設定し、update.upt を TF カードにコピーします。 3)本器で、「システム設定」の 「ファームウェアアップデート」を選 択して ボタンで確認し、本器が自動的に再起動してアップグレ ードします。 ご注意: アップグレード中に本器を操作しないでください 8. 端末情報について. メモリー情報(使用済み容量、使用可 能の空き容量)、およびファームウェアのバージョン情報が表示さ れます。 音楽閲覧 「音楽閲覧」では、Micro SD カードまたは OTG デバイスのすべ てファイルをチェックすることができます。...
- Page 70 い。 パソコンからファイルをダウンロードできません - 本器がパソコンに正しく接続されていることを確認します。 - Micro SD カードが本器に挿入されているか、本器が認識され ているか、または Micro SD カードが損傷しているか等を確認しま す。 - Micro SD カードに記憶容量があるかどうかを確認します。 仕様 本器名前 AGPTEK ポータブル HiFi 音楽プレーヤー サイズ 94*57*15mm 重さ 108g スクリーン 2.0 インチ TFT スクリーン (320*240) 1500mA/3.7V リチウム電池 パワー 入力:5V/1A (マイクロ USB) 充電パワー...
- Page 71 All manuals and user guides at all-guides.com 周波数 20Hz-20KHz ダイナミック範 98db 囲 イヤホンインピ 8Ω~150Ω ーダンス 模擬出力 3.5mm ライン出力 3.5mm USB 端子 USB2.0 Micro SD カー 端子 最大 128G に拡張可能 ド 作動温度 40℃ Windows XP/ Vista/ Win7/8.1/ Mac OS 10/Linux 2.4.2 and above 本製品についてのご質問は、support@agptek.com までお 気軽にお問い合わせください。...
- Page 72 All manuals and user guides at all-guides.com...