Rowenta DW52 Serie Manuel D'utilisation
Masquer les pouces
Voir aussi pour DW52 Serie:
- Mode d'emploi (35 pages) ,
- Manuel d'utilisation (37 pages) ,
- Manuel d'utilisation (34 pages)
Publicité
Liens rapides
Publicité

Manuels Connexes pour Rowenta DW52 Serie


Sommaire des Matières pour Rowenta DW52 Serie
- Page 1 DW52XX DW53XX DW82XX DW83XX www.rowenta.com...
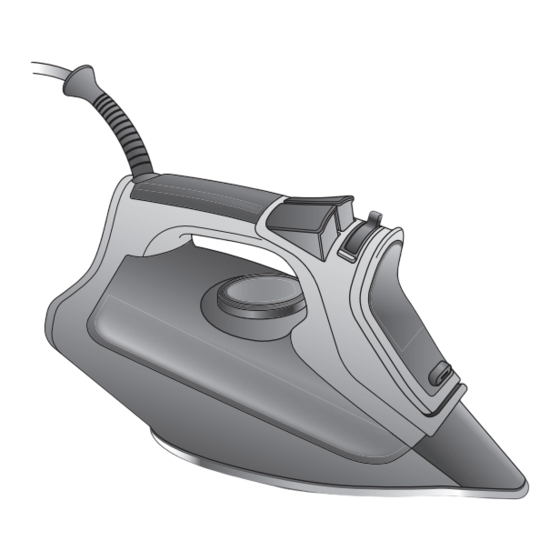
- Page 2 PRODUCT DESCRIPTION 1. Thermostat pilot light 2. Auto off indicator light* 3. Burst of steam button 4. Spray button 5. Steam lever 6. Filling inlet 7. Precision tip 8. Self clean 9. Anti calc valve 10. Anti drip 11. Temperature control dial DESCRIPTIF PRODUIT 1.
- Page 3 IMPORTANT SAFETY INSTRUCTIONS READ ALL INSTRUCTIONS BEFORE USING THE IRON. When using your iron, basic safety precautions should always be followed, including the following: 1. Use iron only for its intended use. 2. To protect against a risk of electric shock, do not immerse the iron in water or other liquids.
- Page 4 SAVE THESE INSTRUCTIONS FOR YOUR SAFETY PLEASE READ THESE INSTRUCTIONS CAREFULLY AND KEEP THEM FOR FUTURE REFERENCE. This appliance complies with the technical rules and standards for safety currently in force (Electromagnetic Compa ti-bility, Low Voltage, Environnement). • This appliance is not intended for use by persons (including children) with reduced physical, sensory or mental ca pa-bilities, or lack of experience and knowledge, unless they have been given supervision or instruction concerning use of the appliance by a person responsible...
- Page 5 • This product has been designed for domesic and indoor use only. The manufacturer will accept no responsibility and the gua-rantee will be terminated, if this product is used for commercial purposes, inappropriate use or failure to comply with the instructions. WHAT WATER TO USE? Your appliance was designed to operate using untreated tap water.
- Page 6 If there is a problem? PROBLEM POSSIBLE CAUSE SOLUTION Water drips from the You are using steam while Wait until the thermostat light holes in the soleplate. the iron is not hot enough. goes out. You are using the shot of Wait a few seconds between steam button too often.
- Page 7 CONSIGNES DE SECURITE LISEZ ENTIÈREMENT LE MODE D’EMPLOI AVANT D’UTILISER LE FER. Lorsque vous utilisez votre fer à repasser, veillez à prendre quelques précautions élémentaires, les suivantes, en particulier : 1. N’utilisez le fer que pour l’usage pour lequel il a été conçu. 2.
- Page 8 CONSERVEZ CES INSTRUCTIONS POUR VOTRE SÉCURITÉ MERCI DE LIRE ATTENTIVEMENT CE MODE D’EMPLOI ET DE LE CONSERVER. Pour votre sécurité, cet appareil est conforme aux normes et réglementations applicables (Directives Basse Tension, Compatibilité Electromagnétique, Environnement …). • Cet appareil n’est pas prévu pour être utilisé par des personnes (y compris les enfants) dont les capacités physiques, sensorielles ou mentales sont réduites, ou des personnes dénuées d’expérience ou de connaissance, sauf si elles ont pu bénéficier, par l’intermédiaire...
- Page 9 vapeur qui peut occasionner des brûlures, spécialement lorsque vous repassez sur un angle de votre table à repasser. Ne dirigez jamais la vapeur sur des personnes ou des animaux. • Votre fer doit être utilisé et posé sur une surface stable résistant à la chaleur.
- Page 10 Y a-t-il un problème ? PROBLÈME CAUSE POSSIBLE SOLUTION De l’eau s’écoule Vous utilisez de la vapeur Attendez que l’indicateur du par les trous de la alors que le fer n’est pas thermostat s’éteigne. semelle. encore assez chaud. Vous utilisez trop Attendez quelques secondes fréquemment le bouton de avant d’appuyer sur le bouton...
- Page 11 INSTRUCCIONES DE SEGURIDAD Lea todas las instrucciones antes de utilizar su aparato. Cuando utilice su plancha respete las siguientes instrucciones de seguridad: 1. Utilice su aparato sólo para la aplicación para la que ha sido creado. 2. No sumerja su aparato en agua o cualquier otro líquido para evitar cualquier riesgo de descarga eléctrica.
- Page 12 el cable de forma que sea imposible jalar de él o tropezar con él por inadvertencia. Si el cordón de alimentación es dañado, éste debe ser reemplazado por el fabricante o su agente de servicio o por personal calificado para evitar el riesgo. CONSERVE ESTAS INSTRUCCIONES PARA SU SEGURIDAD LEA DETENIDAMENTE ESTE MANUAL DE INSTRUCCIONES Y...
- Page 13 • La suela de la plancha puede estar muy caliente : no la toque nunca y deje que la plancha se enfríe antes de guardarla. El aparato emite vapor que puede producir quemaduras, especialmente cuando planche en un ángulo de la tabla de planchar. No dirija nunca el vapor hacia personas o animales.
- Page 14 En caso de algún problema PROBLEMA POSIBLE CAUSA SOLUCIÓN El agua gotea de los Está usted usando Espere hasta que la luz del agujeros de la placa de el vapor mientras la termostato se apague. asiento. plancha aún no está lo suficientemente caliente.
- Page 15 1. SET UP / MISE EN ROUTE / PONER EN MARCHA Remove the soleplate cover. Enlevez la protection de la semelle. Retire la proteccion de la suela. Set the steam lever on position. Placez la commande de régulation de la vapeur sur la position Girar el regulador de vapor a la posicion planchado sin vapor...
- Page 16 Stop filling water when MAX level is reached. Arrêtez de remplir le réservoir lorsque le niveau MAX est atteint. Parar de llenar el tanque cuando se haya alcanzado el nivel MAX. Close the filling inlet door. Fermez la trappe de remplissage. Cerrar el orificio de llenado.
- Page 17 The pilot light is switched on when the iron is heating up. Le voyant lumineux est allumé lorsque le fer est en chauffe. Al encedenrse la luz piloto, se indica el calentamiento de la suela. Once the pilot light is switched off the iron is ready to be used and steam can be activated.
- Page 18 When Auto Off function is on the Auto Off indicator light blinks and the iron starts to cool down. Lorsque la fonction Arrêt Automatique est activée l’indicateur lumineux d’arrêt automatique clignote et le fer commence à refroidir. Cuando la funcion Autoapagado está...
- Page 19 3. SETTING THE TEMPERATURE Synthetics Wool - Silk Linen - Cotton 4. DRY IRONING / REPASSAGE A SEC / PLANCHAR SIN VAPOR Set the steam lever on position. Placez la commande de régulation de la vapeur sur la position Girar el regulador de vapor sobre la posición 5.
- Page 20 6. SHOT OF STEAM / JET DE VAPEUR / GOLPE DE VAPOR Set the thermostat knob on MAX position. Placez le bouton de thermostat sur la position MAX. Girar el botón de termostato al MAX. sec. Press the burst of steam button for 1 second.
- Page 21 7. VERTICAL STEAM / VAPEUR VERTICALE / VAPOR VERTICAL Set the thermostat knob on MAX position. Placez le bouton de thermostat sur la position MAX. Girar el botón del termostato al MAX. sec. Hold the iron vertically and press the shot of steam button for 1 second.
- Page 22 Do not do vertical steaming on yourself or on others. Ne défroissez pas verticalement sur vous même ou sur les autres. No realizar el planchado vertical sobre sí mismo u otra persona. 8. WARNING / ATTENTION / ATENCIÓN When the iron is plugged put it on its heel.
- Page 23 Una vez que la suela haya enfriado puede limpiarla con un trapo húmedo ó con un estropajo. Do not use detergent to clean the soleplate. We recommend the Rowenta soleplate cleaning kit. Do not use sharp or abrasive cleaning accessories to clean the soleplate.
- Page 24 10. IRON STORAGE / RANGEMENT DU FER / GUARDAR LA PLANCHA Unplug the iron. Débranchez le fer. Desenchufar la plancha. Switch the steam lever / STOP or iron may leak if some water remains in the iron. Placez la commande de régulation de la vapeur sur la position / STOP pour éviter au fer de fuir si il reste de l’eau...
- Page 25 Wrap the cord around the iron’s heel and store it in vertical position. Enroulez le cordon autour du talon du fer et rangez le en position verticale. Enrollar el cordón del talón y guardar la plancha en posición vertical. Do not store the iron in horizontal position.
- Page 26 11. CLEANING THE ANTI CALC VALVE (every two months) NETTOYAGE DE LA TIGE ANTI CALCAIRE (tous les deux mois) LIMPIEZA DE LA VARILLA ANTICALCAREA (cada dos meses) 6x YEARS/ ANNEE / ANO We recommend to clean the calc collector every 2 months. Nous recommandons de nettoyer le collecteur de calcaire tous les 2 mois .
- Page 27 Empty the water tank over a sink. Videz le réservoir au dessus d’un évier. Vaciar el tanque en un lavabo. Push the 2 buttons on the left & right side of the valve pin to unlock to a mid position. Appuyez sur les 2 boutons situés à...
- Page 28 Soak the anti calc valve in a cup of plain lemon juice or a cup of white vinegar for 4 hours. WARNING: never touch the end of the valve. Laissez tremper la tige anti calcaire pendant 4 heures dans un verre de vinaigre d’alcool blanc ou du jus de citron pur.
- Page 29 12. SELF CLEANING ( every two ) / AUTO NETTOYAGE ( weeks toutes ) / AUTOLIMPIEZA les 2 semaines cada 2 semanas We recommend to clean the calc collector every 2 weeks. Nous recommandons de nettoyer le collecteur de calcaire toutes les 2 semaines.
- Page 30 Set the thermostat knob on MAX position. Placez le bouton de thermostat sur la position MAX. Girar el botón del termostato al posicion MAX. The pilot light is switched on when the iron is heating up. Le voyant lumineux est allumé lorsque le fer est en chauffe.
- Page 31 Hold the iron over a sink. Tenez votre fer au dessus d’un évier. Colocar la plancha sobre un lavabo. Push the 2 buttons on the left & right side of the valve pin to relaese valve pin to the self clean position. Appuyez sur les 2 boutons situés à...
- Page 32 Replace the anti calc valve into position. CLICK Remettez la tige anti calcaire en place. Volver a colocar la válvula anticálcarea. Plug the iron. Branchez le fer. Enchufar la plancha. Let the iron heat up for 2 minutes to dry 2 min.
- Page 33 Una vez que la suela haya enfriado puede limpiarla con un trapo húmedo ó con un estropajo. Do not use detergent to clean the soleplate. We recommend the Rowenta soleplate cleaning kit. Do not use sharp or abrasive cleaning accessories to clean the soleplate.
- Page 34 1820010698...