
Manuels Connexes pour Hansgrohe PuraVida 15073


Sommaire des Matières pour Hansgrohe PuraVida 15073
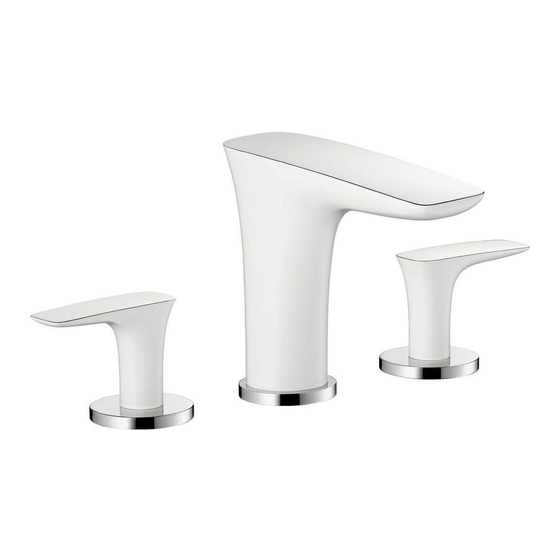
- Page 1 EN Installation / User Instructions / Warranty FR Instructions de montage / Mode d'emploi / Garantie ES Instrucciones de montaje / Manejo / Garantía PuraVida 15073xx1...
- Page 2 À prendre en considération pour be installed by a licensed, professional plumber. l’installation • Please read over these instructions thoroughly before beginning installation. Make sure that you have all • Pour de meilleurs résultats, Hansgrohe recommande tools and supplies needed to complete the installation. que ce produit soit installé par un plombier professionnel licencié. • This faucet requires ½" hot and cold supply lines (not included).
- Page 3 Español Datos tecnicos Tools Required / Outiles Utiles / Herramientas Útiles Presión recomendada en servicio 15 - 75 PSI Presión en servicio max. 145 PSI Temperatura recomendada del 120° - 140° F* 9 mm agua caliente 16 mm Temperatura del agua caliente max. 176° F* Caudal máximo 1.2 GPM Tamaño del orificio en la superficie de montaje caño 1⅜" válvulas 1¼" Profundidad máxima de la 1⅜" superficie de montaje *Debe conocer y cumplir todos los códigos locales apli- cables para ajustar la temperatura del calentador de agua. Consideraciones para la instalación • Para obtener mejores resultados, la instalación debe This unit meets or exceeds the following: estar a cargo de un plomero profesional matriculado.
- Page 4 3" 5⅞" 2⅜" 4" 2" 2" 2" 1¼" 1⅛" ½ 8"...
- Page 5 Installation / Installation / Instalación red / rouge / rojo English Français Español To insure correct operation of the Installez la valve de l’eau chaude Para que el grifo funcione cor- faucet, install the hot valve on the à gauche et celle de l’eau froide rectamente, el suministro de agua left and the cold valve on the right. à droite. caliente debe estar a la izquierda y el de agua fría a la derecha. Remove the valve mounting nuts Retirez l’anneau de montage. from the valves. Retire el oro de montaje. Installez la valve. Install the valves. Instale la válvula. Installez l’anneau de montage sur Install the mounting nuts. la valve. Instale el aro de montaje.
- Page 6 English Français Español Rest the valve on the mounting Déposez la valve sur la surface de Apoye la válvula en la superficie surface. montage. de montaje. Tighten the screws by hand. Serrez l’écrou de montage et les Apriete los tornillos con la mano. vis de serrage. Turn the valve stems to the off Fermez les robinets. Gire los vástagos de las válvulas a position. la posición cerrada. Lubrifiez légèrement les tiges et les Lightly lubricate the stems and the filets sur les plaques de montage Lubrique ligeramente los vástagos threads on the handle mount- en utilisant de la graisse de plom- y las roscas en las placas de ing plates using white plumbers' berie blanche. montaje con grasa blanca para grease. plomería.
- Page 7 5.2 ft-lb 7 Nm English Français Español Install the handles. Installez les poignées. Instale las manijas. Secure the handle to the valve by Tournez la cloche de la poignée Fije la manija a la válvula girando rotating the escutcheon clockwise. dans le sens horaire pour qu’elle el escudo en sentido horario. se visse sur la tige de la valve. Inspect the alignment of the Vérifiez l’alignement des poignées. Inspeccione la alineación de las handles. manijas. S’il ne convient pas, deserrez les If it is unsatisfactory, loosen the vis et tournez le robinet. Si no es satisfactoria, afloje los screws and rotate the valve. tornillos y gire la válvula. Serrez les vis. Tighten the tensioning screws using Apriete los tornillos tensores con a screwdriver. un destornillador.
- Page 8 2.2 ft-lb 3 Nm English Français Español Place the spout assembly on the Déposez le bec sur la surface de Apoye el surtidor en la superficie mounting surface. montage. de montaje. Install fiber washer, metal washer, Installez la rondelle en fibre, la Instale la arandela de fibra, la and mounting nut. rondelle métalilique, et l’écrou de arandela metálica y la tuerca de montage sur le bec. montaje en el surtidor. Serrez l'écrou de montage. Apriete la tuerca de montaje. Tighten the tensioning screws. Serrez les vis de pression. Apriete los tornillos tensores.
- Page 9 9 mm 16 mm 5.9 ft-lb 8 Nm English Français Español Connect the hoses to the valves. Poussez l’extrémité du tuyau dans Conecte las mangueras a las válvulas. l’orifice de la valve. Tighten the hose nuts using two wrenches, as shown. Serrez fermement l’écrou à l’aide Apriete las tuercas de la d’une clé. manguera con dos llaves, como se Do not allow the muestra. hoses to twist. Faites en sorte No permita las que le tuyau de A twisted hose may raccordement ne mangueras se...
- Page 10 > 2 min English Français Español Flush the faucet for at least two Rincez le robinet pendant au Lave el grifo durante al menos 2 minutes. moins 2 minutes. minutos. Install the aerator. Installez l’aérateur. Instale el aireador. Do not overtighten Ne serrez pas No apriete el the aerator, or trop l’aérateur, aireador en exceso, damage may result. vous pourriez puesto que podría l’endommager.
- Page 11 Replacement Parts / Pièces détachées / Repuestos 95271xx0 98139000 95270xx0 (18x2.5) 94008000 95787000 95290000 (32x2.5) 92880000 92634000 98127000 (40x3) (11x2) 94009000 13961000 97357000 96321001 xx = Finishes / Couleurs / Acabados 00 chrome 40 white/chrome...
- Page 12 User Instructions / Instructions de service / Manejo ouvert fermé abierto cerrar cold chaud froid frío caliente Cleaning / Nettoyage / Limpiar...
- Page 13 • Damage to the product caused by improper care or the use of improper cleaning agents is not covered by the warranty. • If a component of the product is damaged, replace it, as there is risk of injury. Conseil de nettoyage pour les produits Hansgrohe Les robinets pour les salles de bains et les cuisines modernes ainsi que les produits récents pour les douches se composent de matériaux différents afin de satisfaire aux besoins du marché en termes de conception et de fonctionnalité. Afin d'éviter d'endommager le produit, il est nécessaire d'en prendre soin.
- Page 14 Les dommages au produit causés par un mauvais entretien ou par l'utilisation de produits de net- toyage inadéquats ne sont pas couverts par la garantie. • Si un composant du produit est endommagé, remplacez-le, car il existe un risque de blessure. Recomendación de limpieza para los productos de Hansgrohe Hoy en día, las griferías de baño y de cocina así como duchas modernas se componen de materiales muy distintos para satisfacer las exigencias del mercado respecto al diseño y la funcionalidad. Para evitar daños y reclamaciones hay que tener en cuenta ciertos aspectos tanto en el uso como en su limpieza.
- Page 15 WHAT IS COVERED BY THE WARRANTY The warranty covers only your Hansgrohe manufactured product. Hansgrohe warrants this product against defects in material or workmanship as follows: Hansgrohe will replace at no charge for parts only or, at its option, replace any product or part of the product that proves defective because of improper workmanship and/or material, under normal installation, use, service and maintenance. If Hansgrohe is unable to provide a replacement and repair is not practical or cannot be made in timely fashion, Hansgrohe may elect to refund the purchase price in exchange for the return of the product. LENGTH OF WARRANTY Replacement or repaired parts of products will be covered for the term of this warranty, as stated in the following two sentences. If you are a consumer who purchased the product for use primarily for personal, family or household purposes, this warranty extends for as long as you own the product and the home in which the product is originally installed. If you purchased the product for use primarily for any other purpose, including, without limitation, a commercial purpose, this warranty extends only (i) for 1 year, with respect to Hansgrohe & Commercial prod- ucts, and (ii) for 5 years, with respect to Axor products. THIS WARRANTY DOES NOT COVER, AND HANSGROHE WILL NOT PAY FOR: A. Conditions, malfunctions or damage not resulting from defects in material or workmanship. B. Conditions, malfunctions or damage resulting from normal wear and tear, improper installation, improper maintenance, misuse, abuse, negligence, accident or alteration; the use of abrasive or caustic cleaning agents or “no-rinse” cleaning products, or the use of the product in any manner contrary to the product instructions; or conditions in the home such as excessive water pressure or corrosion. C. Labor and other expenses for disconnection, deinstallation, or return of the product for warranty service (including but not limited to proper packaging and shipping costs), or for installation or reinstallation of the product. D. Accessories, connected materials and products, or related products not manufactured by Hansgrohe. E.
- Page 16 ANY PERSON TO CREATE FOR IT ANY OTHER OBLIGATION OR LIABILITY IN CONNECTION WITH THIS PRODUCT. HANSGROHE SHALL NOT BE LIABLE TO PURCHASER OR ANY OTHER PERSON FOR ANY INCIDENTAL,SPECIAL OR CONSEQUENTIAL DAMAGES,ARISING OUT OF BREACH OF THIS WARRANTY OR ANY IMPLIED WARRANTY (INCLUDING BUT NOT LIMITED TO ANY IMPLIED WARRANTY OF MERCHANTABILITY).