Publicité
Les langues disponibles
Les langues disponibles
Liens rapides
All manuals and user guides at all-guides.com
HE20
Room
Cinema System
user manual
imagine
the possibilities
Thank you for purchasing this Samsung product.
To receive more complete service,
please register your product at
www.samsung.com/global/register
Publicité

Manuels Connexes pour Samsung HE20


Sommaire des Matières pour Samsung HE20
- Page 1 All manuals and user guides at all-guides.com HE20 Room Cinema System user manual imagine the possibilities Thank you for purchasing this Samsung product. To receive more complete service, please register your product at www.samsung.com/global/register...
- Page 2 TV Screen Saver Function If the main unit remains in Stop mode for 3 minutes, Samsung logo appears on TV screen. The RTS-HE20 automatically switches itself into the power saving mode after 20 minutes in the Screen Saver mode. Power Saving Function The RTS-HE20 automatically shuts itself off after 20 minutes in Stop mode.
- Page 3 All manuals and user guides at all-guides.com Safety information SAFETY WARNINGS TO REDUCE THE RISK OF ELECTRIC SHOCK, DO NOT REMOVE THE COVER(OR BACK). NO USER-SERVICEABLE PARTS ARE INSIDE. REFER SERVICING TO QUALIFIED SERVICE PERSONNEL. This symbol indicates “dangerous voltage” inside the product that presents a risk of CAUTION electric shock or personal injury.
- Page 4 All manuals and user guides at all-guides.com PRECAUTIONS Ensure that the AC power supply in your house complies with the identification sticker located on the back of your player. Install your player horizontally, on a suitable base (furniture), with enough space around it for ventilation (7.5~10cm). Make sure the ventilation slots are not covered. Before moving the player, ensure the disc tray is empty.
- Page 5 All manuals and user guides at all-guides.com contents FEATURES What’s included SAFETY INFORMATION Safety Warnings Precautions GETTING STARTED Before Reading the User’s Manual Playable Discs Do not use the following types of disc! Copy Protection Disc Type and Characteristics 10 Front Panel DESCRIPTION 11 Rear Panel REMOTE CONTROL...
- Page 6 All manuals and user guides at all-guides.com SYSTEM SETUP 34 Setting the Language 34 Setting The Display 37 Rating Level 37 Change Password 38 DIVX(R) Registration 38 Setting the DRC 38 Setting the AV-SYNC 38 Setting the EQUALIZER Function 39 Setting the DSP Function 39 SLEEP TIMER Function 39 Adjusting Display Brightness 40 Listening to Radio...
- Page 7 If a problem occurs, check the Troubleshooting. (See pages 41) Copyright ©2009 Samsung Electronics Co.,Ltd. All rights reserved; No part or whole of this user’s manual may be reproduced or copied without the prior written permission of Samsung Electronics Co.,Ltd.
- Page 8 All manuals and user guides at all-guides.com Getting started DVD (Digital Versatile Disc) offers fantastic audio and video, thanks to Dolby Digital surround sound and MPEG-2 video compression technology. Now you can enjoy these realistic effects in the home, as if you were in a movie Cinema or concert hall. Room Cinema Systems and the discs are coded by region.
- Page 9 All manuals and user guides at all-guides.com Getting started DISC TYPE AND CHARACTERISTICS This product does not support Secure (DRM) Media fi les. ❖ CD-R Discs • Some CD-R discs may not be playable depending on the disc recording device (CD-Recorder or PC) and the condition of the disc.
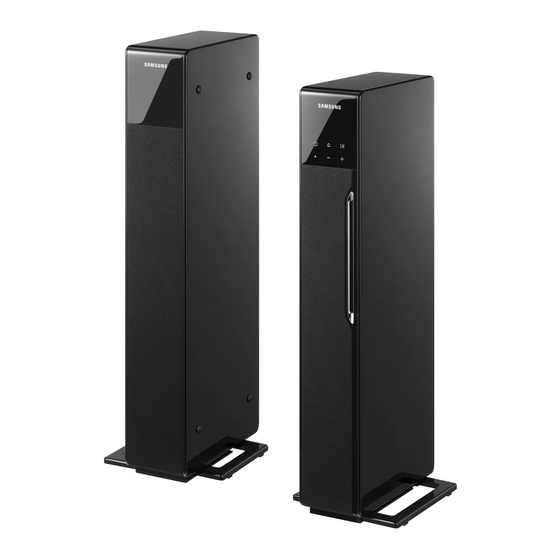
- Page 10 Volume Control (+) Display Service for Speaker system is not available. For speaker system replacement please contact your authorised Samsung Service Centre. If you press the button. there will be a Bip Sound. There will be a delay between 3 seconds, when you touch the Power ON/OFF.
- Page 11 All manuals and user guides at all-guides.com REAR PANEL SPEAKER OUTPUT CONNECTORS Connect Left, subwoofer speakers. Connect digital still camera, MP3 Player, memory stick, card reader, or USB Host other removable storage devisces. Connect to the Analogue output of an external device (such as a MP3 AUX IN JACK Player) Use the HDMI cable, connect this HDMI output terminal to the HDMI...
- Page 12 All manuals and user guides at all-guides.com Remote control Operation Range of the Remote Control The remote control can be used up to approximately 23 feet (7 meters) in a straight line. It can also be operated at a horizontal angle of up to 30° from the remote control sensor.
- Page 13 All manuals and user guides at all-guides.com TOUR OF THE REMOTE CONTROL...
- Page 14 All manuals and user guides at all-guides.com Remote control POWER button DSP button DVD button TREBLE/BASS button USB button TUNER MEMORY button Number buttons (0 ~ 9) ZOOM button CD Ripping button REMAIN button STEP Button MO/ST button REVERSE/FORWARD Skip buttons SUBTITLE button VOLUME button EXIT button...
- Page 15 All manuals and user guides at all-guides.com Connections This section involves various methods of connecting the Digital Room Cinema to other external components. Before moving or installing the product, be sure to turn off the power and disconnect the power cord. CONNECTING THE SPEAKERS Position of Digital Room Cinema Place it on a stand or cabinet shelf, or under the TV stand.
- Page 16 All manuals and user guides at all-guides.com Connections Connecting The Speakers Press down the terminal tab on the back of the speaker. Insert the black wire into the black terminal (–) and the red wire into the red (+) terminal, and then release the tab. Connect the connecting plugs to the back of the Room Cinema.
- Page 17 All manuals and user guides at all-guides.com CONNECTING THE VIDEO OUT TO YOUR TV Choose one of the three methods for connecting to a TV. METHOD3 METHOD2 METHOD1 (supplied) (supplied) METHOD 1 : HDMI Connect the HDMI cable from the HDMI OUT jack on the back of the Room Cinema System to the HDMI IN jack on your TV.
- Page 18 (TV, projector. etc). Content is encrypted at the source device to prevent unauthorisedd copies from being made. • What is Anynet+? Anynet+ is a convenient function that offers linked operation of this unit through Samsung TVs with the Anynet+ feature. •...
- Page 19 All manuals and user guides at all-guides.com CONNECTING AUDIO FROM EXTERNAL COMPONENTS AUX1 : Connecting an External Component/MP3 player Components such as an MP3 Player Connect AUX IN (Audio) on the Room Cinema to the Audio Out of the external component/MP3 player.
- Page 20 All manuals and user guides at all-guides.com Connections CONNECTING THE FM ANTENNA Connect the FM antenna supplied to the FM 7Ω COAXIAL Jack. Slowly move the antenna wire around until you fi nd a location where reception is good, then fasten it to a wall or other rigid surface.
- Page 21 All manuals and user guides at all-guides.com Before using your room theatre THE ROOM CINEMA SYSTEM Plug the main unit's power cord into the AC power supply. Press the DVD button to switch to DVD mode to operate the DVD Room Cinema.
- Page 22 All manuals and user guides at all-guides.com Playback DISC PLAYBACK Load a disc vertically into the Disc Insert Hole. • Place a disc vertically into a disc slot with the disc facing right. PLAY ( ) button. • Playback starts automatically. To stop playback, press the STOP ( ...
- Page 23 All manuals and user guides at all-guides.com MP3/WMA-CD PLAYBACK Data CDs (CD-R, CD-RW) encoded in MP3/WMA format can be played. Load the MP3/WMA disc. • The MP3/WMA menu screen will appear and playback will start. • The appearance of the menu depends on the MP3/WMA disc.
- Page 24 All manuals and user guides at all-guides.com Playback JPEG FILE PLAYBACK Images captured with a digital camera or camcorder, or JPEG fi les on a PC can be stored on a CD and then played back with this Room Cinema. Picture Library ...
- Page 25 All manuals and user guides at all-guides.com DIVX PLAYBACK The functions on this page apply to DivX disc playback. Skip Forward/Back During playback, press the [ ®®l button. l√√ • Goes to the next fi le whenever you press the $ button, if there are over 2 fi...
- Page 26 All manuals and user guides at all-guides.com Playback DivX(Digital internet video eXpress) DivX is a video fi le format developed by Microsoft and is based on MPEG4 compression technology to provide audio and video data over the Internet in real-time. MPEG4 is used for video encoding and MP3 for audio encoding so that the users can watch a movie at near DVD-quality video and audio.
- Page 27 All manuals and user guides at all-guides.com USING THE PLAYBACK FUNCTION Displaying Disc Information To view the current Title, Chapter, and counter position, press the INFO button during DVD playback. The display screen can also be used to quickly choose a title, chapter, or playing time.
- Page 28 All manuals and user guides at all-guides.com Playback Fast Playback Press the ( √√ ®® ) button. • Each time the button is pressed during playback, the playback speed changes as follows: X2 X4 X8 X16 ...
- Page 29 All manuals and user guides at all-guides.com Repeat Playback Repeat playback allows you to repeatedly play a chapter, title, track (song), or directory (MP3 fi le). Press the REPEAT button. • Each time the button is pressed during playback, the repeat playback mode changes as follows: REPEAT : CHAPTER ¨...
- Page 30 All manuals and user guides at all-guides.com Playback Zoom (Screen Enlarge) Function This function allows you to enlarge a particular area of the displayed image. Press the ZOOM button. Press the Cursor ▲, ▼, ◄, ► button to move to ANGLE display. Press the ENTER button.
- Page 31 All manuals and user guides at all-guides.com Depending on a disc, the Disc Menu may not work. Using the Title Menu For DVDs containing multiple titles, you can view the title of each movie. Depending on the disc, the availability of this feature may vary.
- Page 32 All manuals and user guides at all-guides.com Playback Safe USB Removal To prevent damage to the memory stored in the USB device, perform safe removal before disconnecting the USB cable. • Press the STOP ( ) button • Remove the USB cable. Skip Forward/Back During playback, press the ( ®®l...
- Page 33 All manuals and user guides at all-guides.com Supported Formats File Sampling Format File name Bit rate Version Pixel extension Frequency Still Picture JPG .JPEG – – 640x480 – .MP3 80~384kbps – – 44.1kHz Music .WMA 56~128kbps – 44.1kHz DivX3.11~ Movie DivX .AVI,.ASF 4Mbps...
- Page 34 All manuals and user guides at all-guides.com System setup System setup For your convenience, you can set this Room Cinema's features for the best use in your home environment. SETTING THE LANGUAGE OSD(On-Screen Display) language is set to English by default. No Disc ®...
- Page 35 All manuals and user guides at all-guides.com 4:3 Letter box Select this to play a 16:9 picture in the letter box mode on a conventional TV. Black bars will appear at the top and bottom of the screen. 4:3 Pan&Scan Select this to play a 16:9 picture in the pan &...
- Page 36 DISPLAY SETUP No Disc Setting Up the BD Wise ® TV Aspect : Wide Disc Menu When the player is connected to a SAMSUNG TV which supports “BD ® Screen Messages : On TV System : PAL ® Wise”,you can enjoy optimized Picture Quality by setting the “BD Wise”...
- Page 37 All manuals and user guides at all-guides.com SETTING (RATING LEVEL) Use this to restrict playback of adult or violent DVDs you do not want Setup No Disc Language Setup ® children to view. Disc Menu ® Display Setup In Stop mode, press the MENU button. ®...
- Page 38 All manuals and user guides at all-guides.com System setup d Press the RETURN button to return to the previous level. d Press the EXIT button to exit the setup screen. This function works only if a DVD disc contains the rating level information. DVIX (R) REGISTRATION Please use the Registration code to register this player with the DivX (R) video on demand format.
- Page 39 All manuals and user guides at all-guides.com SETTING THE DSP FUNCTION DSP(Digital Signal Processor) : DSP modes have been designed to simulate different acoustic environments. Press the DSP button. • Each time the button is pressed, the selection changes as follows: STUDIO ➞...
- Page 40 All manuals and user guides at all-guides.com Radio LISTENING TO RADIO This feature lets you to listen FM radio from this Room Cinema System. Anytime we want to display FM radio menu, just press TUNER button on the remote control. Press the TUNER button.
- Page 41 Refer to the chart below when this unit does not function properly. If the problem you are experiencing is not listed below or if the instruction below does not help, turn off the unit, disconnect the power cord, and contact the nearest authorisedd dealer or Samsung Electronics Service Centre. SYMPTOM Check/Remedy I cannot eject the disc.
- Page 42 128 MB MP3 Player YP-780 Samsung MP3 Player Iriver H320 Iriver 20G HDD MP3 Player YP-35 Samsung MP3 Player YH-920 Samsung 20G HDD MP3 Player YP-55 Samsung MP3 Player YP-T7 Samsung MP3 Player iAUDIO U2 Cowon MP3 Player YP-MT6 Samsung...
- Page 43 All manuals and user guides at all-guides.com Appendix CAUTIONS ON HANDLING AND STORING DISCS Small scratches on the disc may reduce sound and picture quality or cause skipping. Be especially careful not to scratch discs when handling them. Handling discs Do not touch the playback side of the disc.
- Page 44 Dimensions (W x H x D) Front : 4.0 Kg Weights Subwoofer : 3.8 Kg *: Nominal specifi cation - Samsung Electronics Co., Ltd reserves the right to change the specifi cations without notice. - Weight and dimensions are approximate.
- Page 45 All manuals and user guides at all-guides.com Contact SAMSUNG WORLD WIDE If you have any questions or comments relating to Samsung products, please contact the SAMSUNG customer care center. Region Country Contact Center Web Site CANADA 1-800-SAMSUNG(726-7864) www.samsung.com/ca North America...
- Page 46 All manuals and user guides at all-guides.com Correct Disposal of This Product (Waste Electrical & Electronic Equipment) (Applicable in the European Union and other European countries with separate collection systems) This marking on the product, accessories or literature indicates that the product and its electronic accessories (e.g.
- Page 47 All manuals and user guides at all-guides.com HE20 Système Home cinéma Manuel d’utilisation Un monde de possibilités Merci d'avoir choisi Samsung. Pour bénéfi cier d’un service plus complet, enregistrez votre produit sur le site www.samsung.com/global/register...
- Page 48 Lecture multiformat et tuner FM Le RTS-HE20 allie une fonction de lecture multiformat (DVD-VIDEO, CD, CD MP3, CD WAV, DivX, CD R/RW) à un tuner FM sophistiqué, le tout dans un seul lecteur. Prise en charge des hôtes USB Vous pouvez connecter et lire des fi...
- Page 49 All manuals and user guides at all-guides.com consignes de sécurité AVERTISSEMENTS AFIN DE LIMITER LES RISQUES D'ÉLECTROCUTION, NE RETIREZ JAMAIS LE COUVERCLE (OU LE CACHE ARRIÈRE). AUCUN DES ÉLÉMENTS INTERNES N'EST RÉPARABLE PAR L'UTILISATEUR. CONFIEZ L'ENTRETIEN DE CET APPAREIL À UNE PERSONNE QUALIFIÉE. Ce symbole signale la présence à...
- Page 50 All manuals and user guides at all-guides.com consignes de sécurité PRÉCAUTIONS Assurez-vous que l’alimentation secteur de votre maison est conforme aux indications inscrites sur l'autocollant d'identifi cation situé à l'arrière de votre lecteur. Installez votre lecteur à l’horizontale, sur une surface appropriée (meuble), et ménagez un espace autour suffi sant pour la ventilation (7,5 à...
- Page 51 All manuals and user guides at all-guides.com contenu FONCTIONS Contenu CONSIGNES DE SÉCURITÉ Avertissements Précautions INFORMATIONS PRÉALABLES Avant de lire le manuel d'utilisation Disques compatibles Types de disques non compatibles Protection contre la copie Types de disque et caractéristiques DESCRIPTION 10 Façade 11 Panneau arrière TÉLÉCOMMANDE...
- Page 52 All manuals and user guides at all-guides.com contenu CONFIGURATION DU SYSTÈME 35 Réglage de la langue 35 Confi guration du type d’écran du téléviseur 38 Confi guration (niveau de classfi cation) 38 Changement de mot de passe 39 Enregistrement DIVX (R) 39 Confi...
- Page 53 En cas de problème, consultez la section Dépannage. (reportez-vous aux pages 42 à 43) Copyright ©2009 Samsung Electronics Co.,Ltd. Tous droits réservés ; il est interdit de reproduire ou de copier tout ou partie de ce manuel d'utilisation sans l'accord préalable écrit de Samsung Electronics Co., Ltd.
- Page 54 All manuals and user guides at all-guides.com informations préalables Le DVD (Digital Versatile Disc) offre une qualité audio et vidéo exceptionnelle grâce au son ambiophonique Dolby Digital et à la technologie de compression vidéo MPEG-2. Désormais, vous pouvez bénéficier de ces effets très réalistes chez vous, comme si vous étiez dans une salle de cinéma ou de concert.
- Page 55 All manuals and user guides at all-guides.com TYPES DE DISQUE ET CARACTÉRISTIQUES Cet appareil ne prend pas en charge les fi chiers sécurisés (DRM) (Gestion des droits numériques). ❖ Disques CD-R • Certains disques CD-R ne peuvent pas être lus en fonction du périphérique d’enregistrement utilisé (graveur de CD ou ordinateur) et de l’état du disque.
- Page 56 Réglage du volume (+) Affi chage La réparation des enceintes n’est pas possible. Pour le remplacement des enceintes, veuillez contacter votre centre de dépannage Samsung agréé. Si vous appuyez sur le bouton. il y aura un bip sonore. ...
- Page 57 All manuals and user guides at all-guides.com PANNEAU ARRIÈRE CONNECTEURS DE SORTIE DES Permettent de brancher l'enceinte gauche et le caisson de basse. ENCEINTES Permet de brancher un appareil photo numérique, un lecteur MP3, une Hôte USB carte mémoire Memory Stick, un lecteur de carte ou tout autre support de stockage amovible.
- Page 58 All manuals and user guides at all-guides.com télécommande Portée de fonctionnement de la télécommande La télécommande peut être utilisée jusqu’à environ 7 mètres en ligne droite. Elle peut également être utilisée à un angle horizontal de 30° maximum par rapport au capteur de la télécommande. Insertion des piles de la télécommande 1.
- Page 59 All manuals and user guides at all-guides.com FONCTIONS DE LA TÉLÉCOMMANDE...
- Page 60 All manuals and user guides at all-guides.com télécommande Bouton POWER (MARCHE/ARRÊT) Bouton DSP Bouton DVD Bouton TREBLE/BASS Bouton USB (USB) Bouton TUNER MEMORY Touches numériques (0 à 9) Bouton ZOOM Bouton CD Ripping Bouton REMAIN Bouton STEP (PAS À PAS) Bouton MO/ST Boutons de saut AVANT/ARRIÈRE Bouton SUBTITLE...
- Page 61 All manuals and user guides at all-guides.com branchements Cette section indique différents modes de branchement du Home cinéma numérique à d'autres périphériques externes. Avant de déplacer ou d'installer l’appareil, mettez-le hors tension et débranchez le cordon d’alimentation. BRANCHEMENT DES ENCEINTES Position du Home cinéma numérique Placez-le sur un support, une étagère ou dans le meuble TV.
- Page 62 All manuals and user guides at all-guides.com branchements Branchement des enceintes Appuyez sur la languette de la borne située à l’arrière de l'enceinte. Insérez le fi l noir dans la borne noire (-) et le fi l rouge dans la borne rouge (+) puis relâchez la languette.
- Page 63 All manuals and user guides at all-guides.com BRANCHEMENT DE LA SORTIE VIDÉO SUR LE TÉLÉVISEUR Choisissez l’une des méthodes suivantes pour le branchement sur le téléviseur. MÉTHODE 1 MÉTHODE 3 MÉTHODE 2 (fournie) (fournie) MÉTHODE 1 : HDMI À l’aide du câble HDMI, reliez la prise HDMI OUT (SORTIE HDMI) située à l'arrière du système Home cinéma à...
- Page 64 Anynet+ est une fonction pratique qui permet de commander le lecteur via la télécommande d'un téléviseur Samsung compatible Anynet+. • Si votre téléviseur Samsung comporte le logo n, il peut accueillir la fonction Anynet+. • Lorsque vous allumez le lecteur et insérez un disque, le lecteur démarre la lecture du disque et le téléviseur s’allume et passe automatiquement en mode HDMI.
- Page 65 All manuals and user guides at all-guides.com Si le téléviseur ne prend pas en charge la résolution confi gurée, l’image affi chée sera déformée. Reportez-vous au manuel d’utilisation de votre téléviseur pour de plus amples informations sur la méthode de sélection de la source d’entrée vidéo du téléviseur.
- Page 66 All manuals and user guides at all-guides.com branchements BRANCHEMENT DE L’ANTENNE FM Branchez l’antenne FM fournie à la prise FM 7Ω COAXIALE. Déplacez progressivement le fi l de l’antenne jusqu’à trouver une position dans laquelle la réception est de qualité, fi xez-le ensuite solidement à un mur ou une autre surface solide. ...
- Page 67 All manuals and user guides at all-guides.com avant d’uti l i s er votre Home ci n éma Le système Home cinéma Branchez le cordon d’alimentation de l’unité principale à la source d’alimentation secteur. Appuyez sur le bouton DVD pour passer en mode DVD et utiliser le lecteur DVD du Home cinéma. Pas de Disque ...
- Page 68 All manuals and user guides at all-guides.com lecture LECTURE DE DISQUES Insérez un disque verticalement dans la fente d’insertion de disques. • Placez délicatement un disque dans le tiroir, face imprimée dirigée vers le haut. Fermez le tiroir en appuyant sur le bouton PLAY (LECTURE) ( )). •...
- Page 69 All manuals and user guides at all-guides.com LECTURE DES CD MP3/WMA Les CD de données (CD-R, CD-RW) encodés au format MP3 ou WMA peuvent être lus. Insérez le disque MP3/WMA. • L’écran du menu MP3/WMA s’affi che et la lecture commence. •...
- Page 70 All manuals and user guides at all-guides.com lecture Lecture des fichiers JPEG Les images provenant d’un appareil photo ou d’un caméscope numérique ou les fi chiers JPEG d’un PC peuvent être stockés sur un CD puis lus à l’aide de votre Home cinéma. Bibliothéque ...
- Page 71 All manuals and user guides at all-guides.com LECTURE DES DIVX Les fonctions énumérées sur cette page s’appliquent à la lecture des disques DivX. Saut avant/arrière Pendant la lecture, appuyez sur le bouton [# ou $]. • Passe au fi chier suivant à chaque fois que vous appuyez sur le bouton $ (à...
- Page 72 All manuals and user guides at all-guides.com lecture DivX (Digital internet video eXpress) DivX est un format de fi chiers vidéo développé par Microsoft et basé sur la technologie de compression MPEG4 pour fournir des données audio et vidéo en temps réel sur Internet. Le format MPEG4 est utilisé...
- Page 73 All manuals and user guides at all-guides.com UTILISATION DE LA FONCTION DE LECTURE Affi chage des informations du disque Pour affi cher le titre, le chapitre actuellement lu ainsi que le compteur, appuyez sur le bouton INFO (INFO) pendant la lecture du DVD. Cet écran vous permet également de choisir rapidement un titre, un chapitre ou encore un moment précis affi...
- Page 74 All manuals and user guides at all-guides.com lecture Lecture rapide Appuyez sur le bouton √√ ®® • Chaque fois que vous appuyez sur ce bouton pendant la lecture, les vitesses de lecture défi lent dans l’ordre suivant : X2 ...
- Page 75 All manuals and user guides at all-guides.com Répétition de la lecture La répétition de la lecture vous permet de lire de façon répétée un chapitre, un titre, une plage (chanson) ou un répertoire (fi chier MP3). Appuyez sur le bouton REPEAT. •...
- Page 76 All manuals and user guides at all-guides.com lecture Fonction Zoom (Agrandissement de l’écran) Cette fonction vous permet d’agrandir une partie de l’image affi chée. Appuyez sur la touche ZOOM. Appuyez sur ▲, ▼, ◄, ► pour aller à l’affi chage ANGLE. Appuyez sur la touche ENTER.
- Page 77 All manuals and user guides at all-guides.com En mode Stop (Arrêt), Appuyez sur le bouton MENU (MENU). ▲ ▼ Appuyez sur le bouton du curseur pour sélectionner Disc Menu (Menu disque), puis appuyez sur le bouton ENTER (ENTRÉE). Le menu Disque peut ne pas être compatible avec certains disques. Utilisation du menu Title (Titre) Pour les DVD contenant plusieurs titres, vous pouvez affi...
- Page 78 All manuals and user guides at all-guides.com lecture LECTURE DE FICHIERS MULTIMÉDIA AVEC LA FONCTIONNALITÉ USB HOST (HÔTE USB) Lisez vos fi chiers photo, vidéo ou musicaux enregistrés sur un lecteur MP3, une mémoire USB ou un caméscope numérique en audio haute qualité en connectant le périphérique de stockage sur le port USB du système Home cinéma.
- Page 79 All manuals and user guides at all-guides.com Extraction audio Cette fonction permet de copier les fi chiers audio d’un CD sur un périphérique USB au format MP3. Ouvrez le tiroir disque. Connectez le périphérique USB. Placez-y un CD audio (CD DA), puis refermez le tiroir disque. Sur le fi...
- Page 80 All manuals and user guides at all-guides.com lecture Périphériques compatibles Les périphériques USB qui prennent en charge le stockage de grande capacité USB v.1.0. (appareils USB fonctionnant comme disque dur externe sur Windows (2000 et version ultérieure) sans installation de pilote supplémentaire). Lecteur MP3 : les lecteurs MP3 de type HDD (disque dur) ou fl...
- Page 81 All manuals and user guides at all-guides.com confi guration du système Pour plus de facilité, vous pouvez régler les fonctions de ce Home cinéma de la façon la mieux adaptée à votre environnement. RÉGLAGE DE LA LANGUE La langue OSD (On Screen Display) (Affi chage à l’écran) est réglée sur Anglais par Réglage Pas de Disque défaut.
- Page 82 All manuals and user guides at all-guides.com confi guration du système Réglage du format d’affi chage du téléviseur (Taille de l’écran) Le rapport horizontal/vertical du format d’image d’un téléviseur conventionnel est de 4:3 tandis que celui d’un téléviseur écran large de haute défi...
- Page 83 Confi guration de la fonction BD Wise ® Format êcran : Large Menu Disque Lorsque le lecteur est connecté à un téléviseur SAMSUNG prenant en ® Messages écran : Oui charge "BD Wise" (BD Wise), vous bénéfi ciez d'une qualité d'image ®...
- Page 84 All manuals and user guides at all-guides.com confi guration du système suivez les instructions du manuel d’utilisation du téléviseur relatives aux réglages du balayage progressif dans les menus du téléviseur. Si la sortie Vidéo n’est pas correctement réglée, l’écran peut être bloqué. ...
- Page 85 All manuals and user guides at all-guides.com CONTRÔLE PARENTAL Pas de Disque Menu Disque Menu Titres Entrer le nouveau Code Secret Audio Réglage DÉPLQC SÉLECT RETOUR QUITTE Cette option fonctionne uniquement si un DVD contient des informations entrant dans le cadre de l’interdiction. ...
- Page 86 All manuals and user guides at all-guides.com confi guration du système CONFIGURATION DE LA FONCTION EQUALIZER (ÉGALISEUR) EQ (ÉG) : vous pouvez sélectionner CLASSIQUE, ROCK, JAZZ ou POP pour améliorer le rendu sonore du genre musical que vous êtes en train de lire •...
- Page 87 All manuals and user guides at all-guides.com radio ÉCOUTE DE LA RADIO Cette fonction vous permet d’écouter la radio FM sur votre système Home cinéma. Pour afficher le menu de radio FM, appuyez simplement sur le bouton TUNER (SYNTONISEUR) de la télécommande. Appuyez sur la touche TUNER.
- Page 88 Reportez-vous au tableau ci-dessous lorsque cet appareil ne fonctionne pas correctement. Si le problème que vous rencontrez n’est pas répertorié ci-dessous ou si les consignes ne vous sont d’aucune aide, éteignez l’appareil, débranchez le cordon d’alimentation et contactez le revendeur agréé le plus proche ou un centre de dépannage Samsung Electronics. SYMPTÔME Vérifi cation/Solution •...
- Page 89 All manuals and user guides at all-guides.com SYMPTÔME Vérifi cation/Solution • • L’unité principale ne fonctionne pas. Lorsque le lecteur est en mode No Disc (Pas de disque), (exemple : l’appareil s’éteint ou émet un appuyez pendant plus de 5 secondes sur le bouton de saut bruit anormal).
- Page 90 Lecteur MP3 128 Mo YP-780 Samsung Lecteur MP3 Iriver H320 Iriver Lecteur MP3 disque dur 20 Go YP-35 Samsung Lecteur MP3 YH-920 Samsung Lecteur MP3 disque dur 20 Go YP-55 Samsung Lecteur MP3 YP-T7 Samsung Lecteur MP3 iAUDIO U2 Cowon Lecteur MP3 YP-MT6...
- Page 91 All manuals and user guides at all-guides.com annexes PRÉCAUTIONS À PRENDRE LORS DE LA MANIPULATION ET DU RANGEMENT DES DISQUES De petites rayures sur la surface du disque peuvent altérer la qualité du son et de l’image ou provoquer des sauts. Veillez à...
- Page 92 Avant : 4.0 Kg Poids Caisson de basse : 3.8 Kg *: Caractéristiques nominales - Samsung Electronics Co., Ltd se réserve le droit de modifi er les caractéristiques techniques sans avis préalable. - Le poids et les dimensions sont approximatifs.
- Page 93 All manuals and user guides at all-guides.com...
- Page 94 All manuals and user guides at all-guides.com Contact SAMSUNG WORLD WIDE If you have any questions or comments relating to Samsung products, please contact the SAMSUNG customer care center. Pour toutes questions ou observations concernant les produits Samsung, veuillez contacter le service clientèle de...
- Page 95 All manuals and user guides at all-guides.com Les bons gestes de mise au rebut de ce produit (Déchets d’équipements électriques et électroniques) (Applicable dans les pays de l’Union Européenne et dans d’autres pays européens pratiquant le tri sélectif) Ce symbole sur le produit, ses accessoires ou sa documentation indique que ni le produit, ni ses accessoires électroniques usagés (chargeur, casque audio, câble USB, etc.) ne peuvent être jetés avec les autres déchets ménagers.