Publicité
Les langues disponibles
Les langues disponibles
Liens rapides
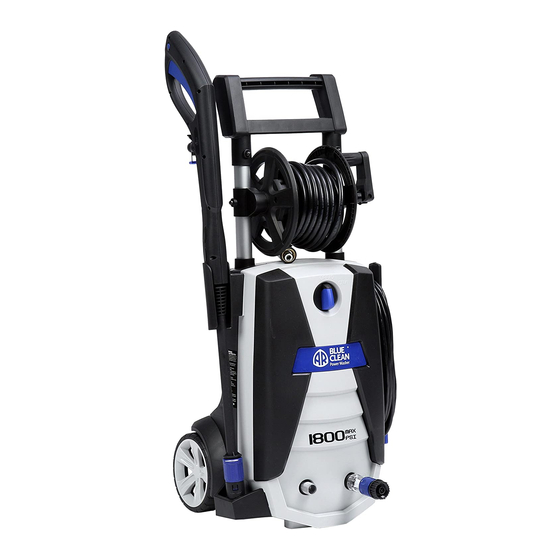
1800 PSI
Electric Pressure Washer
92729-LQ
All manuals and user guides at all-guides.com
ASSEMBLY, CARE AND
USE INSTRUCTIONS
Model AR 383 S
READ CAREFULLY
IMPORTANT:
AND
REFERENCE
Questions, problems, missing parts?
Before returning to your retailer, call our
customer service department at 1-866-235-5112,
8 a.m. - 5:00 p.m., CST, Monday - Friday.
www.arblueclean.com
RETAIN THESE INSTRUCTIONS
ATTACH RECEIPT TO MANUAL FOR FUTURE
Publicité

Manuels Connexes pour Blue Clean AR 383 S


Sommaire des Matières pour Blue Clean AR 383 S
- Page 1 All manuals and user guides at all-guides.com 1800 PSI Electric Pressure Washer ASSEMBLY, CARE AND USE INSTRUCTIONS Model AR 383 S READ CAREFULLY IMPORTANT: RETAIN THESE INSTRUCTIONS ATTACH RECEIPT TO MANUAL FOR FUTURE REFERENCE Questions, problems, missing parts? Before returning to your retailer, call our customer service department at 1-866-235-5112, 8 a.m.
- Page 2 Pump Saver ........................14 Troubleshooting ....................... 15 Limited Warranty ......................16 Replacement Parts List ....................17 PRODUCT SPECIFICATIONS PRODUCT SPECIFICATIONS SPECIFICATIONS Rated PSI Max GPM Weight Model (lbs/sq. in.) (Gal/per min) Cold Water Volts Amps (lbs.) AR 383 S 1800 ✔...
- Page 3 All manuals and user guides at all-guides.com PACKAGE CONTENTS PACKAGE CONTENTS PACKAGE CONTENTS (Hose reel for storage only) O-Rings OFF/O ON/I 1800 PSI PART DESCRIPTION QUANTITY PART DESCRIPTION QUANTITY Power Washer Unit QC Garden Hose Adapter High Pressure Hose High/Low Lance Nozzle Nozzle Cleaning Wire Turbo Lance Nozzle Spray Gun Holster...
- Page 4 All manuals and user guides at all-guides.com SAFETY INFORMATION SAFETY INFORMATION SAFETY INFORMATION Please read and understand this entire manual before carefully and only when you are alert. attempting to assemble, operate, or install the product. 10. Watch your balance and footing while using your power washer.
- Page 5 34. NEVER use lances or other parts that are not compatible for this specific AR Blue Clean unit. 26. NEVER use hot water with your power washer. It will 35. NEVER use an extension power cord since it defeats overheat and damage the high pressure pump.
- Page 6 All manuals and user guides at all-guides.com PREPARATION PREPARATION PREPARATION Before beginning assembly of product, make sure all Tools Required for Assembly (not included): Phillips parts are present. Compare parts with package contents screwdriver list and hardware contents list. If any part is missing or damaged, DO NOT attempt to assemble the product.
- Page 7 All manuals and user guides at all-guides.com ASSEMBLY INSTRUCTIONS High Pressure Hose Assembly Screw high pressure hose (B) clockwise onto bottom left, when facing the unit, front of power washer unit (A). Pull back collar and insert o-ring post into water outlet far enough so collar can thread onto outlet threads until hand tight.
- Page 8 All manuals and user guides at all-guides.com ASSEMBLY INSTRUCTIONS Lock Unlock Locking Spray Gun (before Lance installation) To lock the trigger of the spray gun (K), aim the gun igh/Low Nozzle Lance and Turbo Nozzle Lance away from you and push the lock button from right to Installation left.
- Page 9 All manuals and user guides at all-guides.com ASSEMBLY INSTRUCTIONS ASSEMBLY INSTRUCTIONS Push the QC garden hose adapter (G) onto the clear Attach a garden hose to QC garden hose adapter (G). quick connect (F). It will “click” into place. Do not pull the blue sleeve back while pushing QC garden hose Note: Flush out garden hose before connecting adapter (G) onto clear quick connect (F).
- Page 10 All manuals and user guides at all-guides.com OPERATING INSTRUCTIONS OPERATING INSTRUCTIONS OFF/0 OFF/0 ON/I ON/I • Turn the power switch to the “ON” (|) position. The unit will turn on for 1 - 2 seconds and shut off. This is a normal function of the auto start feature. Squeeze the spray gun trigger to begin pressure washing.
- Page 11 All manuals and user guides at all-guides.com OPERATING INSTRUCTIONS OPERATING INSTRUCTIONS IMPORTANT: When applying detergent using low OUT position pressure spray, the variable spray head must be set for the “Pencil Stream”. This is when the metal blades in front of the nozzle are wide open so the detergent spray is not constricted.
- Page 12 All manuals and user guides at all-guides.com OPERATING INSTRUCTIONS OPERATING INSTRUCTIONS OPERATING INSTRUCTIONS Operation Tips • If you hear the motor run intermittently when the trigger is not being squeezed, that is normal. The pump is priming itself so it is ready to operate when the trigger is squeezed.
- Page 13 All manuals and user guides at all-guides.com CARE AND MAINTENANCE Detergents Cleaning Nozzles • Use detergents designed for power washers. These • A clogged or partially clogged nozzle can cause can be purchased online at our website www. significant reduction of water pressure coming out arblueclean.com.
- Page 14 ALL climates. It also assists with Note: Instructions on Pump Saver Bottle are generic and protection from internal corrosion. The Blue Clean part # not model specific. is: PW64511 (16oz. bottle). Order online at www.arblueclean.com...
- Page 15 All manuals and user guides at all-guides.com TROUBLESHOOTING If you have any questions regarding the product, please call customer service at 1-866-235-5112. PROBLEM CORRECTIVE ACTION Unit will not turn on. 1. The GFCI module on the end of the power cord must be plugged directly into an outlet. 2.
- Page 16 All manuals and user guides at all-guides.com CARE AND MAINTENANCE TROUBLESHOOTING PROBLEM CORRECTIVE ACTION The power washer 1. It sounds like your power washer is working just fine. When the water is connected, turns on for 2 the accessories are assembled properly, and the power switch is turned on, the power seconds, shuts off, washer may turn on for 1 - 2 seconds to prime the pump.
- Page 17 All manuals and user guides at all-guides.com REPLACEMENT PARTS LIST For replacement parts, call our customer service department at 1-866-235-5112, 8 a.m. - 5:00 p.m., CST, Monday - Friday or order online at www.arblueclean.com PW909104K PART DESCRIPTION PART # PART DESCRIPTION PART # Detergent Tank (28 oz.) PW4220020...
- Page 18 All manuals and user guides at all-guides.com 1800 PSI LAVEUSE À PRESSION ÉLECTRIQUE GUIDE D'ASSEMBLAGE, D'ENTRETIEN ET D'UTILISATION Modèle AR 383 S LIRE ATTENTIVEMENT IMPORTANT : CONSERVER CE GUIDE ET INSÉRER LA FACTURE DANS LE GUIDE POUR RÉFÉRENCE ULTÉRIEURE. Questions, problèmes, pièces manquantes? Avant de retourner l'appareil chez le marchand, contactez notre service à...
- Page 19 Garantie limitée ....................... 33 Liste des pièces de rechange ..................34 SPÉCIFICATIONS DU PRODUIT SPÉCIFICATIONS Modèle Débit Eau froide Volts Poids nominale maximum (kg) (k/cm2) (Litre/min) (lb) (lb/po2) (Gal./min) AR 383 S 5 268 4,92 11,79 ✔ (1 800) (1,3) (26)
- Page 20 All manuals and user guides at all-guides.com CONTENU DE L'EMBALLAGE CONTENU DE L'EMBALLAGE Enrouleur, pour range- (Hose reel for ment uni- storage only) quement O-Rings OFF/O ON/I 1800 PSI PIÈCE DESCRIPTION QUANTITÉ PIÈCE DESCRIPTION QUANTITÉ Laveuse à pression Adaptateur de tuyau d’arro- sage rapide Tuyau à...
- Page 21 All manuals and user guides at all-guides.com SAFETY INFORMATION CONSIGNES DE SÉCURITÉ CONSIGNES DE SÉCURITÉ Assurez-vous de lire et de comprendre l’intégralité du 10. Toujours garder une position stable et sûre pendant présent manuel avant de tenter d’assembler, d’utiliser ou l'utilisation de la laveuse à...
- Page 22 34. NE JAMAIS utiliser une lance ou un autre composant qui n'est pas compatible avec ce modèle 26. NE JAMAIS utiliser d'eau chaude dans la laveuse d'appareil AR Blue Clean. à pression. Cela aura pour effet de surchauffer la 35. NE JAMAIS brancher une rallonge au cordon pompe à...
- Page 23 All manuals and user guides at all-guides.com PRÉPARATION PRÉPARATION ASSEMBLY INSTRUCTIONS Avant de commencer l'assemblage de l'appareil, Outil nécessaire pour l'assemblage (non compris) : assurez-vous que toutes les pièces sont dans Tournevis cruciforme l'emballage. Comparez les pièces à la liste des pièces et du matériel.
- Page 24 All manuals and user guides at all-guides.com INSTRUCTIONS D’ASSEMBLAGE Assemblage du tuyau à haute pression Vissez le tuyau à haute pression (B) dans le sens horaire sur le raccord situé en bas à gauche, sur la face avant (A) de l’appareil. Retirez le collier vers l'arrière et insérez l'embout dans la sortie d'alimentation en eau suffisamment profondément de sorte que le collier puisse être vissé...
- Page 25 All manuals and user guides at all-guides.com ASSEMBLY INSTRUCTIONS INSTRUCTIONS D'ASSEMBLAGE Verrouillage Lock Déverrouillage Unlock Verrouillage du pistolet pulvérisateur (avant l'installation de la lance). Installation de la lance à buse P et BP et de la lance Pour verrouiller la gâchette du pistolet pulvérisateur (K), à...
- Page 26 All manuals and user guides at all-guides.com INSTRUCTIONS D'ASSEMBLAGE Enfoncez le raccord rapide du tuyau d’arrosage (G) sur le raccord rapide transparent (F). Un clic se fait en- Reliez un tuyau d'arrosage à l’adaptateur rapide de tendre indiquant qu'ils sont en place. Ne tirez pas vers tuyau d'arrosage (G).
- Page 27 All manuals and user guides at all-guides.com OPERATING INSTRUCTIONS MODE D'EMPLOI OFF/0 OFF/0 OFF/0 OFF/0 ON/I ON/I ON/I ON/I • Placez l’interrupteur à la position « ON » (|). L'appareil se met en marche pendant une à deux secondes et s'arrête. Il s'agit du fonctionnement normal du mode de mise en marche automatique.
- Page 28 All manuals and user guides at all-guides.com OPERATING INSTRUCTIONS MODE D’EMPLOI IMPORTANT : Lorsque vous appliquez le détergent Position OUT OUT position avec le jet à basse pression, la buse à jet variable doit être réglée à jet étroit. À ce moment-là, les lames métalliques au devant de la buse sont grandes ouvertes afin que le jet de détergent ne soit pas Position OUT...
- Page 29 All manuals and user guides at all-guides.com OPERATING INSTRUCTIONS MODE D’EMPLOI MODE D'EMPLOI Conseils d'utilisation • Il est normal d'entendre le moteur tourner par intermittence, même lorsque la gâchette n'est pas enfoncée. C'est la pompe qui s'amorce pour être en mesure de fonctionner lorsqu'on appuie sur la gâchette.
- Page 30 All manuals and user guides at all-guides.com ENTRETIEN ET MAINTENANCE Détergents Nettoyage des buses • Utilisez un détergent conçu pour les laveuses à • Une buse obstruée ou partiellement obstruée peut pression. Vous pouvez l’acheter en ligne à l’adresse provoquer une importante réduction de la pression www.arblueclean.com.
- Page 31 à également à protéger l’appareil de la corrosion interne. pression. Le numéro de pièce Blue Clean est le : PW64511 3) Mettez l’appareil en marche. Éteignez la laveuse (bouteille 16 oz). Commandez en ligne à l’adresse www.
- Page 32 All manuals and user guides at all-guides.com DÉPANNAGE Pour toute question concernant le produit, communiquez avec le service à la clientèle au 1 866 235-5112. PROBLÈME MESURE CORRECTRICE L’appareil ne se met 1. Le disjoncteur de fuite de terre à l’extrémité du cordon d'alimentation doit être branché pas en marche.
- Page 33 All manuals and user guides at all-guides.com DÉPANNAGE PROBLÈME MESURE CORRECTRICE La laveuse à pression 1. Il semble que votre laveuse à pression fonctionne parfaitement bien. Lorsque l’eau est se met en marche raccordée, que les accessoires sont correctement assemblés et que l’interrupteur est pendant deux à...
- Page 34 All manuals and user guides at all-guides.com LISTE DES PIÈCES DE RECHANGE Pour commander des pièces de rechange, communiquez avec le service à la clientèle au 1 866 235-5112, de 8 h à 17 h, HNC, du lundi au vendredi ou en ligne au www.arblueclean.com. PW909104K PIÈCE DESCRIPTION...
- Page 35 All manuals and user guides at all-guides.com 1800 PSI Lavadora a presión eléctrica INSTRUCCIONES DE MONTAJE, CUIDADO Y USO Modelo AR 383 S LEA CUIDADOSAMENTE IMPORTANTE: GUARDE ESTAS INSTRUCCIONES Y ADJUNTE EL RECIBO AL MANUAL PARA FUTURAS REFERENCIAS ¿Preguntas, problemas, piezas faltantes? Antes de la devolución al distribuidor, llame...
- Page 36 Garantía limitada .......................... 50 Lista de piezas de repuesto ......................51 ESPECIFICACIONES DEL PRODUCTO ESPECIFICACIONES Modelo Capacidad PSI Máx. GPM Agua fría Voltios Amperios Peso (kg) (lb) (kg/cm (Litro/min) (lb/pulgada (gal/por min) AR 383 S 5,268 (1,800) 4.92 (1.3) 11.79 (26) ✔...
- Page 37 All manuals and user guides at all-guides.com CONTENIDO DEL PAQUETE CONTENIDO DEL PAQUETE Carrete de manguera para alma- cenamiento (Hose reel for únicamente storage only) O-Rings OFF/O ON/I 1800 PSI PIEZA DESCRIPCIÓN CANTIDAD PIEZA DESCRIPCIÓN CANTIDAD Unidad de la lavadora a presión Adaptador de manguera de jardín QC Manguera de presión alta...
- Page 38 All manuals and user guides at all-guides.com SAFETY INFORMATION INFORMACIÓN DE SEGURIDAD INFORMACIÓN DE SEGURIDAD Lea y comprenda este manual completo antes de intentar 9. NO utilice la lavadora a presión cuando se encuentre montar, operar o instalar el producto. bajo la influencia del alcohol o de drogas.
- Page 39 34. NUNCA utilice lanzas ni otras piezas que no sean 26. NUNCA use agua caliente con la lavadora a presión. Esto compatibles con esta unidad AR Blue Clean específica. sobrecalentará y dañará la bomba de presión alta. 35. NUNCA utilice un cable de alimentación de extensión 27.
- Page 40 All manuals and user guides at all-guides.com PREPARACIÓN PREPARACIÓN PREPARATION Antes de comenzar el montaje del producto, asegúrese Herramientas requeridas para el montaje (no incluidas): de que todas las piezas estén presentes. Compare las Destornillador Phillips piezas con la lista de contenido del paquete y la lista de aditamentos.
- Page 41 All manuals and user guides at all-guides.com INSTRUCCIONES DE MONTAJE Montaje de la manguera de presión alta Atornille la manguera de presión alta (B) hacia la derecha en la parte inferior izquierda, estando frente a la unidad de la lavadora a presión (A). Tire hacia atrás el collarín e inserte la varilla del empaque de anillo en la salida de agua lo suficiente para que el collarín se pueda enroscar en la salida hasta que esté...
- Page 42 All manuals and user guides at all-guides.com INSTRUCCIONES DE MONTAJE Bloquear Lock Desbloquear Unlock Bloquear la pistola rociadora (antes de la instalación de Instalación de la lanza de la boquilla turbo y lanza de la lanza) boquilla Alta/baja Para bloquear el gatillo de la pistola rociadora (K), apunte Mientras la pistola rociadora (K) está...
- Page 43 All manuals and user guides at all-guides.com ASSEMBLY INSTRUCTIONS INSTRUCCIONES DE MONTAJE Empuje el adaptador de la manguera de jardín QC (G) sobre la conexión rápida transparente (F). Este hará “clic” en su Acople una manguera de jardín al adaptador de manguera de lugar.
- Page 44 All manuals and user guides at all-guides.com OPERATING INSTRUCTIONS INSTRUCCIONES DE OPERACIÓN OFF/0 OFF/0 OFF/0 OFF/0 ON/I ON/I ON/I ON/I • Gire el interruptor de alimentación a la posición “ON” (|). La unidad se encenderá durante 1 o 2 segundos y se apagará.
- Page 45 All manuals and user guides at all-guides.com OPERATING INSTRUCTIONS INSTRUCCIONES DE OPERACIÓN IMPORTANTE: Cuando aplique detergente con el rociado Posición OUT OUT position (hacia afuera) de presión baja, la cabeza de rociado variable se debe establecer para “Flujo de lápiz”. Esto ocurre cuando las aspas de metal en la parte delantera de la boquilla se abren Posición OUT completamente para que el rociado de detergente no se...
- Page 46 All manuals and user guides at all-guides.com OPERATING INSTRUCTIONS INSTRUCCIONES DE OPERACIÓN INSTRUCCIONES DE OPERACIÓN Consejos para la operación • Si escucha que el motor funciona de forma intermitente cuando no se aprieta el gatillo, eso es normal. La bomba se está purgando para que esté lista para funcionar cuando se apriete el gatillo.
- Page 47 All manuals and user guides at all-guides.com CUIDADO Y MANTENIMIENTO Detergentes Limpieza de las boquillas • Utilice detergentes diseñados para lavadoras a presión. • Una boquilla obstruida o parcialmente obstruida puede Estos se pueden comprar en línea en nuestro sitio web ocasionar una reducción significativa de la presión del www.arblueclean.com.
- Page 48 TODOS los climas. También ayuda a proteger 3) Conecte la alimentación. Apague la lavadora a presión tan contra la corrosión interna. El N.° de pieza de Blue Clean es: pronto como el protector de la bomba comience a salir de PW64511 (botella de 16 onzas).
- Page 49 All manuals and user guides at all-guides.com SOLUCIÓN DE PROBLEMAS Si tiene alguna pregunta sobre el producto, llame a Servicio al cliente al 1-866-235-5112. PROBLEMA ACCIÓN CORRECTIVA La unidad no enciende. 1. El módulo del GFCI en el extremo del cable de alimentación se debe conectar directamente a una toma de corriente.
- Page 50 All manuals and user guides at all-guides.com SOLUCIÓN DE PROBLEMAS PROBLEMA ACCIÓN CORRECTIVA La lavadora a presión 1. Parece que la lavadora a presión trabaja muy bien. Cuando se conecta el agua, los accesorios se enciende por están montados apropiadamente y el interruptor de alimentación está en on, la lavadora a 2 segundos, se apaga presión puede encender por 1 o 2 segundos para purgar la bomba.
- Page 51 All manuals and user guides at all-guides.com LISTA DE PIEZAS DE REPUESTO Para obtener piezas de repuesto, llame a nuestro Departamento de Servicio al cliente al 1-866-235-5112, de 8:00 a.m. - 5:00 p.m., hora estándar del centro, de lunes a viernes o realice su pedido en línea en www.arblueclean.com PW909104K PIEZA DESCRIPCIÓN...
- Page 52 All manuals and user guides at all-guides.com...