Télécharger Imprimer la page

Publicité

Les langues disponibles

Les langues disponibles

Liens rapides

All manuals and user guides at all-guides.com
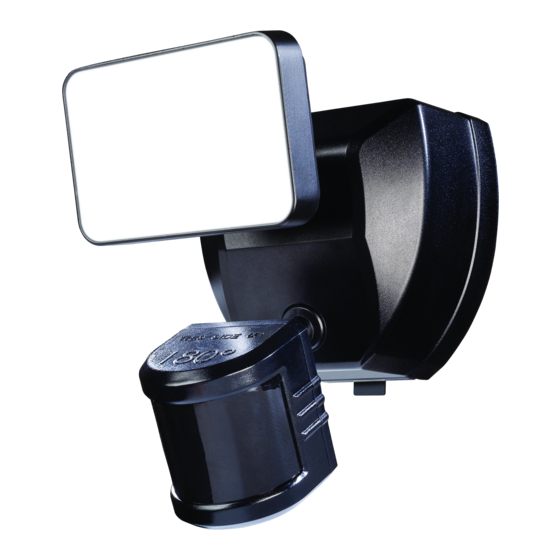
Connected LED Battery
Security Motion Light
Model: 9304
Dated receipt required for warranty replacement.
FEATURES
• Battery Powered
• Wi-fi connectivity
• 180° Motion sensor
UNPACKING
Be sure to remove all contents from packaging and verify
all items are present before assembling this light fixture.
This package includes the following items:
• Security Light
• Owner's Manual
• SECUR360 App Quick Start Guide
• Mounting Hardware
HARDWARE INCLUDED
Note: Six mounting bracket screws are included. The installation will only require two. Discard the unused mounting
bracket screws after installation.
Screw (x2)
Wall Anchor (x2)
© 2020 HeathCo LLC
210449-01A
To see operational and troubleshooting information and videos,
go to www.hzsupport.com

Publicité

loading

Sommaire des Matières pour Heath Zenith secur360 9304

  • Page 1 All manuals and user guides at all-guides.com Connected LED Battery Security Motion Light Model: 9304 Dated receipt required for warranty replacement. FEATURES • Battery Powered • Wi-fi connectivity • 180° Motion sensor UNPACKING Be sure to remove all contents from packaging and verify all items are present before assembling this light fixture.
  • Page 2 All manuals and user guides at all-guides.com IMPORTANT SAFETY AND INSTALLATION INFORMATION Before installing security light, read all instructions carefully and keep owner’s manual for future reference. • WARNING: To prevent possible SERIOUS INJURY or DEATH never allow small children near batteries. If a battery is swallowed, immediately notify a doctor.
  • Page 3 All manuals and user guides at all-guides.com INSTALLATION 1. Press the bottom tab of the wall mounting plate and slide the mounting plate from the light body (see Figure 1). 2. Using the wall mounting plate as a template, mark the position of the mounting holes.
  • Page 4 All manuals and user guides at all-guides.com FINAL ASSEMBLY Slide the rear of the light fixture down onto the mounting plate until it snaps into place (see Figure 5). IMPORTANT: • If wall mounted, make sure the fixture is mounted with the sensor below the lamp head (see page 2).
  • Page 5 All manuals and user guides at all-guides.com FINAL SETUP • Areas where pets or traffic may trigger the motion sensor. • Nearby large, light-colored objects reflecting light may IMPORTANT: All of the settings on the motion sensor are trigger the shut-off feature. Do not point other lights also controlled through the SECUR360 app.
  • Page 6 All manuals and user guides at all-guides.com BATTERY REPLACEMENT IMPORTANT: Properly dispose of drained batteries. 1. Press the bottom tab of the wall mounting plate and slide the light fixture up and off of the mounting plate. “D” Batteries 2. Remove the battery cover on the back of the light fixture and remove the old batteries.
  • Page 7 All manuals and user guides at all-guides.com TROUBLESHOOTING GUIDE SYMPTOM POSSIBLE CAUSE SOLUTION The light will not come on. 1. The motion sensor is aimed in the wrong 1. Re-aim the motion sensor to cover the direction. desired area. 2. Batteries are weak or dead. 2.
  • Page 8 All manuals and user guides at all-guides.com TECHNICAL SERVICE Please call 1-800-858-8501 (English speaking only) for assistance before returning product to store. If you experience a problem, follow this guide. You may also want to visit our Web site at: www.hzsupport.com. If the problem persists, call* for assistance at 1-800-858-8501 (English speaking only), 8:00 AM to 5:00 PM CST (M-F).
  • Page 9 All manuals and user guides at all-guides.com Luz LED de seguridad con detección de movimiento activada con pilas conectada Modelo: 9304 Se necesita el recibo fechado para reemplazo bajo garantía. CARACTERÍSTICAS • Accionada por pilas • Conectividad Wi-fi • Detector de movimiento de 180 ° DESEMPAQUE Asegúrese de retirar todo el contenido del empaque y verificar que todos los elementos estén incluidos antes de...
  • Page 10 All manuals and user guides at all-guides.com INFORMACIÓN IMPORTANTE DE SEGURIDAD E INSTALACIÓN Antes de instalar la luz de seguridad, lea todas las instrucciones con cuidado y guarde el manual del propietario para futura referencia. • ADVERTENCIA: Para evitar posibles LESIONES GRAVES LA MUERTE nunca deje que los niños pequeños estén cerca de las pilas.
  • Page 11 All manuals and user guides at all-guides.com INSTALACIÓN 1. Pulse la lengüeta inferior de la placa de montaje en pared y deslice la placa de montaje del cuerpo del aparato (ver Figura 1). 2. Usando la placa de montaje en pared como una plantilla, marque la posición de los agujeros de montaje.
  • Page 12 All manuals and user guides at all-guides.com MONTAJE FINAL Deslice la parte de atrás del aparato de luz hacia abajo sobre la placa de montaje hasta que cierre a presión en su sitio (vea la Figura 5). IMPORTANTE: • Si lo monta en la pared, asegúrese de que el aparato esté montado con el detector debajo de la cabeza de la lámpara (vea la página 10).
  • Page 13 All manuals and user guides at all-guides.com 2. Ponga el interruptor ON-TIME en OFF o 20 segundos CAMBIOS DE TEMPORADA: (la cantidad de tiempo que la luz permanecerá encendida El detector de movimiento funciona detectando los cambios después de que todo movimiento se haya detenido). de temperatura a través de su campo de visión.
  • Page 14 All manuals and user guides at all-guides.com CAMBIO DE LA BATERÍA IMPORTANTE: Deseche debidamente las pilas drenadas. 1. Pulse la lengüeta inferior de la placa de montaje en Pilas “D” pared y deslice la lámpara hacia arriba y hacia fuera de la placa de montaje.
  • Page 15 All manuals and user guides at all-guides.com CUIDADO Y LIMPIEZA • Para prolongar la apariencia original, limpie la lámpara solo con agua limpia y un paño suave y húmedo. • No use pinturas, solventes ni otros químicos en este aparato de luz. Podrían ser la causa de una prematura deterioración del acabado.
  • Page 16 All manuals and user guides at all-guides.com GUIA DE INVESTIGACION DE AVERIAS SÍNTOMA POSIBLE CAUSA SOLUCIÓN La luz no se enciende. 1. El detector de movimiento está enfocando a 1. Vuelva a enfocar el detector de movimiento para la dirección incorrecta. que cubra el área deseada.
  • Page 17 All manuals and user guides at all-guides.com SERVICIO TÉCNICO Favor de llamar al 1-800-858-8501 (sólo para hablar en inglés) para pedir ayuda antes de devolver el producto a la tienda. Si tiene algún problema, siga esta guía. Usted puede también visitar nuestro sitio Web: www.hzsupport.com. Si el problema continúa, llame al 1-800-858-8501 (sólo para hablar en inglés), de 8:00 AM a 5:00 PM CST (L-V).
  • Page 18 All manuals and user guides at all-guides.com Luminaire DEL de sécurité à piles, branché, à détecteur de mouvement Modèle : 9304 Reçu daté nécessaire pour remplacement sous garantie. CARACTÉRISTIQUES • Alimenté par pile • Connectivité Wi-Fi • Détecteur de mouvement 180° DÉBALLAGE Retirez tout le contenu de l’emballage et assurez-vous d’avoir en main tous les éléments avant de débuter...
  • Page 19 All manuals and user guides at all-guides.com IMPORTANTS RENSEIGNEMENTS DE SÉCURITÉ ET D'INSTALLATION Avant d’installer ce luminaire de sécurité, lisez avec soin toutes les directives et conserver le guide du propriétaire aux fins de référence. • AVERTISSEMENT : Pour éviter tout risque de BLESSURE GRAVE ou de DÉCÈS, ne laissez jamais de jeunes enfants jouer avec des piles.
  • Page 20 All manuals and user guides at all-guides.com INSTALLATION 1. Appuyez sur la languette au bas de la plaque de montage, puis faites glisser cette dernière du corps de l’appareil (voir la Figure 1). 2. En utilisant la plaque d’installation murale comme gabarit, marquez la position des trous d’installation.
  • Page 21 All manuals and user guides at all-guides.com ASSEMBLAGE FINAL Faites glisser l’arrière du luminaire sur la plaque de montage jusqu’à ce qu’il s’enclenche en place (voir la Figure 5). IMPORTANT : • Pour une installation au mur, assurez-vous que le capteur est situé sous le projecteur (voir la page 19).
  • Page 22 All manuals and user guides at all-guides.com 2. Placez le commutateur « ON-TIME » à OFF ou à 20 MODIFICATIONS SAISONNIÈRES : secondes (il s’agit du temps que l’éclairage demeure Le détecteur de mouvement fonctionne en décelant les allumé après que le mouvement s’est arrêté). changements de température dans son champ de vision.
  • Page 23 All manuals and user guides at all-guides.com REMPLACEMENT DE LA PILE IMPORTANT  :   É liminez les piles mortes de manière appropriée. Piles « D » 1. Appuyez sur la languette au bas de la plaque de mon- tage, puis faites glisser le luminaire vers le haut pour le retirer de la plaque.
  • Page 24 All manuals and user guides at all-guides.com ENTRETIEN ET NETTOYAGE • Pour prolonger l’apparence originale, nettoyez uniquement au moyen d’un chiffon doux trempé dans de l’eau. • N’appliquez aucune peinture, solvant ou produit chimique sur ce luminaire. Cela pourrait causer une détérioration prématurée du fini.
  • Page 25 All manuals and user guides at all-guides.com GUIDE DE DÉPANNAGE SYMPTÔME CAUSE POSSIBLE SOLUTION L’éclairage ne s’allume 1. Le détecteur de mouvement est orienté dans 1. Réorientez le détecteur afin de couvrir la zone pas. la mauvaise direction. souhaitée. 2. Les piles sont faibles ou à plat. 2.
  • Page 26 All manuals and user guides at all-guides.com SERVICE TECHNIQUE Veuillez faire le 1 800 858-8501 (service en anglais seulement) pour obtenir de l’aide avant de retourner l’article au magasin. En cas de problème, suivez ce guide. Vous pouvez aussi visiter notre site Web à www.hzsupport.com. Si le problème persiste, composez* le 1 800 858-8501 (service en anglais seulement), entre 8 h 00 et 17 h 00, HNC, du lundi au vendredi.
  • Page 27 All manuals and user guides at all-guides.com This device complies with Part 15 of the FCC Rules. Operation is subject to the following two conditions: (1) this device may not cause harmful interference, and (2) this device must accept any interference received, including interference that may cause undesired operation. Warning: Changes or modifications to this unit not expressly approved by the party responsible for compliance could void the user's authority to operate the equipment.
  • Page 28 All manuals and user guides at all-guides.com Purchase Information Información de la compra Renseignements d’achat Model #: ________________________ Date of Purchase: _____________________ Nº de modelo / N° de modèle Fecha de compra / Date d’achat Staple Purchase Receipt Here Engrape aquí el recibo de compra Agrafez le reçu d’achat ici PLEASE KEEP YOUR DATED SALES RECEIPT, IT IS REQUIRED FOR ALL WARRANTY REQUESTS.