Publicité
Les langues disponibles
Les langues disponibles
Liens rapides
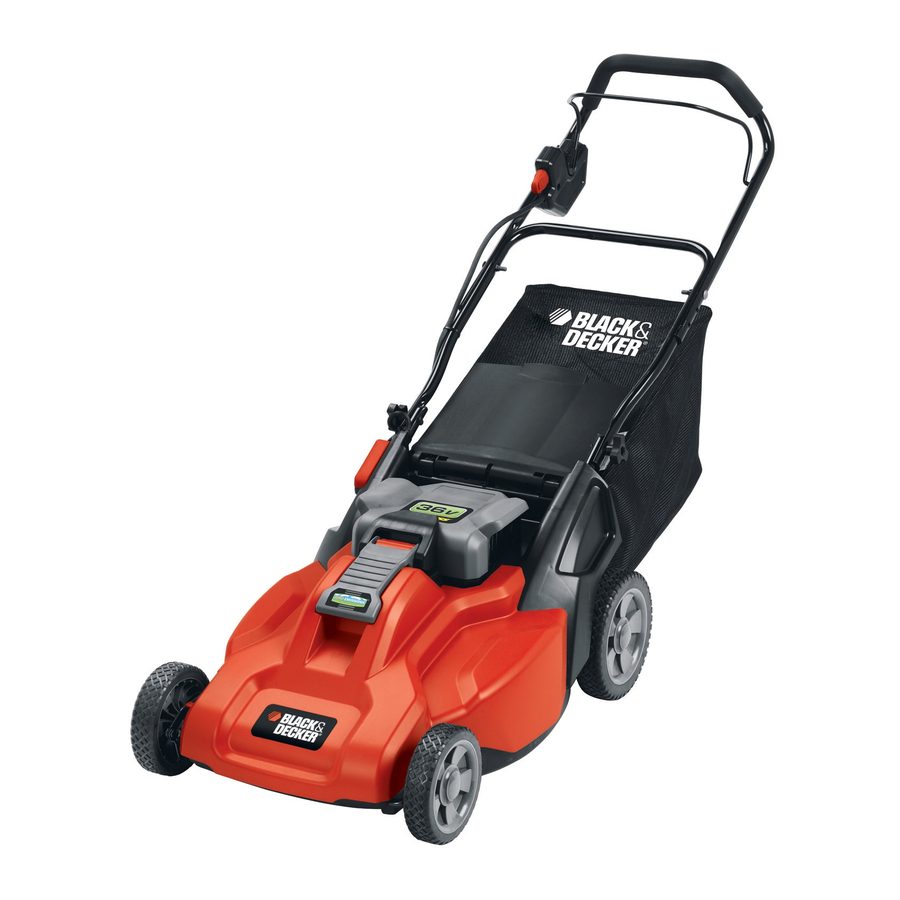
19 Inch (483mm) Cordless Mulching Rear Bag Mowers
Catalog Number CM1936Z
Date Code:
Go to www.BlackandDecker.com/NewOwner to register your new product.
PLEASE READ BEFORE RETURNING THIS PRODUCT FOR ANY REASON:
If you have a question or experience a problem with your Black & Decker purchase, go to
If you can't find the answer or do not have access to the internet, call 1-800-544-6986 from 8 a.m. to 5 p.m. EST Mon. -- Fri. to speak with an agent.
KEY INFORMATION YOU SHOULD KNOW:
• Do not operate mower unless handle is locked into position.
• For best cutting results, keep blade sharpened and balanced.
• Inspect and thoroughly clean your mower after each use (a deck with caked grass will degrade performance).
• Make sure mowing area is clear of other persons or pets prior to starting and during operation.
• Fully charge your mower before using it for the first time for optimal performance. Fully charge your battery after every use.
All manuals and user guides at all-guides.com
INSTRUCTION MANUAL
Thank you for choosing Black & Decker!
for instant answers 24 hours a day.
Please have the catalog number available when you call.
SAVE THIS INSTRUCTION MANUAL FOR FUTURE REFERENCE.
VEA EL ESPAÑOL EN LA CONTRAPORTADA.
INSTRUCTIVO DE OPERACIÓN, CENTROS DE SERVICIO Y PÓLIZA DE GARANTÍA.
ADVERTENCIA: LÉASE ESTE INSTRUCTIVO ANTES DE USAR EL PRODUCTO.
Catalog Number SPCM1936
Date Code:
HTTP://WWW.BLACKANDDECKER.COM/INSTANTANSWERS
Publicité

Manuels Connexes pour Black & Decker CM1936Z


Sommaire des Matières pour Black & Decker CM1936Z
- Page 1 All manuals and user guides at all-guides.com 19 Inch (483mm) Cordless Mulching Rear Bag Mowers INSTRUCTION MANUAL Catalog Number CM1936Z Catalog Number SPCM1936 Date Code: Date Code: Thank you for choosing Black & Decker! Go to www.BlackandDecker.com/NewOwner to register your new product.
- Page 2 It is important for you to read and understand this manual. The information it contains relates to protecting YOUR SAFETY and PREVENTING All manuals and user guides at all-guides.com SAFETY GUIDELINES - DEFINITIONS PROBLEMS. The symbols below are used to help you recognize this information. Indicates an imminently hazardous situation which, if not avoided, will result in death or serious injury.
- Page 3 Slopes are a major factor related to slip and fall accidents, which can result in severe injury. Operation on all slopes requires extra caution. If you All manuals and user guides at all-guides.com SLOPE OPERATION feel uneasy on a slope, do not mow it. 1.
- Page 4 To reduce your exposure to these chemicals, wear approved safety equipment such as dust masks that are specially designed to filter out microscopic particles. FUNCTIONAL DESCRIPTION CM1936Z 1.) Safety key/charging port 2.) Bail Handle (Switch lever) 3.) Handle attachment bolts 4.) Handle quick adjust knobs...
- Page 5 FUNCTIONAL DESCRIPTION All manuals and user guides at all-guides.com SPCM1936 1.) Safety key/charging port 2.) Bail Handle (Switch lever) 3.) Handle attachment bolts 4.) Handle quick adjust knobs 5.) Grass bag 6.) Cut height adjustment release 7.) Cut height indicator 8.) Removable battery 9.) Battery latch 10.) Battery guage...
- Page 6 PREPARATION All manuals and user guides at all-guides.com PLEASE REFER TO DIAGRAMS (A, B, C...) AND ITEM NUMBERS (1, 2, 3...) AS NOTED THROUGHOUT MANUAL. FOR EXAMPLE, A-1 REFERS TO ITEM 1 IN FIGURE A. UNPACKING - (FIGURES A, B) CAUTION: Pinch point.
- Page 7 ASSEMBLING THE GRASS CATCHER (FIGURES E1, E2, E3, E4) All manuals and user guides at all-guides.com 1. Before starting to assemble the grass bag to the frame, check that the grass bag and frame are similar to figure E1. 2. Slide the grass bag onto the frame as shown in figure E2. 3.
- Page 8 • A fully charged battery can be safely stored down to -40°C (-40°F). • The battery is maintenance free. • The CM1936Z can use either the RB3610 or RB3612 battery. The RB3612 battery is for use with the SPCM1936 mower only. The battery should not be used for any other purpose.
- Page 9 CHARGING PROCEDURE- FIGURES J, K, L All manuals and user guides at all-guides.com The battery can be removed from the mower for charging or left in place 1. Remove safety key J-1. 2. Align the charger plug J-2 with the arrow J-4 on top and insert the charger plug into the receptacle J-3 on the mower (green terminal to green terminal, white terminal to white terminal) or remove the battery and insert the charger plug K-1(with the arrow on top) into the...
- Page 10 TO TURN MOWER ON All manuals and user guides at all-guides.com Insert safety key J-1 into the switch housing, until it is fully seated inside housing. The mower is now operational and can be started by activat- ing the switch lever M-2. DANGER: SHARP MOVING BLADE.
- Page 11 Sharp moving blade. Do not operate the mower if the rear door is not closed under spring tension as serious injury could All manuals and user guides at all-guides.com result.Take your mower to the nearest service center for repair. DANGER: FOR MODELS WITHOUT "ON-DEMAND"...
- Page 12 FOR MODELS WITH "ON-DEMAND" Your mower may be equipped with the On-Demand feature that allows the conversion of All manuals and user guides at all-guides.com mulching to bagging or discharging with the turn of a knob. Release bail handle to turn mower off, wait for the blade to come to a complete stop. Then remove safety key.
- Page 13 MULCHING MOWING TIPS All manuals and user guides at all-guides.com Your mower was shipped from Black & Decker with the mulch insert installed if not equipped with On-Demand. While mulching, your new mower is designed to cut the grass clippings into small pieces and distribute them back into the lawn. Under normal conditions, the mulched grass will biodegrade quickly to provide nutrients to the lawn.
- Page 14 6. Position piece of wood W-1 to keep blade from turning as shown in figure W. Install flange nut with the flange against the blade spacer and securely tighten. All manuals and user guides at all-guides.com BLADE SHARPENING KEEP BLADE SHARP FOR BEST MOWER PERFORMANCE. A DULL BLADE DOES NOT CUT GRASS CLEANLY OR MULCH PROPERLY.
- Page 15 242501-05 REPLACEMENT GRASS BAG MB-1200 REPLACEMENT BLADE RB-3610 OR RB-3612 BATTERY PACK FOR MODEL CM1936Z. RB-3612 BATTERY PACK FOR MODEL SPCM1936. HERE ARE SOME HELPFUL HINTS TO GET THE MOST FROM YOUR BLACK & DECKER CORDLESS MOWER...AND KEEP YOUR LAWN LOOKING BEAUTIFUL Lawns should first be mowed in the spring when the grass is about 2-1/2 to 3 inches (63mm) to (76mm) high.
- Page 16 Mow your lawn when it is dry to avoid clumping of wet grass. If you have a choice, late afternoon is the ideal time for mowing, not only because the grass is dry, but also because the sensitive new cut area of the grass will not be exposed to intense sunlight. All manuals and user guides at all-guides.com Keep the mowing blade sharp for a nice clean cut.
- Page 17 TROUBLESHOOTING GUIDE (Conʼt.) PROBLEM SOLUTION All manuals and user guides at all-guides.com Battery charger LEDʼs not on. A. Check plug connection. Unplug charger, wait a few seconds. Plug charger in again to see if LED's come on. B. There are two charge ports on your mower - at the upper handle end and at the battery pack.
- Page 18 483 mm (19 po) GUIDE DʼUTILISATION Numéro de catalogue Numéro de catalogue CM1936Z SPCM1936 Merci d’avoir choisi Black & Decker! Consulter le site Web www.BlackandDecker.com/NewOwner pour enregistrer votre nouveau produit. À LIRE AVANT DE RETOURNER CE PRODUIT POUR QUELQUE RAISON QUE CE SOIT : HTTP://WWW.BLACKANDDECKER.COM/INSTANTANSWERS...
- Page 19 All manuals and user guides at all-guides.com LIGNES DIRECTRICES EN MATIÈRE DE SÉCURITÉ - DÉFINITIONS Il est important de lire et de comprendre ce mode dʼemploi. Les informations quʼil contient concernent VOTRE SÉCURITÉ et visent à ÉVITER TOUT PROBLÈME. Les symboles ci-dessous servent à aider à reconnaître cette information. Indique une situation dangereuse imminente qui, si elle nʼest pas évitée, causera la mort ou des graves blessures.
- Page 20 15. Désengager le système d'entraînement, le cas échéant, avant de démarrer le moteur. 16. Si la tondeuse se met à vibrer de façon anormale, relâcher l'anse, attendre que la lame s'immobilise et retirer la clé de sûreté et le bloc-piles, All manuals and user guides at all-guides.com puis en rechercher immédiatement la raison.
- Page 21 • PRENDRE SOIN DE LA TONDEUSE. Maintenir les arêtes de coupe tranchantes et propres afin dʼassurer la meilleure performance et pour réduire le risque de blessures. Suivre les consignes de graissage et de changement dʼaccessoires. Inspecter régulièrement le cordon de la tondeuse, All manuals and user guides at all-guides.com en cas de dommage, en confier la réparation à...
- Page 22 DESCRIPTION FONCTIONNELLE All manuals and user guides at all-guides.com CM1936Z 1.) Clé de sûreté/port de charge 2.) Anse (manette du manocontacteur) 3.) Boulons de réglage de la poignée 4.) Boutons de rangement de la poignée 5.) Collecteur d'herbe 6.) Dispositif de dégagement du réglage de la hauteur de coupe...
- Page 23 DESCRIPTION FONCTIONNELLE All manuals and user guides at all-guides.com SPCM1936 1.) Clé de sûreté/port de charge 2.) Anse (manette du manocontacteur) 3.) Boulons de réglage de la poignée 4.) Boutons de rangement de la poignée 5.) Collecteur d'herbe 6.) Dispositif de dégagement du réglage de la hauteur de coupe 7.) Indicateur de la hauteur de coupe 8.) Pile amovible...
- Page 24 PRÉPARATION All manuals and user guides at all-guides.com SE REPORTER AUX SCHÉMAS (A, B, C...) ET AUX NUMÉROS D'ARTICLE (1, 2, 3...) TELS QU'INDIQUÉS DANS CE MODE D'EMPLOI. PAR EXEMPLE, A-1 IDENTIFIE L'ARTICLE 1 DE L'ILLUSTRATION A. DÉBALLAGE (ILLUSTRATIONS A, B) MISE EN GARDE : Zone de pincement.
- Page 25 MONTAGE DU COLLECTEUR D'HERBE (ILLUSTRATIONS E1, E2, E3 ET E4) All manuals and user guides at all-guides.com 1. Avant d'assembler le collecteur d'herbe au cadre, vérifier que le collecteur d'herbe et le cadre sont semblables à ceux de l'illustration E1. 2.
- Page 26 • Une pile à pleine charge se range en toute sécurité jusqu'à la température de -40 °C (-40 °F). • La pile est sans entretien. • La CM1936Z peut utiliser le bloc-piles RB3610 ou RB3612. Le bloc-piles RB3612 est uniquement destiné à la tondeuse SPCM1936. Le bloc-piles ne doit servir à rien d'autre.
- Page 27 AVERTISSEMENT : RISQUE D'INCENDIE All manuals and user guides at all-guides.com DÉBRANCHER SYSTÉMATIQUEMENT LE CHARGEUR DE LA SOURCE D'ALIMENTATION (PRISE MURALE) AVANT DE RETIRER LE CONNECTEUR DU CHARGEUR. SOUS CERTAINES CONDITIONS, AVEC LE CHARGEUR BRANCHÉ À LA SOURCE D'ALIMENTATION, LE CONNECTEUR EXPOSÉ PEUT ÊTRE COURT-CIRCUITÉ PAR UN CORPS ÉTRANGER ET PEUT PROVOQUER UN INCENDIE. TOUT CORPS ÉTRANGER CONDUCTEUR, TEL QUE, MAIS SANS EN EXCLURE D'AUTRES, LA LAINE D'ACIER, LE PAPIER D'ALUMINIUM OU TOUTE ACCUMULATION DE PARTICULES MÉTALLIQUES, DOIT ÊTRE MAINTENU À...
- Page 28 DÉMARRAGE DE LA TONDEUSE All manuals and user guides at all-guides.com Insérer la clé de sûreté J-1 dans le contact, l'enfoncer jusqu'à ce qu'elle soit complètement rentrée dans celui-ci. La tondeuse est maintenant opérationnelle. La faire démarrer en actionnant la manette du manocontacteur M-2. DANGER : LAME TRANCHANTE EN MOUVEMENT.
- Page 29 ÉCRAN PROTECTEUR ET PANNEAU ARRIÈRE - ILLUSTRATION O All manuals and user guides at all-guides.com L'écran protecteur O-1 est conçu pour minimiser la projection arrière par la lame de la tondeuse, de pierres ou autres objets provenant de sous le châssis.
- Page 30 4. Insérer les crochets de suspension Q-4 du collecteur d'herbe sur la tondeuse comme l'indique la figure R. Relâcher le panneau d'éjection All manuals and user guides at all-guides.com arrière. DANGER : Lame mobile tranchante. Ne jamais utiliser la tondeuse à...
- Page 31 CONSEILS POUR TONDRE LA PELOUSE All manuals and user guides at all-guides.com REMARQUE : TOUJOURS INSPECTER LA SURFACE À TONDRE ET RETIRER TOUTE PIERRE, BÂTON, FIL, OS ET AUTRES DÉBRIS QU POURRAIENT ÊTRE PROJETÉS PAR LA LAME EN ROTATION. 1. Tondre les pentes en diagonale, jamais de haut en bas. Être extrêmement prudent lors des virages sur les pentes. Ne pas tondre les pentes excessivement inclinées.
- Page 32 RETRAIT ET INSTALLATION DE LA LAME - ILLUSTRATION U All manuals and user guides at all-guides.com 1. RELÂCHER L'ANSE POUR ÉTEINDRE LA TONDEUSE, ATTENDRE QUE LA LAME S'IMMOBILISE ET RETIRER LA CLÉ DE SÛRETÉ ET LE BLOC-PILES. 2. Utiliser un morceau de bois de 2x4 U-1 (environ 2 pieds de longueur) (610 mm) pour empêcher la lame de tourner lors du retrait de l'écrou à...
- Page 33 ÉQUILIBRAGE DE LA LAME All manuals and user guides at all-guides.com Vérifier l'équilibre de la lame en enfilant le trou central de la lame Y-1 sur un clou ou un tournevis à tige ronde Y-2, fixé horizontalement dans un étau Y-3. Si l'une des extrémités de la lame pivote vers le bas, la limer. La lame est correctement en équilibre quand aucune extrémité...
- Page 34 242501-05 COLLECTEUR D'HERBE DE RECHANGE MB-1200 LAME DE RECHANGE BLOC-PILES RB-3610 OU RB-3612 POUR LE MODÈLE CM1936Z. BLOC-PILE RB-3612 POUR LE MODÈLE SPCM1936. VOICI QUELQUES CONSEILS PRATIQUES POUR OPTIMISER L'UTILISATION DE VOTRE TONDEUSE SANS FIL BLACK & DECKER... ET OBTENIR UNE PELOUSE DE RÊVE...
- Page 35 à tout moment en cours de tonte, régler les roues à une hauteur de coupe plus élevée. Une surcharge du moteur peut résulter dans une coupe inégale et une décharge rapide de la batterie. All manuals and user guides at all-guides.com Trois bonnes idées pour améliorer l'apparence de la pelouse : varier fréquemment le sens de coupe, couper horizontalement sur les pentes (ceci est également une bonne mesure de sécurité) et ne pas oublier de superposer le champ de coupe à...
- Page 36 PROBLÈME SOLUTION All manuals and user guides at all-guides.com La tondeuse ne ramasse pas l'herbe coupée dans le A. La goulotte est encrassée. Relâcher l'anse pour éteindre la tondeuse. sac. Retirer la clé de sûreté et le bloc-piles. Vider la goulotte de l'herbe coupée. B.
- Page 37 All manuals and user guides at all-guides.com Information sur les réparations Tous les centres de réparation Black & Decker sont dotés de personnel qualifié en matière dʼoutillage électrique; ils sont donc en mesure dʼoffrir à leur clientèle un service efficace et fiable. Que ce soit pour un avis technique, une réparation ou des pièces de rechange authentiques installées en usine, communiquer avec lʼétablissement Black &...
- Page 38 All manuals and user guides at all-guides.com Podadoras inalámbricas de 483 mm (19 pulgadas) para formación de mantillo con bolsa trasera MANUAL DE INSTRUCCIONES Catálogo N° CM1936Z Catálogo N° SPCM1936 Gracias por elegir Black & Decker! Visite www.BlackandDecker.com/NewOwner para registrar su nuevo producto.
- Page 39 PAUTAS DE SEGURIDAD/DEFINICIONES All manuals and user guides at all-guides.com Es importante que lea y comprenda este manual. La información que contiene se relaciona con la protección de SU SEGURIDAD y la PREVENCIÓN DE PROBLEMAS. Los símbolos que siguen se utilizan para ayudarlo a reconocer esta información. indica una situación de peligro inminente que, si no se evita, provocará...
- Page 40 14. Evite los entornos peligrosos. Nunca opere la podadora sobre césped húmedo o mojado; nunca use la podadora bajo la lluvia. Siempre asegúrese de tener los pies bien apoyados; camine, nunca corra. All manuals and user guides at all-guides.com 15. Desconecte el sistema de accionamiento, de haberlo, antes de arrancar el motor. 16.
- Page 41 • USE LA VESTIMENTA ADECUADA. No use ropa holgada ni joyas. Pueden quedar atrapadas en las piezas móviles. Al trabajar al aire libre, se recomienda usar guantes de goma, pantalones largos y calzado resistente antideslizante. All manuals and user guides at all-guides.com •...
- Page 42 DESCRIPCIÓN DE LAS FUNCIONES - CM1936Z All manuals and user guides at all-guides.com 1.) Llave de seguridad/puerto de carga 2.) Asidero de seguridad (palanca del interruptor) 3.) Pernos de ajuste del mango 4.) Perillas de almacenamiento en el mango 5.) Bolsa recolectora de césped 6.) Liberador de ajuste de altura de...
- Page 43 DESCRIPCIÓN DE LAS FUNCIONES - SPCM1936 All manuals and user guides at all-guides.com 1.) Llave de seguridad/puerto de carga 2.) Asidero de seguridad (palanca del interruptor) 3.) Pernos de ajuste del mango 4.) Perillas de almacenamiento en el mango 5.) Bolsa recolectora de césped 6.) Liberador de ajuste de altura de corte 7.) Indicador de altura de corte...
- Page 44 PREPARACIÓN CONSULTE LOS DIAGRAMAS (A, B, C...) Y LOS NÚMEROS DE LOS ÍTEMS (1, 2, 3...) SEGÚN LA INDICACIÓN INCLUIDA EN EL All manuals and user guides at all-guides.com MANUAL. POR EJEMPLO, POR EJEMPLO, LA INDICACIÓN A-1 SER REFIERE AL ÍTEM 1 DE LA FIGURA A. DESEMBALAJE: (FIGURAS A, A1, A2) PRECAUCIÓN: Punto de pellizco.
- Page 45 ENSAMBLADO DEL RECOLECTOR DE CÉSPED (FIGURAS E1, E2, E3, E4) All manuals and user guides at all-guides.com 1. Antes de comenzar a ensamblar la bolsa recolectora de césped en el marco, verifique que ambos sean similares a la Figura E1. 2.
- Page 46 • La batería debe utilizarse sólo en la podadora CM1936 y no debe utilizarse para ningún otro propósito. • La CM1936Z puede utilizar la batería RB3610 o la RB3612. La batería RB3612 debe utilizarse únicamente con la podadora SPCM1936. La batería no debe utilizarse para ningún otro fin.
- Page 47 ADVERTENCIA: RIESGO DE INCENDIO All manuals and user guides at all-guides.com SIEMPRE DESCONECTE EL CARGADOR DE LA FUENTE DE ENERGÍA (TOMACORRIENTE DE PARED) ANTES DE RETIRAR EL CONECTOR DEL CARGADOR. EN DETERMINADAS CONDICIONES, CUANDO EL CARGADOR ESTÁ CONECTADO A LA FUENTE DE ENERGÍA, EL CONECTOR AL DESCUBIERTO PUEDE SUFRIR UN CORTOCIRCUITO ANTE LA PRESENCIA DE UN MATERIAL EXTRAÑO Y PROVOCAR UN INCENDIO.
- Page 48 PARA ENCENDER LA PODADORA All manuals and user guides at all-guides.com Inserte la llave de seguridad J-1 en el alojamiento del interruptor, hasta que se asiente por completo en el interior del alojamiento. La podadora ahora está lista para usar y se puede arrancar accionando la palanca del interruptor M-2. HOJA MÓVIL FILOSA.
- Page 49 PROTECTOR DE SEGURIDAD Y PUERTA TRASERA: FIGURA O All manuals and user guides at all-guides.com Este protector de seguridad O-1 está diseñado para minimizar el riesgo de que la hoja de la podadora lance piedras u otros objetos hacia atrás desde debajo de la plataforma.
- Page 50 4. Coloque los ganchos para colgar el recolector de césped Q-4 sobre la podadora como se muestra en la Figura R. Suelte la puerta de All manuals and user guides at all-guides.com descarga trasera. Hoja móvil filosa. Nunca haga funcionar la podadora a menos que los ganchos para colgar del recolector de césped estén PELIGRO: debidamente asentados en la podadora y que la puerta de descarga...
- Page 51 CONSEJOS PARA EL CORTE DE CÉSPED All manuals and user guides at all-guides.com NOTA: SIEMPRE INSPECCIONE EL ÁREA DONDE VA A UTILIZAR LA PODADORA Y RETIRE TODAS LAS PIEDRAS, PALOS, ALAMBRES HUESOS Y OTROS RESIDUOS QUE PODRÍAN SER LANZADOS POR LA HOJA EN ROTACIÓN. 1.
- Page 52 RETIRO E INSTALACIÓN DE LA HOJA: FIGURA U All manuals and user guides at all-guides.com 1. SUELTE LA PALANCA DEL INTERRUPTOR PARA APAGAR LA PODADORA, ESPERE HASTA QUE LA HOJA SE DETENGA Y RETIRE LA LLAVE DE SEGURI- DAD Y EL PAQUETE DE BATERÍAS. 2.
- Page 53 SIMETRÍA DE LA HOJA All manuals and user guides at all-guides.com Verifique la simetría de la hoja colocando el agujero central de la hoja Y-1 sobre un clavo o un destornillador de vástago redondo Y-2, sujeto horizontalmente en una prensa Y-3. Si alguno de los extremos de la hoja gira hacia abajo, lime ese extremo.
- Page 54 Nº de pieza 242501-05 BOLSA RECOLECTORA DE CÉSPED DE REPUESTO MB-1200 HOJA DE REPUESTO PAQUETE DE BATERÍAS RB-3610 O RB-3612 PARA EL MODELO CM1936Z. PAQUETE DE BATERÍAS RB-3612 PARA EL MODELO SPCM1936. A CONTINUACIÓN, LE BRINDAMOS ALGUNOS CONSEJOS ÚTILES PARA APROVECHAR AL MÁXIMO SU PODADORA INALÁMBRICA BLACK &...
- Page 55 Tres buenas ideas para realzar el aspecto del césped: Varíe la dirección de corte con frecuencia, corte en dirección horizontal en las laderas (esto es también una buena práctica de seguridad) y no se olvide de solapar el recorrido de corte en cada pasada. All manuals and user guides at all-guides.com 10.
- Page 56 GUÍA DE SOLUCIÓN DE PROBLEMAS All manuals and user guides at all-guides.com PROBLEMA SOLUCIÓN La podadora no funciona al activar la A. Verifique para asegurarse de que la llave de seguridad ha sido instalada palanca de seguridad. y está completamente asentada, y que el botón del alojamiento del interruptor esté...
- Page 57 PROBLEMA SOLUCIÓN All manuals and user guides at all-guides.com La podadora no recoge los recortes de césped A. El conducto está obstruido. Suelte la palanca del interruptor para apagar la con la bolsa. podadora. Retire la llave de seguridad y el paquete de baterías. Elimine los recortes de césped del conducto.
- Page 58 2 AÑOS DE GARANTIA Este producto cuenta con dos años de garantía a partir de la fecha de compra contra cualquier defecto de su funcionamiento, así como All manuals and user guides at all-guides.com cualquier falla debido a materiales empleados para su fabricación ó mano de obra defectuosa. Nuestra garantía incluye la reparación o reposición del producto y/o componentes sin cargo alguno para el cliente incluyendo la mano de obra, esta incluye los gastos de trasportación erogados para lograr cumplimiento de esta garantía en los domicilios diversos señalados.
- Page 59 All manuals and user guides at all-guides.com...
- Page 60 All manuals and user guides at all-guides.com Cat No. CM1936Z, SPCM1936 Form No. 90572812 March 2011 Copyright © 2011 Black & Decker Printed in China...