BRAND Transferpette S Mode D'emploi
Masquer les pouces
Voir aussi pour Transferpette S:
- Mode d'emploi (74 pages) ,
- Mode d'emploi (167 pages) ,
- Mode d'emploi (159 pages)
Table des Matières
Publicité
Les langues disponibles
Les langues disponibles
Liens rapides
Publicité
Chapitres
Table des Matières

Manuels Connexes pour BRAND Transferpette S


Sommaire des Matières pour BRAND Transferpette S
- Page 1 Liquid Handling · Easy Handling! Transferpette ® F I R S T C L A S S · B R A N D Gebrauchsanleitung Operating Manual Mode d'emploi Instrucciones de manejo Istruzioni per l'uso 您可在www.brand.de/cn/manuals 下载本产品的中文操作手册。...
-
Page 3: Table Des Matières
Inhaltsverzeichnis Seite Sicherheitsbestimmungen Einsatzgrenzen Funktions- und Bedienelemente Pipettieren Volumen kontrollieren Genauigkeitstabelle Justieren – Easy Calibration Autoklavieren UV-Entkeimung Filter 5 ml und 10 ml Wartung und Reinigung Bestelldaten · Zubehör Ersatzteile · Zubehör Störung – was tun? Reparatur Kontaktadressen Kalibrierservice Mängelhaftung Entsorgung... -
Page 5: Sicherheitsbestimmungen
Sicherheitsbestimmungen Bitte unbedingt sorgfältig durchlesen! Dieses Gerät kann in Kombination mit gefährlichen Materialien, Arbeits- vorgängen und Apparaturen verwendet werden. Die Gebrauchsanleitung kann jedoch nicht alle Sicherheitsprobleme aufzeigen, die hierbei eventuell auftreten. Es liegt in der Verantwortung des Anwenders, die Einhaltung der Sicherheits- und Gesundheitsvorschriften sicherzustellen und die entspre- chenden Einschränkungen vor Gebrauch festzulegen. -
Page 6: Einsatzgrenzen
Einsatzgrenzen Verwendungszweck Luftpolsterpipette zum Pipettieren von wässrigen Lösungen mittlerer Dichte und geringer bis mittlerer Viskosität. Einsatzgrenzen Das Gerät dient zum Pipettieren von Proben unter Beachtung folgender Grenzen: – Einsatz zwischen +15 °C und +40 °C (59 °F und 104 °F) von Gerät und Reagenz (andere Temperaturen auf Anfrage) –... -
Page 7: Funktions- Und Bedienelemente
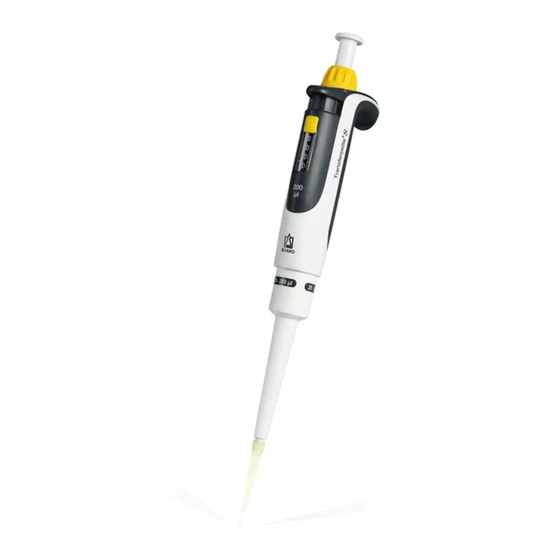
Strich entspricht dem wieder einsetzen. Dezimalpunkt. Griffteil Beschriftungsfenster Pipettenschaft Spitzenaufnahmekonus (Abb.: Transferpette S , Typ Variabel) ® Hinweis: Einwandfreie Analysenergebnisse sind nur mit Qualitäts-Spitzen zu erreichen. Wir empfehlen Pipettenspitzen von BRAND. Weitere Hinweise siehe Genauigkeitstabelle auf Seite 13 und 14. -
Page 8: Pipettieren
Pipettieren • 5 ml- und 10 ml-Geräte sollten nur mit eingebautem PE-Filter verwendet werden (s. Seite 16)! • Pipettenspitzen sind Einmalartikel! Spitze aufstecken Richtige Spitze entsprechend dem Volumenbereich bzw. Color-Code verwenden! Auf dichten und festen Spitzensitz achten. Volumen einstellen a) Volumenverstellschutz nach oben schieben (UNLOCK). - Page 9 Pipettieren c) Pipettierknopf gleichmäßig zurück- gleiten lassen. Damit die Flüssigkeit ihre Endposition erreicht, Spitze noch einige Sekunden eingetaucht lassen. Probe abgeben a) Pipettenspitze an Gefäßwand anlegen. Pipette im Winkel von 30-45° zur Gefäßwand halten. b) Pipettierknopf mit gleichmäßiger Ge- schwindigkeit bis zum ersten Anschlag drücken und festhalten.
- Page 10 Pipettieren Spitze abwerfen Pipettenschaft über einen geeigneten Entsorgungsbehälter halten und die Spitzenabwurftaste bis zum Anschlag niederdrücken. Wichtig! Gerät mit gefüllter Spitze nicht hinlegen, da sonst Medium in das Gerät fließen und dieses kontaminieren kann!
-
Page 11: Volumen Kontrollieren
Volumen kontrollieren Wir empfehlen, je nach Einsatz, alle 3-12 Monate eine Prüfung des Gerätes. Der Zyklus kann aber den individuellen Anforderungen an- gepasst werden. Die gravimetrische Volumenprüfung der Pipette erfolgt durch nach- folgende Schritte und entspricht der DIN EN ISO 8655, Teil 6. Nennvolumen einstellen Maximales angegebenes Gerätevolumen einstellen (Vorgehensweise siehe Seite 8). - Page 12 – 1 *) = Berechnung von Richtigkeit (R%) und Variationskoeffizient (VK%): R% und VK% werden nach den Formeln der statistischen Qualitäts- kontrolle berechnet. Hinweis: Prüfanweisungen (SOPs) und eine Demoversion der Kalibriersoftware EASYCAL ™ 4.0 stehen unter www.brand.de zum Download.
-
Page 13: Genauigkeitstabelle
Genauigkeitstabelle S , Typ Variabel Transferpette ® Volumenbereich Teilvolumen Teilschritte Empfohlener ≤ ± % ≤ % µl µl µl Spitzentyp, µl 0,1 - 1 0,001 0,1 - 20 0,1 - 2,5 0,002 0,5 - 20 1,25 0,25 0,5 - 10 0,01 0,5 - 20 2 - 20... - Page 14 Genauigkeitstabelle S , Typ Fix Transferpette ® Volumenbereich Empfohlener ≤ ± % ≤ % µl Spitzentyp, µl 0,5 - 2 - 200 2 - 200 2 - 200 2 - 200 2 - 200 50 - 1000 1000 50 - 1000 * R = Richtigkeit, VK = Variationskoeffizient 20 °C Endprüfwerte bezogen auf das auf dem Gerät aufgedruckte Nenn-...
-
Page 15: Justieren - Easy Calibration
Justieren – Easy Calibration Das Gerät ist permanent justiert für wässerige Lösungen. Sollte einwand- frei feststehen, dass die Pipette ungenau arbeitet oder, um das Gerät auf Lösungen unterschiedlicher Dichte und Viskosität oder speziell geformte Pipettenspitzen einzustellen, kann es mit Easy Calibration-Technik justiert werden. -
Page 16: Autoklavieren
Autoklavieren S ist komplett autoklavierbar bei 121 °C (250 °F), Die Transferpette ® 2 bar und einer Haltezeit von mindestens 15 Minuten nach DIN EN 285. Pipettenspitze abwerfen. Ohne weitere Demontage die komplette Pipette autoklavieren. S vollständig abkühlen und trocknen lassen. Transferpette ®... -
Page 17: Wartung Und Reinigung
S bis 1000 µl Transferpette ® Wartung und Reinigung Wartung Pipettenaufnahmekonus auf Beschädigung prüfen. Kolben und Dichtung auf Verschmutzung untersuchen. Dichtheit des Geräts prüfen. Dazu Probe aufsaugen, Gerät ca. 10 s senkrecht halten. Falls sich an der Pipettenspitze ein Tropfen bildet: Störung – was tun?, Seite 22. Demontage und Reinigung Pipettenschaft (S) vom Griffteil durch Abschrauben lösen. - Page 18 Kolben und O-Ring-Dichtung auf Verschmutzung untersuchen. Dichtheit des Geräts prüfen. Wir empfehlen das BRAND Dichtheitsprüf- gerät BRAND PLT unit zu verwenden. Alternativ dazu Probe aufsaugen, Gerät ca. 10 s senkrecht halten. Falls sich an der Pipettenspitze ein Tropfen bildet: Störung – was tun?, Seite 22.
-
Page 19: Bestelldaten · Zubehör
Bestelldaten · Zubehör S , Typ Fix Transferpette ® Volumen Bezeichnung Best.-Nr. 10 µl F-10 7047 08 20 µl F-20 7047 16 25 µl F-25 7047 20 50 µl F-50 7047 28 100 µl F-100 7047 38 200 µl F-200 7047 44 500 µl F-500... - Page 20 Ersatzteile S bis 1000 µl Transferpette ® Aussehen und Abmessungen der Ersatzteile entsprechen dem jeweiligen Nennvolumen. S 20-200 µl) (Abb. Ersatzteile Transferpette ® Abwerfer- Kolben- Dichtung mit Schaft mit Abwerfer- oberteil einheit Feder Abwerferfeder unterteil S , Typ Fix Transferpette ®...
-
Page 21: Ersatzteile · Zubehör
Ersatzteile · Zubehör S , 5 ml und 10 ml Transferpette ® Aussehen und Abmessungen der Ersatzteile entsprechen dem jeweiligen Nennvolumen. (Abb. Ersatzteile Transferpette S 5 ml). ® Abwerfer- Abwerfer- Kolben- Schaft- Abwerfer- oberteil unterteil einheit unterteil feder S , Typ Variabel Transferpette ®... -
Page 22: Störung - Was Tun
Störung – was tun? Störung Mögliche Ursache Was tun? Spitze tropft Ungeeignete Spitze Nur Qualitätsspitzen (Gerät undicht) verwenden Spitze sitzt nicht fest Spitze fester aufdrücken Gerät saugt nicht Dichtung verunreinigt Dichtung reinigen oder zu wenig auf, Dichtung oder Konus Dichtung oder Schaft abgegebenes beschädigt ersetzen... -
Page 23: Reparatur
Gerät an Hersteller oder Händler senden. Vor- drucke können beim Händler oder Hersteller angefordert werden, bzw. stehen unter www.brand.de zum Download bereit. In den USA und Kanada: – Bitte klären Sie mit BrandTech Scientific, Inc. die Voraussetzungen für die Rücksendung bevor Sie das Gerät zum Service einschicken. -
Page 24: Kontaktadressen
Kontaktadressen BRAND GMBH + CO KG Otto-Schott-Straße 25 97877 Wertheim (Germany) Tel.: +49 9342 808-0 Fax: +49 9342 808-98000 E-Mail: info@brand.de www.brand.de USA und Kanada: BrandTech Scientific, Inc. ® 11 Bokum Road Essex, CT 06426-1506 (USA) Tel.: +1-860-767 2562 Fax: +1-860-767 2563 www.brandtech.com... -
Page 25: Kalibrierservice
Medien sollte häufiger geprüft werden. Die ausführliche Prüfanweisung steht unter www.brand.de bzw. www.brandtech.com zum Download bereit. BRAND bietet Ihnen darüber hinaus die Möglichkeit, Ihre Geräte durch unseren Werks-Kalibrierservice oder durch das BRAND-DAkkS-Labor kalibrieren zu lassen. Schicken Sie uns einfach die zu kalibrierenden Geräte mit der Angabe, welche Art der Kalibrierung Sie wünschen. -
Page 26: Mängelhaftung
Mängelhaftung Wir haften nicht für Folgen unsachgemäßer Behandlung, Verwendung, Wartung, Bedienung oder nicht autorisierter Reparatur des Gerätes oder für Folgen normaler Abnutzung, insbesondere von Verschleißteilen wie z.B. Kolben, Dichtungen, Ventilen sowie bei Glasbruch. Gleiches gilt für die Nichtbeachtung der Gebrauchsanleitung. Insbesondere übernehmen wir keine Haftung für entstandene Schäden, wenn das Gerät weiter zer- legt wurde als in der Gebrauchsanleitung beschrieben oder wenn fremde Zubehör- bzw. - Page 27 Table of Contents Page Safety Instructions Limitations of Use Operating and Control Elements Pipetting Checking the Volume Accuracy Table Adjustment – Easy Calibration Autoclaving UV sterilization 5 ml and 10 ml Filter Servicing and Cleaning Ordering Information · Accessories Spare Parts · Accessories Troubleshooting Repairs Contact addresses...
-
Page 29: Safety Instructions
Safety Instructions Please read the following carefully! This instrument may sometimes be used with hazardous materials, opera- tions, and equipment. It is beyond the scope of this manual to address all of the potential safety risks associated with its use in such applications. It is the responsibility of the user of this pipette to consult and establish appropriate safety and health practices and determine the applicability of regulatory limitations prior to use. -
Page 30: Limitations Of Use
Limitations of Use Purpose The pipette is an air-displacement system for pipetting aqueous solutions with medium density and low to medium viscosity. Limitations of Use The instrument is intended for the pipetting of liquids within the following limitations: – Temperature of both the instrument and solution should be between +15 °C to +40 °C (59 °F to 104 °F). -
Page 31: Operating And Control Elements
Pipette shaft Tip cone (Fig. shows Transferpette ® adjustable volume) Note: Optimum analysis results can only be obtained with quality tips. We recommend pipette tips from BRAND. For further information, refer to the accuracy table on pages 37 and 38. -
Page 32: Pipetting
Pipetting • 5 ml and 10 ml instruments should only be used with the PE filter installed (see page 40). • Pipette tips are disposables items! Fitting the tip Use the correct tip according to the volume range or the color code. Ensure that the tip is securely seated. - Page 33 Pipetting c) Let the pipetting button slide back slowly. In order for the liquid to reach its end position, leave the tip immersed for a few seconds. Discharge sample a) Place the pipette tip against the wall of the vessel. Hold the pipette at an angle of 30-45°...
-
Page 34: Important
Pipetting Ejecting the tip Hold the pipette shaft over a suitable disposal container and press the tip ejection key to the stop. Important! Don't lay the instrument horizontal when the tip is filled. Liquid may enter and contaminate the instrument. -
Page 35: Checking The Volume
Checking the Volume Depending on use, we recommend inspection of the instrument every 3 to 12 months. The cycle can, however, be adjusted to individual requirements. The gravimetric testing of the pipette volume is performed according to the following steps and is in accordance with DIN EN ISO 8655, Part 6. Set nominal volume Set volume to the maximum volume indicated on the instrument (see page 32 for procedure). - Page 36 *) = Calculation of accuracy (A%) and variation coefficient (CV%): A% and CV% are calculated according to the formulas for statistical control. Note: Testing instructions (SOPs) and a demo version of the EASYCAL calibration software are available for download at www.brand.de.
-
Page 37: Accuracy Table
Accuracy Table S , adjustable volume Transferpette ® Volume range Volume step Increment Recommended ≤ ± % ≤ % µl µl µl type of tip, µl 0.1 - 1 0.001 0.1 - 20 0.1 - 2.5 0.002 0.5 - 20 1.25 0.25 0.5 - 10... - Page 38 Accuracy Table S , Fixed volume Transferpette ® Volume range Recommended ≤ ± % ≤ % µl type of tip, µl 0.5 - 2 - 200 2 - 200 2 - 200 2 - 200 2 - 200 50 - 1000 1000 50 - 1000 * A = Accuracy, CV = Coefficient of Variation...
-
Page 39: Adjustment - Easy Calibration
Adjustment – Easy Calibration The instrument is permanently adjusted for aqueous solutions. If the pipette operation is clearly inaccurate, or if the instrument must be adjusted for solutions of different densities and viscosities or specially- shaped pipette tips, adjustments can be made using the Easy Calibration Technique. -
Page 40: Autoclaving
Autoclaving S is completely autoclavable at 121 °C (250 °F), The Transferpette ® 2 bar absolute (30 psi) with a holding time of at least 15 minutes, according to DIN EN 285. Eject the pipette tip. Autoclave the complete pipette without any further disassembling. S to completely cool and dry. -
Page 41: Servicing And Cleaning
S up to 1000 µl Transferpette ® Servicing and Cleaning Servicing Inspect the pipette tip cone for damage. Inspect the piston and seal for contamination. Test the instrument‘s piston seal. To do this, affix a tip, and aspirate a sample. Hold the instrument vertically, with the sample in the tip for approximately 10 s. - Page 42 Inspect the pipette tip cone for damage. Inspect the piston and O-Ring-seal for contamination. Test the instrument‘s piston seal. We recommend using the BRAND leak testing instrument PLT unit. Alternatively: to do this, affix a tip, and as- pirate a sample. Hold the instrument vertically, with the sample in the tip for approximately 10 s.
-
Page 43: Ordering Information · Accessories
Ordering Information · Accessories S , fixed volume Transferpette ® Capacity Description Cat. No. 10 µl F-10 7047 08 20 µl F-20 7047 16 25 µl F-25 7047 20 50 µl F-50 7047 28 100 µl F-100 7047 38 200 µl F-200 7047 44 500 µl... - Page 44 Spare Parts S up to 1000 µl Transferpette ® Parts will differ slightly depending on nominal volume of instrument. (Fig. shows spare parts S 20-200 µl) for Transferpette ® Upper part Piston Seal with Shaft with Lower part of ejector unit spring ejector spring...
-
Page 45: Spare Parts · Accessories
Spare Parts · Accessories S , 5 ml and 10 ml Transferpette ® Parts will differ slightly depending on nominal volume of instrument. (Fig. shows spare parts for Transferpette S 5 ml). ® Upper part of Lower part of Piston Lower part of Ejector ejector... -
Page 46: Troubleshooting
Troubleshooting Problem Possible cause Corrective action Tip dripping Unsuitable tip Only use high-quality (instrument leaks) tips Tip not seated tightly Press tip on firmly The instrument does Seal contaminated Clean seal not aspirate or as- The seal or cone is Replace seal or shaft pirates too little;... -
Page 47: Repairs
– Complete the “Declaration on Absence of Health Hazards” and send the instrument to the manufacturer or supplier. Ask your supplier or manufac- turer for the form. The form can also be downloaded from www.brand.de. In the U.S. and Canada: –... -
Page 48: Contact Addresses
Contact addresses BRAND GMBH + CO KG Otto-Schott-Straße 25 97877 Wertheim (Germany) Tel.: +49 9342 808-0 Fax: +49 9342 808-98000 E-Mail: info@brand.de www.brand.de USA and Canada: BrandTech Scientific, Inc. ® 11 Bokum Road Essex, CT 06426-1506 (USA) Tel.: +1-860-767 2562 Fax: +1-860-767 2563 www.brandtech.com... -
Page 49: Calibration Service
Service. Just send in the instruments to be calibrated, accompanied by an indication of which kind of calibration you wish. Your instruments will be returned within a few days together with a test report (BRAND Calibration Service) or with a DAkkS Calibration Certificate. For further information, please contact your dealer or BRAND. -
Page 50: Disposal
Warranty We shall not be liable for the consequences of improper handling, use, servicing, operating or unauthorized repairs of the instrument or the consequences of normal wear and tear especially of wearing parts such as pistons, seals, valves and the breakage of glass as well as the failure to follow the instructions of the operating manual. - Page 51 Table de matières Page Règles de sécurité Limites d'emploi Eléments de fonction et de commande Pipetage Réglage du volume Table de précision Ajustage – Easy Calibration Autoclavage Désinfection aux rayons UV Filtre 5 ml et 10 ml Entretien et nettoyage Données de commande ·...
-
Page 53: Règles De Sécurité
Règles de sécurité A lire attentivement! Cet appareil peut être utilisé avec des matériaux dangereux ou en relation avec des appareillages ou procédés dangereux. Le livret mode d'emploi n'a pas pour but d‘exposer tous les problèmes de sécurité pouvant en résulter. -
Page 54: Limites D'emploi
Limites d'emploi Utilisation Pipette à coussin d'air, faite pour pipeter des solutions aqueuses de densité moyenne et de viscosité faible à moyenne. Limites d'emploi Cet appareil a été conçu pour le pipetage d’échantillons sous réserve des limites suivantes: – emploi entre +15 °C et +40 °C (59 °F et 104 °F) de l'appareil et du réactif (d'autres plages température sur demande) –... -
Page 55: Eléments De Fonction Et De Commande
S , type Variable) (ill.: Transferpette ® Remarque: Des résultats d'analyse exacts ne peuvent être obtenus qu'avec des pointes de qualité. Nous conseillons les pointes de pipette de BRAND. Pour plus d'informations voir le tableau de précision pages 61 et 62. -
Page 56: Pipetage
Pipetage • Les appareils de 5 ml et 10 ml ne devraient être utilisés qu'avec des filtres PE intégrés (voir page 64)! • Les pointes de pipette sont des articles à usage unique. Pose de la pointe N'utiliser que des pointes appropriées correspondant au volume ou au code couleur! Veiller à... -
Page 57: Ejection De L'échantillon
Pipetage c) Afin que le liquide atteigne sa position finale, laisser encore la pointe plongée env. quelques secondes. Ejection de l'échantillon a) Placer la pointe de la pipette contre la paroi du récipient. Maintenir la pipette avec un angle de 30 à 45° par rapport à... - Page 58 Pipetage Ejecter la pointe de pipette Tenir la tige de la pipette au-dessus d'un collecteur de déchets approprié puis enfon- cer la touche d'éjection de pointe jusqu'à la butée. Important: Un appareil avec une pointe remplie ne doit jamais être posé à l'horizontale! Du liquide pénétrerait à...
-
Page 59: Réglage Du Volume
Réglage du volume En fonction de l'usage, nous recommandons de faire contrôler l'appa- reil tous les 3 à 12 mois. Mais le cycle peut être adapté aux exigences individuelles. L'essai volumétrique gravimétrique des pipettes s’effectue de la manière suivante et satisfait aux exigences de la 6ème partie de la norme DIN EN ISO 8655. -
Page 60: Déviation Standard
E% et CV% seront calculés selon les formules utilisés pour le contrôle statistique de qualité. Remarque: Des instructions de contrôle (SOPs) et une version de démonstration du logiciel de calibrage EASYCAL ™ 4.0 peuvent être téléchargées sur le site www.brand.de. -
Page 61: Table De Précision
Table de précision S , type Variable Transferpette ® Gamme de Volume de Pas inter- Type de pointe ≤ ± % ≤ % volume µl la fraction µl médiares µl rec., µl 0,1 - 1 0,001 0,1 - 20 0,1 - 2,5 0,002 0,5 - 20 1,25... - Page 62 Table de précision S , type Fix Transferpette ® Gamme de Type de pointe ≤ ± % ≤ % volume µl rec., µl 0,5 - 2 - 200 2 - 200 2 - 200 2 - 200 2 - 200 50 - 1000 1000 50 - 1000...
-
Page 63: Ajustage - Easy Calibration
Ajustage – Easy Calibration Cet appareil est ajusté pour les solutions aqueuses. S’il est établit avec certitude que la pipette ne fonctionne pas précisément, ou s’il faut ajuster l’appareil pour des densités et des viscosités différentes ou pour des pointes de pipettes spéciales, les réglages correspondants peuvent être effectués grâce à... -
Page 64: Autoclavage
Autoclavage S est complètement autoclavable à 121 °C (250 °F), 2 La Transferpette ® bares avec une durée de maintien d'au moins 15 mn selon DIN EN 285. Jeter la pointe de la pipette. Autoclaver la pipette complète sans rien démonter de plus. Laisser complètement refroidir et sécher la Transferpette ®... -
Page 65: Entretien Et Nettoyage
S jusqu'à 1000 µl Transferpette ® Entretien et nettoyage Entretien Contrôler l’absence de détérioration au niveau du cône pour le logement de la pointe. Contrôler la propreté du piston et du joint d’étanchéité. Contrôlez l’étanchéité de l’appareil. Pour ce faire, aspirer l’échantillon puis tenir l’appareil à... - Page 66 Contrôler la propreté du piston et du joint torique. Nous conseillons employer l'appareil Contrôlez l’étanchéité de l’appareil. de côntrole d'étanchéité BRAND PLT unit. Alternatif: pour ce faire, aspirer l’échantillon puis tenir l’appareil à la verticale pendant env. 10 s. Lorsqu’une goutte se forme à...
-
Page 67: Données De Commande · Accessoires
Données de commande · Accessoires S , type Fix Transferpette ® Volume Spécification Réf. 10 µl F-10 7047 08 20 µl F-20 7047 16 25 µl F-25 7047 20 50 µl F-50 7047 28 100 µl F-100 7047 38 200 µl F-200 7047 44 500 µl... -
Page 68: Pièces De Rechange
Pièces de rechange S jusqu'à 1000 µl Transferpette ® Aspect visuel et dimensions des pièces de rechange conformément au volume nominal correspondant (illustr. pièces de rechange de la Transferpette ® 20-200 µl) Partie supérieure Unité du Joint d’étanchéité Tige avec Partie inférieure de l’éjecteur piston... -
Page 69: Pièces De Rechange · Accessoires
Pièces de rechange · Accessoires S , 5 ml et 10 ml Transferpette ® Aspect visuel et dimensions des pièces de rechange conformément au volume S 5 ml). nominal correspondant (illustration pièces de rechange de la Transferpette ® Partie supérieure Partie inférieure Unité... -
Page 70: Dérangement - Que Faire
Dérangement – que faire? Dérangement Cause possible Que faire? Pointe goutte Pointe inadéquate Employer uniquement (l'appareil n'est des pointes de qualité pas étanche) La pointe n'est pas Resserrer la pointe fixée correctement Joint d'étanchéité Nettoyer le joint encrassé Joint ou cône Remplacer le joint L’appareil n’aspire endommagé... -
Page 71: Réparation
– Remplir l’»Attestation de Décontamination» et la retourner avec l’appareil au fabricant ou au fournisseur. Demander le formulaire au fournisseur ou au fabricant ou bien en téléchargement gratuit sous www.brand.de. Aux États-Unis et au Canada: – Veuillez contacter BrandTech Scientific, Inc. pour demander les condi- tions de retour de l’appareil avant de le renvoyer au service après-... -
Page 72: Adresses De Contact
Adresses de contact BRAND GMBH + CO KG Otto-Schott-Straße 25 97877 Wertheim (Germany) Tel.: +49 9342 808-0 Fax: +49 9342 808-98000 E-Mail: info@brand.de www.brand.de États-Unis et Canada: BrandTech Scientific, Inc. ® 11 Bokum Road Essex, CT 06426-1506 (USA) Tel.: +1-860-767 2562 Fax: +1-860-767 2563 www.brandtech.com... -
Page 73: Service De Calibration
Les instructions de contrôle détaillés sont disponibles en téléchargement gratuit sur www.brand.de ou www.brandtech.com. BRAND vous offre également la possibilité de faire calibrer vos instru- ments par notre service de calibration ou par le laboratoire de calibration DAkkS de BRAND. Envoyer simplement les appareils à calibrer et indi- quer, quelle sorte de calibration vous désirez. -
Page 74: Garantie
Garantie Nous déclinons toute responsabilité en cas de conséquences d'un traite- ment, d'une utilisation, d'un entretien et d'une manipulation incorrecte, d'une réparation non-autorisée de l'appareil ou d'une usure normale, notamment des pièces d'usure, telles que les pistons, les joints d'étan- chéité, les soupapes et de rupture de pièces en verre. - Page 75 Contenido Página Normas de seguridad Limitaciones de empleo Elementos funcionales y operativos Pipetear Controlar el volumen Tabla de precisión Ajustar – Easy Calibration Autoclavage Esterilización con UV Filtro 5 ml y 10 ml Mantenimiento y limpieza Referencias · Accesorios Recambios · Accesorios ¿Qué...
-
Page 77: Normas De Seguridad
Normas de seguridad ¡Rogamos lea este documento cuidadosamente! Este aparato puede entrar en contacto con instalaciones, aplicaciones o materiales peligrosos. Estas instrucciones de manejo no tienen por objeto enumerar todas las limitaciones de seguridad que pueden presentarse durante el uso. El usuario del aparato tiene responsabilidad de tomar las medidas suficientes para su seguridad y su salud, así... -
Page 78: Limitaciones De Empleo
Limitaciones de empleo Aplicación Pipeta con cojín de aire para pipeteado de soluciones acuosas densidad medias y de viscosidad baja a media. Limitaciones de empleo El aparato sirve para pipetear muestras teniendo en consideración las siguientes limitaciones: – emplear entre +15 °C y +40 °C (59 °F y 104 °F) de aparato y reactivos (pueden obtenerse otras temperaturas si así... -
Page 79: Elementos Funcionales Y Operativos
(Ilustr.: Transferpette S , Tipo Variable) ® Indicación: Los resultados analíticos perfectos sólo se logran con puntas de alta calidad. Recomendamos puntas de pipetas de BRAND. Para más indicaciones, véase la tabla de precisión en la página 85 y 86. -
Page 80: Pipetear
Pipetear • Los aparatos de 5 ml y 10 ml sólo deben utilizarse teniendo un filtro PE instalado (ver pág. 88). • Puntas de pipeta son artículos desechables! Acoplar la punta Utilizar la punta apropiada, de acuerdo con el rango de volumen y el código de color. - Page 81 Pipetear c) Soltar lentamente el pulsador de pipe- teado. Para que el líquido alcance su posición final, dejar la punta sumer- gida durante algunos segundos más. Expulsar la muestra a) Apoyar la punta de la pipeta en la pared del recipiente. Sostener la pipeta contra la pared del recipiente en un ángulo de 30-45°.
- Page 82 Pipetear Expulsar la punta Mantenga el vástago de pipetas sobre un recipiente de residuos adecuado y pulse hacia abajo la tecla de eyección de la punta hasta el tope. Importante: ¡No colocar nunca el aparato con la punta llena en posición horizontal! Ya que introduciría el liquido en el interior del mismo y puede contaminarlo.
-
Page 83: Controlar El Volumen
Controlar el volumen Recomendamos, dependiendo del uso, que el aparato pase por un control cada 3-12 meses. No obstante, el ciclo puede adaptarse a sus necesidades individuales. La comprobación de volumen gravimétrica de la pipeta se realiza en pasos subsiguientes y cumple con la norma DIN EN ISO 8655, parte 6. Ajustar el volumen nominal Ajuste el volumen al máximo volumen indicado en el instrumento (para informarse sobre el modo de proceder, véase la página 80). - Page 84 *) = Cálculo de la exactitud (E%) y el coeficiente de variación (CV%): E% y CV% se calculan según las fórmulas de control estadístico de calidad. Indicación: Bajo www.brand.de se encuentran instrucciones de ensayo disponibles, como así también una versión del programa de calibración EASYCAL ™...
-
Page 85: Tabla De Precisión
Tabla de precisión S , Tipo Variable Transferpette ® Gama de ajuste Volumen Pasos Tipo de punta ≤ ± % ≤ % µl parcial µl parciales µl rec., µl 0,1 - 1 0,001 0,1 - 20 0,1 - 2,5 0,002 0,5 - 20 1,25 0,25... - Page 86 Tabla de precisión S , Tipo Fix Transferpette ® Gama de ajuste Tipo de punta ≤ ± % ≤ % µl rec., µl 0,5 - 2 - 200 2 - 200 2 - 200 2 - 200 2 - 200 50 - 1000 1000 50 - 1000...
-
Page 87: Ajustar - Easy Calibration
Ajustar – Easy Calibration El aparato está ajustado permanentemente para soluciones acuosas. Si la pipeta no funcionara de forma exacta, o fuera necesario regularla para trabajos con densidades o viscosidades distintas, o para emplear puntas de pipeta con formatos especiales, puede ajustarse mediante la técnica Easy Calibration. -
Page 88: Autoclavage
Autoclavage S es completamente autoclavable a 121 °C (250 °F), La Transferpette ® 2 barres y con un tiempo de exposición de como mínimo 15 minutos según DIN EN 285. Expulsar la punta de la pipeta. Sin desmontarlo adicionalmente, autoclavizar la pipeta completo S se enfríe y seque completamente. -
Page 89: Mantenimiento Y Limpieza
S hasta 1000 µl Transferpette ® Mantenimiento y limpieza Mantenimiento Compruebe que el cono de acoplamiento de puntas de pipetas no está dañado. Compruebe también si los émbolos y la obturación están limpios. Compruebe la hermeticidad del aparato. Para ello, absorba una muestra y mantenga el aparato en posición vertical durante unos 10 segundos. -
Page 90: Desmontaje Y Limpieza
Compruebe también que el émbolo y la junta (anillo O) estén limpios. Recomendamos usar el aparato Compruebe la hermeticidad del aparato. vertificador de estanqueidad de BRAND PLT unit. Alternativo: p ara ello, aspire una muestra y mantenga el aparato en posición vertical durante unos 10 segundos. -
Page 91: Referencias · Accesorios
Referencias · Accesorios S , Tipo Fix Transferpette ® Volumen Especificación Ref. 10 µl F-10 7047 08 20 µl F-20 7047 16 25 µl F-25 7047 20 50 µl F-50 7047 28 100 µl F-100 7047 38 200 µl F-200 7047 44 500 µl F-500... -
Page 92: Transferpette ® S Hasta 1000 Μl
Recambios S hasta 1000 µl Transferpette ® Aspecto y dimensiones de las piezas de repuesto según el volumen nominal correspondiente. (Ilustr. de S 20-200 µl). piezas de recambio para Transferpette ® Pieza superior Unidad de Junta con Vástago con muelle Pieza inferior de eyección émbolos... -
Page 93: Recambios · Accesorios
Recambios · Accesorios S , 5 ml y 10 ml Transferpette ® Aspecto y dimensiones de las piezas de repuesto según el volumen nominal corres- S 5 ml). pondiente. (Ilustr. de repuestos para Transferpette ® Pieza superior Pieza inferior Unidad Parte inferior Muelle de eyección... -
Page 94: Qué Hacer En Caso De Avería
¿Qué hacer en caso de avería? Avería Causa probable ¿Qué hacer? La punta gotea Punta no adecuada Utilizar sólo puntas de (el aparato no es calidad hermético) La punta no está bien Apretar más fuerte la sujeta punta El aparato no aspira La junta está... -
Page 95: Reparación
– Rellenar la “Declaración sobre la ausencia de riesgos para la salud” y enviarla con el aparato al fabricante o al distribuidor. Pedir el formulario al proveedor o al fabricante, o se encuentran bajo www.brand.de para un download. En los EE.UU. y Canadá: –... -
Page 96: Direcciones De Contacto
Direcciones de contacto BRAND GMBH + CO KG Otto-Schott-Straße 25 97877 Wertheim (Germany) Tel.: +49 9342 808-0 Fax: +49 9342 808-98000 E-Mail: info@brand.de www.brand.de EE. UU. y Canadá: BrandTech Scientific, Inc. ® 11 Bokum Road Essex, CT 06426-1506 (USA) Tel.: +1-860-767 2562 Fax: +1-860-767 2563 www.brandtech.com... -
Page 97: Servicio De Calibración
Además, BRAND le ofrece la posibilidad de calibrar sus instrumentos por medio del servicio de calibrado de BRAND o por el laboratorio de calibra- do DAkkS. Mándenos sencillamente los instrumentos a calibrar con la información qué tipo de calibrado desea. Recibirá los instrumentos con un certificado de fábrica o con un certificado de calibrado DAkkS después... -
Page 98: Garantía
Garantía No seremos responsables de las consecuencias derivadas del trato, manejo, mantenimiento, uso incorrecto o reparación no autorizada del aparato, ni de las consecuencias derivadas del desgaste normal, en especial de partes susceptibles de abrasión, tales como émbolos, juntas hermeticas, valvulas, ni de la rotura de partes de vidrio o del incumpli- miento de las instrucciones de manejo. - Page 99 Indice Pagina Norme di sicurezza Limitazioni all'uso Elementi funzionali e di comando Pipettaggio Controllo del volume Tabella di precisione Calibrazione – Easy Calibration Sterilizzazione in autoclave Sterilizzazione UV Filtro 5 ml e 10 ml Manutenzione e pulizia Ordinazioni · Accessori Parti di ricambio ·...
-
Page 101: Norme Di Sicurezza
Norme di sicurezza Leggere con attenzione! Questo strumento può essere utilizzato con materiali, procedure e apparec- chiature pericolosi. Le istruzioni per l'uso non possono però coprire tutte le eventuali problematiche di sicurezza che possono presentarsi. È respon- sabilità dell'utilizzatore osservare adeguate prescrizioni per la sicurezza e la salute e definire prima dell'uso le opportune limitazioni. -
Page 102: Limitazioni All'uso
Limitazioni all'uso Scopo Pipetta a cuscinetto d’aria per il pipettaggio di soluzioni acquose di media densità e di viscosità da bassa a media. Limiti operativi Lo strumento può essere utilizzato per il pipettaggio di campioni con le seguenti limitazioni: – uso tra +15 °C e +40 °C (59 °F e 104 °F) dello strumento e del reagente (per temperature diverse chiedere informazioni) –... -
Page 103: Elementi Funzionali E Di Comando
Cono di inserimento del puntale S , tipo Variabile) (Fig.: Transferpette ® Avvertenza: Per ottenere risultati analitici inconfutabili usare solo puntali di qualità. Raccomandiamo l’uso dei puntali BRAND. Per ulteriori indicazioni consultare la tabella di precisione alle pagine 109 e 110. -
Page 104: Pipettaggio
Pipettaggio • Usare le pipette da 5 ml e 10 ml solo con filtro PE incorporato (vedere pag. 112)! • I puntali sono articoli monouso! Inserimento del puntale Scegliere il puntale adatto in base al range di volume prescelto e al Color-Code! Assicurarsi che il puntale sia inserito ermeticamente e saldamente sulla pipetta. - Page 105 Pipettaggio c) Rilasciare il pulsante di pipettaggio con un movimento uniforme. Lasciare il puntale ancora immerso nel liquido per qualche secondo, per consen- tire al campione di raggiungere la sua posizione finale. Rilascio del campione a) Appoggiare il puntale sulla parete del recipiente.
- Page 106 Pipettaggio Espulsione del puntale Tenere il gambo della pipetta sopra un recipiente adeguato per lo smaltimento e premere il tasto di espulsione del puntale fino allo scatto. Importante! La pipetta con il puntale riempito non deve mai essere adagiata in posizione orizzontale;...
-
Page 107: Controllo Del Volume
Controllo del volume Raccomandiamo di far controllare lo strumento ogni 3-12 mesi, secondo la frequenza d’uso. Il ciclo di manutenzione può essere stabilito in base alle esigenze dell’utente. Il controllo gravimetrico del volume della pipetta deve essere effettuato come riportato di seguito, in accordo con la norma DIN EN ISO 8655, parte 6. - Page 108 *) = calcolo dell’accuratezza (A%) e del coefficiente di variazione (CV%): A% e CV% vengono calcolati secondo le formule del controllo di qualità statistico. Avvertenza: Le Procedure operative standard (SOP) e una versione demo del soft- ware di calibrazione EASYCAL ™ 4.0 possono essere scaricate da www.brand.de.
-
Page 109: Tabella Di Precisione
Tabella di precisione S , tipo Variabile Transferpette ® Volume Volume Divisione Tipo di puntale ≤ ± % ≤ % µl parziale µl µl rac., µl 0,1 - 1 0,001 0,1 - 20 0,1 - 2,5 0,002 0,5 - 20 1,25 0,25 0,5 - 10... - Page 110 Tabella di precisione S , tipo Fix Transferpette ® Volume Tipo di puntale ≤ ± % ≤ % µl rac., µl 0,5 - 2 - 200 2 - 200 2 - 200 2 - 200 2 - 200 50 - 1000 1000 50 - 1000 * A = Accuratezza, CV = Coefficiente di variazione...
-
Page 111: Calibrazione - Easy Calibration
Calibrazione – Easy Calibration Lo strumento è calibrato permanentemente per soluzioni acquose. La pipetta può essere calibrata con la tecnica Easy Calibration se è stato accertato con sicurezza che manca di precisione, o se si desidera impo- starla per soluzioni di densità e viscosità diverse o per puntali dalla forma particolare. -
Page 112: Sterilizzazione In Autoclave
Sterilizzazione in autoclave S può essere interamente sterilizzato in autoclave a La Transferpette ® 121 °C (250 °F), 2 bar e tempo di permanenza di almeno 15 min per DIN EN 285. Espellere il puntale. Sterilizzare in autoclave la pipetta intera, senza smontarla. Lasciar raffreddare e asciugare completamente la Transferpette ®... -
Page 113: Manutenzione E Pulizia
S fino a 1000 µl Transferpette ® Manutenzione e pulizia Manutenzione Ispezionare il cono di inserimento del puntale per individuare eventuali danni. Ispezionare il pistone e la guarnizione per rimuovere eventuale sporco. Controllare la tenuta della pipetta aspirando un campione e tenendo lo strumento in posizione verticale per circa 10 secondi. - Page 114 Ispezionare il pistone e la guarnizione O-Ring alla ricerca di sporco. Controllare la tenuta della pipetta. Raccomandiamo utilizzare lo strumento per prove di tenuta PLT unit di BRAND. Alternativo: aspirando un cam- pione e tenendo lo strumento in posizione verticale per circa 10 secondi.
- Page 115 Dati per le ordinazioni · Accessori S , tipo Fix Transferpette ® Volume Modello Codice 10 µl F-10 7047 08 20 µl F-20 7047 16 25 µl F-25 7047 20 50 µl F-50 7047 28 100 µl F-100 7047 38 200 µl F-200 7047 44...
-
Page 116: Parti Di Ricambio
Parti di ricambio S fino a 1000 µl Transferpette ® L’aspetto e le misure delle parti di ricambio corrispondono ai rispettivi volumi nominali. (Fig. Parti di ricambio Transferpette ® 20-200 µl) Parte superiore Alloggiamento Guarnizione Gambo con molla Parte inferiore dell’espulsore del pistone con molla... -
Page 117: Parti Di Ricambio · Accessori
Parti di ricambio · Accessori S , 5 ml e 10 ml Transferpette ® L’aspetto e le misure delle parti di ricambio corrispondono ai rispettivi volumi nominali. (Fig. Parti di ricambio Transferpette S 5 ml) ® Parte superiore Parte inferiore Parte inferiore Molla dell’... -
Page 118: Individuazione E Risoluzione Dei Problemi
Individuazione e risoluzione dei problemi Difetto Causa possibile Rimedio Il puntale gocciola Puntale non adatto Usare solo puntali (scarsa tenuta) di qualità Il puntale non è inserito Inserire saldamente saldamente il puntale La pipetta non Guarnizione sporca Pulire la guarnizione aspira o aspira poco, Danno a livello della Sostituire la guarnizione... -
Page 119: Riparazioni
I moduli possono essere richiesti al distributore o al produttore, oppure si possono scari- care dal sito www.brand.de. Dentro di Stati Uniti e del Canada: – Si invita a chiarire i requisiti per la restituzione con BrandTech Scienti- fic, Inc. -
Page 120: Indirizzi Di Contatto
Indirizzi di contatto BRAND GMBH + CO KG Otto-Schott-Straße 25 97877 Wertheim (Germany) Tel.: +49 9342 808-0 Fax: +49 9342 808-98000 E-Mail: info@brand.de www.brand.de Stati Uniti e Canada: BrandTech Scientific, Inc. ® 11 Bokum Road Essex, CT 06426-1506 (USA) Tel.: +1-860-767 2562 Fax: +1-860-767 2563 www.brandtech.com... -
Page 121: Servizio Calibrazione
Inoltre, BRAND vi offre la possibilità di far tarare i vostri strumenti dal nostro Servizio calibrazione o dal Laboratorio DAkkS BRAND. Inviateci semplicemente i vostri strumenti con le indicazioni del tipo di tara- tura richiesta. -
Page 122: Garanzia
Garantia Non ci assumiamo alcuna responsabilità per le conseguenze di manipo- lazione, uso, manutenzione e impiego non corretti, o per riparazioni non autorizzate dello strumento o per le conseguenze del normale consumo, in particolare dei componenti soggetti ad usura, come ad esempio pistoni, guarnizioni e valvole, e in caso di rottura del vetro. - Page 124 9974 76 · Printed in Germany · 21/0814/3...