
Manuels Connexes pour VANTRUE Element 1


Sommaire des Matières pour VANTRUE Element 1
- Page 1 English/Deutsch/Français/Polski Element 1 User Manual Smart Cube Voice-controlled Dashcam 122mmX130mm...
- Page 3 Hey, find us here: www.vantrue.net/contact facebook.com/vantrue.live...
-
Page 4: Table Des Matières
CONTENTS VERZEICHNIS CONTENU SPIS TREŚCI What’s in the box? Basic Operation Was ist in der Box? Grundlegende Bedienung Qu'y a-t-il dans la boîte? Opération de base Co znajdziemy w pudełku? Podstawowe funkcje Specifications Camera Overview Spezifikation Die Übersicht über Kamera Spécification Vue d'ensemble de la caméra Dane techniczne... -
Page 5: What's In The Box
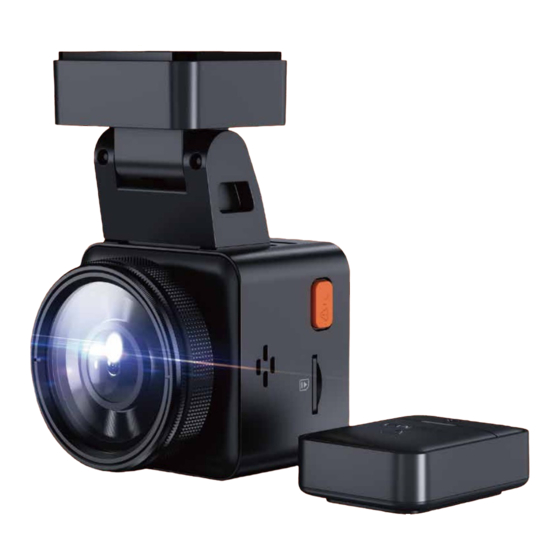
1. What's in the box? N E N N E N E Vantrue E1 GPS Adhesive Car Charger with Dash Cam Mount Built-in Type C Cable (11.5ft) Type C Data Cable Wireless Remote Electrostatic stickers (3.3ft, for transferring Control files only) -
Page 6: Camera Overview
2. Camera Overview Name Description Records clear audio with the video footage. Microphone Serial Number Serial number for warranty registration. Button During video recording, long press to turn off the screen, short press to stop video recording and enter standby mode; you can confirm the selected option in the menu;... - Page 7 Button During video recording and standby, long press to quickly enter parking mode, and short press to turn on/off the microphone; in menu settings, N E N N E N E long press to scroll through menu options, and short press to display the next menu option; during file browsing, long press to scroll to display file, short press to display the next file;...
-
Page 8: Screen Overview
LED Status Description Steady green light In standby status Blinking green light Camera is recording Screen Overview GPS Signal Connecting G-Sensor OFF Video Resolution G-Sensor ON GPS Signal Locked No memory card inserted Voice Assistant Memory card inserted 2560x1440P 30FPS WiFi ON Mic is ON WiFi Connected Mic is OFF... - Page 9 3. Installation 3.1 Installing a Memory Card (Recommended: Vantrue U3 high-speed micro SD card). N E N N E N E Please insert a memory card (memory card capacity: 32GB-512GB, card speed: U3/Class10/A2). The dashcam has certain requirements on the card speed of the memory card.
- Page 10 After inserting the memory card, if the screen prompts "Card error, please format" (please note that the recorder does not record at this time), please directly press the button to enter the menu and start the formatting process. REMINDER: REMINDER: We recommend formatting the card once a month to ensure normal operation of the dash cam.
- Page 11 3.2 Installing the camera onto your windshield Align the mount with the dash cam mount interface then push in until the mount is installed N E N N E N E N E N N E N E Thoroughly clean the windshield with water or alcohol, then wipe it with a dry cloth.
- Page 12 Note: There are two protective films numbered 1 and 2. Please remove the protective film from No. 1, paste the electrostatic sticker on the windshield, and then remove the protective film from No.2. Remove the 3M tape from the mount, then fix the mount and camera on the electrostatics stickers.
-
Page 13: App Download
Please scan the QR code of the relevant version below to download the APP and install it. Search for the "Vantrue Cam" app in App Store or Google Play Store to find the app and then download and install it on your phone. -
Page 14: Wifi Connection
Note: After this camera is successfully connected to the mobile phone through WiFi, it can realize real-time video preview, change camera settings, download files without Internet connection, and play back videos on the mobile phone. However, the GPS track playback and video sharing functions will depend on the Internet or telecom value-added services (requires you to turn off/disconnect the camera WiFi). - Page 15 3.5 App Connection After the WiFi connection is successful, click "+" when opening the app for the first time, add the camera model, then the app will automatically N E N N E N E connect to the camera and display the current real-time recording situation of the camera.
- Page 16 The initial password for this device is only used for initial login. In order to prevent potential security risks, please be sure to change the initial password after the initial login to prevent others from logging into your device without authorization or other adverse consequences. If you forget the WiFi password, you can restore the default setting of the device, and the Wi-Fi password of the device will also be restored to the default password(12345678).
-
Page 17: App Operation
3.6 App Operation Camera Setting N E N N E N E Full-Screen icon Microphone switch Stop Recording icon Snapshot Album After entering the app's real-time preview, you can perform the following operations: Video preview: After the app is successfully connected to the camera, enter the real-time preview page, click the full-screen button or place the phone horizontally, and the real-time screen will automatically switch to the full-screen preview mode. - Page 18 3.7 App Upgrade Open the "Vantrue Cam" App, connect to Wi-Fi, and enter Settings > About > Detect New Version. The app will automatically detect whether the its version is the latest version. If there is a new version of the app, follow the prompts and upgrade the version.
-
Page 19: Basic Operation
4. Basic Operation 4.1 Menu Settings N E N N E N E The E1 dash cam has 3 function menus, which are: record settings, system settings, and file browsing. You can set your dash cam according to your requirements with these function setting. Press the button, pause the video first, and then press the button... - Page 20 After setting, your license plate number can be displayed in the recorded video. -Stamp: Enable or disable the watermark stamp on video and photos. The watermark stamp includes date and time label, VANTRUE label, license plate number, GPS location information, and speed label. All enabled by default.
- Page 21 -Format Memory Card: Format all data on the memory card. -Format Reminder Setup: Select the reminder options: 15 Days, 1 Month, and Off. Default is off. N E N N E N E To prevent you from forgetting to format the memory card regularly, we have added a format reminder time setting.
- Page 22 -System Info: Check the current model, firmware version, and the Vantrue official website. -Certifications: You can view the certification information of E1 camera. -Default Setting: Reset the device back to factory settings. C. Files Review the video and photo files recorded by the camera.
-
Page 23: Main Functions
4.2. Main Functions 4.2.1 Loop Recording N E N N E N E After inserting the memory card and connecting the power, the E1 dash cam will auto turn on and enter loop recording. The duration of each recorded video will be saved in the normal video folder according to the loop recording time you set. -
Page 24: Event Recording
4.2.2 Event Recording Event video is triggered by the G-sensor(Gravity Sensor), which can be automatically triggered or manually locked. During driving, in case of special circumstances, the camera will automatically lock for event recording or you can manually lock it for event recording. - Page 25 Files Event Video 20220820_140633_0001_E... Event Video N E N N E N E 20220820_140633_0002_E... Normal Video 20220820_140633_0003_E... Photo 20220820_140633_0004_E... All Files Note: The sensitivity of the automatic locking video trigger is determined by the sensitivity of the collision. The higher the sensitivity setting, the greater the probability of being triggered.
- Page 26 Note: Please use a hardwiring kit or other stable and continuous power supply to power the camera to ensure that the camera works properly in parking mode. The E1 operating environment temperature is 14°F to 158°F (-10°C to 70°C). We recommend selecting Collision Detection within this temperature range, as it will automatically turn off once the tempera- ture exceeds the normal operating temperature range.
- Page 27 Collision Detection When collision detection is enabled, the icon will be displayed on the recording interface, indicating that the camera is currently using collision N E N N E N E detection mode. Collision detection sensitivity can be adjusted from 1 to 5 levels.
- Page 28 Note: If the dash cam continues to be hit during collision detection recording, it will exit the collision detection mode and enter normal recording, restarting the 5-minute entry mechanism. Motion Detection When the motion detection is turned on, the icon will be displayed on the recording interface, indicating that the dash cam is currently in motion detection mode.
- Page 29 2560x1440P 30FPS N E N N E N E 00:00:37 08-20-2022 14:09:07 MP/H Note: Motion detection mode can only be engaged when the camera is turned on. Once the camera is turned off, the motion detection mode will not work. The resolution of 1944P and 1440P HDR do not support the pre-record- ing function, so after enabling motion detection, the resolution will automatically be changed to 1440P for recording.
- Page 30 2560x1440P 30FPS 00:00:37 08-20-2022 14:09:07 MP/H Note: Low Bitrate recording can only be engaged when the camera is turned on. Once the camera is turned off, Low Bitrate recording will not work. Low Framerate mode When the low framerate mode is selected, the camera will record according to your selection among 1FPS/5FPS/10FPS/15FPS.
-
Page 31: Time Lapse
Note: The time unit of the calculation formula is seconds, so the final normal recording time calculated is also in seconds. If you need to convert it N E N N E N E into other time units, please check the units and convert. The low framerate mode is similar to the time-lapse recording function, but the difference is that there is no 5-minute entry mechanism for time-lapse recording, which will be directly turned on after setting. - Page 32 GPS signal. GPS information is recorded along with video. To view it, please download and install the VANTRUE Cam App and VANTRUE GPS Player (available for download at www.vantrue.net). - 28 -...
-
Page 33: Wireless Remote Control
Los Angeles. If you do not know the time zone of your location, you can use WiFi to connect to the Vantrue Cam app, and confirm that the automatic time adjustment function in the app is turned on. - Page 34 suitable location on your car, then tear off the adhesive sticker from the remote control and stick it to your selected location. (Note: The remote control needs to be installed in a position that does not affect safe driving) Functions of the remote control: After the remote control is successfully connected, press the button to enable or disable audio.
- Page 35 After the connection is successful, when you short press the button, the camera will lock the current file and take a video snapshot; continue to short press during the locked video, and continue to N E N N E N E capture the photo.
-
Page 36: Voice Assistant
Note: When the power is low, the battery needs to be replaced(The battery model of the remote control is a CR2032 battery). It does not support charging. 4.2.8 Voice Assistant In addition to controlling the camera with the remote control, you can also control the camera with voice command. -
Page 37: Display Settings
4.2.9 Display Settings E1 is a small screen camera, so we specially set two screen display modes for you. N E N N E N E The first is full-screen mode. Full-screen mode is full-screen display, with a larger screen ratio, but it will lose some of the left and right viewing angles. 2560x1440P 30FPS 00:00:37 08-20-2022 14:09:07... - Page 38 20220822_140633_0002_N 1280x720 08/20/2022 7:15 00:30 01:07 --Delete Videos Delete the video on the camera. Press the button in the file browsing interface to pop up the delete menu. Normal Video Delete This File? Delete All Files? - 34 -...
- Page 39 b.Viewing files on a Computer Connect the included TYPE-C USB data cable to the camera and the computer. N E N N E N E After the connection is successful, the icon will appear on the display of the camera to transfer data, and then you can view the video files in the computer folder.
- Page 40 You can also use a USB card reader to read the memory card informa- tion. c.View on the "Vantrue Cam"App After the camera is successfully connected to the mobile phone through WiFi, it can play back, download and delete files in the mobile app.
-
Page 41: Upgrading The Firmware
The system will automatically update with the Micro-SD card firmware upgrade file. The camera will restart once the upgrade has been completed. The latest firmware version is always available at the official VANTRUE website (www.vantrue.net). We strongly recommend registering your product (www.vantrue.net/register) to receive a notification email when a new firmware update is available. - Page 42 5. Specifications The specifications of this product may change without prior notice due to product improvements. Model Chips Novatek high-performance processor Image Sensor Sony CMOS Sensor Screen 1.54” IPS Screen WiFi Built-in 2.4G Lens Front: 160° wide viewing angle; F/1. 8 wide aperture Languages Engish/ Français/ Español/ Deutsch/ Italiano/...
-
Page 43: Warranty & Support
Warranty N E N N E N E The VANTRUE Element 1 Dash Cam comes with a full 12 months warranty. ® If you register your product on our official site (www.vantrue.net/register), you can extend the warranty to 18 months. -
Page 44: Was Ist In Der Box
1. Was ist in der Box? Vantrue E1 GPS Klebehalterung Auto-Ladegerät mit Dash Cam mitgeliefertes USB C Kabel(3.5Meter) USB-C Daten Kable Wireless Elektrostatische (1Meter) Fernbedienung Aufkleber Warnaufkleber Brechstange Benutzerhandbuch Optionales Zubehör CPL Fliter - 40 -... -
Page 45: Die Übersicht Über Kamera
2. Die Übersicht über Kamera N D E N E N E Num. Name Beschreibung Mikrofon Zeichnet den Ton mit dem Videomaterial auf. Serien Nummer Seriennummer für die Garantieregistrierung. Taste Während der Aufnahme lange drücken, um den Bildschirm auszuschalten; kurz drücken, um die Aufnahme zu stoppen und in den Standby-Mo- dus zu wechseln;... - Page 46 Option im Menü(OK); Bei der Wiedergabe von Dateien können die Dateien abspielen/anhalten taste Lange drücken, um den Parkmodus aufzurufen, während die Kamera aufzeichnet und des Standby; Kurz drücken, Mikrofon AN/AUS; Abwärtsauswahl; Im Wieder- gabemodus kurz drücken, um die Dateien zu löschen Taste lange drücken während des Videos oder...
-
Page 47: Beschreibung
LED Status Beschreibung Grünes Lichtes ist auf der Im standby status. Anzeigelampe sichtbar Grünes Licht blinkt auf Im Aufnahme der Anzeigelampe N D E N E N E Bildschirmübersicht GPS-Signal durchsuchen GPS Signal wird gesperrt Video Auflösung G-Sensor AUS G-Sensor AN Sprachassistent Keine SD Karte SD Karte eingelegt... - Page 48 3. Installation 3.1 Speicherkarte installieren(VANTRUE U3 MicroSD-Karte empfohlen) Bitte legen Sie eine Speicherkarte ein (Speicherkartenkapazität: 32GB-512GB, Kartengeschwindigkeit: U3/Class10/A2), da die Dashcam bestimmte Anforderungen an die Kartengeschwindigkeit der Speicherk- arte stellt. Für einen zuverlässigen Betrieb empfehlen wir die Verwendung einer VANTRUE SD-Karte (separat erhältlich).
- Page 49 ieren aus und bestätigen Sie das Formatieren der Speicherkarte, bis die Meldung „Formatieren erfolgreich“ angezeigt wird. Wenn nach dem Einlegen der Speicherkarte der Bildschirm „Kartenfehler, bitte formatieren“ anzeigt (bitte beachten Sie, dass der Rekorder zu diesem Zeitpunkt nicht aufzeichnet), drücken Sie bitte direkt die Taste N D E N E N E um das Menü...
- Page 50 3.2 Installieren Sie die Kamera auf Ihrer Windschutzscheibe Verbinden Sie die Halterung mit der Montagesockel der Kamera und drücken Sie sie hinein, bis sie einrastet. Reinigen Sie die Windschutzscheibe gründlich mit Wasser oder Alkohol und wischen Sie sie dann mit einem trockenen Tuch ab. Kleben Sie den elektrostatischen Aufkleber hinter den Rückspiegel.
- Page 51 Entfernen Sie das 3M-Klebeband von der Halterung und befestigen Sie N D E N E N E dann die Halterung und die Kamera auf dem Elektrostatik-Aufkleber Schließen Sie das Autoladegerät an den Zigarettenanzünder des Autos an und stecken Sie dann das USB-Ende des Ladegeräts in den USB-C-Stromanschluss der Kamera.
- Page 52 Bitte scannen Sie den QR-Code der entsprechenden Version unten, um die APP herunterzuladen und zu installieren. Suchen Sie im App Store oder Google Play Store nach der App „Vantrue Cam“, um die App zu finden, und laden Sie sie dann herunter und installieren Sie sie auf Ihrem Telefon.
-
Page 53: Wlan-Verbindung
Hinweis: Nachdem diese Kamera erfolgreich über WLAN mit dem Mobiltelefon verbunden wurde, kann sie eine Echtzeit-Videovorschau realisieren, Kameraeinstellungen ändern, Dateien ohne Internetverbind- ung herunterladen und Videos auf dem Mobiltelefon wiedergeben. Die Wiedergabe von GPS-Tracks und die Video-Sharing-Funktionen hängen jedoch vom Internet oder den Mehrwertdiensten der Telekom ab N D E N E N E (erfordert das Ausschalten/Trennen des WLAN der Kamera). - Page 54 3.5 WLAN-Verbindung Nachdem die WLAN-Verbindung erfolgreich ist, klicken Sie beim ersten Öffnen der APP auf „+“, fügen Sie das Kameramodell hinzu, und die APP verbindet sich automatisch mit der Kamera und zeigt die aktuelle Echtzeit-Aufnahmesituation der Kamera an. Notiz: Wenn Sie sich vor dem Öffnen der APP nicht mit dem WLAN verbinden, fordert die APP Sie auf: „Bitte zuerst mit WLAN verbinden“...
- Page 55 Das Initialpasswort dieses Geräts wird nur für die Erstanmeldung verwen- det. Um potenziellen Sicherheitsrisiken vorzubeugen, ändern Sie das Initialpasswort bitte rechtzeitig nach der ersten Anmeldung, um zu verhindern, dass sich andere unbefugt in Ihr Gerät einloggen oder andere nachteilige Folgen haben. N D E N E N E Wenn Sie das WLAN-Passwort vergessen, können Sie die Standardeinstel-...
- Page 56 3.6 WLAN-Verbindung Einstellungen Vollbild-Schalter Mikrofonschalter Aufnahme starten/ pausieren Schnappschuss Fotoalbum Nach dem Aufrufen der APP-Echtzeitvorschau können Sie die folgenden Vorgänge ausführen: Videovorschau: Nachdem die APP erfolgreich mit der Kamera verbunden wurde, rufen Sie die Echtzeit-Vorschauseite auf, klicken Sie auf die Vollbild-Schaltfläche oder platzieren Sie das Telefon horizontal, und der Echtzeit-Bildschirm wechselt automatisch in den Vollbild-Vorschaumodus.
- Page 57 N E N E Vorschauoberfläche der App erfassen. 3.7 APP-Upgrade Öffnen Sie die „Vantrue Cam“-App, stellen Sie eine Verbindung zum WLAN her und geben Sie „Einstellungen > Info > Neue Version erkennen“ ein. Die App erkennt automatisch, ob die App-Version die neueste Version ist.
-
Page 58: Grundlegende Bedienung
4. Grundlegende Bedienung 4.1 Menüeinstellungen Die E1 Dash Cam verfügt über 3 Funktionsmenüs, nämlich Video Einstellun- gen, System Einstellungen und Datei. In dieser Funktionseinstellung können Sie Ihre Dashcam nach Ihren Wünschen einstellen. Drücken Sie die Taste, halten Sie zuerst das Video an und drücken Sie dann die Taste , um die Menüeinstellungen aufzurufen. - Page 59 N E N E werden. -Stempel: Aktivieren oder deaktivieren Sie den Wasserzeichenstempel des Videos und der Fotos. Der Wasserzeichenstempel enthält Datums- und Uhrzeitetikett, VANTRUE-Etikett, Nummernschildnummer, GPS-Standort, Geschwindigkeitsetikett. Alle standardmäßig aktiviert. -Zeitraffer: Der Standardwert ist deaktiviert. Sie können 1FPS/5FPS/10F- PS/15FPS aktivieren.
- Page 60 können Optionen wie niedrige Empfindlichkeit/hohe Empfindlichkeit/- Standard/Aus wählen. -SprachInhalte: Spracherkennungsbefehle nur in Englisch. Sie können verschiedene Befehle verwenden, um die Kamera fernzusteuern, damit sie funktioniert. -SD Karte formatieren: Alle Daten auf der Speicherkarte formatieren. -Formatierungsmeldung: Wählen Sie die Erinnerungsoptionen: 15 Tage, 1 Monat und Aus.
- Page 61 Video nicht zu beeinträchtigen, können Sie je nach Region zwischen 50 Hz oder 60 Hz wählen. -System Info: Überprüfen Sie das aktuelle Modell, die Firmware-Version und die offizielle Website von Vantrue. -Standardeinstellung: Setzen Sie das Gerät auf die Werkseinstellungen zurück.
- Page 62 -Foto: Fotodatei. -Alle: Alle Standardvideos und Videos von kritischen Ereignissen wurden aufgezeichnet. 4.2. Spezifikation 4.2.1 Daueraufnahme Nach dem Einlegen der Speicherkarte und dem Anschließen der Strom- versorgung schaltet sich die E1-Dashcam automatisch ein und beginnt mit der Loop-Aufnahme. Die Dauer jedes aufgezeichneten Videos wird basie- rend auf der von Ihnen eingestellten Loop-Aufnahmezeit im normalen Videoordner gespeichert.
- Page 63 4. Nachdem die Loop-Aufnahme ausgeschaltet wurde, beträgt die Dauer jedes Videos 20 Minuten, und die Aufnahme wird beendet, wenn die Kapazität der Speicherkarte voll ist. 4.2.2 Notfallaufzeichnung N D E N E N E Während des Fahrens können Sie den Rekorder unter besonderen Umstän- den manuell oder automatisch für Notfallaufzeichnungen sperren.
- Page 64 Datei Notfallvideo Notfallvideo 20220820_140633_0001_E... 20220820_140633_0002_E... Normal Video 20220820_140633_0003_E... Fotos 20220820_140633_0004_E... Alle Dateien Notiz: Die Empfindlichkeit des Auslösens des automatischen Sperrens wird durch die Empfindlichkeit der Kollision bestimmt. Je höher die Empfind- lichkeitseinstellung, desto größer ist die Wahrscheinlichkeit, ausgelöst zu werden. Die Gesamtkapazität der Notfallsvideodatei macht 30% der Gesamt- kapazität der aktuellen Speicherkarte aus.
- Page 65 ben. Sie können 5 Minuten warten, um automatisch einzutreten, oder lange auf die Abwärtstaste drücken, um manuell einzutreten. HINWEIS: Um sicherzustellen, dass die Kamera im Parkmodus ordnungsgemäß funktioniert, verwenden Sie bitte die Hardwire Kits oder eine andere N D E N E N E stabile und kontinuierliche Stromversorgung, um die Dashcam mit Strom zu versorgen.
- Page 66 4.2.3.2 Kollisionserkennung Wenn die Kollisionserkennung aktiviert ist, wird das Kollisionserken- nungssymbol auf der Aufzeichnungsoberfläche angezeigt, was darauf hinweist, dass der Rekorder derzeit den Kollisionserkennungsmodus verwendet. Die Empfindlichkeit der Kollisionserkennung kann von 1 bis 5 Stufen eingestellt werden, Sie können sie entsprechend der Gewohnheit sowie der Umgebung des Autos anpassen.
- Page 67 Notiz: Wenn die Dashcam während der Kollisionserkennungsaufzeichnung weiterhin getroffen wird, verlässt sie den Kollisionserkennungsmodus und wechselt in die normale Aufzeichnung, wodurch der 5-Minuten-Eingabemechanismus neu gestartet wird. N D E N E N E Das Kollisionserkennungsvideo wird im Ordner „Normal“ gespeichert. Um zu verhindern, dass das Video überschrieben wird, überprüfen Sie es bitte rechtzeitig und speichern Sie die erforderliche Kollisionserken- nungsdatei, um Verluste zu vermeiden.
- Page 68 schaltet sich nach 3 Minuten aus. Wenn die Frontkamera die Bewegung des Objekts erkennt, beginnt sie automatisch 30 Sekunden lang mit der Aufnahme und 3 bis 5 Sekunden Video vor der Bewegung, speichert die Aufnahme im Ordner „Normal“. 2560x1440P 30FPS 00:00:37 08-20-2022 14:09:07 MP/H...
- Page 69 4.2.3.4 Modus mit Niedriger Bitrate Wenn die Aufzeichnung mit niedriger Bitrate aktiviert ist, wird das Symbol oder in der unteren rechten Ecke des Bildschirms angezeigt, je nachdem, ob Sie 1080P 15FPS oder 720P 15FPS wählen. Wenn nach 5 Minuten Aufnahme keine Bewegung erkannt wird, erscheint N D E N E N E ein Symbol...
- Page 70 4.2.3.5 Modus mit niedriger Framerate Wenn der niedrige Frameratenmodus ausgewählt ist, nimmt die Kamera entsprechend der Auswahl von 1FPS/5FPS/10FPS/15FPS auf. Wenn Sie beispielsweise 1 FPS auswählen und die Framerate der aktuellen Videoauflösung 30 FPS beträgt, generiert der Rekorder ein Video mit 30 FPS pro Sekunde.
- Page 71 Im Modus mit niedriger Bildrate benötigt die Kamera außerdem eine stabile Stromversorgung. Sobald die Stromversorgung ausgeschaltet oder erschöpft ist, wird die Kamera heruntergefahren. 4.2.4 Zeitraffer Wenn Zeitraffer ausgewählt ist, nimmt die Kamera entsprechend der N D E N E N E Auswahl von 1FPS/5FPS/10FPS/15FPS auf.
- Page 72 U-Bahn, Tunnel usw. ) wirkt sich auch auf den Empfang des GPS-Signals aus. GPS-Informationen werden in dem von Ihnen aufgenommenen Video aufgezeichnet. Um es anzuzeigen, laden Sie bitte die VANTRUE Cam APP und den VANTRUE GPS Player herunter und installieren Sie sie (zum Download verfügbar auf www.vantrue.net). - 68 -...
- Page 73 Die automatische GPS-Korrekturzeiteinstellung der E1-Dashcam ist standardmäßig aktiviert. Sie können GMT-08:00 auswählen, indem Sie Ihre Zeitzone auswählen, z. B. Los Angeles. Wenn Sie die Zeitzone Ihres Standorts nicht kennen, können Sie sich über WLAN mit der Vantrue Cam N D E N E N E APP verbinden und bestätigen, dass die automatische Zeitanpassungs-...
- Page 74 Installation der Fernbedienung: Nachdem die Fernbedienung mit der Kamera abgeglichen wurde, wählen Sie bitte eine geeignete Stelle an Ihrem Auto aus, reißen Sie dann den Aufkleber der Fernbedienung ab und kleben Sie ihn auf die ausgewählte Stelle. (Hinweis: Die Fernbedienung muss in einer Position installiert werden, die das sichere Fahren nicht beeinträchtigt.) - 70 -...
- Page 75 Funktionen der Fernbedienung: Nachdem die Fernbedienung erfolgreich verbunden wurde, drücken Sie die Taste , um die Aufnahme zu aktivieren oder zu deaktivieren. N D E N E N E 2560x1440P 30FPS 00:00:37 20-08-2022 14:09:07 MP/H Nachdem die Verbindung erfolgreich hergestellt wurde, drücken Sie kurz die Notfall-Taste , sperrt die Kamera die aktuelle Datei und macht einen Video-Schnappschuss;...
- Page 76 Batterie der Fernbedienung ersetzen: Auf der Unterseite der Fernbedienung befindet sich eine „OPEN“-Mark- ierung. Bitte öffnen Sie es langsam entlang dieser markierten Position. Entfernen Sie nach dem Öffnen die alte Batterie, legen Sie die neue Batterie ein und schließen Sie die hintere Abdeckung der Fernbedi- enung.
- Page 77 4.2.8 Spracherkennung Neben der Steuerung der Kamera mit der Fernbedienung können Sie dem Rekorder über den Sprachassistenten auch Sprachbefehle erteilen, Derzeit unterstützte Sprachen sind Englisch , Japanisch, Russisch, Chine- sisch. Detailliertere Sprachbefehle finden Sie unter System Einstellungen > N D E N E N E Sprachinhalt.
- Page 78 2560x1440P 30FPS 00:00:37 20-08-2022 14:09:07 MP/H Der andere ist der Vollansichtsmodus. In diesem Modus wird der gesamte von der Videokamera gesehene Inhalt angezeigt, und das Verhältnis der Videobildschirmanzeige beträgt 4:3. 2560x1440P 30FPS 00:00:37 20-08-2022 14:09:07 MP/H 4.2.10 Anzeigen von Videos/Fotos a.Anzeigen von Dateien auf der Kamera Nachdem Sie auf „Dateien“...
- Page 79 20220822_140633_0002_N 1280x720 08/22/2022 7:15 N D E N E N E 00:30 01:07 - Videos löschen Löschen Sie das Video auf der Kamera. Drücken Sie die Notfallstaste in der Benutzeroberfläche zum Durchsuchen von Dateien, um das Menü „Löschen“ aufzurufen. Normal Video Diese Datei Löschen? Alle Dateien löschen? - 75 -...
- Page 80 b. Anzeigen von Dateien auf einem Computer Verbinden Sie über das mitgelieferte USB-C Datenkabel die Kamera und dem Computer. Nachdem die Verbindung erfolgreich hergestellt wurde, erscheint das Symbol auf dem Display der Kamera, um Daten zu übertragen, und dann können Sie die Videodateien im Computerordner durchsuchen. - 76 -...
- Page 81 N E N E Sie können auch einen USB-Kartenleser verwenden, um die Speicherk- arteninformationen zu lesen. c.View auf „Vantrue Cam“ APP Nachdem die Kamera erfolgreich über WLAN mit dem Mobiltelefon verbunden wurde, kann sie Dateien in der mobilen APP wiedergeben, herunterladen und löschen.
-
Page 82: Aktualisieren Der Firmware
Das System aktualisiert automatisch, wenn die Micro-SD-Karte die Firmware-Upgrade-Datei enthält. Die Kamera wird neu gestartet, sobald das Upgrade abgeschlossen ist. Die neueste Firmware-Version ist immer auf der offiziellen VANTRUE-Web- site (www.vantrue.net) verfügbar. Wir empfehlen dringend, Ihr Produkt zu registrieren (www.vantrue.net/register), um eine Benachrichti- gungs-E-Mail zu erhalten, wenn ein neues Firmware-Update verfügbar ist. - Page 83 5. Spezifikation Die Spezifikationen dieses Produkts können sich aufgrund von Produktver- besserungen ohne vorherige Ankündigung ändern. Model Chips Novatek Hochleistungsprozessor N D E N E N E Bild Sensor Sony CMOS Sensor Screen 1.54” IPS WiFi Eingebaut 2.4G Linse Vorderseite: 160° breiter Betrachtungswinkel; F/1.
-
Page 84: Garantie Und Support
Monate genießen. Unterstützung Wenn Sie Fragen zu Ihrem Produkt haben, zögern Sie bitte nicht, uns unter support@vantrue.net zu kontaktieren oder uns eine Nachricht über die Live-Chat-Box auf www.vantrue.net zu senden. Anfragen werden in der Regel innerhalb von 12-24 Stunden beantwortet. -
Page 85: Qu'y A-T-Il Dans La Boîte
1. Qu'y a-t-il dans la boîte? Dashcam VANTRUE Support adhésif Chargeur de voiture ® avec câble USB C N E N E N F R (3.5 m) Câble de données Télécommande Autocollants USB C ( 1m ) sans Fil électrostatiques... -
Page 86: Vue D'ensemble De La Caméra
2. Vue d'ensemble de la caméra Numéro Description Microphone Enregistre un son clair avec les séquences vidéo. Numéro de Numéro de série pour l'enregistrement de la Série garantie. Bouton Pendant l'enregistrement , Appui long pour éteindre l'écran, appui court pour arrêter l'enregis- trement vidéo et passer en mode veille ;Vous pouvez confirmer l'option sélectionnée dans le menu et lire/mettre en pause des fichiers. - Page 87 Pendant l'enregistrement vidéo et la veille, Bouton Appui long pour entrer rapidement en mode parking et aappui court pour allumer/éteindre le microphone ; Dans le menu et la navigation des fichiers, Appui long pour faire défiler les options, Appui court pour afficher l'option suivante ;...
-
Page 88: Aperçu De L'écran
État des voyants Description Le voyant vert reste allumé En état de veille. Le voyant vert clignote La caméra est en train d'enregistrer. Aperçu de l'écran Capteur G désactivé Capteur G activé Connexion du signal GPS Résolution vidéo Signal GPS verrouillé Sans carte mémoire Assistant vocal Carte mémoire insérée... -
Page 89: Installation D'une Carte Mémoire (Carte Microsd Vantrue Recommandée)
3. Installation 3.1 Installation d'une carte mémoire (Carte microSD VANTRUE recommandée) Veuillez insérer une carte mémoire (capacité de la carte mémoire : 32 Go-512 Go, vitesse de la carte : U3/Class10/A2), car la dashcam a certaines exigences sur la vitesse de la carte mémoire. Pour un fonctionnement fiable, nous vous recommandons d'utiliser la carte SD VANTRUE (vendue séparément). - Page 90 de formatage et confirmez pour formater la carte mémoire jusqu'à ce qu'il vous demande "Formaté avec succès" . Après avoir inséré la carte mémoire, si l'écran affiche "Erreur de carte, veuillez formater" (veuillez noter que l'enregistreur n'enregistre pas à ce moment), veuillez appuyer directement sur le bouton pour accéder au menu et démarrer le processus de formatage.
-
Page 91: Installation De La Caméra Sur Votre Pare-Brise
3.2 Installation de la caméra sur votre pare-brise Alignez le support avec l'interface de montage de la caméra, puis poussez jusqu'à ce que le support soit installé N E N E N F R Nettoyez soigneusement le pare-brise avec de l'eau ou de l'alcool, puis essuyez-le avec un chiffon sec. - Page 92 Retirez le ruban adhésif 3M du support, puis fixez le support et la caméra sur l'autocollant électrostatique. Connectez le chargeur de voiture à l'allume-cigare de la voiture, puis insérez l'extrémité USB du chargeur dans le port d'alimentation USB de USB C de l'appareil. - 88 -...
- Page 93 N F R 3.3 Téléchargement de l'APP Veuillez scanner le code QR de la version appropriée ci-dessous pour télécharger l'APP et l'installer.Recherchez l'application "Vantrue Cam" dans l'App Store ou Google Play Store pour trouver l'application, puis téléchargez-la et installez-la sur votre téléphone.
- Page 94 Remarque : Une fois la caméra connectée au téléphone mobile via WiFi, vous pouvez prévisualiser la vidéo en temps réel, modifier les paramètres de l'enregistreur, télécharger le fichier avec 0 trafic et lire la vidéo sur le téléphone mobile. Cependant, les fonctions de lecture de piste GPS et de partage vidéo dépendront des services à...
-
Page 95: Connexion App
3.5 Connexion APP Une fois la connexion WiFi établie, cliquez sur "+" lors de la première ouverture de l'APP, ajoutez le modèle de caméra, puis l'APP se connect- era automatiquement à la caméra et affichera la situation d'enregis- trement en temps réel actuelle de la caméra. N E N E N F R Noter:... - Page 96 Le mot de passe initial de cet appareil est uniquement pour la connex- ion initiale. Afin d'éviter les risques de sécurité potentiels, assurez-vous de le changer initial à temps après la connexion initiale pour empêcher d'autres personnes de se connecter à votre appareil sans autorisation ou d'autres conséquences néfastes.
-
Page 97: Fonctionnement De L'application
3.6 Fonctionnement de l'application Réglage N E N E N F R Bouton plein écran Microphone Bouton arrêter l'enregistrement Instantané Album Après être entré dans l'aperçu en temps réel de l'APP, vous pouvez effectuer les opérations suivantes : Aperçu vidéo : une fois l'appareil connecté avec succès à l'APP, l'enregistreur accède à... - Page 98 3.7 Mise à niveau de l'application Ouvrez l'application "Vantrue Cam", entrez "Paramètres> À propos> Détecter nouveau Version", l'App détectera automatiquement si la version de l'App est la dernière version. S'il existe une nouvelle version de l'application, suivez les invites de l'application et mettez-la à...
-
Page 99: Opération De Base
4. Opération de base 4.1 Paramètres de Menu Dashcam E1 dispose de 3 menus de fonctions, qui sont les paramètres d'enregistrement, les paramètres système et la navigation dans les fichiers. Vous pouvez régler votre caméra de tableau de bord selon vos besoins dans ce paramètre de fonction. - Page 100 Le niveau par défaut est 3, sélectionner les options de sensibilité: 1,2,3,4,5, Désactive. Une sensibilité élevée signifie qu'une légère collision déclenchera la détection. Enregistrement Audio: Activé par défaut. Vous pouvez choisir de le désactiver si vous ne voulez pas enregistrer le son environnant. Exposition: Par défaut est +0,0 valeur d'exposition.
- Page 101 caméra peut être contrôlée via l'application du téléphone. Réglage de l'Affichage:Le mode plein écran est par défaut. Vous pouvez passer en mode panorama. Assistant Vocal : Le contrôle en français n'est pas pris en charge actuel- lement.Uniquement en anglais.La sensibilité par défaut est Standard. Les commandes vocales peuvent être reconnues une fois l'option activée.
- Page 102 sez la bonne fréquence selon les différentes régions. Informations système: Vérifiez le modèle de la machine, la version du logiciel, l'URL du site officiel Paramètres Défaut: Vous pouvez restaurer les paramètres d'usine. C.Parcourir les Documents Passez en revue et supprimez les vidéos stockées dans des dossiers de fichiers.
-
Page 103: Présentation Des Fonctions
4.2. Présentation des fonctions 4.2.1 Enregistrement en Boucle Avec une carte mémoire insérée, la caméra démarre (par défaut) immédiatement l'enregistrement vidéo en boucle lorsqu'elle est connectée à une source d'alimentation. Selon la taille de la carte mémoire actuelle, une fois que l'enregistrement atteint le réglage (70% de la capacité... -
Page 104: Vidéo D'urgence
4.2.2 Vidéo d'urgence L'enregistrement d'urgence est déclenché par G-Sensor, qui peut être divisé en déclenchement automatique et verrouillage manuel. 2560x1440P 30FPS 2560x1440P 30FPS 00:00:37 00:00:37 20-08-2022 14:09:07 MP/H 20-08-2022 14:09:07 MP/H Verrouillage manuel : Cliquez sur l'icône pour commencer à verrouiller l'enregistrement et la vidéo est enregistrée dans le dossier vidéo d'urgence. - Page 105 Noter: La sensibilité du déclencheur vidéo à verrouillage automatique est déterminée par la sensibilité de la collision. Plus le réglage de sensibilité est élevé, plus la probabilité d'être déclenché est grande. La capacité totale du fichier vidéo d'événement représente 30% de la capacité...
- Page 106 La température de l'environnement de fonctionnement E1 est de 14°F à 158°F (-10°C à 70°C). Nous vous recommandons de sélectionner la détection de collision dans cette plage de température, car elle s'éteindra automatiquement une fois la température trop élevée. veuillez éteindre la caméra lorsque vous vous garez s'il fait trop chaud. Si la température est élevée, Veuillez éteignez la caméra lorsque vous vous garez.
- Page 107 A. Détection de Collision Lorsque la détection de collision est activée, son icône s'affiche à l'écran, indiquant que la caméra utilise actuellement le mode de détection de collision. La sensibilité de détection de collision peut être ajustée de 1 à 5 niveaux, Une sensibilité élevée signifie qu'une légère collision peut facilement déclencher l'enregistrement.
- Page 108 Remarque: Si l'enregistreur est continuellement en collision pendant le processus d'enregistrement de détection de collision, il quittera le mode de détection de collision, entrera dans l'enregistrement normal et redémar- rera le mécanisme d'entrée de 5 minutes. La vidéo de détection de collision sera enregistrée dans le dossier Normal.
- Page 109 Processus d'enregistrement vidéo : lorsque l'enregistreur détecte le mouvement de l'objet ou ressent la vibration de la voiture, il déclenche automatiquement l'enregistrement vidéo. VANTRUE E1 a une fonction de pré-enregistrer 3-5 secondes, de sorte que la vidéo de détection de...
- Page 110 C. Enregistrement à faible débit Lorsque Enregistrement à faible débit est activée, son icône s'affiche à l'écran, selon l'option que vous choisissez d'être 1080P 15FPS ou 720P 15FPS. Si l'enregistreur de conduite ne détecte pas le mouvement ou la vibration de l'objet dans les 5 minutes, le mode de enregistrement à...
- Page 111 vous sélectionnez 1FPS et que la résolution vidéo actuelle est de 30FPS, l'enregistreur générera une vidéo de 30FPS toutes les secondes. Après le stationnement, l'enregistreur activera le mécanisme d'entrée pendant 5 minutes, puis entrera automatiquement en mode de fréquence d'images faible. La vidéo accélérée peut grandement préserver l'intégrité...
-
Page 112: Enregistrement En Accélérée
Le mode à faible fréquence d'images doit être exécuté lorsque l'appareil est allumé. Une fois la dashcam éteint, ce mode ne fonction- nera pas. 4.2.4. Enregistrement en Accélérée Lorsque Mode à faible fréquence d'images est avtivé, la dashcam enregistrera selon la sélection de 1FPS/5FPS/10FPS/15FPS. Par exemple, si vous sélectionnez 1FPS et que la résolution vidéo actuelle est de 30FPS, l'enregistreur générera une vidéo de 30FPS toutes les secondes. -
Page 113: Correction Automatique De L'heure Par Gps
) affectera également la réception du signal GPS. Les informations GPS sont enregistrées dans la vidéo que vous avez enregistrée. Pour le voir, veuillez télécharger et installer VANTRUE Cam APP et VANTRUE GPS Player (disponibles en téléchargement sur www.vantrue.net. -
Page 114: Télécommande Sans Fil
4.2.7 Télécommande sans Fil La caméra est équipée d'une télécommande, qui peut être utilisée pour contrôler rapidement la caméra pour un instantané, une vidéo d'urgence, l'enregistrement marche/arrêt et d'autres fonctions. Connexion de la télécommande : Retirer la feuille isolante de la télécommande, la caméra s'adaptera automatiquement à... - Page 115 N E N E N F R Fonctions de la télécommande : Une fois la télécommande connectée avec succès, appuyez sur le bouton pour activer ou désactiver l'enregistrement. 2560x1440P 30FPS 00:00:37 20-08--2022 14:09:07 MP/H - 111 -...
- Page 116 Une fois la connexion établie, lorsque vous appuyez brièvement sur le bouton d'urgence , la caméra verrouille le fichier actuel et prend un instantané vidéo ; continuez à appuyer brièvement pendant la vidéo verrouillée et continuez à capturer la photo . 2560x1440P 30FPS 00:00:37 20-08-2022 14:09:07...
- Page 117 Remarque: N E N E N F R Lorsque la puissance est faible, la batterie doit être remplacée (le modèle de batterie de la télécommande est une batterie CR2032). Il ne prend pas en charge la charge. 4.2.8.Assistant Vocal (En Anglais) En plus de contrôler la caméra avec la télécommande, vous pouvez également donner des commandes vocales à...
-
Page 118: Paramètres D'affichage
4.2.9. Paramètres d'affichage E1 est une caméra à petit écran, nous avons donc spécialement défini deux modes d'affichage pour vous. Le mode plein écran. Le mode plein écran est un affichage plein écran, avec un rapport d'écran plus grand, mais il perdra certains des angles de vision gauche et droit. -
Page 119: Lecture Et Suppression De Fichiers
4.2.10. Lecture et Suppression de Fichiers a. Regarder sur la caméra Lire les vidéos Après avoir cliqué sur "Fichiers", entrez dans n'importe quel dossier, après avoir ouvert le dossier vidéo, vous pouvez appuyer sur le bouton Bas pour sélectionner le fichier suivant, et appuyez sur le bouton Bas pour supprimer le fichier pendant la lecture. - Page 120 b. Regarder sur l'ordinateu Connectez le câble de données USB C fourni à l'appareil et à l'ordina- teur. Une fois la connexion réussie, l'icône apparaîtra sur l'écran de l'appareil pour transférer les données, puis vous pourrez visualiser les fichiers vidéo dans le dossier de l'ordinateur. - 116 -...
- Page 121 Selon le système informatique des différents utilisateurs, une fois l'appareil connecté à l'ordinateur, il s'affichera en tant que lecteur amovible ou dossier amovible sur l'ordinateur. Pour afficher le fichier sur l'ordinateur, vous pouvez directement cliquer avec le bouton droit pour ouvrir le menu et le supprimer. Vous pouvez également utiliser un lecteur de carte USB pour lire les informations de la carte mémoire.
-
Page 122: Mise À Niveau Du Logiciel
4.2.11 Mise à niveau du logiciel La version du logiciel de la dashcam sera annoncée sur le site officiel de VANTRUE. Vous pouvez contacter le service client ou télécharger la dernière version du logiciel à partir du site officiel, et mettre à niveau selon les invites du site officiel.(www.vantrue.net) -
Page 123: Spécification
Dans des conditions hivernales extrêmes, c'est-à-dire -4°F (-20°C) ou moins, détachez la caméra du pare-brise lorsqu'elle n'est pas utilisée et rangez-la dans la boîte à gants 5. Spécification Modèle Processeur de puce Processeur Novatek haute performance N E N E N F R Capteur d'image Capteur CMOS Sony... -
Page 124: Garantie & Support
Si vous vous inscrivez en tant que membre sur le site officiel de VANTRUE, votre période de service de garantie peut être étendue à 18 mois. -
Page 125: Opcjonalne Akcesoria
1. Co znajdziemy w pudełku? Vantrue E1 Uchwyt Ładowarka wideorejestrator samochodowa USB C (3.5m) N E N E N P L Kabel USB C do Przycisk WiFi Naklejki przesyłu danych 1m elektrostatyczne Naklejki Vantrue Szpatułka Instrukcja użytkownika Opcjonalne akcesoria Filtr CPL... -
Page 126: Budowa Kamery
2. Budowa kamery Nazwa Opis Mikrofon Nagrywa dźwięk wraz z materiałem wideo. Numer seryjny Numer seryjny urzadzenia. Przycisk Podczas nagrywania wideo, długie naciśnięcie wyłącza ekran, krótkie naciśnięcie zatrzymuje nagrywanie wideo i przechodzi w tryb czuwania; wybraną opcję można zatwierdzić w menu; podczas odtwarzania plików można odtwar- zać/wstrzymywać... - Page 127 Przycisk Podczas nagrywania wideo i czuwania, długie naciśnięcie powoduje szybkie przejście do trybu parkowania, a krótkie naciśnięcie włącza/wyłąc- za mikrofon; w ustawieniach menu długie naciśnięcie powoduje przewijanie opcji menu, krótkie naciśnięcie powoduje wyświetlenie następnej opcji menu; podczas przeglądania plików, długie naciśnięcie, aby przewinąć do pliku, krótkie naciśnięcie, aby wyświetlić...
- Page 128 Podłącz do kabla typu C lub ładowarki Port mocujący samochodowej, aby uzyskać zewnętrzne źródło zasilania. Reset Krótkie wciśnięcie powoduje reset urządzenia. Ekran 1.54” LCD LED Status Opis Zielona dioda W stanie gotowości. świeci ciągle Zielona diode miga Kamera nagrywa. Przegląd ekranu Rozdzielczość...
- Page 129 3. Instalacja 3.1 Instalowanie karty pamięci (zalecana szybka karta microSD Vantrue U3). Włóż kartę pamięci (pojemność karty pamięci: 32 GB-512 GB, szybkość karty: U3/Class10/A2), ponieważ kamera ma określone wymagania dotyczące szybkości karty pamięci. Aby zapewnić niezawodne działanie, zalecamy korzystanie z karty SD VANTRUE lub Samsung PRO Endurance (sprzedawana oddzielnie).
- Page 130 pomyślnie”. Jeżeli po włożeniu karty pamięci na ekranie pojawi się komunikat „Błąd karty, proszę sformatować” (należy pamiętać, że rejestrator w tym momencie nie nagrywa), należy bezpośrednio nacisnąć aby wejść do menu i rozpocząć proces formatowania. UWAGA Zalecamy formatowanie karty raz w miesiącu, aby zapewnić normalne korzystanie z kamery;...
- Page 131 3.2 Instalowanie kamery na przedniej szybie Wyrównaj uchwyt z interfejsem mocowania kamery, a następnie wciśnij, aż uchwyt zostanie zainstalowany N E N E N P L Dokładnie wyczyść przednią szybę wodą lub alkoholem, a następnie wytrzyj suchą szmatką. Naklej naklejkę elektrostatyczną za lusterkiem wstecznym, co jest zalecaną...
- Page 132 Usuń taśmę 3M z uchwytu, a następnie przymocuj uchwyt i kamerę do naklejki elektrostatycznej. Podłącz ładowarkę samochodową do zapalniczki samochodowej, a następnie włóż końcówkę USB ładowarki do portu zasilania USB typu C kamery. Po uruchomieniu samochodu kamerę można włączyć natychmiast. - 128 -...
-
Page 133: Pobieranie Aplikacji
3.3 Pobieranie Aplikacji Zeskanuj kod QR odpowiedniej wersji poniżej, aby pobrać aplikację i ją zainstalować. Wyszukaj aplikację „Vantrue Cam” w App Store lub Google Play Store, aby znaleźć aplikację, a następnie pobierz ją i zainstaluj na swoim telefonie. - 129 -... - Page 134 Uwaga: Po pomyślnym podłączeniu tego urządzenia do telefonu komórkowego przez Wi-Fi, może on realizować podgląd wideo w czasie rzeczywistym, zmieniać ustawienia kamery, pobierać pliki bez połączenia z Internetem i odtwarzać filmy na telefonie komórkowym. Jednak funkcje odtwarzania śladów GPS i udostępniania wideo będą zależeć od usług dodatkowych z Internetu lub usług telekomunikacyjnych (wymaga wyłączenia/odłączenia WiFi kamery).
- Page 135 3.5 Łączenie z aplikacją Po pomyślnym nawiązaniu połączenia Wi-Fi kliknij „+” podczas otwierania aplikacji po raz pierwszy, dodaj model kamery, a następnie aplikacja automatycznie połączy się z kamerą i wyświetli aktualną sytuację nagrywania kamery w czasie rzeczywistym. N E N E N P L UWAGA: Jeśli nie połączysz się...
- Page 136 Początkowe hasło tego urządzenia służy tylko do pierwszego logowa- nia. Aby zapobiec potencjalnym zagrożeniom bezpieczeństwa, pamiętaj o zmianie początkowego hasła na czas po pierwszym zalogowaniu, aby uniemożliwić innym zalogowanie się do Twojego urządzenia bez autoryzacji lub innych negatywnych konsekwencji. Jeśli zapomnisz hasła Wi-Fi, możesz przywrócić domyślne ustawienia urządzenia, a hasło Wi-Fi urządzenia również...
-
Page 137: Funkcje Aplikacji
3.6 Funkcje aplikacji Ustawienia kamery Tryb pełnoekranowy Wł/wył mikrofon N E N E N P L Zatrzymuje nagrywanie Zdjęcie Album Po wejściu do podglądu aplikacji w czasie rzeczywistym możesz wykonać następujące operacje: Podgląd wideo: Po pomyślnym podłączeniu aplikacji do E1 wejdź na stronę... - Page 138 Migawka wideo: możesz przechwycić bieżący ekran w interfejsie podglą- du aplikacji na bieżąco. 3.7 Aktualizacja Otwórz aplikację „Vantrue Cam”, połącz się z Wi-Fi i wejdź w „Ustawienia> Informacje> Wykryj nową wersję”, aplikacja automatycznie wykryje, czy wersja aplikacji jest najnowszą wersją. Jeśli dostępna jest nowa wersja aplikacji, postępuj zgodnie z monitami aplikacji i uaktualnij wersję.
-
Page 139: Podstawowe Funkcje
4. Podstawowe funkcje 4.1 Ustawienia menu Kamera E1 posiada 3 menu funkcyjne, którymi są ustawienia nagrywania, ustawienia systemowe i przeglądanie plików. W tym ustawieniu funkcji możesz ustawić kamerę samochodową zgodnie z własnymi wymaganiami. Wciśnij aby zatrzymać nagrywanie a potem aby wejść w ustawie- nia. - Page 140 -Dodaj do nagrania: Włącz lub wyłącz pieczęć znaku wodnego wideo i zdjęć. Znaczek znaku wodnego zawiera etykietę daty i godziny, etykietę VANTRUE, numer tablicy rejestracyjnej, informacje o lokalizacji GPS, etykietę prędkości. Wszystkie włączone domyślnie. -Tryb poklatkowy: domyślna wartość jest wyłączona. Możesz włączyć...
- Page 141 -Treść głosowa: polecenia rozpoznawania głosu. Możesz użyć różnych poleceń, aby zdalnie sterować kamerą do pracy. -Formatuj kartę pamięci: Formatuj wszystkie dane na karcie pamięci. -Konfiguracja przypomnienia formatu: Wybierz opcje przypomnienia: 15 dni, 1 miesiąc i Wył. Domyślnie jest wyłączone. Aby zapobiec regularnemu zapominaniu o formatowaniu karty pamięci, dodaliśmy ustawienie czasu przypomnienia o formatowaniu.
- Page 142 50 Hz lub 60 Hz w zależności od regionu. 50hz dla Polski. -Informacje o systemie: Sprawdź aktualny model, wersję oprogramowa- nia układowego i oficjalną stronę internetową Vantrue. -Ustawienie domyślne: Zresetuj urządzenie do ustawień fabrycznych. C. Pliki Przejrzyj filmy i zdjęcia nagrane przez E1 na urządzeniu.
- Page 143 wideo poklatkowego to 20300128_140633_0006_T_A.MP4. -Zdjęcia: pliki zdjęć. -Wszystko: Nagrano wszystkie standardowe nagrania wideo i nagrania z wydarzeń krytycznych. N E N E N P L - 139 -...
-
Page 144: Dane Techniczne
4.2. Dane techniczne 4.2.1 Nagrywanie w pętli Po włożeniu karty pamięci i podłączeniu zasilania kamera na deskę rozdzielczą E1 automatycznie się włączy i przejdzie do nagrywania w pętli. Czas trwania każdego nagranego wideo zostanie zapisany na podstawie ustawionego czasu nagrywania w pętli, zapisanego w normalnym folderze wideo. - Page 145 4.2.2 Nagrywanie zdarzeń Wideo zdarzenia jest wyzwalane przez czujnik G (czujnik grawitacyjny), który może być wyzwalany automatycznie lub ręcznie blokowany. Podczas jazdy, w szczególnych okolicznościach, plik zostanie automaty- cznie zablokowany w przypadku wykrycia zdarzenia lub można plik zablokować ręcznie w przypadku nagrywania awaryjnego. 2560x1440P 30FPS 2560x1440P 30FPS N E N E...
- Page 146 Pliki Zdarzenia Zdarzenia 20220820_140633_0001_E... 20220820_140633_0002_E... Normalne 20220820_140633_0003_E... Zdjęcia 20220820_140633_0004_E... Wszystkie pliki Uwaga: Czułość wyzwalacza automatycznego blokowania wideo jest określo- na przez czułość kolizji. Im wyższe ustawienie czułości, tym większe prawdopodobieństwo wyzwolenia. Całkowita pojemność pliku wideo zdarzenia stanowi 30% całkowitej pojemności bieżącej karty pamięci. Gdy plik wideo wydarzenia osiągnie górny limit, nowy plik wideo wydarzenia automatycznie zastąpi oryginalny plik wideo wydarzenia.
- Page 147 4.2.3 Tryb parkowania (gdy tryb parkowania jest włączony, funkcja wideo poklatkowego nie będzie działać. Te dwie funkcje nie mogą działać jednocześnie) Tryb parkowania działa jako funkcja strażnicza w różnych sytuacjach. Możesz przełączać się na różne tryby monitorowania parkowania w zależności od różnych sytuacji parkingowych. Po włączeniu trybu parkowania są...
- Page 148 Detekcja kolizji Kiedy detetkcja kolizji jest włączona Ikona wykrywania kolizji zostanie wyświetlona w interfejsie nagrywania, wskazując, że rejestrator aktualnie używa trybu wykrywania kolizji. Czułość wykrywania kolizji można regulow- ać w zakresie od 1 do 5 poziomów, można dostosować do przyzwyczaje- nia, a także otoczenia samochodu.
- Page 149 UWAGA: Jeśli kamera nadal będzie wykrywać wstrząs podczas nagrywania wykrywania kolizji, wyjdzie z trybu wykrywania kolizji i przejdzie do normalnego nagrywania, uruchamiając ponownie 5-minutowy mecha- nizm wprowadzania. Nagranie wideo z wykrywania kolizji zostanie zapisane w folderze Normalne. Aby zapobiec zapętleniu wideo, sprawdź go na czas i zapisz wymagany plik wykrywania kolizji, aby zapobiec utracie.
- Page 150 2560x1440P 30FPS 00:00:37 20-08-2022 14:09:07 MP/H UWAGA: Tryb wykrywania ruchu musi być wykonywany, gdy kamera jest włączo- na. Po wyłączeniu kamery tryb wykrywania ruchu nie będzie działał. Rozdzielczość 1944P i 1440P HDR nie obsługuje funkcji nagrywania wstępnego, więc po włączeniu wykrywania ruchu rozdzielczość zostanie automatycznie zmieniona na 1440P do nagrywania.
- Page 151 2560x1440P 30FPS 00:00:37 20-08-2022 14:09:07 MP/H 05-01-2022 14:09:07 MP/H 01-05-2022 14:09:07 MP/H Uwaga: Nagrywanie z niską szybkością transmisji bitów należy wykonać, gdy kamera jest włączona. Po wyłączeniu kamery nagrywanie z małą N E N E N P L szybkością transmisji nie będzie działać. Tryb poklatkowy Gdy wybrany jest tryb niskiej szybkości klatek, kamera będzie nagrywać...
- Page 152 [Normalny czas nagrywania = Czas nagrywania poklatkowego (sek) x Szybkość nagrywania FPS/Opcja nagrywania poklatkowego] (Czas należy przeliczyć na sekundy). UWAGA: Jednostką czasu we wzorze obliczeniowym są sekundy, więc ostatec- zny obliczony normalny czas nagrywania to również sekundy. Jeśli potrzebujesz przeliczyć to na inne jednostki czasu, sprawdź i przekonwertuj je samodzielnie.
- Page 153 2560x1440P 30FPS 00:00:37 20-08--2022 14:09:07 MP/H Wzór na obliczanie czasu trwania wideo to: [Normalny czas nagrywania = Czas nagrywania poklatkowego (sek) x Szybkość nagrywania FPS/Opcja nagrywania poklatkowego] N E N E N P L (Czas należy przeliczyć na sekundy). 4.2.5 Funkcja GPS Funkcja GPS jest również...
- Page 154 Możesz wybrać GMT-08:00, wybierając swoją strefę czasową, na przykład Los Angeles. Jeśli nie znasz strefy czasowej swojej lokalizacji, możesz użyć WIFI, aby połączyć się z aplikacją Vantrue Cam i potwierdzić, że funkcja automatycznej regulacji czasu w aplikacji jest włączona.
- Page 155 2560x1440P 30FPS 00:00:37 20-08-2022 14:09:07 MP/H Montaż pilota: Po dopasowaniu pilota do aparatu należy wybrać odpowiednie miejsce w samochodzie, a następnie oderwać samoprzylepną naklejkę pilota i przykleić ją w wybranym miejscu. (Uwaga: pilot musi być zainstalowany w N E N E N P L pozycji, która nie wpływa na bezpieczną...
-
Page 156: Funkcje Pilota
Funkcje pilota: Po pomyślnym podłączeniu pilota naciśnij przycisk, aby włączyć lub wyłączyć nagrywanie. 2560x1440P 30FPS 00:00:37 20-08-2022 14:09:07 MP/H Po pomyślnym nawiązaniu połączenia, po krótkim naciśnięciu przy- cisk SOS, kamera zablokuje bieżący plik i zrobi migawkę wideo; kontynuuj krótkie naciśnięcie podczas zablokowanego wideo i kontyn- uuj robienie zdjęcia 2560x1440P 30FPS 00:00:37... - Page 157 Wymiana baterii w pilocie: Na spodzie pilota znajduje się znak "OPEN", proszę powoli podważyć, aby otworzyć otaczającą szczelinę wzdłuż pozycji rowka tego znaku, aby otworzyć. N E N E N P L Po otwarciu delikatnie podważ baterię z rowka z przodu komory baterii, a następnie wyjmij starą...
-
Page 158: Asystent Głosowy
4.2.8 Asystent głosowy Oprócz sterowania kamerą za pomocą pilota, możesz również wydawać polecenia głosowe rejestratorowi za pośrednictwem asystenta głosowe. Aby uzyskać bardziej szczegółowe polecenia głosowe, sprawdź Ustawie- nia systemu > Treść głosowa. Domyślnym ustawieniem jest standardowa czułość. Rozpoznawanie głosu ma opcje takie jak niska czułość/standardowa/wysoka czułość/wyłączone. - Page 159 4.2.9 Ustawienia ekranu E1 to kamera z małym ekranem, więc specjalnie ustawiliśmy dla Ciebie dwa tryby wyświetlania ekranu. Pierwszy to tryb pełnoekranowy. Tryb pełnoekranowy to wyświetlanie pełnoekranowe, z większym współczynnikiem ekranu, ale utraci część lewego i prawego kąta widzenia. 2560x1440P 30FPS N E N E N P L 00:00:37...
- Page 160 4.2.10 Przeglądanie zdjęć/plików a. Przeglądanie plików w kamerze Po kliknięciu „Pliki” wprowadź dowolny folder, po otwarciu folderu wideo możesz nacisnąć przycisk W dół, aby wybrać następny plik, a następnie nacisnąć przycisk W dół, aby usunąć plik podczas odtwarzania. 20220822_140633_0002_N 1280x720 08/20/2022 7:15 00:30...
- Page 161 b. Przeglądanie plików na komputerze Podłącz dołączony do zestawu kabel USB TYPE-C do E1 i komputera. N E N E N P L Kiedy połączony jest pomyślnie Ikona pojawi się na wyświetlaczu E1 w celu przesłania danych, a następnie będzie można przeglądać pliki wideo w folderze komputera.
- Page 162 Do odczytania informacji o karcie pamięci można również użyć czytnika kart USB. c. Zobacz w aplikacji „Vantrue Cam” Po pomyślnym podłączeniu E1 do telefonu komórkowego przez Wi-Fi, może odtwarzać, pobierać i usuwać pliki w aplikacji mobilnej.
-
Page 163: Aktualizacja Oprogramowania
Kamera uruchomi się ponownie po zakończeniu aktualizacji. Najnowsza wersja oprogramowania jest zawsze dostępna na oficjalnej stronie internetowej VANTRUE (www.vantrue.pl/wsparcie). Zdecydowan- ie zalecamy zarejestrowanie produktu (www.vantrue.net/register), aby otrzymać wiadomość e-mail z powiadomieniem, gdy dostępna będzie nowa aktualizacja oprogramowania układowego. 4.2.12 Temperatura pracy Kamera jest zaprojektowana do pracy w temperaturach od -4 do 158°F... -
Page 164: Dane Techniczne
5. Dane techniczne Specyfikacje tego produktu mogą ulec zmianie bez wcześniejszego powiadomienia z powodu ulepszeń produktu. Model Procesor Novatek high performance processor Sensor obrazu Sony CMOS Sensor Ekran Pantalla IPS de 1.54" WiFi Wbudowane 2.4G Obiektyw Przód: 160°szerokokątny; F/1. 8 Dostępne języki Engish/ Français/ Español/ Deutsch/ Italiano/ 简体中文/русский/ 日本語/ Polski... -
Page 165: Gwarancja & Wsparcie
Zarejestruj swój produkt na naszej oficjalnej stronie (www.van- true.net/register) aby być na bieżąco z aktualizacjami. Wsparcie Jeśli masz jakiekolwiek pytania dotyczące produktu, nie wahaj się skontak- tować z nami pod adresem biuro@vantrue.pl Zapytania są zazwyczaj udzielane w ciągu 12-24 godzin. N E N E N P L... - Page 166 Skontaktuj się z nami: facebook.com/vantruePolska www.vantrue.pl - 162 -...