Table des Matières
Publicité
Liens rapides
sauder.com
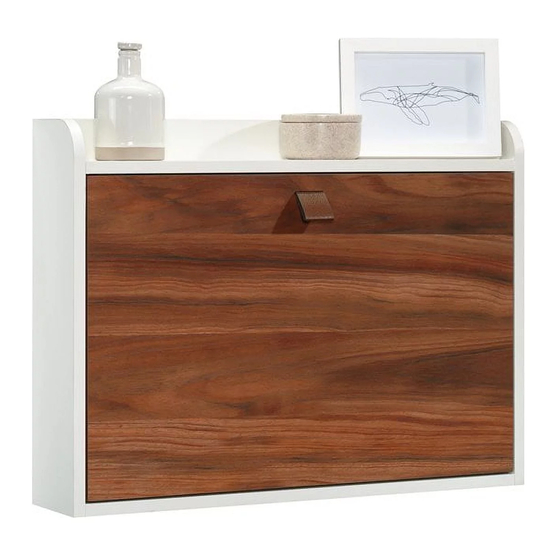
Wall Desk
Anda Norr Collection | Model 423547
Need help? Visit Sauder.com to view video assembly tips or chat with a live rep.
Prefer the phone? Call 1-800-445-1527.
Share your journey!
For things 'n such.
NOTE: THIS INSTRUCTION
BOOKLET CONTAINS IMPORTANT
SAFETY INFORMATION.
PLEASE READ AND KEEP FOR
FUTURE REFERENCE.
English pg 1-9
Français pg 10-11
Español pg 12-13
Lot #: 524570
Date Purchased: __________________
12/12/18
Be sure to give us a ring before
making any returns. 1-800-445-1527
Publicité
Table des Matières

Sommaire des Matières pour Sauder 423547
- Page 1 NOTE: THIS INSTRUCTION BOOKLET CONTAINS IMPORTANT SAFETY INFORMATION. PLEASE READ AND KEEP FOR Need help? Visit Sauder.com to view video assembly tips or chat with a live rep. FUTURE REFERENCE. Prefer the phone? Call 1-800-445-1527. English pg 1-9 Français pg 10-11 Español pg 12-13...
- Page 2 No. 2 Phillips Screwdriver Tip Shown Actual Size Hardware Identifi cation Assembly Steps Pencil Français 10-11 Electric drill with 1/8" and 3/16" or 6mm bits (ONLY in indicated step) Español 12-13 Safety Tape Measure Warranty Level Hammer Page 2 www.sauder.com 423547...
-
Page 3: Part Identifi Cation
WALL UNIT (1) Hardware Identifi cation METAL BRACKET - 2 DRYWALL ANCHOR - 2 L-WRENCH - 1 SILVER 2" FLAT HEAD SCREW - 2 SILVER 1-3/8" FLAT HEAD SCREW - 2 SILVER 1/2" HEX HEAD SCREW - 2 423547 www.sauder.com Page 3... - Page 4 Locate and mark the wall stud locations on your wall. å NOTE: BE SURE THE TWO MARKS ON THE STUDS ARE LEVEL BEFORE DRILLING. å Wall Stud Desired upper line of wall unit 7" Lower edge line of WALL SUPPORT Angled edge Page 4 www.sauder.com 423547...
- Page 5 SILVER 2" FLAT HEAD SCREWS (4) into the 1/8" holes. Wall Stud Upper line of wall unit 7" Lower line of WALL SUPPORT (A) Angled edge SILVER 2" FLAT HEAD SCREW (2 used in this step) 423547 www.sauder.com Page 5...
- Page 6 With a pencil, create a mark onto the wall through the METAL BRACKET holes. å Carefully lower your WALL UNIT (B) to the fl oor. å larger hole SILVER 1/2" FLAT HEAD SCREW (2 used in this step) Page 6 www.sauder.com 423547...
- Page 7 fl ush with the wall. NOTE: Stud attachment will not use a DRYWALL å ANCHOR. Wall Stud Drill an 3/16" or 6mm hole for the DRYWALL ANCHOR. Drill an 1/8" hole into a stud in the wall. 423547 www.sauder.com Page 7...
- Page 8 Fasten the WALL UNIT (B) to the wall by turning two å SILVER 1-3/8" FLAT HEAD SCREWS (5) through the METAL BRACKETS and into the DRYWALL ANCHORS or stud in the wall. SILVER 1-3/8" FLAT HEAD SCREW (2 used in this step) Page 8 www.sauder.com 423547...
- Page 9 This completes assembly. Clean with your favorite å furniture polish or a damp cloth. Wipe dry. And to celebrate, why not share your success story? 10 lbs. 10 lbs. 25 lbs. 423547 www.sauder.com Page 9...
-
Page 10: Bureau Mural
Modèle 423547 Bureau mural Utilisez les instructions d’ a ssemblage en français avec les NOUS SOMMES LA POUR VOUS AIDER! schémas étape par étape du manuel d’instruction en anglais. Nous faisons de notre mieux pour nous assurer que votre meuble Chaque étape en français correspond à... - Page 11 Suspendre l’UNITÉ MURALE (B) sur le SUPPORT MURAL (A). À l’ a ide d’un crayon, mettre une marque sur le mur à travers les trous de la CONSOLE EN MÉTAL. Abaisser avec précaution l'UNITÉ MURALE (B) sur le sol. 423547 www.sauder.com Page 11...
-
Page 12: Lista De Partes
Si UNIDAD DE PARED .............1 necesita ponerse en SOPORTE DE METAL ..........2 contacto con Sauder en ANCLAJE PARA EL DRYWALL ......2 cuanto a esta unidad, refi érase al número LLAVE EN L ...............1 de lote y al número de... - Page 13 Cuelgue la UNIDAD DE PARED (B) en el SOPORTE DE PARED (A). Con un lápiz, ponga una marca en la pared a través los agujeros del SOPORTE DE PARED. Con cuidado baje la UNIDAD DE PARED (B) al piso. 423547 www.sauder.com Page 13...
- Page 14 • Es peligroso colocar los televisores sobre el peso y la ubicación de la pantalla de muebles que no están diseñados para imágenes pueden hacer que el mueble se soportar un televisor. incline hacia adelante. Page 14 www.sauder.com 423547...
-
Page 15: Garantie Limitée De 5 Ans
à compter de la date d'achat la première fois et qui sont signalés à Sauder dans les limites de couverture de la contre tout défaut de matériaux ou de fabrication des composantes de mobilier Sauder. - Page 16 Dear Valued Customer: So, how did it go? Thanks so much for choosing Sauder® furniture. I hope the Set a world record for speed? purchase and assembly process was a positive experience Feeling good about yourself? and you feel good about the furniture you just built. If you Nice.


