
Manuels Connexes pour Bresser 5201020


Sommaire des Matières pour Bresser 5201020
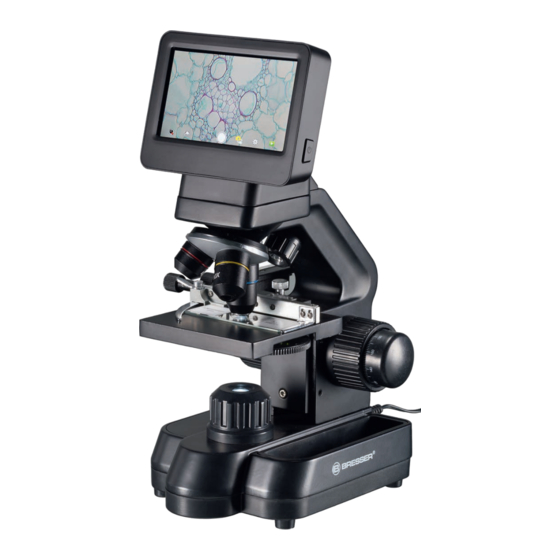
- Page 1 LCD-MIKROSKOP TOUCH LCD MICROSCOPE TOUCH Art. No. 5201020 BEDIENUNGSANLEITUNG INSTRUCTION MANUAL MODE D’EMPLOI INSTRUCCIONES DE USO...
- Page 2 Fig. 1 Fig. 2 Max. 32 GB 1 1& 1 ) ! - 2 -...
- Page 3 Fig. 3 Photo mode Video mode Settings - 3 -...
- Page 4 BEDIENUNGSANLEITUNG ...... 5 INSTRUCTION MANUAL .......10 MODE D’EMPLOI ........14 INSTRUCCIONES DE USO ......18 GARANTIE & SERVICE / WARRANTY & SERVICE GARANTIE ET SERVICE / GARANTÍA Y SERVICIO .....22 GARANZIA E ASSISTENZA / ГАРАНТИЯ - 4 -...
-
Page 5: Allgemeine Informationen
Allgemeine Informationen GEFAHR! Kinder dürfen das Gerät nur unter Aufsicht benutzen. Verpackungsmaterialien (Plastiktüten, Gummibänder, Zu dieser Anleitung etc.) von Kindern fernhalten! Es besteht ERSTICKUNGSGE- Lesen Sie bitte aufmerksam die Sicherheitshinweise in dieser FAHR! Anleitung. Verwenden Sie dieses Produkt nur wie in der Anlei- tung beschrieben, um Schäden am Gerät oder Verletzungen zu VORSICHT! vermeiden. - Page 6 Enthaltene Teile die Auflichtbeleuchtung (Fig. 2 Abb. 15). Die gleichzeitige Be nutzung der Durch- und Auflichtbeleuchtung ist nur bei • Mikroskop mit Objektiven (4x, 10x, 40x) und integrierter halbdurchsichtigen Objekten sinnvoll. Diese Betriebsart ist für Kamera/Bildschirm-Einheit. Durchlichtobjekte auf Objektträgern nicht empfehlenswert, da •...
- Page 7 Mikroskop wird nun als Massenspeicher erkannt. Videomodus Melden Sie zum Beenden das Mikroskop ordnungsgemäß Video-Weißabgleich ab. Ziehen Sie das USB-Kabel heraus. Halten Sie den Ein-/ Siehe „A2“ Ausschalter ca. 2-4 Sekunden gedrückt. Das Mikroskop schal- Video-Auflösung tet sich aus, welches mit einem Piep-Ton signalisiert wird. Wählbar zwischen 720P (60 fps) und 1080P (30 fps) Bei 720P Aufnahmen, wird nahezu die gesamte HDMI-Verbindung...
-
Page 8: Entsorgung
ihrem Mikros kop in Berührung kommt. Vermeiden Sie auch Finger ab drücke auf allen optischen Flächen! Sollte dennoch Staub oder Schmutz auf Ihr Mikroskop oder Zubehör gera- ten sein, entfernen Sie diesen wie unten beschrieben. 3. Reinigung nichtoptischer Komponenten: Bevor Sie nichtoptische Komponenten des Mikroskops (z. - Page 9 - 9 -...
-
Page 10: General Information
General Information contact with the eyes or mouth, rinse thoroughly with water. In the event of pain, contact a doctor immediately and take the substances with you. About this Instruction Manual Please read the safety instructions in this manual carefully. To NOTE! avoid damage to the unit and the risk of injury, only use this Do not disassemble the device. - Page 11 Scope of delivery Colour filter wheel The colour filter wheel (Fig. 1, image 8) beneath the microscope • Microscope with objectives (4x, 10x, 40x) and integrated table can be used to influence the image quality when camera/display unit. observing transparent specimens. Fine details are displayed •...
- Page 12 Connect the HDMI cable supplied with the microscope to the Switching from Video Mode to Photo Mode Micro HDMI output (Fig. 2 Fig. 14) of the microscope and to a Settings suitable receiver. Switch on the microscope. After a few seconds the image will Access to SD card appear on the receiver.
- Page 13 Notes on cleaning 1. Avoid disassembling the microscope! Because of being a precise optical instrument, do not disassemble the microscope. That may cause serious damage to its performance. Do not disassemble the objectives. 2. Avoid contamination! You should make sure that dust or moisture do not come in contact with your microscope.
-
Page 14: Informations Générales
Informations Générales etc.) doivent être tenu hors de la portée des enfants! Il ya un risque d’étouffement! À propos de ce mode d‘emploi ATTENTION! Veuillez lire attentivement les instructions de sécurité de ce Les enfants ne doivent pas avoir accès aux produits manuel. - Page 15 Contenu de la livraison de l’éclairage transmis et incident est conseillé uniquement avec les objets semi-transparents. Ce mode n’est pas • Microscope avec objectifs (4x, 10x, 40x) et unité caméra/ recommandé pour les objets fins et transparents sur des lames affichage intégrée.
- Page 16 Le message „Connexion“ apparaît à l‘écran. S‘il s‘éteint, vous Affichage des images fixes disponibles pouvez accéder au SD. Le microscope est maintenant reconnu Indique le nombre d‘images qui peuvent encore être comme un dispositif de stockage de masse. capturées. (Selon le contenu informatif de l‘image, la Déconnectez-vous correctement du microscope pour sortir.
-
Page 17: Recyclage
Remarques sur le nettoyage plus d'informations sur l'élimination appropriée de votre centre local de recyclage des déchets ou environnement. 1. Évitez de démonter le microscope! Parce que d'être un instrument optique précis, ne pas démonter le microscope. Cela peut causer de graves dommages à... -
Page 18: Informaciones De Carácter General
Informaciones de carácter general plástico, bandas de goma) alejadas del alcance de los niños. ¡Existe PELIGRO DE ASFIXIA! Sobre este manual ¡PRECAUCIÓN! Lea atentamente las indicaciones de seguridad recogidas en No dejar los productos químicos y líquidos incluidos este manual. Emplee este producto exclusivamente de la forma al alcance de los niños. - Page 19 Incluye con una luz superior blanca también puede optimizar detalles de la imagen al observar objetos bajo la luz incidental (por • Microscopio con objetivos 4x, 10x y 40x y cámara con pan- ejemplo, los objetos transparentes). talla integrada. • Platina mecánica (montada de fábrica) Observación •...
- Page 20 Modo vídeo cable USB. Mantenga pulsado el interruptor de encendido y apagado durante unos 2-4 segundos. El microscopio se apa- Balance de blancos de vídeo gará emitiendo un pitido. Vea „A2“. Resolución de vídeo Conexión HDMI Selecciona entre 720P (60 fps) y 1080P (30 fps) El microscopio puede transmitir la imagen a un dispositivo con Para las grabaciones de 720P, se utiliza casi toda la entrada HDMI como, por ejemplo, un monitor, un televisor o...
- Page 21 NOTAS sobre la limpieza 1. Evitar desmontar el microscopio! Porque al ser un instrumento óptico preciso, no desmonte el microscopio. Eso puede causar graves daños a su rendimiento. No desmonte los objetivos. 2. Evite la contaminación! Usted debe asegurarse de que el polvo o la humedad no entren en contacto con su microscopio.
-
Page 22: Garanzia E Assistenza
Alternatively you can also send an email esaustive su questo prodotto in una lingua specifica? Venga a to manuals@bresser.de or leave a message on +49 (0) 28 72 – visitare il nostro sito Web al seguente link (codice QR Code) per 80 74-220*. - Page 23 - 23 -...
- Page 24 Bresser GmbH Gutenbergstr. 2 · DE-46414 Rhede Germany www.bresser.de · service@bresser.de Irrtümer und technische Änderungen vorbehalten. · Errors and technical changes reserved. Sous réserve d’erreurs et de modifications techniques. · Vergissingen en technische veranderingen voorbe- houden. Queda reservada la posibilidad de incluir modificaciones o de que el texto contenga errores.