Table des Matières
Publicité
Les langues disponibles
Les langues disponibles
Liens rapides
Betriebsanleitung | Operating instructions | Mode d'emploi |
Istruzioni per l'uso | Instrucciones de servicio | Bruksanvisning
Vakuum-Steuergerät
Vacuum control unit
Unité de contrôle du vide
Unità di comando per vuoto
Unidad de control de vacío
Vakuumstyrenhet
VCU
R412015242/10.2014, Replaces: 10.2010, DE/EN/FR/IT/ES/SV
Publicité
Table des Matières

Sommaire des Matières pour Aventics VCU Série
- Page 1 Betriebsanleitung | Operating instructions | Mode d’emploi | Istruzioni per l’uso | Instrucciones de servicio | Bruksanvisning Vakuum-Steuergerät Vacuum control unit Unité de contrôle du vide Unità di comando per vuoto Unidad de control de vacío Vakuumstyrenhet R412015242/10.2014, Replaces: 10.2010, DE/EN/FR/IT/ES/SV...
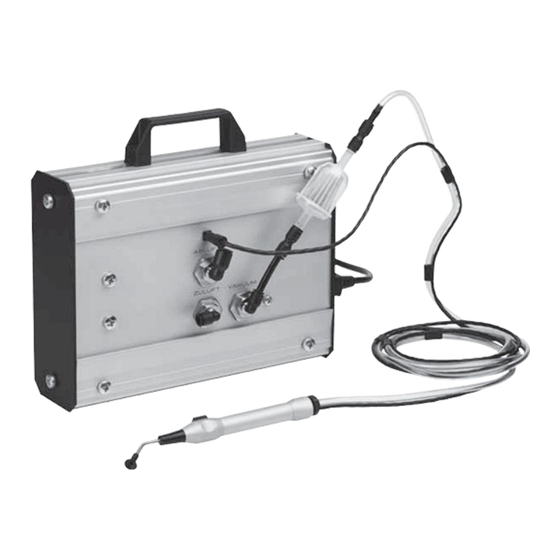
- Page 2 Abbildungen: Ansicht variiert je nach Produkt. Figures: View varies according to the product. Figures : la vue peut varier en fonction du produit. Immagini: la vista varia a seconda del prodotto. Figuras: la vista varía según el producto. Bilder: Utseendet varierar beroende på produkt. 00138426 Steuergerät mit Hauptschalter (1) und Spannungswähler (2) Control unit with main switch (1) and voltage selector (2)
- Page 3 Beachten Sie die gültigen Vorschriften zur Unfallverhütung und zum Umweltschutz im Verwenderland und am Arbeitsplatz. Zu dieser Dokumentation Verwenden Sie Produkte von AVENTICS nur in technisch einwandfreiem Zustand. Prüfen Sie das Produkt auf offensichtliche Mängel, wie beispielsweise Risse im Diese Anleitung enthält wichtige Informationen, um das Vakuum-Steuergerät sicher Gehäuse oder fehlende Schrauben, Abdeckkappen, Dichtungen.
- Page 4 (Elektrischer Anschluss: 115/230 V, 50 Hz gemäß Einstellung am O Sollte nach Prüfung der o.g. Punkte die Saugleistung nicht wiederhergestellt Spannungswähler sein, setzen Sie sich bitte mit Ihrem AVENTICS-Vertragshändler in Verbindung. Montage Schalldämpfer (optional): 8. Schrauben Sie den Schalldämpfer 1 auf den Abluft-Anschluss...
-
Page 5: About This Documentation
6 (electrical connection: 115/230 V, 50 Hz according to the setting on the use and to avoid workplace accidents. voltage selector Only use AVENTICS products that are in perfect working order. Examine the product for obvious defects, such as cracks in the housing or missing screws, caps, or seals. -
Page 6: Service And Repairs
1. Unscrew the silencer Tubing or cable length 2. Screw the new silencer (1827000023) 1 onto the exhaust connection. approx. If the vacuum capacity is not restored, please contact your authorized AVENTICS dealer. Weight approx. 40 g Exchanging the dirt filter (spare part) 1. - Page 7 A propos de cette documentation Utilisez les produits AVENTICS exclusivement lorsque leur état technique est impeccable. Ce mode d’emploi contient des informations importantes pour monter et mettre en Vérifier sur le produit la présence de vices manifestes ou de dégâts dus au...
-
Page 8: Entretien Et Maintenance
AVENTICS | VCU | R412015242–BDL–001–AB | English 2. Relier le tube en PU 7 du filtre à impuretés au raccordement de Recherche et élimination de défauts vide 18 de l’unité de contrôle. 3. Enficher la pincette de vide 12 munie du tuyau de vide (tuyau en PVC Défaillance... - Page 9 6 (attacco elettrico: 115/230 V, 50 Hz secondo la regolazione sul selettore di tensione Osservare le prescrizioni antinfortunistiche e di protezione ambientale vigenti nello stato in cui l’apparecchio viene usato e sul posto di lavoro. Utilizzare i prodotti AVENTICS esclusivamente in condizioni tecniche perfette.
- Page 10 Peso ca. 40 g ATTENZIONE! Per altri dati tecnici consultare il catalogo online alla pagina www.aventics.com. Pericolo di ferimento dovuto allo smontaggio o alla sostituzione in pressione o in tensione elettrica! Lo smontaggio o la sostituzione sotto pressione o con tensione elettrica collegata può...
- Page 11 Acerca de esta documentación trabajo. Utilice los productos AVENTICS sólo si no presentan problemas técnicos. Estas instrucciones contienen información importante para montar y poner en Compruebe si el producto presenta algún defecto visible como, por ejemplo, funcionamiento la unidad de control de vacío de un modo seguro y apropiado.
- Page 12 Peso (aprox.) 40 g Cambio del filtro de suciedad (repuesto) Puede consultar más datos técnicos en el catálogo online en www.aventics.com. 1. Extraiga las dos piezas de acoplamiento del filtro de suciedad 2. Sustituya el filtro de suciedad 3. Coloque las piezas de acoplamiento de nuevo en el filtro de suciedad Desmontaje y sustitución...
-
Page 13: Säkerhetsföreskrifter
Följ gällande föreskrifter för att undvika olycka och för att skydda miljön i användarlandet och på arbetsplatsen. Montera ljuddämpare (tillval) Produkter från AVENTICS får bara användas om de är i ett tekniskt felfritt skick. 8. Skruva fast ljuddämparen 1 på frånluftsanslutningen... - Page 14 3,3 kg 2. Skruva på den nya ljuddämparen (1827000023) 1 på frånluftsanslutningen Vakuumpincett: igen. Om sugeffekten ändå inte återställs ska du vända dig till din AVENTICS- Mått ca Ø18 x 130 mm återförsäljare. Slang- resp. kabellängd ca Byta smutsfilter (reservdel)
- Page 16 German language. R412015242–BDL–001–AB/10.2014 Subject to modifications. © All rights reserved by AVENTICS GmbH, even and especially in cases of proprietary rights applications. It may not be reproduced or given to third parties without its consent.


