Table des Matières
Publicité
Les langues disponibles
Les langues disponibles
Liens rapides
CAT135-220-340 - NLFRENES - v1.0 15082013
CAT135
Cabina limpiadora de piezas
P.02 Gelieve te lezen en voor later gebruik bewaren
NL
P.05 Veuillez lire et conserver pour usage ultérieur
FR
P.08 Please read and keep for future reference
EN
P.11 Leer y guardar para posteriores consultas
ES
CAT220
HANDLEIDING - MODE D'EMPLOI - MANUAL
CAT135 (754751350)
CAT220 (754752222)
CAT340 (754751340)
Onderdelenreiniger
Nettoyeur de pièces
Parts washer
CAT340
®
Publicité
Table des Matières

Sommaire des Matières pour Metal Works CAT135
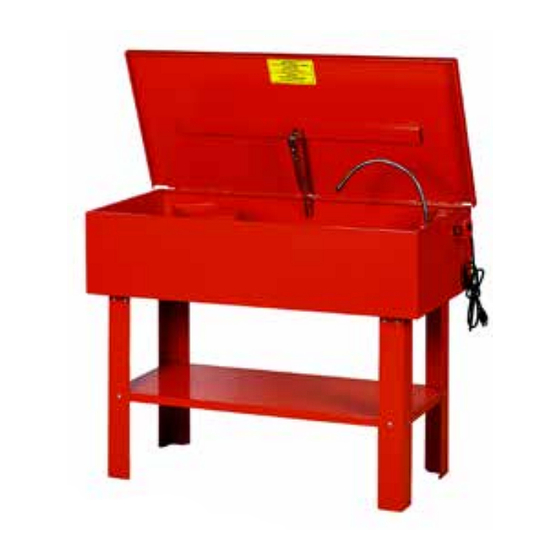
- Page 1 ® CAT135-220-340 - NLFRENES - v1.0 15082013 CAT135 CAT340 CAT220 HANDLEIDING - MODE D’EMPLOI - MANUAL CAT135 (754751350) CAT220 (754752222) CAT340 (754751340) Onderdelenreiniger Nettoyeur de pièces Parts washer Cabina limpiadora de piezas P.02 Gelieve te lezen en voor later gebruik bewaren P.05 Veuillez lire et conserver pour usage ultérieur...
-
Page 2: Alvorens Te Installeren
® CAT135-220-340 - NLFRENES - v1.0 15082013 1 Alvorens te installeren 1. Schroef de zelftappende vijzen los om de bescherming te verwijderen. 2. Verwijder de beschermmousse rond de pomp. 3. Plaats opnieuw de bescherming en schroef opnieuw vast. 2 Montage 2.1 CAT135... - Page 3 ® CAT135-220-340 - NLFRENES - v1.0 15082013 4 Gebruiksaanwijzing 1. Vul de kuip (07) met het aanbevolen reinigingsmiddel juist tussen het min. en max. niveaumarkering op de buitenkant van de kuip. 2. Plaats de te reinigen gereedschap(pen) in het reinigingsmiddel.
- Page 4 ® CAT135-220-340 - NLFRENES - v1.0 15082013 6 Onderhoud • Gebruik enkel een goedgekeurd reinigingsmiddel. • Hou de filter proper, en vervang het reinigingsmiddel wanneer het vuil wordt. • Verwijder de stop (11) om de kuip te ledigen. Nota: installeer een elleboog en een flexibel om de vloeistof te laten lopen in een opvangreservoir.
-
Page 5: Avant Installation
® CAT135-220-340 - NLFRENES - v1.0 15082013 1 Avant installation 1. Dévissez les vis à tôles pour enlever la protection. 2. Enlevez la mousse autour de la pompe. 3. Remettez à nouveau la protection et resserrez. 2 Montage 2.1 CAT135 1. -
Page 6: Consignes De Sécurité Pendant L'utilisation
® CAT135-220-340 - NLFRENES - v1.0 15082013 4 Instructions d’utilisation 1. Remplissez la cuve (07) avec un solvant recommandé juste entre le marquage de niveau min. et max. à l’extérieur de la cuve. 2. Placez les outils à nettoyer dans le solvant. -
Page 7: Entretien
® CAT135-220-340 - NLFRENES - v1.0 15082013 6 Entretien • Utilisez uniquement un solvant approprié. • Gardez le filtre propre et remplacez le solvant s’il est sale. • Enlevez le bouchon (11) pour vider la cuve. Remarque : installez un coude et un flexible pour laisser couler le liquide dans un réservoir. -
Page 8: Before Mounting
® CAT135-220-340 - NLFRENES - v1.0 15082013 1 Before mounting 1. Unscrew self tapping screws to remove the cover. 2. Take out protective foam around the pump. 3. Place cover back and fasten screw. 2 Mounting 2.1 CAT135 1. The handle for the cover (01) needs to be assembled. Remove nuts and washers from handle. Place handle in place on front part of cover and tighten screws with washers and nuts. - Page 9 ® CAT135-220-340 - NLFRENES - v1.0 15082013 4 Operation instructions 1. Fill the body (07) with the recommended cleaning solution just between the max. level and min. level marking on the outside of the body. 2. Place tool(s) to be cleaned into the cleaning solution.
- Page 10 ® CAT135-220-340 - NLFRENES - v1.0 15082013 6 Maintenance • Use only an approved cleaning solution. • Keep the filter clean, and replace the cleaning solution when it becomes dirty. • Remove the drain plug (11) to empty the tub.
-
Page 11: Antes De Usar
® CAT135-220-340 - NLFRENES - v1.0 15082013 1 Antes de usar 1. Desatornille la tapa. 2. Quite la espuma protectora. 3. Vuelva a colocar la tapa y atornille. 2 Montaje 2.1 CAT135 Montar el mango de la tapa (#04). Quitar las tuercas y arandelas del mango. Poner el mango sobre la parte delantera de la tapa y apretar los pernos con las arandelas y las tuercas. - Page 12 ® CAT135-220-340 - NLFRENES - v1.0 15082013 4 Operación 1. Llenar la cuba (07) con un disolvente adeudado justo entre la marca de nivel mín. y máx. que hay en el exterior de la cuba. 2. Colocar las piezas a limpiar dentro del disolvente.
-
Page 13: Resolución De Problemas
® CAT135-220-340 - NLFRENES - v1.0 15082013 6 Mantenimiento • Utilizar solamente disolventes adecuados. • Mantener el filtro limpio y sustituir el disolvente si se moja. • Quitar el tapón (11) para vaciar la cuba. Nota: instalar un codo y un tubo flexible para dejar que el líquido caiga en un depósito. - Page 14 ® CAT135-220-340 - NLFRENES - v1.0 15082013 Opengewerkte tekening en onderdelenlijst Vue éclatée et liste des pièces détachées Exploded view and part list Vista explodida y lista de piezas CAT135...
- Page 15 ® CAT135-220-340 - NLFRENES - v1.0 15082013 CAT220...
- Page 16 ® CAT135-220-340 - NLFRENES - v1.0 15082013 CAT340...
- Page 17 ® CAT135-220-340 - NLFRENES - v1.0 15082013 EG conformiteitsverklaring Déclaration de conformité CE EC declaration of conformity Declaración de conformidad según la CE Aslak S.L. Fabrikant/Invoerder Fabricant/Importateur Salvador Gil i Vernet, 5 Manufacturer/Retailer Pol. Ind. Can Torres i Can Llobet Fabricante/Importador ES-08192 Sant Quirze del Vallès - Barcelona...


