Table des Matières
Publicité
Les langues disponibles
Les langues disponibles
Liens rapides
IT
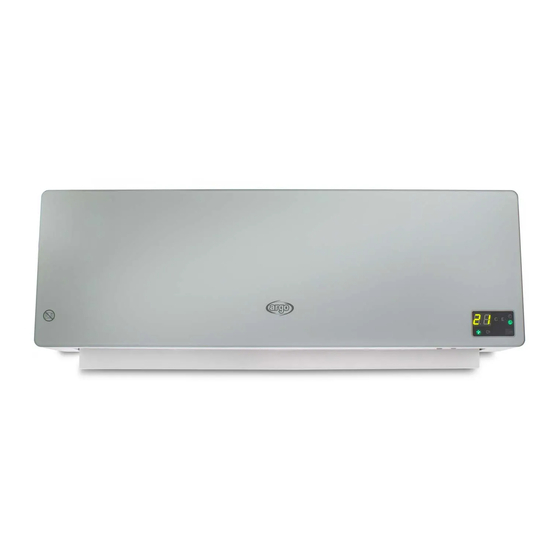
TERMOVENTILATORE CERAMICO DA PARETE
Il presente prodotto è adatto solo a ambienti correttamente
isolati o ad un uso occasionale.
ISTRUZIONI PER L'USO
Leggere attentamente le istruzioni prima di far funzionare l'apparecchio oppure fare manutenzione.
Osservare tutte le istruzioni di sicurezza; la mancata osservanza delle istruzioni può portare a
incidenti e/o danni. Conservare queste istruzioni.
V 06/19
1
Publicité
Table des Matières

Manuels Connexes pour Argo Chic Silver


Sommaire des Matières pour Argo Chic Silver
- Page 1 TERMOVENTILATORE CERAMICO DA PARETE Il presente prodotto è adatto solo a ambienti correttamente isolati o ad un uso occasionale. ISTRUZIONI PER L’USO Leggere attentamente le istruzioni prima di far funzionare l’apparecchio oppure fare manutenzione. Osservare tutte le istruzioni di sicurezza; la mancata osservanza delle istruzioni può portare a incidenti e/o danni.
-
Page 2: Informazioni Generali Di Sicurezza
INFORMAZIONI GENERALI DI SICUREZZA • Utilizzare questo termoventilatore solo come descritto in questo manuale. Qualsiasi altro uso non consigliato dal costruttore può causare incendi, scosse elettriche, o incidenti a persone. • Assicurarsi che il tipo di alimentazione elettrica sia conforme alle richieste elettriche del termoventilatore (220-240V~50Hz). - Page 3 • AVVERTENZA: Non utilizzare il termoventilatore con un programmatore o qualsiasi altro dispositivo esterno che accenda il termoventilatore automaticamente, in quanto sussistono rischi di incendio se il termoventilatore è coperto o posizionato in modo scorretto. • Non restringere le griglie di ingresso ed uscita aria. •...
- Page 4 • Per disconnettere il termoventilatore, mettere l’interruttore in posizione OFF e rimuovere la spina dalla presa. Tirare solo la spina. Non tirare il cavo quando si spegne il termoventilatore . • Non collocare nulla sul cavo e non piegare il cavo. •...
-
Page 5: Descrizione Delle Parti
SEMPRE LA SPINA DALLA PRESA. • Un termoventilatore ha al suo interno parti che generano archi o scintille. Non deve essere utilizzato in aree che potrebbero essere pericolose come ad esempio aree a rischio di incendio, di esplosione, cariche di sostanze chimiche o atmosfere cariche di umidità. - Page 6 COME INSTALLARE IL TERMOVENTILATORE Il termoventilatore deve essere installato su un muro prima dell’utilizzo. Non tentare di utilizzarlo senza installazione. La sequenza di installazione è la seguente: 1. Predisporre uno spazio per installare l’apparecchio (figura 1). 2. Fare due buchi adatti della dimensione del Fisher Ø 8 mm nel muro. (figura 2) – D= 575 mm Fisher Figura 1 Figura 2...
- Page 7 TELECOMANDO 1. Tasto ON/OFF - accensione / spegnimento da stand-by 2. Tasto SWING - impostazione oscillazione flap Tasto TIMER - impostazione timer giornaliero ON/OFF (1-12h) Tasto SET - impostazione Tasto MODE - selezione modalità ventilazione fredda, ECO, COMFORT Tasto - regolazione della temperatura Tasto OK - conferma programmi settimanali Tasto +...
- Page 8 COME UTILIZZARE IL TERMOVENTILATORE Collegare il cavo di alimentazione ad una presa di corrente appropriata (220-240V~50Hz), come indicato sulla targhetta dati. ACCENSIONE DEL TERMOVENTILATORE Premere il pulsante sull’unità per accendere il termoventilatore in modalità stand-by. Premere il pulsante telecomando per mettere il moto l’unità. OATTIVAZIONE OSCILLAZIONE AUTOMATICA FLAP Premere il pulsante sul pannello comandi o...
-
Page 9: Manutenzione E Stoccaggio
IMPOSTAZIONE DEL TIMER SETTIMANALE (solo da telecomando) Dopo aver impostato l’orario e il giorno della settimana premere P per accedere all’impostazione del timer settimanale, Premere DAY per impostare il giorno di accensione (d1, d2, d3,…), Premere EDIT per impostare i periodi di funzionamento del termoventilatore (P1, P2,… P6) Premere TIME/ON per impostare l’orario di accensione (00-24) Premere TIME/OFF per impostare l’orario di spegnimento (00-24) Premere i pulsanti + o –... - Page 10 REGOLAMENTO (UE) 2015/1188 DELLA COMMISSIONE del 28 aprile 2015 recante modalità di applicazione della direttiva 2009/125/CE del Parlamento europeo e del Consiglio in merito alle specifiche per la progettazione ecocompatibile degli apparecchi per il riscaldamento d'ambiente locale Identificativo del modello: CHIC SILVER/CHIC WHITE Dato Simbolo Valore Unità...
- Page 11 INFORMAZIONE PER IL CORRETTO SMALTIMENTO DELPRODOTTO ai sensi dell’art. 26 D.Lgs 14/03/14, no. 49 “ATTUAZIONE DELLA DIRETTIVA EUROPEA 2012/19/UE SUI RIFIUTI DA APPRECCHIATURE ELETTRICHE ED ELETTRONICHE” Alla fine della sua vita utile questo apparecchio non deve essere smaltito insieme ai rifiuti domestici. Richiamiamo l’importante ruolo del consumatore nel contribuire al riutilizzo, al riciclaggio e ad altre forme di recupero di tali rifiuti.
- Page 12 WALL-MOUNTED CERAMIC FAN HEATERS This product is only suitable for well insulated spaces or occasional use. OPERATING INSTRUCTIONS Read the instructions carefully before operating the appliance or carrying out maintenance operations. Observe all the safety instructions; failure to observe the instructions may lead to accidents and/or damage.
-
Page 13: General Safety Information
GENERAL SAFETY INFORMATION • Use this fan heater only as outlined in this manual. Any other use not recommended by the manufacturer may cause fire, electric shock or injury to persons. • Make sure that the type of mains power complies with the electrical requirements of the fan heater (220-240 V~50 Hz). - Page 14 • Do not restrict the air inlet and outlet grilles. • The appliance heats up significantly when running and can cause burns. Avoid unprotected contact with the hot surface. • Keep flammable materials, such as furniture, cushions, blankets, paper, cloths, curtains and similar items at least 1 m away from the front, sides and back of the appliance.
- Page 15 • Using extension leads are not recommended as they may overheat and cause a fire hazard. Never use a single extension lead to operate multiple appliances. • Do not immerse the power cable, plug or any other part of the appliance in water or other liquids.
-
Page 16: Description Of Parts
• In the event of any anomalies (abnormal noise or a strange smell), immediately turn off the appliance; do not attempt to repair it but take it to your local service centre. DESCRIPTION OF PARTS 7. Remote control 1. Air suction grille 2. - Page 17 HOW TO INSTALL THE FAN HEATER The fan heater must be installed on the wall before use. Do not try to use it without installation. The installation sequence is listed below: 1. Select a space for installing the appliance (figure 1). 2.
-
Page 18: Remote Control
REMOTE CONTROL 1. ON/OFF button - switching on/off from stand-by mode 2. SWING button - flap swivel setting TIMER button - setting daily timer ON/OFF (1-12h) SET button - set MODE button - fan mode setting cold, ECO, COMFORT Button - temperature regulation OK button - confirm weekly programmes + Button temperature regulation Open window function activation button... - Page 19 HOW TO USE THE FAN HEATER Connect the power cable to a suitable electric socket (220-240V~50Hz), as indicated in the data plate. SWITCHING THE FAN HEATER ON on the remote control Press the button on the appliance to switch the fan heater to stand-by mode. Press the to switch the appliance ON.
-
Page 20: Overheating Safety Device
Press TIME/ON to set the switch-on time (00-24) Press TIME/OFF to set the switch-off time (00-24) Press the + or – buttons to set the desired temperature Press OK to confirm the settings To set any other subsequent operating times, (max 6) repeat the procedure from point 2 to point 6. Repeat the procedure from point 1 to set the other days of the week. - Page 21 Tabel 2 - Annex II - Ecodesign requirements - Requirements for product information - COMMISSION REGULATION (EU) 2015/1188 of 28 April 2015 implementing Directive 2009/125/EC of the European Parliament and of the Council with regard to ecodesign requirements for local space heaters Model identifier(s): CHIC SILVER / CHIC WHITE Item Symbol...
- Page 22 INFORMATION ON THE CORRECT DISPOSAL OF THE PRODUCT pursuant to Art. 26 of (Italian) Legislative Decree no. 49 of 14/03/14, “IMPLEMENTATION OF DIRECTIVE 2012/19/EU ON WASTE ELECTRICAL AND ELECTRONIC EQUIPMENT” At the end of its useful life, this appliance must not be disposed of together with household waste. We call your attention to the crucial role played by the consumer in the reuse, recycling and other forms of recovery of such waste.
-
Page 23: Radiateur Soufflant Céramique Mural
RADIATEUR SOUFFLANT CÉRAMIQUE MURAL Ce produit ne peut être utilisé que dans des locaux bien isolés ou de manière occasionnelle. INSTRUCTIONS D’UTILISATION Lire attentivement ces instructions avant de faire fonctionner l’appareil ou avant toute opération d’entretien. Se conformer aux consignes de sécurité. Le non-respect de ces instructions peut causer des accidents et/ou des dommages. -
Page 24: Informations Générales Sur La Sécurité
INFORMATIONS GÉNÉRALES SUR LA SÉCURITÉ • Utiliser ce radiateur soufflant uniquement tel que cela est décrit dans cette notice d'utilisation. Tout usage autre que celui conseillé par le fabricant peut être la cause d’incendies, de chocs électriques ou d’accidents pour les personnes. •... - Page 25 connecté à un circuit qui est régulièrement allumé et éteint par le réseau. • AVERTISSEMENT : ne pas utiliser le radiateur soufflant avec un programmateur ou avec tout autre dispositif extérieur permettant son allumage automatique car il subsiste des risques d’incendie si le radiateur soufflant est couvert ou mal placé.
- Page 26 • La cause de surchauffe la plus fréquente est l'accumulation de poussière à l'intérieur de l'appareil. Après avoir débranché l'appareil, éliminer la poussière accumulée en nettoyant la grille à l'aide d'un aspirateur. • Ne pas utiliser de produits abrasifs pour nettoyer l’appareil. Le nettoyer à...
-
Page 27: Description Des Pièces
• Ne pas utiliser à l’extérieur. • À sa première mise en service, le radiateur soufflant dégage une légère odeur tout à fait inoffensive. Cette odeur est la conséquence normale du premier réchauffement des éléments internes chauffants et ne devrait plus se produire par la suite. ATTENTION : L’INTERRUPTEUR MARCHE/ARRÊT NE SUFFIT PAS À... -
Page 28: Panneau De Commandes Et Afficheur À Led Présents Sur L'appareil
MODE D’INSTALLATION DU RADIATEUR SOUFFLANT Le radiateur soufflant doit être installé sur un mur avant son utilisation. Ne pas essayer de l'utiliser avant qu'il ait été correctement installé. Les étapes de l’installation sont les suivantes : 1. Préparer un espace où installer l’appareil (figure 1). 2. -
Page 29: Télécommande
TÉLÉCOMMANDE 1. Touche Marche/Arrêt - allumage / extinction à partir du mode veille 2. Touche OSCILLATION - réglage de l'oscillation du volet Touche MINUTERIE - réglage de la minuterie journalière Marche/Arrêt (1-12 h) Touche SET - réglage Touche MODE - sélection des modes ventilation froide, ECO, COMFORT Touche - réglage de la température Touche OK - confirmation des programmes hebdomadaires Touche + réglage de la température... -
Page 30: Mode D'utilisation Du Radiateur Soufflant
MODE D’UTILISATION DU RADIATEUR SOUFFLANT Brancher le cordon d’alimentation sur une prise de courant appropriée (220-240 V~/50 Hz), répondant aux indications de la plaque signalétique. ALLUMAGE DU RADIATEUR SOUFFLANT Appuyer sur la touche située sur l'appareil pour allumer le radiateur soufflant en mode veille. Appuyer sur la touche de la télécommande pour mettre en route l'appareil. -
Page 31: Dispositif De Sécurité Contre La Surchauffe
d1, d2, d3, … qui correspondent respectivement à lundi, mardi, mercredi, … Une fois le jour sélectionné, appuyer sur la touche OK pour confirmer. RÉGLER DE LA MINUTERIE HEBDOMADAIRE (uniquement à partir de la télécommande) Après avoir réglé l'heure et le jour de la semaine, appuyer sur P pour accéder au réglage de la minuterie hebdomadaire. Appuyer sur DAY pour régler le jour d'allumage (d1, d2, d3,…) Appuyer sur EDIT pour régler les périodes de fonctionnement du radiateur soufflant (P1, P2,…... - Page 32 RÈGLEMENT (UE) 2015/1188 DE LA COMMISSION du 28 avril 2015 portant application de la directive 2009/125/CE du Parlement européen et du Conseil en ce qui concerne les exigences d'écoconception applicables aux dispositifs de chauffage décentralisés Référence(s) du modèle: CHIC SILVER / CHIC WHITE Caractéristique Symbole Valeur Unité...
- Page 33 INFORMATION POUR LA MISE AU REBUT CORRECTE DU PRODUIT en vertu de l'art. 26 du Décret Législatif italien 14/03/14, n° 49 « MISE EN APPLICATION DE LA DIRECTIVE EUROPÉENNE 2012/19/UE SUR LES DÉCHETS DES ÉQUIPEMENTS ÉLECTRIQUES ET ÉLECTRONIQUES » En fin de vie, cet appareil ne doit pas être éliminé avec les déchets ménagers. Nous rappelons le rôle important du consommateur dans la contribution à...
- Page 34 KERAMIK-THERMOVENTILATOR FÜR WANDMONTAGE Dieses Produkt ist nur für ordnungsgemäß isolierte Räume oder gelegentliche Benutzung geeignet. GEBRAUCHSANLEITUNG Lesen Sie die vorliegende Gebrauchsanleitung aufmerksam durch, bevor Sie das Gerät in Betrieb nehmen oder warten. Halten Sie alle Sicherheitshinweise sorgfältig ein: Eine Nichtbeachtung kann zu Unfällen und/oder Schäden führen.
-
Page 35: Allgemeine Informationen Zur Sicherheit
ALLGEMEINE INFORMATIONEN ZUR SICHERHEIT • Benutzen Sie den Thermoventilator nur im Rahmen der in diesem Handbuch beschriebenen Anweisungen. Jeder nicht vom Hersteller empfohlene Einsatz kann Brand, Stromstöße oder Personenschäden verursachen. • Stellen Sie sicher, dass die Stromversorgung den elektrischen Anforderungen des Thermoventilators entspricht (220–240 V~/50 Hz). •... - Page 36 externe Umschaltvorrichtung wie eine Zeitschaltuhr versorgt werden oder an einen Stromkreis angeschlossen werden, der regelmäßig von den Versorgern ein- und ausgeschaltet wird. • HINWEIS: Verwenden Sie den Thermoventilator nicht mit einem Programmiergerät oder einer anderen externen Vorrichtung zur automatischen Einschaltung, da ein Brandrisiko besteht, wenn das Gerät abgedeckt oder falsch aufgestellt wird.
- Page 37 • Die häufigste Ursache für Überhitzung ist Staubansammlung im Gerät. Entfernen Sie Staubansammlungen, indem Sie den Stecker ziehen und die Gitter mithilfe eines Staubsaugers reinigen. • Verwenden Sie keine Scheuermittel zur Reinigung des Geräts. Reinigen Sie es mit einem feuchten (nicht nassen) Tuch, das Sie mit Seifenwasser befeuchtet haben.
- Page 38 • Stellen Sie den Thermoventilator nicht unter einer Steckdose auf. • Verwenden Sie das Gerät nicht im Freien. • Bei der ersten Inbetriebnahme kann ein leichter, jedoch völlig ungefährlicher Geruch entstehen. Dieser Geruch ist im Zusammenhang mit dem erstmaligen Erhitzen der inneren Heizelemente völlig normal und sollte später nicht mehr auftreten.
-
Page 39: Beschreibung Der Teile
BESCHREIBUNG DER TEILE 7. Fernbedienung 1. Luftansauggitter 2. LED-Display 3. Gitter für Luftaustritt 4. Waagerechter Schwingflügel (Flap) 5. Taste TIMER 6. Taste F zur Funktionswahl INSTALLATION DES THERMOVENTILATORS Der Thermoventilator muss vor der Inbetriebnahme an der Wand installiert werden. Versuchen Sie nicht, das Gerät ohne Installation zu benutzen. - Page 40 BEDIENFELD UND LED-DISPLAY AM GERÄT ON/OFF-TASTE TASTE TIMER TASTE F Funktionswahl LED Betriebsart LED Betriebsart COMFORT Energieeinsparung Maximale Wärme (2000 W) (1000 W) RAUMTEMPERATUR -DISPLAY LED TIMER LED °C TEMPERATUR LED WOCHEN- LED Betriebsart TIMER OFFENE FENSTER V 06/19...
- Page 41 FERNBEDIENUNG 1. Taste ON/OFF - Ein-/Ausschalten aus dem Standby 2. Taste SWING - Einstellung Flügel-Schwenkbewegung Taste TIMER - Einstellung Tages-Timer ON/OFF (1-12 h) Taste SET - Einstellung Taste MODE - Wahl der Lüftungsbetriebsart kalt, ECO, COMFORT Taste - Regelung der Temperatur Taste OK - Bestätigung der Wochenprogramme Taste + Regelung der Temperatur Taste zum Einschalten der Funktion Fenster geöffnet...
- Page 42 GEBRAUCH DES THERMOVENTILATORS Schließen Sie das Netzkabel an eine geeignete Steckdose (220-240 V~/50 Hz) an, wie auf dem Typenschild angegeben. EINSCHALTEN DES THERMOVENTILATORS Drücken Sie die Taste am Gerät, um den Thermoventilator im Standby-Betrieb einzuschalten. Drücken Sie die auf der Fernbedienung, um das Gerät in Gang zu setzen. Taste AKTIVIERUNG AUTOMATISCHE SCHWENKBEWEGUNG DES FLÜGELS Drücken Sie die Taste...
-
Page 43: Wartung Und Lagerung
EINSTELLUNG DES WOCHEN-TIMERS (nur über Fernbedienung) Nachdem Sie die Uhrzeit und den Wochentag eingestellt haben, drücken Sie P, um die Einstellung des Wochen-Timers aufzurufen. Drücken Sie DAY, um den Tag für das Einschalten einzustellen (d1, d2, d3 usw.). Drücken Sie EDIT, um die Betriebszeiten des Thermoventilators einzustellen (P1, P2, ... P6). Drücken Sie TIME/ON, um die Uhrzeit für das Einschalten einzustellen (00-24). - Page 44 VERORDNUNG (EU) 2015/1188 DER KOMMISSION vom 28. April 2015 zur Durchführung der Richtlinie 2009/125/EG des Europäischen Parlaments und des Rates im Hinblick auf die Festlegung von Anforderungen an die umweltgerechte Gestaltung von Einzelraumheizgeräten Modellkennung(en): CHIC SILVER / CHIC WHITE Angabe Symbol...
- Page 45 INFORMATION ZUR VORSCHRIFTSGEMÄSSEN ENTSORGUNG DES PRODUKTES gemäß Art. 26 des ital. Gesetzes Nr. 49 vom 14.03.2014 „UMSETZUNG DER EUROPÄISCHEN RICHTLINIE 2012/19/EG ÜBER ELEKTRO- UND ELEKTRONIK-ALTGERÄTE“ Am Ende seiner Lebensdauer darf dieses Gerät nicht im Haushaltsmüll entsorgt werden. Jeder Verbraucher kann einen wichtigen Beitrag zur erneuten Nutzung, zum Recycling und zu anderen Formen der Wiederverwendung dieser Altgeräte leisten.
- Page 46 TERMOVENTILADOR CERÁMICO DE PARED Este producto está indicado únicamente en lugares abrigados o para una utilización puntual. INSTRUCCIONES DE USO Leer las instrucciones detenidamente antes de encender el aparato o de hacer algún mantenimiento. Observar todas las instrucciones de seguridad; la inobservancia de las instrucciones puede ser fuente de accidentes y/o daños.
-
Page 47: Información General Sobre La Seguridad
INFORMACIÓN GENERAL SOBRE LA SEGURIDAD • Utilizar este termoventilador solo como se indica en este manual. Cualquier otro uso no recomendado por el fabricante puede provocar incendios, descargas eléctricas o accidentes personales. • Cerciorarse de que el tipo de suministro eléctrico coincida con las especificaciones eléctricas del termoventilador (220-240V~50Hz). - Page 48 posicionado de manera incorrecta podría provocarse un incendio. • No restringir las rejillas de entrada y salida de aire. • El termoventilador se calienta mucho durante el uso y puede quemar. Evitar el contacto de la piel no protegida con la superficie caliente.
- Page 49 • No es aconsejable utilizar prolongadores, ya que pueden recalentarse y ser fuente de incendios. No utilizar nunca un solo prolongador para hacer funcionar más de un aparato. • No sumergir el cable, la clavija o cualquier otro componente del aparato en agua o en otros líquidos.
-
Page 50: Descripción De Las Partes
riesgo de incendio, de explosión, o cargadas de sustancias químicas o de humedad. • Extraer la clavija cuando el aparato no esté en uso. • Para evitar accidentes, apagar el aparato cuando vaya a quedar sin vigilancia. • En caso de anomalías (ruido anómalo u olor extraño) apagar el aparato de inmediato;... - Page 51 CÓMO INSTALAR EL TERMOVENTILADOR El termoventilador debe instalarse en la pared antes de su funcionamiento. No intentar utilizarlo sin instalación. El procedimiento de instalación es el siguiente: 1. Preparar el espacio necesario para instalar el aparato (figura 1). 2. Taladrar la pared para la colocación de dos tapones Fisher Ø 8 mm. (figura 2) – D= 575 mm Fisher Figura 1 Figura 2...
-
Page 52: Mando A Distancia
MANDO A DISTANCIA 1. Tecla ON/OFF - encendido / apagado desde stand-by 2. Tecla SWING - ajuste de la oscilación del flap Tecla TIMER - ajuste del temporizador diario ON/OFF (1-12h) Tecla SET - ajuste Tecla MODE - selección del modo ventilación fría, ECO, COMFORT Tecla - regulación de la temperatura Tecla OK - confirmación de los programas semanales Tecla + regulación de la temperatura... - Page 53 CÓMO UTILIZAR EL TERMOVENTILADOR Conectar el cable de alimentación a una toma de corriente adecuada (220-240V~50Hz), como se indica en la placa de datos. ENCENDIDO DEL TERMOVENTILADOR en el mando Pulsar el botón en la unidad para encender el termoventilador en modo de stand-by. Pulsar el botón a distancia para poner la unidad en movimiento.
-
Page 54: Mantenimiento Y Almacenaje
AJUSTE DEL TEMPORIZADOR SEMANAL (solo desde el mando a distancia) Tras haber ajustado la hora y el día de la semana, pulsar P para acceder al ajuste del temporizador semanal. Pulsar DAY para ajustar el día de encendido (d1, d2, d3,…), Pulsar EDIT para ajustar los periodos de funcionamiento del termoventilador (P1, P2,…... - Page 55 REGLAMENTO (UE) 2015/1188 DE LA COMISIÓN de 28 de abril de 2015 por el que se aplica la Directiva 2009/125/CE del Parlamento Europeo y del Consejo en lo relativo a los requisitos de diseño ecológico aplicables a los aparatos de calefacción local Identificador(es) del modelo : CHIC SILVER / CHIC WHITE Partida Símbolo Valor...
- Page 56 INFORMACIÓN PARA LA ELIMINACIÓN CORRECTA DEL PRODUCTO EN VIRTUD DEL ART. 26 DEL DECRETO LEGISLATIVO 14/03/14, N. 49 “APLICACIÓN DE LA DIRECTIVA EUROPEA 2012/19/UE SOBRE LOS DESECHOS DE APARATOS ELÉCTRICOS Y ELECTRÓNICOS” Al final de su vida útil, este aparato no se debe eliminar junto a los desechos domésticos. Destacamos el importante papel de la contribución del consumidor a la reutilización, el reciclado y demás formas de recuperación de estos desechos.