Table des Matières

Manuels Connexes pour Amann Girrbach smart mix


Sommaire des Matières pour Amann Girrbach smart mix
- Page 1 Modellherstellung Model fabrication Fabrication du modèle Sviluppo dei modelli Elaboración de modelos _Bedienungsanleitung _User manual _Mode d’emploi _Istruzioni d’uso _Modo de empleo...
- Page 2 _Deutsch 04 - 08 _English 09 - 12 _Française 13 - 16 _Italiano 17 - 20 _Espagnole 21 - 24 _EG-Declaration of conformity 25 - 26...
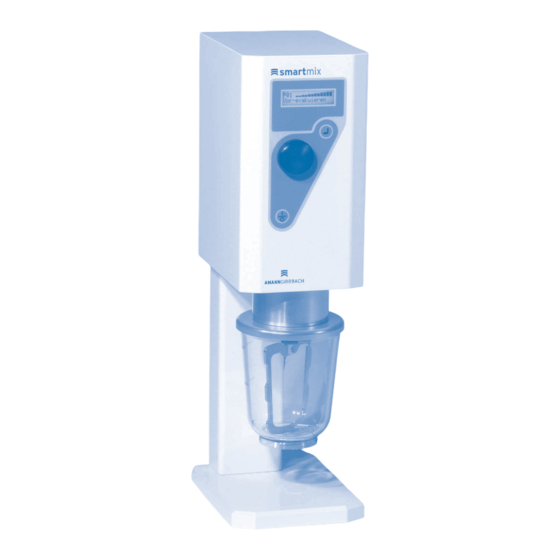
- Page 4 BEDIENUNGSANLEITUNG 6. Programmbezeichnung Hier wird eine Programmbezeichnung eingegeben. SMARTMIX Diese Bezeichnung besteht maximal aus 12 Zeichen. LC-Display Sämtliche Eingaben erfolgen mittels des Multifunk- Enter- oder Eingabetaste tions-Drehknopfs. Bei der Entwicklung von Smartmix wurde auf höchstmögliche Ergonomie und Einfach- Multifunktions-Drehknopf heit geachtet. Diese Einfachheit zeigt sich im Bedien- Start-Stop Taste teil von Smartmix, welches lediglich aus dem multi- funktionalen Drehknopf und 2 weiteren Tasten...
- Page 5 4. Jetzt können Sie Ihren Smartmix einfach über die speichert haben. Sie müssen lediglich die Enter-Taste gross dargestellten Einführlöcher aufhängen. Gerät (B) betätigen, die gewünschte Rührzeit mit Hilfe des nicht loslassen bevor vollständig eingerastet. multifunktionalen Drehknopfs (C) einstellen und zur Speicherung wiederum die Enter-Taste (B) drücken.
- Page 6 86 mm...
- Page 7 4. Wenn Sie die Standard-Einstellungen für Ihr Rühr- Öffnung. Smartmix nie ohne Vorfilter in Betrieb programm verwenden wollen, drücken Sie erneut nehmen! die Enter-Taste (B). Das Gerät ist nun betriebsbereit (weitere Anweisungen im Kapitel „Mischvorgang“). WARTUNG 5. Wenn Sie Ihr Rührprogramm exakter definieren Smartmix ist wie die meisten AmannGirrbach-Geräte wollen, ändern Sie die Position des Auswahlpfeils wartungsfrei konzipiert, somit auch mit einer war-...
-
Page 8: Sicherheitshinweise
WARN- UND SICHERHEITSHINWEISE: Smartmix wurde für den Einsatz im Dental-Labor entwickelt. Inbetriebnahme und Bedienung müssen gemäß Bedienungsanleitung erfolgen. Für Schäden, die sich aus anderweitiger Verwendung oder nicht sachgemäßer Handhabung ergeben, übernimmt der Hersteller keine Haftung. Darüber hinaus ist der Benutzer verpflichtet, das Gerät eigenverantwortlich vor Gebrauch auf Eignung und Einsetzbarkeit für die vorgesehenen Zwecke zu prüfen, sofern diese nicht in der... -
Page 9: Description Of The Unit
USER MANUAL INSTALLATION After unpacking the unit, please check it immediate- ly for possible damage incurred during transport. LC-Display Should the unit have been damaged during trans- port, please complain to your supplier immediately. "Enter” button Although this unit is supplied ready for use, always Multifunctional rotary knob check the voltage setting (115/230 V) immediately above the power socket. - Page 10 on the LC display. An alarm can be heard once OPERATING THE UNIT mixing has been completed. The Smartmix is switched on with the On/Off-switch on the bottom of the unit. The front panel of this During mixing, the vacuum pump sucks the beaker unit includes a two-line LC display (A), the "Enter”...
- Page 11 7. The premixing stage can be switched off or on in the next field. Again, turn the MRK to the desired setting and press the "Enter” button (B). 8. This setting can be used to place the material under vacuum without mixing it, before the actu- al mixing process starts.
- Page 12 WARNINGS AND SAFETY ASPECTS: The Smartmix was developed for use in dental laboratories. It must be installed and operated as described in the user’s manual. The manu-facturer is not liable for damage caused by using the unit for other purposes or handling it incorrectly. In addition, if the intended application is not listed in the user’s manual, the user is obliged to check personally in advance that the unit is suitable for...
-
Page 13: Description Du Appareils
MODE D’EMPLOI du sens de rotation est désactivée. 6. Désignation des programmes Ici, on peut introduire un nom de programme. Cette LC-Display désignation peut comporter jusqu’à 12 signes au maximum. Touche Enter Toutes les introductions de données se font à l’aide Bouton á... -
Page 14: Sélection De La Langue
3. Retirer le gabarit. Percer les trous. Introduire morisationd’un programme de mélange »). Essuyer ensuite dans les trous les chevilles jointes à la soigneusement le bord supérieur du bol et mettre le fourniture et tourner les vis jusqu’à environ 4mm couvercle en place. -
Page 15: Unité D'affichage Du Vide
10. Dans le dernier champ, un nom de programme STRUCTURE DU MENU : peut être introduit. Pour cela, il faut tourner encore une fois le BFM (C) jusqu’à ce que la let- tre à utiliser soit trouvée. Confirmez la lettre en appuyant sur la touche Enter (B), le curseur se déplace automatiquement sur l’emplacement sui- vant. -
Page 16: Mises En Garde Et Consignes De Sécurité
MISES EN GARDE ET CONSIGNES DE SÉCURITÉ: Smartmix a été conçu pour un usage au laboratoi- re dentaire. La mise en service et la manipulation doivent être effectuées selon le mode d’emploi. Aucune responsabilité ne peut être imputée au fabricant pour les dégâts consécutifs à une utilisation non prévue ou à... -
Page 17: Descrizione Dell'apparecchio
ISTRUZIONI D’USO 6. Nome del programma Questa funzione vi consente di dare un nome al vos- tro programma che può avere fino a 12 caratteri. Pantalla LC Tutte le impostazioni vengono effettuate mediante la manopola multifunzionale. Smartmix è stato conce- Tecla Enter pito in modo da rendere l'apparecchio il più... -
Page 18: Selezione Della Lingua
l'apparecchio è pronto per il funzionamento. Per mettere in funzione il Smartmix accendere l’in- Avviare ora la miscelazione premendo il tasto Start- terruttore acceso/spento posto nella parte inferiore Stop (D) e portare il recipiente dal basso al tronchet- dell’-apparechio. Sul lato frontale l'apparecchio è to di aspirazione. - Page 19 5. Per definire i dettagli del vostro programma di MANUTENZIONE miscelazione, portate la freccia della manopola Come molte altre apparecchiature AmannGirrbach, MFB (C) sulla posizione ”parametri di miscelazio- anche Smartmix è concepito in modo da non richie- ne” e premete il tasto Enter (B). dere manutenzione;...
-
Page 20: Avvertenze Di Sicurezza
AVVERTENZE DI SICUREZZA: Smartmix è stato concepito per il funzionamento nel laboratorio odontotecnico. Per la messa in fun- zione e l'uso dovranno essere rispettate le norme riportate nel libretto. Il produttore non può essere considerato responsabile per eventuali danni derivanti da usi impropri o erronei. L'utente è... -
Page 21: Modo De Empleo
MODO DE EMPLEO Todos los datos se introducen mediante el mando giratorio multifunción. Al desarrollar el Smartmix se prestó atención a la máxima ergonomía y sencillez. Esta sencillez queda reflejada en la zona de mando Display LC del Smartmix, que está formada únicamente por el Tasto Enter mando giratorio multifunción y dos teclas adicionales. - Page 22 Inicie ahora el proceso de batido presionando la MANEJO tecla "Start-Stop” (D) y acerque el vaso de batido Para poner en funcionamiento el Smartmix, accione desde abajo hacia la boca de aspiración. Después de primero el interruptor de Encendido/apagado en la un par de segundos el vaso ya quedará...
- Page 23 para funcionar (hallará instrucciones suplemen- MANTENIMIENTO tarias en el capítulo "proceso de batido”). El Smartmix, como la mayoría de aparatos 5. Si desea definir su programa de batido con más AmannGirrbach está concebido para funcionar sin exactitud, modifique la posición de la flecha de mantenimiento, por lo cual está...
-
Page 24: Advertencias Yconsejos De Seguridad
ADVERTENCIAS Y CONSEJOS DE SEGURIDAD: El Smartmix ha sido desarrollado para su uso en laboratorios dentales. La puesta en servicio y el manejo deberán realizarse según las instrucciones de empleo. El fabricante no se hará responsable de los daños derivados de otros usos o de una mani- pulación incorrecta. - Page 25 EU – Declaration of conformity Fa. Amann Girrbach GmbH 6842 Koblach | Austria Hereby declare that the design, construction and commercial execution of the machine designated below is in conformity with the relevant safety and health requirements of the appropriate EU directive.
- Page 26 EU – Konformitätserklärung EU – Déclaration de conformité CE Hiermit erklären wir, Fa. Amann Girrbach GmbH Par, la présente, nous, Fa. Amann Girrbach GmbH 6842 Koblach | Austria 6842 Koblach | Austria dass die nachfolgend bezeichnete Maschine aufgrund Ihrer Konzipier- que l’appareil désigné...
- Page 28 Made in the European Union ISO 9001 Manufacturer | Hersteller Distribution | Vertrieb Distribution | Vertrieb D/A Amann Girrbach AG Amann Girrbach GmbH Herrschaftswiesen 1 Dürrenweg 40 austria@amanngirrbach.com 6842 Koblach | Austria 75177 Pforzheim | Germany germany@amanngirrbach.com Fon +43 5523 62333-0...