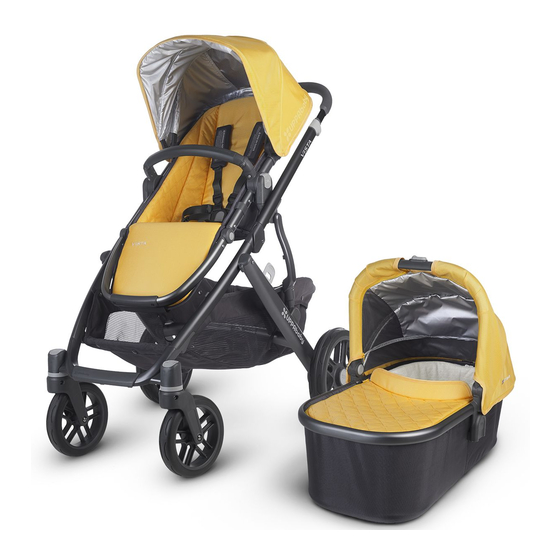
UPPAbaby VISTA Mode D'emploi
Masquer les pouces Voir aussi pour VISTA:

Publicité

Les langues disponibles

Les langues disponibles

Liens rapides

Model 0101 | Version 2
USA
UPPAbaby, 60 Sharp Street, Ste 3, Hingham, MA 02043 | www.uppababy.com | 781.413.3000
Model 0205 | Version 2
Canada
5514KM, 109 Vanderhoof Avenue, Unit 6, Toronto, Ontario M4G 2H7 | www.uppababy.com | 416.422.2700
All rights reserved. © 2014 UPPAbaby. UPPAbaby and all associated logos are trademarks. All product specifications are correct at time of print.
UPPAbaby reserves the right to change anything at any time without prior notice. Color representation is as close as print processes allow.
Not all colors available at all retailers.

Publicité

Table des Matières
loading

Sommaire des Matières pour UPPAbaby VISTA

  • Page 1 5514KM, 109 Vanderhoof Avenue, Unit 6, Toronto, Ontario M4G 2H7 | www.uppababy.com | 416.422.2700 All rights reserved. © 2014 UPPAbaby. UPPAbaby and all associated logos are trademarks. All product specifications are correct at time of print. UPPAbaby reserves the right to change anything at any time without prior notice. Color representation is as close as print processes allow.
  • Page 2: Table Des Matières

    TABLE OF CONTENTS TABLA DE CONTENIDOS / TABLE DES MATIÈRES ENGLISH Warnings + General Safety Information Cleaning + General Maintenance Parts List Stroller Assembly Bassinet Assembly Bassinet Operation Stroller Operation Limited Warranty ESPAÑOL Advertencias + Información General Sobre Seguridad Limpieza + Mantenimiento General Listado de Piezas Ensamblaje del Cochecito Ensamblaje del Capazo...
  • Page 3: Warnings + General Safety Information

    • This bassinet is only designed to be used with UPPAbaby stroller frames. Keep these instructions for future reference. • DO NOT use the infant carrier if it is damaged or broken.
  • Page 4: Cleaning + General Maintenance

    • Spot clean or hand wash in cold water with mild detergent. Dry flat and away from direct sunlight before re-use or storage. DO NOT bleach, iron or dry clean. • To extend the life of your VISTA’s fabric, keep it clean and do not leave it in direct sunlight for WARNING long periods of time.
  • Page 5: Parts List

    PARTS LIST STROLLER ASSEMBLY UNFOLDING THE STROLLER Canopy Telescoping Handlebar Bumper Bar Stroller Frame STEP 1: Push latch back with your thumb to release Seat Basket Bassinet locking mechanism. Canopy Mattress + Mattress STEP 2: Pull handle upward until frame locks open, Cover INSTALLING FRONT/BACK WHEELS Front...
  • Page 6: Canopy Installation

    STROLLER ASSEMBLY BASSINET ASSEMBLY ATTACHING/REMOVING THE SEAT SETTING UP THE BASSINET To Attach Seat: Lower seat onto frame in forward or reverse position To Remove Seat: Simultaneously and press down until it clicks into place. Pull up on seat to ensure it is push down release buttons locked to frame.
  • Page 7: Bassinet Operation

    BASSINET OPERATION BASSINET OPERATION ATTACHING BASSINET TO STROLLER FRAME PROPER USE OF ACCESSORIES To Attach Bassinet to Stroller Frame: Guide the To Remove Bassinet from Stroller Frame: Slide plastic bassinet hubs over the posts on the stroller frame. button on carry handle in the direction indicated Using Bassinet Storage Bag: Slide collapsed bassinet Proper Use of Bassinet Bug Shield Push until you hear a “click”...
  • Page 8: Stroller Operation

    STROLLER OPERATION STROLLER OPERATION SETTING THE SWIVEL/LOCKING SYSTEM ADJUSTING HANDLE HEIGHT + LEG REST To Lock Front Wheel Swivel: Push grey button down to activate lock. To Unlock Front Wheel Swivel: Push grey button down to deactivate lock. To Adjust Handle: Squeeze button at top and slide To Adjust Leg Rest: Simultaneously push buttons on handle to one of three desired positions suited to sides of leg rest and rotate to desired position.
  • Page 9: Adjusting Shoulder Harness Height

    STROLLER OPERATION STROLLER OPERATION OPERATING THE SEAT HARNESS ADJUSTING SHOULDER HARNESS HEIGHT STEP 1: Detach grey adjustment clip from harness STEP 2: Reattach clip to the desired harness loop. attachment loop. To Lock the Harness: Slide belt ends into center lock To Unlock the Harness: Depress grey button at center housing until it clicks together.
  • Page 10 STROLLER OPERATION STROLLER OPERATION FOLDING THE STROLER REMOVING FABRICS FROM SEAT NOTE: When folding frame with seat attached, seat must be in forward facing and upright position. STEP 1: Activate brake to prevent stroller from rolling STEP 2: Engage button on top of handle bar and forward while folding.
  • Page 11: Limited Warranty

    LIMITED WARRANTY REMOVING FABRICS FROM CANOPY Your UPPAbaby stroller is warranted to be free from any manufacturing defects for a period of 2 years from the date of purchase under normal use and in compliance with NOTE: Remove canopy from toddler seat prior to removing canopy fabric.
  • Page 12: Advertencias + Información General Sobre Seguridad

    • NO use el cargador de bebé si está dañado o roto. • Este cochecito está diseñado para usarse solo con un niño, a menos que esté equipado con accesorios de UPPAbaby homologados. PELIGRO DE CAÍDAS • El sonido de un chasquido será la confirmación de que los broches se han acoplado correctamente.
  • Page 13: Limpieza + Mantenimiento General

    ESTRANGULACIÓN • NO doble ni guarde el cochecito VISTA si está húmedo o mojado, ni lo guarde en un sitio donde haya humedad. • Los cordones pueden causar estrangulación! NO ponga objetos con MANTENIMIENTO Y REPARACIÓN:...
  • Page 14: Listado De Piezas

    LISTADO DE PIEZAS ENSAMBLAJE DEL COCHECITO DESPLEGAR EL COCHECITO Capota Manillar Telescópico Protector Chasis del Delantero Cochecito PASO 1: con el pulgar, empuje el seguro hacia atrás Asiento Cesta Capota del para soltar el mecanismo de bloqueo. Capazo Colchón + Funda del PASO 2: tire del manillar hacia arriba hasta que el Colchón...
  • Page 15: Ensamblaje Del Capazo

    ENSAMBLAJE DEL COCHECITO ENSAMBLAJE DEL CAPAZO COLOCAR/QUITAR EL ASIENTO INSTALACIÓN DEL CAPAZO Para Colocar el Asiento: ponga el asiento sobre el chasis en la posición Para Quitar el Asiento: apriete al del sentido de la marcha o contraria al sentido de la marcha y empújelo mismo tiempo los soltadores hacia abajo hasta que encaje.
  • Page 16: Funcionamiento Del Capazo

    FUNCIONAMIENTO DEL CAPAZO FUNCIONAMIENTO DEL CAPAZO COLOCAR EL CAPAZO EN EL CHASIS DEL COCHECITO USO CORRECTO DE LOS ACCESORIOS Para Colocar el Capazo en el Chasis del Cochecito: Para Quitar el Capazo del Chasis del Cochecito: guíe los tapacubos del capazo sobre los postes en el deslice el botón de plástico en el asa de transporte chasis del cochecito.
  • Page 17: Funcionamiento Del Cochecito

    FUNCIONAMIENTO DEL COCHECITO FUNCIONAMIENTO DEL COCHECITO PONER RUEDAS PIVOTANTES/SISTEMA DE BLOQUEO AJUSTAR LA ALTURA DEL MANILLAR + REPOSAPIERNAS Para Bloquear el Pivote de la Rueda Delantera: pulse el botón gris para activar el cierre. Para Desbloquear el Pivote de la Rueda Delantera: pulse el botón gris para desactivar el cierre.
  • Page 18 FUNCIONAMIENTO DEL COCHECITO FUNCIONAMIENTO DEL COCHECITO FUNCIONAMIENTO DEL ARNÉS DEL ASIENTO AJUSTAR LA ALTURA DEL ARNÉS PARA LOS HOMBROS PASO 1: saque la anilla de ajuste gris de la presilla PASO 2: vuelva a colocar la anilla en la presilla del arnés.
  • Page 19 FUNCIONAMIENTO DEL COCHECITO FUNCIONAMIENTO DEL COCHECITO PLEGAR EL COCHECITO QUITAR LOS TEJIDOS DEL ASIENTO NOTA: al plegar el chasis con el asiento enganchado, este último debe estar colocado en el sentido de la marcha y en posición erguida. PASO 1: active el freno para impedir que el PASO 2: pulse el botón en la parte superior de la barra cochecito ruede hacia delante mientras lo pliega.
  • Page 20: Garantía Limitada

    • El daño ha sido causado por una instalación incorrecta de las piezas y/o accesorios de UPPAbaby. Remítase montaje a este folleto de instrucciones si necesita orientación sobre la utilización y mantenimiento de la silla de paseo.
  • Page 21: Mises En Garde Et Informations Générales Sur La Sécurité

    • NE PAS utiliser la nacelle si elle est endommagée ou cassée. • Cette poussette est conçue pour un seul enfant, sauf s’il est équipé d’un accessoire approuvé par UPPAbaby. RISQUE DE CHUTE • Il est impératif qu’un déclic se fasse entendre pour confirmer le bon enclenchement de chaque pièce de fixation.
  • Page 22: Mise En Garde - Risque De Strangulation

    à la lumière directe du soleil pendant de DE STRANGULATION longues périodes. • NE PAS plier ou ranger la poussette VISTA si elle est humide ou mouillée, et ne pas la ranger dans • Les cordons présentent un risque de strangulation! NE PAS placer un endroit humide.
  • Page 23: Liste Des Pièces

    LISTE DES PIÈCES ASSEMBLAGE DE LA POUSSETTE DÉPLIAGE DE LA POUSSETTE Capote Barre-poignée Télescopique Barre Châssis Pare-chocs ÉTAPE 1 : Poussez la languette avec le pouce pour Siège Panier Capote de ouvrir le mécanisme de verrouillage. la Nacelle Matelas + Housse de ÉTAPE 2 : Tirez la poignée vers le haut jusqu’à...
  • Page 24: Fixation/Retrait Du Siège

    ASSEMBLAGE DE LA POUSSETTE ASSEMBLAGE DE LA NACELLE FIXATION/RETRAIT DU SIÈGE PRÉPARATION DE LA NACELLE Pour Fixer le Siège : Posez le siège sur le châssis, en position face à l’avant Pour Retirer le Siège : Appuyez ou à l’arrière, et appuyez dessus jusqu’à ce qu’il s’encliquette en place. simultanément sur les boutons de Tirez le siège vers vous pour vous assurer qu’il est bien fixé...
  • Page 25: Utilisation De La Nacelle

    UTILISATION DE LA NACELLE UTILISATION DE LA NACELLE FIXATION DE LA NACELLE SUR LE CHÂSSIS DE LA POUSSETTE UTILISATION DES ACCESSOIRES Pour Fixer la Nacelle sur le Châssis de la Poussette : Pour Retirer la Nacelle du Châssis de la Poussette : Placez les moyeux de la nacelle sur les tiges du Faites glisser le bouton en plastique de la poignée de Utilisation du Sac de Rangement de la Nacelle :...
  • Page 26: Utilisation De La Poussette

    UTILISATION DE LA POUSSETTE UTILISATION DE LA POUSSETTE RÉGLAGE DU SYSTÈME PIVOTANT ET DE BLOCAGE RÉGLAGE DE LA HAUTEUR DE LA POIGNÉE ET DU REPOSE-JAMBES Pour Bloquer les Roues avant Pivotantes : Poussez le bouton gris vers le bas pour enclencher le frein. Pour Débloquer lesRoues avant Pivotantes : Poussez le bouton gris vers le bas pour relâcher le frein.
  • Page 27: Utilisation Du Harnais

    UTILISATION DE LA POUSSETTE UTILISATION DE LA POUSSETTE UTILISATION DU HARNAIS RÉGLAGE DE LA HAUTEUR DES HARNAIS AUX ÉPAULES ÉTAPE 1 : Détachez la pince de réglage grise de la ÉTAPE 2 : Réattachez la pince à la boucle de harnais bouche de fixation du harnais.
  • Page 28: Pliage De La Poussette

    UTILISATION DE LA POUSSETTE UTILISATION DE LA POUSSETTE PLIAGE DE LA POUSSETTE RETRAIT DU TISSU DU SIÈGE REMARQUE : Avant de plier le châssis avec le siège, veillez à ce que celui-ci soit tourné vers l’avant et en position droite. ÉTAPE 1 : Serrez le frein pour empêcher la poussette ÉTAPE 2 : Enfoncez le bouton sur le haut de la barre- de rouler en avant pendant que vous la pliez.
  • Page 29: Retrait Du Tissu De La Capote

    Cette garantie est uniquement valide dans le pays d’achat d’origine. Cette garantie est sujette aux conditions en vigueur dans le pays où ce produit a été acheté. Ces conditions peuvent varier. UPPAbaby n’enverra pas de pièces de rechange ou de réparation hors du pays d’achat.

Table des Matières