Table des Matières
Publicité
Les langues disponibles
Les langues disponibles
Liens rapides
Publicité
Chapitres
Table des Matières

Sommaire des Matières pour Di-soric LHT 9-45 M 10 P3-B4
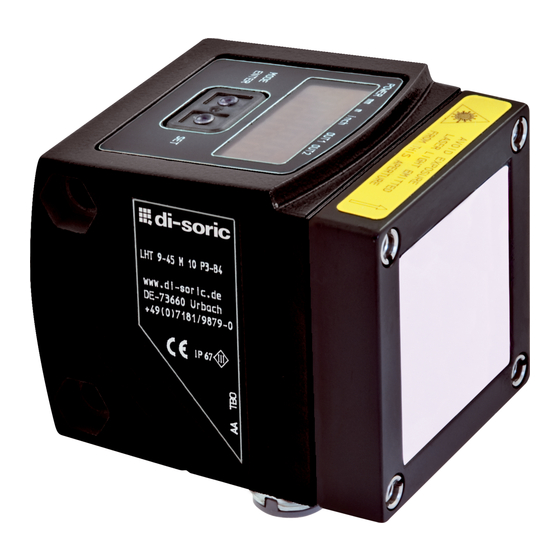
- Page 1 Bedienungsanleitung Operating instructions Notice de montage Reflexlichttaster mit Hintergrundausblendung Diffuse reflection sensor with background suppression Système réflexion directe avec suppression de l´arrière-plan LHT 9-45 M 10 P3-B4...
-
Page 2: Table Des Matières
Inhalt Bestimmungsgemäße Verwendung ......3 Bedien- und Anzeigeelemente ....... . . 3 Montage . -
Page 3: Bestimmungsgemäße Verwendung
Bestimmungsgemäße Verwendung Der Reflexlichttaster erfasst berührungslos Gegenstände und Materialien und meldet sie durch ein Schaltsignal. Zusätzlich wird der Objektabstand angezeigt. Tastweite 0,2...10 m (bezogen auf weißes Papier 200 x 200 mm, 90 % Remission). Bedien- und Anzeigeelemente LED 1: Gerät ist betriebsbereit. 2 x LED grün LED 2: Anzeigeeinheit für Objektabstand = mm Anzeige des Schaltzustands;... -
Page 4: Montage
Montage • Richten Sie den Reflexlichttaster auf das zu erfassende Objekt aus, • befestigen Sie ihn mit Hilfe einer Montagehalterung. Elektrischer Anschluss Das Gerät darf nur von einer Elektrofachkraft installiert werden. Befolgen Sie die nationalen und internationalen Vorschriften zur Errichtung elektrotechnischer Anlagen. Spannungsversorgung nach EN50178, SELV, PELV. -
Page 5: Schaltabstand Und Schaltfunktion Einstellen
Schaltabstand und Schaltfunktion einstellen • Gerät soll schalten, wenn das Objekt erkannt wird: Objekt plazieren, [OUT On] mindestens 2 s lang drücken, wieder loslassen. → Display zeigt <WAIT>. Wenn Display blinkend ”OFF” anzeigt: Objekt entfernen, kurz [OUT Off] drücken, wieder loslassen. →... -
Page 6: Inbetriebnahme / Betrieb
Programmierung fehl geschlagen: Display zeigt “FAIL”. • Messwertdifferenz ist zu gering, Schaltpunkt nicht übernommen. Tasten ver- oder entriegeln: • 10 s lang gleichzeitig beide Tasten drücken. Das Display zeigt “Loc” (Tasten verriegelt) oder “uLoc” (Tasten nicht verrie- gelt). Inbetriebnahme / Betrieb Prüfen Sie nach Montage, elektrischem Anschluss und Programmie- rung, ob das Gerät sicher funktioniert. -
Page 7: Maßzeichnung
Maßzeichnung M12x1 1: 4-stellige alphanumerische Anzeige / LED Funktionsanzeigen 2: Programmiertasten... - Page 8 Contents Functions and features ........9 Operating and indicating elements .
-
Page 9: Functions And Features
Functions and features The diffuse-reflection sensor detects objects and materials without contact and indicates their presence by a switched signal. In addition, the distance to the object is indicated. Range 0.2...10 m (referred to white paper 200 x 200 mm, 90 % remission). -
Page 10: Installation
Installation Align the photocell and fasten to a mounting device. Electrical connection The unit must only be connected by a skilled electrician. The national and international regulations for the installation of elec- trical equipment must be adhered to. Voltage supply to EN50178, SELV, PELV. The device shall be supplied from an isolating source and protected by an overcurrent device such that the limited voltage circuit requirements in accordance with UL 508 are met. - Page 11 Setting of the sensing range and switching function • The sensor is to switch when the object is detected: Position the object, press [OUT On] for min. 2 s, then release it.. → The display indicates “WAIT”. When “OFF” flashes on the display: Remove the object, briefly press [OUT Off], then release it.
-
Page 12: Set-Up / Operation
Programming failed: The display indicates “FAIL”. • The measured value difference is too small, switch point not a dopted. Lock or unlock the buttons: • Press the two buttons simultaneously for 10 s. The display indicates “Loc” (buttons locked) or “uLoc” buttons not locked). Set-up / Operation After mounting, wiring and programming check whether the unit operates correctly. -
Page 13: Scale Drawing
Scale drawing M12x1 1: 4-digit alphanumeric display, LEDs 2: Programming buttons... - Page 14 Contenu Caractéristiques et fonctionnement ......15 Eléments de service et d'indication ......15 Montage .
-
Page 15: Caractéristiques Et Fonctionnement
Caractéristiques et fonctionnement Le détecteur réflexion directe détecte des objets et matières sans contact et indique leur présence par un signal de commutation. En plus, la distance par rapport à l'objet est indiquée. Portée 0,2...10 m (sur papier blanc 200 x 200 mm, rémission 90 %). Eléments de service et d'indication LED 1 : l'appareil est opérationnel. -
Page 16: Montage
Montage • Orienter le détecteur réflexion directe en direction de l'objet à détecter, • le fixer avec un dispositif de fixation. Raccordement électrique L'appareil doit être raccordé par un électricien qualifié. Les règle- ments nationaux et internationaux relatifs à l'installation de matériel électrique doivent être respectés. -
Page 17: Réglage De La Portée Et De La Fonction De Commutation
Réglage de la portée et de la fonction de commutation • L'appareil doit commuter lorsque l'objet est détecté : Positionner l'objet, appuyer sur [OUT On] pendant min. 2 s, ensuite le relâcher. → “WAIT” est affiché Si “OFF” est affiché en clignotant : Enlever l'objet, appuyer sur [OUT Off] brièvement, ensuite le relâcher. -
Page 18: Programmation Non Réussie
Programmation non réussie : “FAIL” est affiché. • Différence de la valeur mesurée trop faible, point de commutation non modifié. Verrouiller ou déverrouiller les boutons-poussoirs : • Appuyer sur les deux boutons-poussoirs simultanément pendant 10 s. “Loc” (boutons-poussoirs verrouillés) ou “uLoc” (boutons-poussoirs déver- rouillés) est affiché. -
Page 19: Dimensions
Dimensions M12x1 1: Visualisation alphanumérique à 4 digits, LED 2: Boutons-poussoirs de programmation... - Page 20 Fax: +49 71 81 98 79-179 info @ di-soric.com www.di-soric.com di-soric International di-soric GmbH & Co. KG | Germany di-soric Solutions GmbH & Co. KG | Germany di-soric Austria GmbH & Co. KG | Austria di-soric SAS | France di-soric Pte. Ltd. | Singapore www.di-soric.com/international...


