Publicité
Les langues disponibles
Les langues disponibles
Liens rapides
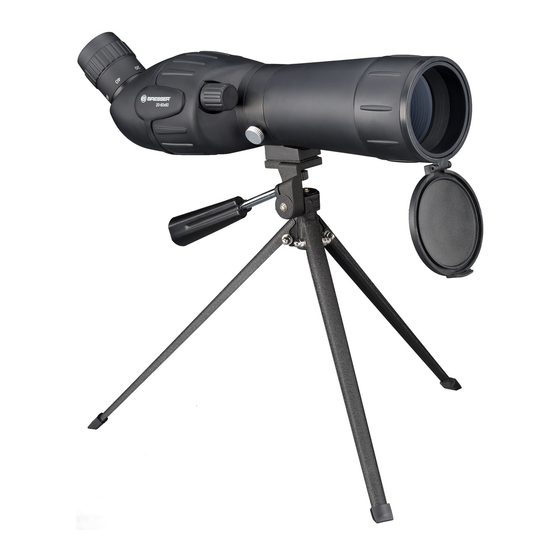
20-60x60
Zoom-Spektiv • Zoom Spotting Scope
Longue-vue • Spektiv
Art. No. 88-20100
art. no. 96-12513
Bedienungsanleitung ..3
DE
instRuCtiOn manual ....7
GB
mOde d'emplOi ............ 11
FR
Návod k použití .......... 15
CZ
Publicité

Sommaire des Matières pour Bresser 20-60x60
- Page 1 20-60x60 Zoom-Spektiv • Zoom Spotting Scope Longue-vue • Spektiv Art. No. 88-20100 art. no. 96-12513 Bedienungsanleitung ..3 instRuCtiOn manual ..7 mOde d’emplOi .... 11 Návod k použití ..15...
-
Page 3: Entsorgung
GEFAHR von Körperschäden! SCHUTZ der Privatsphäre! mertemperatur einige Zeit akklima- Schauen Sie mit diesem Ge- Das Fernglas ist für den Pri- tisieren, so dass die Restfeuchtig- rät niemals direkt in die Son- vatgebrauch gedacht. Ach- keit abgebaut werden kann. Setzen ne oder in die Nähe der Sonne. - Page 4 7. Feststellschraube für die Gewindeschraube am Stativkopf (9) • Zoom Tubusschelle des Stativs und ziehen Sie die Be- Durch drehen am Zoomrad (2), läßt 8. Sonnenblende festigungsschraube (10) unterhalb sich der Bildausschnitt individuell 9. Stativkopf mit Gewindeschraube des Stativkopfes handfest an. einstellen.
- Page 5 Fenster. Auch unterschiedliche In- Fixierschraube (X) vorsichtig hand- Beobachtung der Landschaft/Natur nen- und Außentemperaturen redu- fest anziehen. Die Kamera-App des Beim Betrachten von Landschaften zieren die Abbildungsqualität. Smartphone starten. Smartphone oder weit entfernten Objekten kann mit sanftem Druck auf die Gummi- bei sommerlichen Temperaturen •...
- Page 6 Sie unter www. bresser.de/garantiebedingungen einsehen. Sie wünschen eine ausführliche Anleitung zu diesem Produkt in einer bestimmten Sprache? Dann besuchen Sie unsere Website über nachfolgenden Link (QR Code) für verfügbare Versionen. www.bresser.de/download/9612513 Service-Hotline*: +49 (0) 28 72 – 80 74-210 * Lokale Rufnummer in Deutschland (Die Höhe der...
- Page 7 RISK of physical injury! RESPECT privacy! DISPOSAL Never look through this This device is meant for Dispose of the packaging device directly at or near the private use. Respect others material/s as legally required. sun. There is a risk of BLINDING privacy –...
- Page 8 15. Soft Carry Case with carrying strap observing position, the scope can position. To fasten the main tube 16. Smartphone holder be locked by turning the panhandle in the desired position turn the (13) the other way as before fastening screw (7) clockwise. Fastening the scope on the tripod (clockwise).
-
Page 9: Important
When viewing land objects, you will and details of our services at www. app on the smartphone. Press the be observing through heat waves bresser.de/warranty_terms. smartphone gently onto the rubber on the earth surface. You may have Would you like detailed instructions studs of the supporting surface. - Page 10 Service Hotline*: +49 (0) 28 72 – 80 74-210 * Number charged at local rates in Germany (the amount you will be charged per phone call will depend on the tariff of your phone provider); calls from abroad will involve higher costs.
- Page 11 RISQUE de blessures corporelles! Ne jamais exposer l’appareil à des Tenez l’appareil à l’abri de la pous- Avec cet appareil, ne regar- températures élevées! sière et de l’humidité ! Après l’avoir dez jamais directement vers utilisé – spécialement en cas de le soleil ou à...
- Page 12 caoutchouc pied (11) au maximum. Placez le Contrôles 2. Zoom trépied sur une surface stable et • Molette de mise au point: 3. Molette de mise au point, bague plane (comme une table). Regardez dans l’oculaire (1) et tour- de mise au point Votre longue-vue possède un adap- nez la molette de mise au point (3) 4.
- Page 13 dans la position désirée, tourner la Lire attentivement le manuel pour ne pas tomber ! vis de serrage (7) dans le sens des obtenir plus d’informations sur les Le smartphone doit être fixé de aiguilles d’une montre. avertissements. sorte que la lentille de la caméra se trouve directement au-dessus de •...
- Page 14 ; les appels depuis l’étranger entrainent des coûts plus élevés. Vous pouvez consulter l’intégralité des conditions de garantie ainsi que les informations concernant la pro- longation de la garantie et les pres- tations de service sur www.bresser. de/warranty_terms.
- Page 15 NEBEZPEČÍ tělesného poškození! OCHRANA soukromí! proti prachu a uložte přístroj do Nikdy nedívejte Dalekohled je určen pro dodaného pouzdra. tímto přístrojem přímo do soukromé použití. Dbejte slunce nebo do jeho okolí. Hrozí soukromí Vašich LIKVIDACE NEBEZPEČÍ OSLEPNUTÍ! spoluobčanů – nepozorujte tímto Balicí...
- Page 16 10. Upevňovací šroub pro hlavici Otočením držadla (13) proti směru tlačítko (3) za účelem opětovného stativu hodinových ručiček odemkněte zaostření. 11. Nohy stativu vertikální (nahoru dolů) 12. Osy pro vertikální a horizontální horizontální (vlevo a vpravo) osy • Pohybování s hlavním tubusem: posun (12).
- Page 17 Povolte upevňovací šroub (X) držá- službách naleznete na stránkách ku na chytrý telefon (16) a přehrňte Pozorování pozemních cílů www.bresser.de/warranty_terms držák přes okulár tak, aby doseda- Při pozorování pozemních cílů Přejete podrobný návod la styčná...
- Page 18 Vámi požadovanou verzi k dispozici. www.bresser.de/download/9612513 Servisní horká linka*: 00 800 - 63 43 7000 * volání zdarma...
- Page 20 Bresser GmbH Gutenbergstr. 2 DE-46414 Rhede Germany www.bresser.de...


