HEIDENHAIN AK ERA 4x80 Instructions De Montage
Masquer les pouces
Voir aussi pour AK ERA 4x80:
- Instructions de montage (24 pages) ,
- Instructions de montage (24 pages) ,
- Instructions de montage (21 pages)

Manuels Connexes pour HEIDENHAIN AK ERA 4x80


Sommaire des Matières pour HEIDENHAIN AK ERA 4x80
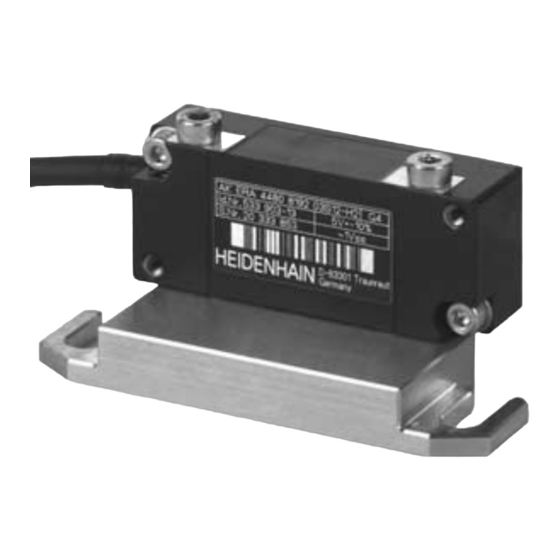
- Page 1 Mounting Instructions Istruzioni di montaggio Abtastkopf Scanning Head (mating dimensions mechanically compatible with ERA 180) Tête captrice Testina di scansione (compatibile con ERA 180) Cabezal captador AK ERA 4x80 3/2008...
- Page 2 Inhalt . Contents . Sommaire . Indice . Indice 4, 6 5, 7 Avvertenze generali Dimensions of ERA 4x80 scanning head without sealing air inlet Dimensioni della testina ERA 4x80 senza pressurizzazione Dimensions of ERA 4x80 scanning head with sealing air inlet Dimensioni della testina ERA 4x80 con pressurizzazione Dismounting ERA 180 Smontaggio di ERA 180...
- Page 3 Mounting the scale drum Montaggio del tamburo 15, 17 Mounting of scanning head 4080 with and without sealing air inlet Montaggio della testina 4080 con e senza pressurizzazione 18, 20 19, 21 Checking the output signals / Cleaning Instructions Verifica dei segnali in uscita / Istruzioni per la pulizia Use of compressed air Pressurizzazione 24, 26...
- Page 4 Maße in mm Dimensions in mm Cotes en mm Dimensioni in mm Dimensiones en mm DIN EN 61340 – 5 – 1 DIN EN 61340 – 5 – 2...
- Page 5 Avoid direct contact of fluids with the encoder and connector! Evitare che il sistema di misura e il connettore vengano a contatto con liquidi. If necessary, provide appropriate protection to the unit. See the cleaning instructions on page 21. Se necessario, prevedere un dispositivo di protezione. Istruzioni per la pulizia a pagina 21.
- Page 6 When mounting the scanning head and the scale drum, please refer to the dimensions and notes in the Mounting Instructions for the respective ERA 4x0x Scale Drum. All mounting surfaces must be clean and free of burrs. The specified shaft tolerances must be complied with. The scale drum is to be fastened with all provided screws and washers.
- Page 7 Per il montaggio della testina e del tamburo, attenersi anche alle dimensioni e alle indicazioni riportate sulle istruzioni di montaggio del corrispondente tamburo ERA 4x0x. Le superifici di montaggio devono essere prive di graffi e pulite. Devono essere rispettate le tolleranze dell'albero indicate. Il tamburo deve essere fissato con tutte le viti e le rondelle previste.
- Page 8 AK ERA 4x80 ohne Sperrluftanschluss AK ERA 4x80 without sealing air inlet AK ERA 4x80 sans raccordement de pressurisation AK ERA 4x80 senza pressurizzazione AK ERA 4x80 sin conexión de aire de estanqueidad Á À Æ Æ Æ Æ Æ...
- Page 9 Bearing ¬ Cuscinetto À Mounting clearance set with spacer foil Distanza di montaggio definita con pellicola Á Coupling joints must not be loosened (retaining compound) No aflojar las uniones roscadas (laca de seguridad)
- Page 10 AK ERA 4x80 mit Sperrluftanschluss AK ERA 4x80 with sealing air inlet AK ERA 4x80 avec raccordement de pressurisation AK ERA 4x80 con pressurizzazione AK ERA 4x80 con conexión de aire de estanqueidad Á Æ À Æ Æ Æ Æ...
- Page 11 ¬ Bearing Cuscinetto À Mounting clearance set with spacer foil Verificata distanza di montaggio con spessimetro Á Connecting piece for plastic pressure tubing 6 x 1 mm Raccordo per tubo flessibile in plastica 6 x 1 mm...
- Page 12 Demontage ERA 180 Dismounting ERA 180 To protect the scale drum, insert spacer foil 0.1 mm! Démontage ERA 180 Smontaggio di ERA 180 Per proteggere il tamburo montare la pellicola di taratura di 0,1 mm! Desmontaje del ERA 180...
- Page 13 Slightly loosen M4 screws and remove scanning head. Remove scale drum.
- Page 14 Montage der Teilungstrommel siehe Montageanleitung für die Teilungstrommel ERA 4x0x. For mounting of the scale drum, refer to the Mounting Instructions for ERA 4x0x scale drum. Montage du tambour gradué, cf. Instructions de montage pour les tambours gradués ERA 4x0x. Montaggio del tamburo vedere le Istruzioni di montaggio del tamburo ERA 4x0x.
- Page 15 If a protective cover is to be used, the sealing air inlet of the scanning head must be removed before mounting! In caso di impiego di un carter di protezione è necessario rimuovere il raccordo di pressurizzazione della testina prima di procedere al montaggio!
- Page 16 Remove the protective cover (if applicable). Rimuovere la protezione (si existo). Coupling joints must not be loosened (retaining compound) No aflojar las uniones roscadas (laca de seguridad) Ensure correct position of reference mark track! Attenzione alla posizione della traccia degli indici di riferimento!
- Page 17 Gently press the scanning head against the spacer foil and the mounting surface and secure it with the screws provided. Premere la testina di scansione esercitando una leggera pressione sulla pellicola di montaggio e sulla superficie di avvitamento e fissare.
- Page 18 Manuale di intruzioni del PWT 1x, ID 319 502-9x. Verifica dei segnali in uscita Comprobación de las señales de salida Included in the items supplied with the PWT 18. incluso nello standard di fornitura del PWT 18. AK ERA 4x80 PWT 18...
- Page 19 The PWT shows the signal amplitude, signal quality, position and width of the reference mark in a display window. Il PWT consente di visualizzare ampiezza del segnale, qualità del segnale, posizione e larghezza dell'indice di riferimento. Signal quality Signal amplitude Qualità...
- Page 20 If the given signal values cannot be achieved, check the mounting tolerances or refer to the cleaning instructions . Nel caso non possano essere ottenuti i valori di taratura indicati, controllare le tolleranze di montaggio e attenersi alle istruzioni per la pulizia. 0.5 .
- Page 21 Reinigungshinweise Cleaning Instructions Instructions de nettoyage Istruzioni per la pulizia Instrucciones de limpieza If the scanning head or scale drum is contaminated, carefully clean the encoder with a clean, lint-free cloth and isopropyl alcohol. Remove solid particles with a jet of compressed air first. Con testina di scansione o tamburo contaminato pulire con cura il sistema di misura utilizzando un panno pulito che non lascia pelucchi e isopropanolo.
- Page 22 ISO 8573-1 The compressed air introduced directly into the encoder must be appropriately conditioned, and must comply with the following quality classes as per ISO 8573-1 (1995 Edition): Solid contaminants: Class 1 (max. particle size 0.1 µm and max. particle density 0.1 mg/m at 1 10 Pa).
- Page 23 HEIDENHAIN offers the DA 300 Compressed Air Unit for purifying compressed air. HEIDENHAIN offre per il trattamento dell'aria compressa l'impianto di pressurizzazione DA 300. DA 300 DA300 HEIDENHAIN...
- Page 24 = 5 V see, vedi, A, B, R 0.2 V † R † 0.85 V ( 0.5 V)
- Page 25 AK ER A 4x80 HEIDENHAIN 12 10 A– B– R– Cable shield connected to housing Collegare lo schermo del cavo alla carcassa A– B– R–...
- Page 26 (°C Ø (°F) ³ ³ ³ ³ ³ Ø 3.7 mm ³ ³ ³ Ø 8 mm † 150 m Noise sources Sorgenti di disturbo...
- Page 27 Sollwert: < 1 W. Check the resistance between the connector housing and the machine. Desired value: < 1 W. Valeur nominale: < 1 W. Controllare la resistenza elettrica tra l’alloggiamento del connettore e la macchina. Valore nominale: < 1 W. Valor nominal: <...
- Page 28 DR. JOHANNES HEIDENHAIN GmbH 83301 Traunreut, Germany Technical support Measuring systems { TNC support NC programming PLC programming { Lathe controls www.heidenhain.de Subject to change without notice Con riserva di modifiche...