Publicité
Liens rapides
Publicité

Manuels Connexes pour Fleurco P002


Sommaire des Matières pour Fleurco P002
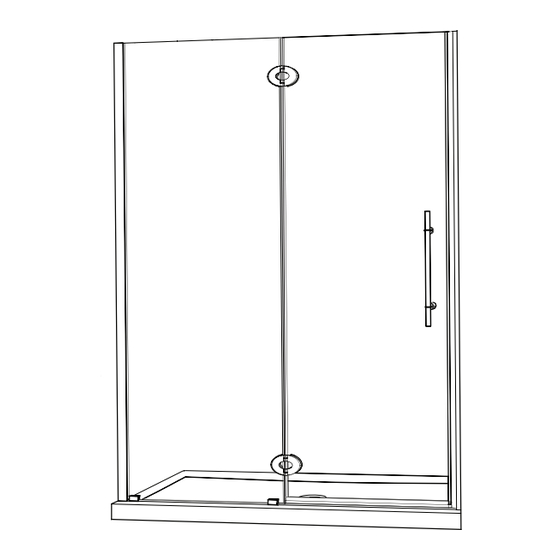
- Page 1 INSTRUCTION MANUAL - GUIDE D’INSTALLATION P002 Shower door - Porte de douche 08.14...
- Page 2 Please keep this manual and product code number for future reference and replacement parts ordering if necessary. Veuillez conserver ce manuel et le code de produit pour des références futures, et au besoin, la commande les pièces de rechange. INSTRUCTIONS GÉNÉRALES GENERAL INSTRUCTIONS •...
- Page 3 INSTALLATION MANUAL - GUIDE D’INSTALLATION TOOLS AND MATERIAL REQUIRED / OUTILS ET MATERIAUX REQUIS DRILL LONG NOSE LOCKING PLIER 1/4˝& 1/16˝ DRILL BITS PERÇEUSE PINCE SERRE ÉTAU MÈCHE 1/4˝ & 1/16˝ SILICONE SCREWDRIVERS TAPE MEASURE SCELLANT TOURNEVIS RUBAN À MESURER MALLET PENCIL CUTTING PLIER...
- Page 4 INSTRUCTION MANUAL - GUIDE D’INSTALLATION INSTALLATION OF COMPONENTS / INSTALLATION DES COMPOSANTES STEP / ÉTAPE 1 STEP / ÉTAPE 8 • Secure the expanders • Wall Jambs Installation • Sécuriser les extenseurs • Installation des jambages see pages / voir pages see pages / voir pages 6 - 7 18 - 19...
- Page 5 INSTRUCTION MANUAL - GUIDE D’INSTALLATION PARTS LISTING / LISTE DES PIÈCES HINGE CHARNIÈRE HINGE CHARNIÈRE ITEM PARTS - PIÈCES PARTS # - # PIÈCES WALL JAMB (REGULAR PUNCH) / JAMBAGE (PERÇAGE RÉGULIER) XX15418-76 SIDE PANEL / PANNEAU FIXE GC2P36S-10H EXPANDER / EXTENSEUR XX15417-76 GASKET / JOINT D’ÉTANCHÉITÉ...
- Page 6 INSTRUCTION MANUAL - GUIDE D’INSTALLATION WALL JAMBS INSTALLATION / INSATLLATION DES JAMBAGES Use a measuring tape to mark the center of the threshold. Run a second line up the wall using a level. Place the wall jambs against the wall. Center the opening of the wall jambs on the line marked previously and mark the location of the holes on both sides.
- Page 7 INSTRUCTION MANUAL - GUIDE D’INSTALLATION WALL JAMB INSTALLATION (CONTINUED) / INSTALLATION DU JAMBAGE (SUITE) Drill a hole at each location with a 1/4” drill bit. Insert one drop of silicone in each hole in the wall before inserting the wall plug (x6). Apply silicone at the bottom of the wall jambs on the side that goes against the wall as...
- Page 8 INSTRUCTION MANUAL - GUIDE D’INSTALLATION FIXED PANEL ASSEMBLY / ASSEMBLAGE DE PANNEAU FIXE Place temporarily the glass RESPECT THE DIMENSION supports on the bottom of the THAT IS return panel at a distance of INDICATED BELOW. 1 ½ ” from the edge of the RESPECTEZ LA DIMENSION glass panel and 2 ½...
- Page 9 INSTRUCTION MANUAL - GUIDE D’INSTALLATION FIXED PANELS INSTALLATION (CONTINUED) / INSTALLATION DES PANNEAUX FIXES (SUITE) Slide the fix panel temporarily into the wall jamb, level the glass panel and lock the position by clamping the wall jamb and the expander with pliers. Unscrew the rear side of the 2 hinges as illustrated.
- Page 10 INSTRUCTION MANUAL - GUIDE D’INSTALLATION CUT THE BOTTOM GASKET / COUPER LE JOINTE INFERIEUR DE PORTE Cut the bottom door gasket with the following path using cutting pliers. Magnetic door gasket side INTERIOR Couper le joint inférieur selon la méthode suivante SHOWER SIDE Côté...
- Page 11 INSTRUCTION MANUAL - GUIDE D’INSTALLATION CUT THE BOTTOM GASKET (CONTINUED) COUPER LE JOINTE INFERIEUR DE PORTE (SUITE) Fix panel with hinges side INTERIOR Côté panneau fixe avec charnière SHOWER SIDE INTÉRIEUR DE LA DOUCHE INTERIOR SHOWER SIDE INTÉRIEUR DE LA DOUCHE 5/8”...
- Page 12 INSTRUCTION MANUAL - GUIDE D’INSTALLATION DOOR PANEL ASSEMBLY / ASSEMBLAGE DU PANNEAU DE PORTE Use a mallet to install the magnetic door gasket on the door panel. Use a mallet to install the bottom gasket on the door panel. Place the 2 spacing blocks under the bottom gaskets. INTERIOR SHOWER SIDE INTÉRIEUR DE...
- Page 13 INSTRUCTION MANUAL - GUIDE D’INSTALLATION DOOR PANEL INSTALLATION / INSTALLATION DE LA PORTE Place the door centered on the threshold of the base and level the glass panels to align the holes . Fasten the remaining hinges back side component to the doors as illustrated.
- Page 14 INSTRUCTION MANUAL - GUIDE D’INSTALLATION DOOR PANEL INSTALLATION (CONTINUED) / INSTALLATION DE LA PORTE (SUITE) Adjust and level the fix and door panels so that the magnetic gaskets are aligned and in contact and the door closes properly. Mark on the base the locations of the door, fix panel and glass supports .
- Page 15 INSTRUCTION MANUAL - GUIDE D’INSTALLATION ACCESSORIES INSTALLATION / INSTALLATION DES ACCESSOIRES Unscrew the hinges back side component as illustrated. Use INTERIOR the provided hex. key SHOWER SIDE INTÉRIEUR DE Remove the door LA DOUCHE and the fix panel with the glass supports. Remove the glass supports from the fix panels.
- Page 16 INSTRUCTION MANUAL - GUIDE D’INSTALLATION ACCESSORIES INSTALLATION (CONTINUED) / INSTALLATION DES ACCESSOIRES (SUITE) Place temporarily the threshold with the side cut at 45 ˚ against the magnetic expander and 45 ˚ CUT EDGE FITS the otherside against THE SIDE OF THE MAGNETIC the wall jamb on the line EXPANDER...
- Page 17 INSTRUCTION MANUAL - GUIDE D’INSTALLATION ACCESSORIES INSTALLATION (CONTINUED) / INSTALLATION DES ACCESSOIRES (SUITE) Reposition the glass supports on the threshold by using the lines INTERIOR marked previously. SHOWER SIDE INTÉRIEUR DE Use a 1/16” drill bit to drill holes LA DOUCHE into the base through the glass supports and the threshold.
- Page 18 INSTRUCTION MANUAL - GUIDE D’INSTALLATION SECURE THE EXPANDERS / SÉCURISER LES EXTENSEURS Slide the fix panel into the wall jamb and glass supports. Level the glass panel and if necessary use the clear setting blocks (#23 & 24). Lock the position by clamping the wall jamb and expander with pliers.
- Page 19 INSTRUCTION MANUAL - GUIDE D’INSTALLATION SECURE THE EXPANDERS (CONTINUED) / SÉCURISER LES EXTENSEURS (SUITE) Ensure that the magnetic gaskets are in contact and secure the fix panel and the magnetic expander to the wall jamb using the screws 3/8” (x6).Place the caps on the heads of apparent screws.
- Page 20 INSTRUCTION MANUAL - GUIDE D’INSTALLATION HANDLE INSTALLATION / INSTALLATION DE POIGNEÉ See sheet for installation and install the handle as shown. Voir la fiche d’installation et installer la poignée tel qu’illustré. IMPORTANT ! BEFORE THE SEALING OPERATION INSTALL SUPPORT SYSTEM (SEE PAGE 22 to 25)! AVANT D’AJOUTER LE SILICONE INSTALLEZ LE SYSTEM DE SUPPORT (VOIR PAGE 22 à...
- Page 21 SEALING / CALFEUTRAGE Silicone the outside of the shower unit along the wall jambs, glass supports and the exterior side of the aluminum threshold. Wait 24 hours before using the shower to allow the silicon to dry. Calfeutrer avec du silicone l’extérieur de l’unité autour les jambages et les supports de verre et à l’extérieur du seuil en aluminium. Attendre 24 heures avant de faire fonctionner la douche pour laisser le silicone séché.
- Page 22 INSTRUCTION MANUAL - GUIDE D’INSTALLATION SUPPORT BARS INSTALLATION / NSTALLATION DES BARRES DE SUPPORT Loosen the glass clip. Align the slotte to the fixed panel. The slotted screw head should be on the inside of the shower. Rest the support bar on the fixed panel inside the tub.
- Page 23 INSTRUCTION MANUAL - GUIDE D’INSTALLATION GLASS SHELF / L’ÉTAGÈRE DE VERRE Install the wall mount bracket, parts 1, 2, 3 and 4 to the glass shelf then fasten only parts 2 and 5 of the second wall mount bracket to the glass panel.
- Page 24 INSTRUCTION MANUAL - GUIDE D’INSTALLATION GLASS SHELF / L’ÉTAGÈRE DE VERRE Place the glass shelf on the second wall mount bracket and install the remaining part 1 and 3. Level and mark the location of the wall mount bracket on the wall. Placer l’étagère en verre sur le deuxième support mural et installer les parties restantes 1 et 3.
- Page 25 INSTRUCTION MANUAL - GUIDE D’INSTALLATION GLASS SHELF / L’ÉTAGÈRE DE VERRE Drill a hole, insert a drop of silicone then insert the wall plug. Percer un trou, y insérer une goutte de silicone, puis insérer la prise murale. GLASS SHELF / L’ÉTAGÈRE DE VERRE Secure part 4 to the wall, then reassemble all the parts from both wall mounts.