Table des Matières
Publicité
Les langues disponibles
Les langues disponibles
Liens rapides
Instructions d'installation et guide de l'usager
Installation Guide and User Manual
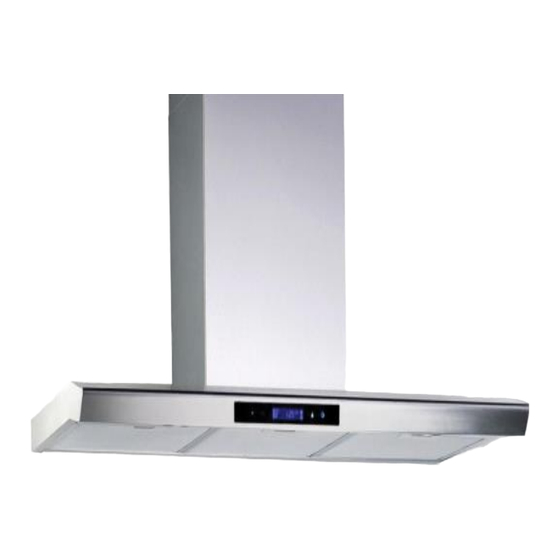
Modèle/Model: LMT430SB
IMPORTANT
: Lire et conserver ces instructions. Read and save these instructions.
NOTE:
Installateur : Laisser ce guide au propriétaire. Propriétaire : conserver ce guide pour référence ultérieure
Installer: Leave this guide with the homeowner. Homeowner: keep this guide for future reference
190814
Publicité
Chapitres
Table des Matières

Manuels Connexes pour Luxair LMT430SB

Sommaire des Matières pour Luxair LMT430SB
- Page 1 Instructions d’installation et guide de l’usager Installation Guide and User Manual Modèle/Model: LMT430SB IMPORTANT : Lire et conserver ces instructions. Read and save these instructions. NOTE: Installateur : Laisser ce guide au propriétaire. Propriétaire : conserver ce guide pour référence ultérieure Installer: Leave this guide with the homeowner.
-
Page 2: Table Des Matières
TABLE OF CONTENTS 1.IMPORTANT SAFETY PRECAUTIONS ..................3-4 2.INSTALLATION INSTRUCTIONS………………………………………………………………………………5,6,7,8,9-10 3.OPERATING THE HOOD ………………………………………………………………………………………………..10-11 4. MAINTENANCE …………………………………………………………………………………………………………………..11 5. WARRANTY…………………………………………………………………………………………………………………………12... -
Page 3: Important Safety Precautions
1. IMPORTANT SAFETY PRECAUTIONS READ AND SAVE THESE INSTRUCTIONS CAUTION: For residential use only. Do not use to exhaust hazardous or explosive materials and/or vapors. CAUTION: Range hood may have very sharp edges; please wear protective gloves when installing, cleaning or servicing the unit. This appliance must be installed by a qualified technician. -
Page 4: Observe The Following
CAUTION: To reduce risk of fire and to properly exhaust air, be sure to duct air outside - do not vent exhaust air into spaces within walls, ceilings, attics, crawl spaces, or garages. Automatically operated device - to reduce risk of injury disconnect from power supply before servicing. -
Page 5: Installation Instructions
2. INSTALLATION INSTRUCTIONS TOOLS NEEDED TO INSTALL THE RANGE HOOD Philips screwdriver Hammer and flat blade screwdriver Sheet metal sheers Pair of pliers Scissors (to cut duct tape) Duct tape Marker or pencil ... -
Page 6: Wall Framing For Adequate Support
WALL FRAMING FOR ADEQUATE SUPPORT THIS VENT HOOD IS HEAVY. ADEQUATE STRUCTURE AND SUPPORT MUST BE PROVIDED IN ALL TYPES OF INSTALLATIONS. IF MOUNTING ON DRY WALL, THE HOOD MUST BE SECURE TO VERTICAL STUDS IN THE WALL, OR TO A HORIZONTAL SUPPORT. PREPARE THE INSTALLATION ... -
Page 7: Electrical Installation
ELECTRICAL INSTALLATION WARNING This range hood must be properly grounded. Turn off electrical power at service entrance before wiring. Check to make sure that the electric chord is not in contact with thee sharp edges of the appliance. Improper grounding can result in a risk of electric shock. Consult a qualified electrician if the grounding instructions are not completely understood, or if doubt exists as to whether the appliance is properly grounded. -
Page 8: Install Hood Mounting Bracket
INSTALL HOOD MOUNTING BRACKET WARNING WHEN CUTTING OR DRILLING INTO WALL, DO NOT DAMAGE ELECTRICAL WIRING AND OTHER HIDDEN UTILITIES. WHEN BUILDING FRAMEWORK, ALWAYS FOLLOW ALL APPLICABLE CONSTRUCTION CODES AND STANDARDS. To construct wood wall framing that is flush with surface of wall studs, ensure that: a) The framing is centered over installation location and is sturdy enough to support the weight of the hood. -
Page 9: Installation Of The Unit
WARNING: BE CAREFUL WHEN INSTALLING THE DECORATIVE CHIMNEY AND HOOD, THEY MAY HAVE SHARP EDGES. CAUTION: DO NOT REMOVE THE PROTECTIVE PLASTIC FILM COVERING THE DECORATIVE CHIMNEY INSTALLATION OF THE UNIT Install 6" round adapter/damper on top of the hood using 4 no. 8 x 7/16" mounting screws. ... -
Page 10: Operating The Hood
Fig.5 Fig.4 Upper chimney mounting bracket-front view Upper chimney Upper mounting chimney Lower bracket chimney 3. OPERATING THE HOOD SOFT TOUCH CONTROL Timer/Power button (K1) Press timer/Power button (K1) once to turn on the system. Press “+” to activate the hood , press timer (K1) again and start power-off delay timer. Use the plus “+”... -
Page 11: Time Setting
TIME SETTING This button is used to set time and time is displayed in 24 hour cycle. To set time, press the timer button (K1) for 4 seconds. The first two digits will flash. Use the blower button “ –“ (K3) to decrease and the “+”... -
Page 12: Replacing Filters
The use of detergent with phosphate may cause discoloration of the filters, but will affect their performance. This discoloration is not covered by the warranty. REPLACING FILTERS Should filters wear out due to age and prolonged use, please contact your service /parts provider for replacement filters. - Page 13 TABLE DES MATIERES 1. MESURES DE SÉCURITÉ IMPORTANTES ..............13-14 2. INSTRUCTIONS D’INSTALLATION………………………………………….……..15,16,17,18,19 3. MODE D’EMPLOI…...…………………………………………………..………………....20 4. ENTRETIEN…………………………………………………………………………………….…….21 5. SERVICE ET GARANTIE ..……..…………………………………………………………….…….21...
-
Page 14: Mesures De Sécurité Importantes
1. MESURES DE SÉCURITÉ IMPORTANTES AVERTISSEMENT Pour usage domestique seulement. Ne pas utiliser pour évacuer des vapeurs ou des matières dangereuses ou explosives. ATTENTION Cette hotte peut avoir des bords très tranchants ; veuillez porter des gants de protection lors de l'installation, du nettoyage ou de l'entretien de l'appareil. - Page 15 AVERTISSEMENT Afin de réduire les risques d’incendie, assurez-vous d’évacuer l’air à l’extérieur. Ne pas évacuer l’air dans des espaces restreints comme l’intérieur des murs ou plafond ou dans le grenier, faux plafond ou garage. Dispositif automatique - pour réduire les risques de blessures débrancher l’appareil avant d’effectuer l'entretien.
-
Page 16: Instructions D'installation
d) Vous pouvez combattre l’incendie en ayant accès à une sortie de secours. 2. INSTRUCTIONS D’INSTALLATION OUTILS NÉCESSAIRES POUR INSTALLER LA HOTTE Tournevis Philips (tête étoilée) Marteau et tournevis à tête plate Pinces Ciseaux à métal ... -
Page 17: Préparation
PRÉPARATION Pour une utilisation à l’intérieur seulement. Pour usage domestique seulement. Ne pas utiliser pour évacuer des vapeurs ou des matières dangereuses ou explosives. Pour une meilleure évacuation des odeurs de cuisson, la distance minimale recommandée au-dessus de la surface de cuisson est de 30 " pour une surface au gaz et de 26" pour une surface électrique. -
Page 18: Installation Électrique
INSTALLATION ÉLECTRIQUE AVERTISSEMENT LE RACCORDEMENT ÉLECTRIQUE DOIT ÊTRE EFFECTUÉ PAR DU PERSONNEL QUALIFIÉ EN RESPECTANT LES NORMES ET RÈGLEMENTS EN VIGUEUR. CET APPAREIL DOIT ÊTRE RELIÉ À UNE MISE À LA TERRE. AVANT D’EFFECTUER LE BRANCHEMENT, COUPEZ L’ALIMENTATION ÉLECTRIQUE DEPUIS LE TABLEAU DE DISTRIBUTION PRINCIPAL. -
Page 19: Installation Du Support De Montage De La Hotte
INSTALLATION DU SUPPORT DE MONTAGE DE LA HOTTE AVERTISSEMENT VEILLEZ À NE PAS ENDOMMAGER LE CÂBLAGE ÉLECTRIQUE OU D’AUTRES ÉQUIPEMENTS NON APPARENTS LORS DE LA DÉCOUPE OU DU PERÇAGE DU MUR OU DU PLAFOND. LORS DE LA CONSTRUCTION DE LA CHARPENTE, TOUJOURS SUIVRE LES CODES ET STANDARDS DE CONSTRUCTION EN VIGUEUR. - Page 20 AVERTISSEMENT SOYEZ PRUDENTS LORS DE L’INSTALLATION DU CONDUIT DÉCORATIF ET DE LA HOTTE, IL POURRAIT Y AVOIR DES ARÊTES VIVES. ATTENTION À CE STADE-CI, NE PAS RETIRER LE FILM PROTECTEUR DE PLASTIQUE RECOUVRANT LA CHEMINÉE DÉCORATIVE (SUPÉRIEUR ET INFÉRIEUR) ET LA HOTTE. ...
-
Page 21: Mode D'emploi
3. MODE D’EMPLOI CONTRÔLE TOUCHES À EFFLEUREMENT Bouton minuterie/puissance (K1) Appuyez une fois sur l'horloge/minuterie (K1) pour allumer l'écran LCD. Appuyez sur « + » (K4) pour mettre la hotte en marche Appuyez de nouveau sur minuterie (K1) et entrez en mode différé. Utiliser le signe "+" (K4) et négatif "-"... -
Page 22: Service Et Garantie
Un entretien régulier aidera à préserver l'apparence de la hotte. Nettoyer les surfaces extérieures périodiquement avec de l'eau tiède savonneuse et un chiffon de coton. N'utilisez pas de détergents corrosifs ni abrasifs car ceux-ci pourraient endommager la surface en acier inoxydable. Pour les dépôts de saleté...