Page 1
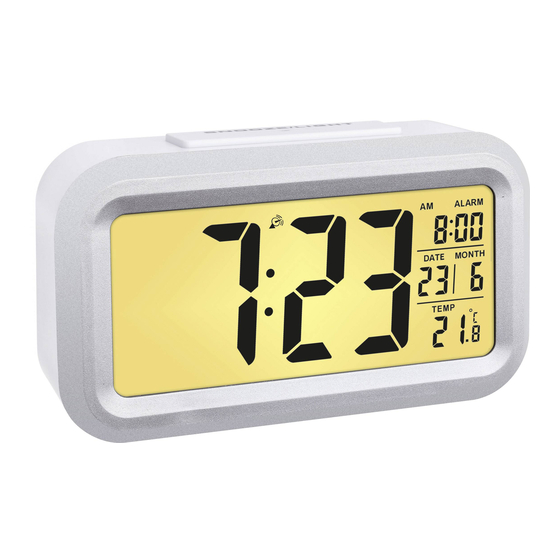
TFA_No. 60.2553_Anleitung_10_19 18.10.2019 16:03 Uhr Seite 1 Bedienungsanleitung Instruction manual Mode d’emploi Istruzioni per l'uso Gebruiksaanwijzing Instrucciones de uso Kat. Nr. 60.2553...
Page 2
TFA_No. 60.2553_Anleitung_10_19 18.10.2019 16:03 Uhr Seite 2 Fig. 1 Fig. 2 B 8 B 7 – 2 – – 3 –...
Page 3
Seite 3 LUMIO PLUS – Funkwecker LUMIO PLUS – Funkwecker Vielen Dank, dass Sie sich für dieses Gerät aus dem Hause TFA entschieden haben. 3. Einsatzbereich und alle Vorteile Ihres neuen Gerätes auf einen Blick • Großes LCD Display 1. Bevor Sie mit dem Gerät arbeiten •...
Page 4
TFA_No. 60.2553_Anleitung_10_19 18.10.2019 16:03 Uhr Seite 4 LUMIO PLUS – Funkwecker LUMIO PLUS – Funkwecker • Batterien nicht ins Feuer werfen, kurzschließen, auseinander nehmen oder aufladen. Explosionsgefahr! B: Rückseite (Fig. 2): • Um ein Auslaufen der Batterien zu vermeiden, sollten schwache Batterien möglichst schnell ausgetauscht werden. Ver- B 1: Alarm ON/OFF Schiebeschalter B 2:...
TFA_No. 60.2553_Anleitung_10_19 18.10.2019 16:03 Uhr Seite 5 LUMIO PLUS – Funkwecker LUMIO PLUS – Funkwecker • Zum Beenden des DCF-Empfangsversuchs drücken Sie die HOUR/MONTH Taste noch einmal. Das DCF-Empfangszeichen Der Empfang hängt hauptsächlich von der geographischen Lage ab. Im Normalfall sollten innerhalb des Radius von 1.500 km verschwindet.
TFA_No. 60.2553_Anleitung_10_19 18.10.2019 16:03 Uhr Seite 6 LUMIO PLUS – Funkwecker LUMIO PLUS – Funkwecker 7.1.2 12-Stunden oder 24-Stunden-Zeitsystem 7.1.3.3 Einstellung der Alarmzeit • Wählen Sie mit der 12/24/YEAR Taste das 12-Stunden oder 24-Stunden-Zeitsystem aus. Im 12-Stunden-Format erscheint • Stellen Sie den Schalter auf AL SET. AM oder PM auf dem Display.
Page 7
TFA_No. 60.2553_Anleitung_10_19 18.10.2019 16:03 Uhr Seite 7 LUMIO PLUS – Funkwecker LUMIO PLUS – Funkwecker • Drücken Sie eine beliebige Taste, um die Snooze-Funktion auszuschalten. 10. Fehlerbeseitigung • Stellen Sie den Schalter auf AL OFF, um die Alarmfunktion auszuschalten. Problem Lösung •...
Page 8
Dieses Produkt darf nicht mit dem Hausmüll entsorgt werden. Der Nutzer ist verpflichtet, das Altgerät zur Hiermit erklärt TFA Dostmann, dass der Funkanlagentyp 60.2553 der Richtlinie 2014/53/EU entspricht. Der vollständige Text der EU- umweltgerechten Entsorgung bei einer ausgewiesenen Annahmestelle für die Entsorgung von Elektro- und Konformitätserklärung ist unter der folgenden Internetadresse verfügbar: www.tfa-dostmann.de/service/downloads/ce...
Page 9
Seite 9 LUMIO PLUS – Radio-controlled alarm clock LUMIO PLUS – Radio-controlled alarm clock Thank you for choosing this instrument from TFA. • Indication of date and indoor temperature • Alarm with snooze function 1. Before you use this product •...
Page 10
TFA_No. 60.2553_Anleitung_10_19 18.10.2019 16:03 Uhr Seite 10 LUMIO PLUS – Radio-controlled alarm clock LUMIO PLUS – Radio-controlled alarm clock • Low batteries should be changed as soon as possible to prevent damage caused by leaking. Never use a combination of B 3: MIN/DATE/°C/°F button B 4:...
TFA_No. 60.2553_Anleitung_10_19 18.10.2019 16:03 Uhr Seite 11 LUMIO PLUS – Radio-controlled alarm clock LUMIO PLUS – Radio-controlled alarm clock • The DCF reception always takes place at 2:00 and 3:00 o'clock in the morning. If the reception is not successfully Therefore, please note the following steps: received at 3:00 o'clock, further attempts will be taken until 5:00 o'clock.
TFA_No. 60.2553_Anleitung_10_19 18.10.2019 16:03 Uhr Seite 12 LUMIO PLUS – Radio-controlled alarm clock LUMIO PLUS – Radio-controlled alarm clock 7.1.3 LOCK/SET switch • The alarm time (default 6:00) will be flashing on the display. • Press the HOUR/MONTH button to adjust the hours. •...
TFA_No. 60.2553_Anleitung_10_19 18.10.2019 16:03 Uhr Seite 13 LUMIO PLUS – Radio-controlled alarm clock LUMIO PLUS – Radio-controlled alarm clock ➜ Change the batteries 8. Backlight • Press the SNOOZE/LIGHT button and the backlight will be activated for 5 seconds. ➜ Press and hold the HOUR/MONTH button for 2 seconds to activate the reception. No DCF reception •...
Page 14
No part of this manual may be reproduced without written consent of TFA Dostmann. The technical data are correct at the time of going to print and may change without prior notice.
Page 15
Seite 15 LUMIO PLUS – Réveil radio-piloté LUMIO PLUS – Réveil radio-piloté Nous vous remercions d'avoir choisi l'appareil de la société TFA. 3. Aperçu du domaine d'utilisation et de tous les avantages de votre nouvel appareil • Grand écran LCD 1.
TFA_No. 60.2553_Anleitung_10_19 18.10.2019 16:03 Uhr Seite 16 LUMIO PLUS – Réveil radio-piloté LUMIO PLUS – Réveil radio-piloté • Ne jetez jamais de piles dans le feu, ne les court-circuitez pas, ne les démontez pas et ne les rechargez pas. Risque d'ex- B : Dos (Fig.
TFA_No. 60.2553_Anleitung_10_19 18.10.2019 16:03 Uhr Seite 17 LUMIO PLUS – Réveil radio-piloté LUMIO PLUS – Réveil radio-piloté • Appuyez encore sur la touche HOUR/MONTH pour désactiver la réception DCF. Le symbole de réception DCF disparaît. Vérifiez les points suivants : •...
TFA_No. 60.2553_Anleitung_10_19 18.10.2019 16:03 Uhr Seite 18 LUMIO PLUS – Réveil radio-piloté LUMIO PLUS – Réveil radio-piloté 7.1.2 Système horaire de 12 heures ou de 24 heures 7.1.3.3 Réglage du réveil • Choisissez avec la touche 12/24/YEAR le système horaire de 12 heures ou de 24 heures. Si vous choisissez le système de •...
TFA_No. 60.2553_Anleitung_10_19 18.10.2019 16:03 Uhr Seite 19 LUMIO PLUS – Réveil radio-piloté LUMIO PLUS – Réveil radio-piloté • Déplacez l'interrupteur sur AL OFF pour arrêter la fonction de réveil. 10. Dépannage • Le symbole de réveil et le symbole snooze disparaissent. Problème Solution ➜...
Page 20
Déclaration de conformité UE 12. Caractéristiques techniques Le soussigné, TFA Dostmann, déclare que l'équipement radioélectrique du type 60.2553 est conforme à la directive 2014/53/UE. Le texte complet de la déclaration UE de conformité est disponible à l'adresse Internet suivante : Alimentation Piles 3 x 1,5 V AAA (non incluses) –...
Page 21
Seite 21 LUMIO PLUS – Orologio sveglia radiocontrollato LUMIO PLUS – Orologio sveglia radiocontrollato Vi ringraziamo per aver scelto l'apparecchio della TFA. 3. Tutte le applicazioni e tutti i vantaggi del vostro nuovo apparecchio • Display LCD grande 1. Prima di utilizzare l'apparecchio •...
Page 22
TFA_No. 60.2553_Anleitung_10_19 18.10.2019 16:03 Uhr Seite 22 LUMIO PLUS – Orologio sveglia radiocontrollato LUMIO PLUS – Orologio sveglia radiocontrollato • Non gettare le batterie nel fuoco, non polarizzarle in maniera scorretta, non smontarle e non cercare di ricaricarle. Peri- B: Parte posteriore (Fig. 2): colo di esplosione! B 1: Commutatore ALARM ON/OFF...
TFA_No. 60.2553_Anleitung_10_19 18.10.2019 16:03 Uhr Seite 23 LUMIO PLUS – Orologio sveglia radiocontrollato LUMIO PLUS – Orologio sveglia radiocontrollato • Per terminare il tentativo di ricezione DCF premere nuovamente il tasto HOUR/MONTH. Il simbolo della ricezione DCF Rispettate le norme elencate qui di seguito: scompare.
TFA_No. 60.2553_Anleitung_10_19 18.10.2019 16:03 Uhr Seite 24 LUMIO PLUS – Orologio sveglia radiocontrollato LUMIO PLUS – Orologio sveglia radiocontrollato 7.1.2 Sistema orario di 12 o 24 ore 7.1.3.3 Impostazione dell'ora della sveglia • Muovere l’interruttore sulla posizione ALARM SET. • Con il tasto 12/24/YEAR selezionare il sistema orario di 12 o di 24 ore. Nel formato 12 ore compare sul display AM/PM. •...
TFA_No. 60.2553_Anleitung_10_19 18.10.2019 16:03 Uhr Seite 25 LUMIO PLUS – Orologio sveglia radiocontrollato LUMIO PLUS – Orologio sveglia radiocontrollato ➜ Sostituire le batterie 8. Retroilluminazione • Premendo il tasto SNOOZE/LIGHT, la retroilluminazione si accende per 5 secondi. ➜ Tenendo premuto per 2 secondi il tasto HOUR/MONTH per attivare la ricezione Nessuna ricezione DCF •...
Page 26
È vietata la pubblicazione delle presenti istruzioni o di parti di esse senza una precedente autorizzazione della TFA Dostmann. I dati 12. Dati tecnici tecnici corrispondono allo stato del prodotto al momento della stampa e possono cambiare senza preavviso.
Page 27
LUMIO PLUS – Zendergestuurde wekker LUMIO PLUS – Zendergestuurde wekker Hartelijk dank dat u voor dit apparaat van de firma TFA hebt gekozen. 3. Hoe u uw nieuw apparaat kunt gebruiken en alle voordelen ervan in één oogopslag • Groot LCD display 1.
Page 28
TFA_No. 60.2553_Anleitung_10_19 18.10.2019 16:03 Uhr Seite 28 LUMIO PLUS – Zendergestuurde wekker LUMIO PLUS – Zendergestuurde wekker • Batterijen niet in het vuur gooien, niet kortsluiten, niet uit elkaar halen of opladen. Kans op explosie! B: Achterkant (Fig. 2): • Zwakke batterijen moeten zo snel mogelijk worden vervangen om lekkage van de batterijen te voorkomen. Gebruik nooit B 1: Alarm ON/OFF schuifschakelaar B 2:...
Page 29
TFA_No. 60.2553_Anleitung_10_19 18.10.2019 16:03 Uhr Seite 29 LUMIO PLUS – Zendergestuurde wekker LUMIO PLUS – Zendergestuurde wekker • Voor het eindigen van het DCF-ontvangst, drukt men nog een keer op de HOUR/MONTH toets. Het DCF-ontvangstsymbool Let dan op de volgende stappen: verdwijnt.
TFA_No. 60.2553_Anleitung_10_19 18.10.2019 16:03 Uhr Seite 30 LUMIO PLUS – Zendergestuurde wekker LUMIO PLUS – Zendergestuurde wekker 7.1.2 12-uur-cyclus of 24 uur cyclus 7.1.3.3 Instelling van de alarmtijd • Kies met behulp van de 12/24/YEAR toets een 12-uur-cyclus of een 24-uur-cyclus. Bij het 12-uurtijdsysteem verschijnt op •...
Page 31
TFA_No. 60.2553_Anleitung_10_19 18.10.2019 16:03 Uhr Seite 31 LUMIO PLUS – Zendergestuurde wekker LUMIO PLUS – Zendergestuurde wekker • Schuif de schakelaar op de instelling AL OFF om de alarmfunctie uit te schakelen. 10. Storingswijzer • Het alarmsymbool en het snoozesymbool verdwijnen. Probleem Oplossing ➜...
Page 32
EU-conformiteitsverklaring ratuur om een milieuvriendelijk verwijderen te garanderen. Hierbij verklaar ik, TFA Dostmann, dat het type radioapparatuur 60.2553 conform is met Richtlijn 2014/53/EU. De volledige tekst van de EU-conformiteitsverklaring kan worden geraadpleegd op het volgende internetadres: www.tfa-dostmann.de/service/downloads/ce 12. Technische gegevens www.tfa-dostmann.de...
Page 33
Seite 33 LUMIO PLUS – Reloj despertador radiocontrolado LUMIO PLUS – Reloj despertador radiocontrolado Muchas gracias por haber adquirido este dispositivo de TFA. 3. Ámbito de aplicación y ventajas de su nuevo dispositivo • Gran pantalla LCD 1. Antes de utilizar el dispositivo •...
Page 34
TFA_No. 60.2553_Anleitung_10_19 18.10.2019 16:03 Uhr Seite 34 LUMIO PLUS – Reloj despertador radiocontrolado LUMIO PLUS – Reloj despertador radiocontrolado • No tire las pilas al fuego, no las cortocircuite, desmonte ni recargue, ya que existe riesgo de explosión. B: Parte posterior (Fig. 2): •...
TFA_No. 60.2553_Anleitung_10_19 18.10.2019 16:03 Uhr Seite 35 LUMIO PLUS – Reloj despertador radiocontrolado LUMIO PLUS – Reloj despertador radiocontrolado • Pulse la tecla HOUR/MONTH durante dos segundos para empezar la inicialización manualmente. El reloj está ahora tratan- Incluso el cambio de la hora de verano e invierno se produce automáticamente. Durante el tiempo de verano aparece DST en do de recibir la señal de radio y el símbolo de recepción DCF parpadea.
TFA_No. 60.2553_Anleitung_10_19 18.10.2019 16:03 Uhr Seite 36 LUMIO PLUS – Reloj despertador radiocontrolado LUMIO PLUS – Reloj despertador radiocontrolado 7.1.1 Conmutación °C/°F 7.1.3.2 Ajuste de la fecha • Deslice el interruptor a la posición DATE SET. • Con la tecla MIN/DATE/°C/°F puede seleccionar entre la indicación de la temperatura en °C (grados Celsius) o °F (grados •...
TFA_No. 60.2553_Anleitung_10_19 18.10.2019 16:03 Uhr Seite 37 LUMIO PLUS – Reloj despertador radiocontrolado LUMIO PLUS – Reloj despertador radiocontrolado • El símbolo snooze parpadea en la pantalla. • Abra el compartimiento de las pilas e introduzca tres pilas nuevas 1,5 V AAA. Asegúrese que las pilas estén colocadas •...
Page 38
Estas instrucciones o extractos de las mismas no pueden ser publicados sin la autorización de la TFA Dostmann. Los datos técnicos Las denominaciones de los metales pesados que contienen son: Cd=cadmio, Hg=mercurio, Pb=plomo de este producto corresponden al estado en el momento de la impresión y pueden ser modificados sin previo aviso.