
Manuels Connexes pour CAME PLX A


Sommaire des Matières pour CAME PLX A
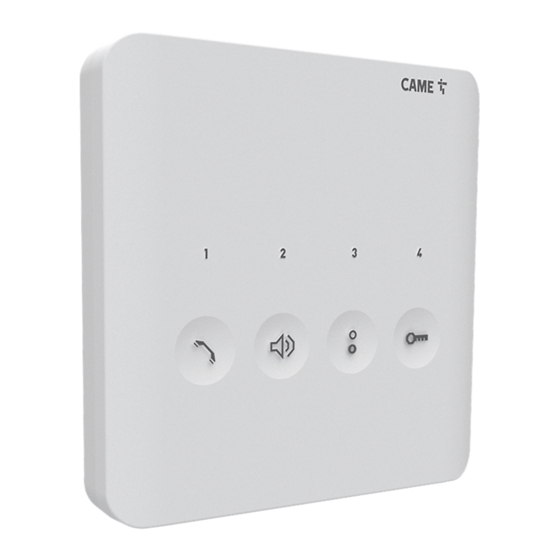
- Page 1 FA01624M04 FA01624-IT Italiano EN English PLX A PLX A FR Français RU Pусский MANUALE UTENTE MANUALE UTENTE...
- Page 2 La data di fabbricazione è indicata nel lotto di produzione stampato sull’etichetta prodotto. Se necessario, contattateci all’indirizzo https://www.came.com/global/en/contact-us. Le condizioni generali di vendita sono riportate nei listini prezzi uffi ciali Came. Funzione dei pulsanti Questo pulsante permette l’attivazione e la disattivazione della comunicazione.
- Page 3 Questo pulsante permette di regolare il volume della suoneria: BASSO, MEDIO, ALTO, SPENTO. Legenda LED rosso Acceso fi sso: il volume è spento. ☞ Premendo il pulsante durante una conversazione, è possibile regolarne il volume audio. Ausiliario 2 /Chiamata portiere. Segnalazione di richiesta di chiamata da portiere.
- Page 4 La funzione di questo pulsante dipende dalla confi gurazione impostata in fase di installazione. Se il pulsante è confi gurato come INTERCOM abiliterà temporaneamente la SECONDA FUNZIONE, consentendo l’attivazione di chiamate INTERCOM da 4 a 6. ☞ Quando la seconda funzione è attiva, i LED bianchi dei pulsanti 1,2,3,4 lampeggeranno.
- Page 5 Intercomunicazione Premendo il pulsante è possibile selezionare l’interno desiderato. Il derivato che chiama emetterà un suono di linea libera. Il derivato che viene chiamato squillerà con la suoneria scelta. Premere questo pulsante del derivato chiamato per attivare la comunicazione audio. ☞...
- Page 6 Comandi ausiliari Premere il pulsante AUX, per attivare il comando ausiliario desiderato. Esempi: accensione di una luce, apertura del cancello. ☞ Il corretto funzionamento potrebbe prevedere dei dispositivi accessori. Trasferimento di chiamata Con una comunicazione attiva, selezionare l’interno al quale si vuole trasferire la chiamata.
- Page 7 Per attivare la comunicazione audio tra i due interni, premere questo pulsante sul derivato chiamato. Il posto esterno rimarrà in attesa. Per mettere in comunicazione l’interno 2 con il posto esterno, premere questo pulsante dell’interno 1. L’interno 2 comunica con il posto esterno. ☞...
- Page 8 Funzioni di Portineria Queste funzioni sono disponibili solo in impianti con postazione di portineria. Notifi ca di chiamata da portiere CONTACT ME Quando il LED di questo pulsante accende, il portiere desidera essere richiamato. ☞ Il LED si spegne quando si entra in comunicazione con il portiere.
- Page 9 Invio segnalazione Panico al portiere Tenere premuto questo pulsante per 2 secondi per inviare una segnalazione PANICO al portiere. Il LED bianco indica che il segnale è stato PANIC! ricevuto dal portiere. Segnalazione di allarme L’attivazione di un contatto di allarme collegato all’apposito ingresso del derivato, provoca l’invio di una segnalazione al portiere e viene notifi...
- Page 10 Funzione apricancello/stato apricancello Tenendo premuto per un tempo prolungato il pulsante è possibile inviare un comando di apertura/chiusura di un’automazione. Il LED segnalerà lo stato dell’automazione. ☞ L’impianto deve essere opportunamente predisposto e confi gurato. ☞ La funzione deve essere attivata sul derivato in fase di associazione della chiamata durante la programmazione dell’impianto.
- Page 11 Configurazione melodie ☞ Bisogna eseguire, in successione, tutte le fasi di confi gurazione descritte di seguito: Ingresso in Confi gurazione Premere e mantenere premuto il pulsante per 3 secondi. Un breve segnale acustico e il LED rosso lampeggiante confermano l’ingresso in confi gurazione. 3 sec ...
- Page 12 Premere questo pulsante per selezionare la melodia ed uscire dalla confi gurazione. Premere questo pulsante per selezionare la melodia e proseguire con la confi gurazione. ☞ Due brevi segnali acustici confermano l’entrata in confi gurazione della melodia della chiamata da pianerottolo. Confi...
- Page 13 Premere questo pulsante per selezionare la melodia ed uscire dalla confi gurazione. Premere questo pulsante per selezionare la melodia e proseguire con la confi gurazione. ☞ Tre brevi segnali acustici confermano l’entrata in confi gurazione del numero di squilli di chiamata. Confi...
- Page 14 Premere questo pulsante per uscire dalla confi gurazione. Dati tecnici Tipo PLX A Alimentazione da BUS (V DC) 15 ÷ 20 Assorbimento in stand-by (mA) < 1 Assorbimento max (mA) Assorbimento singolo LED (mA) Temperatura di stoccaggio (°C)* -25 ÷ +70 Temperatura di funzionamento (°C)
- Page 15 Riferimenti normativi Il prodotto è conforme alle direttive applicabili, vigenti al momento della fabbricazione. FCC - Questo dispositivo è conforme alla parte 15 delle normative FCC. Il funzionamento è soggetto alle due condizioni seguenti: (1) il dispositivo non deve causare interferenze dannose / (2) il dispositivo deve tollerare le interferenze ricevute, incluse le interferenze che possano causare un funzionamento indesiderato.
- Page 16 CAME S.p.A. Via Martiri Della Libertà, 15 31030 Dosson di Casier - Treviso - Italy tel. (+39) 0422 4940 - fax. (+39) 0422 4941 info@came.com - www.came.com...
- Page 17 FA01624-EN PLX A EN English USER MANUAL...
- Page 18 The manufacture date is provided in the production batch printed on the product label. If necessary, contact us at https://www.came.com/global/en/contact-us. The general conditions of sale are given in the offi cial CAME price lists. Function of buttons Press this button to activate and deactivate communication.
- Page 19 Press this button to adjust the ringtone volume: LOW, MEDIUM, HIGH, OFF. LED key red On: the volume is off . ☞ Press the button during a conversation to adjust the audio volume. Auxiliary 2 / Porter call. This signals a request to be called back by the porter. This button sends a DOOR RELEASE or GATE RELEASE command.
- Page 20 The function of this button depends on the confi guration set during installation. If the button is confi gured as an INTERCOM, it will temporarily enable the SECOND FUNCTION, allowing INTERCOM calls 4 to 6 to be activated. ☞ When the second function is active, the white LEDs on the buttons 1,2,3,4 will fl...
- Page 21 Intercommunication Press the button to select the desired internal receiver. The calling receiver will sound to indicate that the line is free. The called receiver will ring with the chosen ringtone. Press this button on the called receiver to activate audio communication. ☞...
- Page 22 Auxiliary controls Press the AUX button to activate the desired auxiliary command. Example switching on a light or opening the gate. ☞ Accessory devices may be required for these commands to work properly. Call forwarding With a call active, select the internal receiver to which you want to transfer the call.
- Page 23 Int.2 Int. 1 To activate audio communication between two internal receivers, press this button on the called receiver. The entry panel will be put on hold. To allow internal receiver 2 to communicate with the entry panel, press this button on internal receiver 1.
- Page 24 Porter functions These functions are only available if the system has a porter desk. Call notifi cation from the porter CONTACT ME When this button LED lights up, this means the porter would like to be called back. ☞ The LED turns off when communication with the porter starts.
- Page 25 Sending a panic signal to the porter Press and hold this button for 2 seconds to send a PANIC signal to the porter. The white LED indicates that the signal has been received by the porter. PANIC! Alarm signal If an alarm contact connected to the relevant receiver entrance is activated, a signal is sent to the porter and an intermittent acoustic signal sounds on the...
- Page 26 Open-gate function/status Press and hold the button for a prolonged period to send an open/close command to an operator. The LED indicates the status of the operator. ☞ The system must be correctly set up and confi gured. ☞ The function must be activated on the receiver when the call is being associated during system programming.
- Page 27 Configuring melodies ☞ Perform each of the following confi guration steps, in succession: Entering confi guration mode Press and hold the button for 3 seconds. A short buzzing sound and a red fl ashing LED confi rm that you have entered confi...
- Page 28 Press this button to select the melody and exit confi guration. Press this button to select the melody and continue confi guration. ☞ You will hear two short beeps to confi rm that you have entered landing-call confi guration mode Confi...
- Page 29 Press this button to select the melody and exit confi guration. Press this button to select the melody and continue confi guration. ☞ You will hear three short beeps to confi rm that you have entered confi guration mode for the number of rings per call.
- Page 30 Press this button to exit confi guration. Technical data Type PLX A Power supply from BUS (V DC) 15 to 20 Consumption in stand-by mode (mA) <1 Maximum consumption (mA) Single LED consumption (mA) Storage temperature (°C)* -25 to +70 Operating temperature (°C)
- Page 31 Legislative references This product complies with the applicable standards in force at the time of manufacturing. FCC - This device complies with part 15 of the FCC Rules. Operation is subject to the following two conditions: (1) this device may not cause harmful interference / (2) this device must accept any interference received, including interference that may cause undesired operation.
- Page 32 CAME S.p.A. Via Martiri Della Libertà, 15 31030 Dosson di Casier - Treviso - Italy tel. (+39) 0422 4940 - fax. (+39) 0422 4941 info@came.com - www.came.com...
- Page 33 FA01624-FR PLX A FR Français MANUEL DE L'UTILISATEUR...
- Page 34 La data de fabrication est indiquée dans le lot de production imprimé sur l'étiquette du produit. Si nécessaire, nous contacter à l'adresse https://www.came.com/global/en/ contact-us. Les conditions générales de vente fi gurent dans les catalogues de prix offi ciels Came. Fonction des boutons Ce bouton permet l'activation et la désactivation de la communication.
- Page 35 Ce bouton permet de régler le volume de la sonnerie : FAIBLE, MOYEN, ÉLEVÉ, ÉTEINT. Légende de la LED rouge Allumée en permanence : le volume est éteint. ☞ L'enfoncement de ce bouton durant une conversation permet d'en régler le volume audio. Auxiliaire 2 / Appel concierge.
- Page 36 La fonction de ce bouton dépend de la confi guration défi nie lors de l'installation. Si le bouton est confi guré comme INTERCOM, il activera temporairement la DEUXIÈME FONCTION, en permettant l'activation d'appels INTERCOM de 4 à 6. ☞ Lorsque la deuxième fonction est activée, les LEDS blanches des boutons 1, 2, 3, 4 clignotent.
- Page 37 Intercommunication Appuyer sur ce bouton pour sélectionner le poste intérieur souhaité. Le poste appelant émettra un son de ligne libre. Le poste appelé sonnera avec la sonnerie choisie. Appuyer sur ce bouton du poste appelé pour activer la communication audio. ☞...
- Page 38 Commandes auxiliaires Appuyer sur le bouton AUX pour activer la commande auxiliaire souhaitée. Exemples : allumage d'une lumière, ouverture du portail. ☞ Un fonctionnement correct pourrait impliquer des dispositifs accessoires. Renvoi des appels Avec une communication activée, sélectionner le poste intérieur vers lequel renvoyer l'appel.
- Page 39 Int.2 Int. 1 Pour activer la communication audio entre les deux postes intérieurs, appuyer sur ce bouton sur le poste appelé. Le poste extérieur restera en attente. Pour mettre en communication le poste intérieur 2 avec le poste extérieur, appuyer sur ce bouton du poste intérieur 1.
- Page 40 Fonctions de Conciergerie Ces fonctions ne sont disponibles que sur les installations équipées d'un poste de conciergerie. Notifi cation d’appel par le concierge CONTACT ME L'allumage de la LED de ce bouton indique que le concierge souhaite être rappelé. ☞ La LED s'éteint lors de l'entrée en communication avec le concierge.
- Page 41 Envoi du signal de Panique au concierge Maintenir ce bouton enfoncé pendant 2 secondes pour envoyer un signal de PANIQUE au concierge. PANIC! La LED blanche indique que le concierge a bien reçu le signal. Signal d’alarme L’activation d'un contact d'alarme relié à...
- Page 42 Fonction d'ouverture du portail/état ouverture portail En maintenant le bouton enfoncé plus longtemps, il est possible d'envoyer une commande d'ouverture/fermeture d'un automatisme. La LED indiquera l'état de l’automatisme. ☞ L’installation doit être correctement préparée et confi gurée ☞ La fonction doit être activée sur le poste en phase d'association de l'appel durant la programmation de l'installation.
- Page 43 Configuration des mélodies ☞ Eff ectuer, l’une après l’autre, toutes les phases de confi guration décrites ci-après : Entrée en mode confi guration Appuyer sur le bouton et le laisser enfoncé pendant 3 secondes. Un signal sonore bref et le clignotement de la Led rouge confi...
- Page 44 Appuyer sur ce bouton pour sélectionner la mélodie et sortir de la confi guration. Appuyer sur ce bouton pour sélectionner la mélodie et poursuivre la confi guration. ☞ Deux bips courts confi rment l’entrée en mode confi guration de la mélodie de l’appel provenant du palier.
- Page 45 Appuyer sur ce bouton pour sélectionner la mélodie et sortir de la confi guration. Appuyer sur ce bouton pour sélectionner la mélodie et poursuivre la confi guration. ☞ Trois bips courts confi rment que le nombre de sonneries d’appel a été programmé.
- Page 46 Appuyer sur ce bouton pour sortir de la confi guration. Données techniques Type PLX A Alimentation par BUS (VDC) 15 ÷ 20 Absorption en mode veille (mA) < 1 Absorption max. (mA) Absorption LED simple (mA) Température de stockage (°C)* -25 ÷...
- Page 47 Références Normatives Ce produit est conforme aux directives applicables, en vigueur lors de sa fabrication. FCC - Ce dispositif est conforme à la partie 15 des normes FCC. Son fonctionnement est soumis aux deux conditions suivantes : (1) le dispositif ne doit pas causer des interférences nuisibles / (2) le dispositif doit tolérer les interférences reçues, y compris les interférences pouvant comporter un fonctionnement indésirable.
- Page 48 CAME S.p.A. Via Martiri Della Libertà, 15 31030 Dosson di Casier - Treviso - Italy tel. (+39) 0422 4940 - fax. (+39) 0422 4941 info@came.com - www.came.com...
- Page 49 FA01624-RU PLX A RU Русский РУКОВОДСТВО ПОЛЬЗОВАТЕЛЯ...
- Page 50 позвонить по номеру, указанному на сайте. Дата изготовления указана в партии продукции, напечатанной на этикетке изделия. При необходимости свяжитесь с нами по адресу https://www.came.com/global/en/contact-us. С общими условиями продажи можно ознакомиться в официальных прейскурантах Came. Функция кнопок Эта кнопка позволяет включать и выключать соединение.
- Page 51 Данная кнопка позволяет регулировать громкость звонка: НИЗКАЯ, СРЕДНЯЯ, ВЫСОКАЯ, ВЫКЛЮЧЕН. Условные обозначения красного светодиодного индикатора Горит ровным светом: громкость выключена. ☞ Нажимая кнопку при интерком-связи, можно отрегулировать громкость аудио. Вспомогательное устройство 2 /Вызов консьержа. Сигнал о вызове с пульта консьержа. Данная...
- Page 52 Функция данной кнопки зависит от конфигурации, установленной на этапе установки. Если кнопка сконфигурирована как ИНТЕРКОМ, временно будет подключена ВТОРАЯ ФУНКЦИЯ, с возможностью активации вызовов ИНТЕРКОМ от 4 до 6. ☞ При активации второй функции, белые светодиодные индикаторы кнопок 1,2,3,4 мигают. Функция активирована приблизительно на 10 секунд и может быть...
- Page 53 Интерком Нажимая данную кнопку, можно выбрать желаемое абонентское устройство. Вызывающее абонентское устройство будет издавать звуковой сигнал свободной линии. Вызываемое абонентское устройство будет звонить с выбранным звонком. Нажмите данную кнопку вызываемого абонентского устройства для активации аудиосвязи. ☞ Если во время разговора между абонентскими устройствами поступает вызов с...
- Page 54 Вспомогательные функции Нажмите кнопку AUX для включения желаемой вспомогательной команды, Примеры: включение света, открытие ворот. ☞ Соответствующее функционирование может предусматривать дополнительные устройства. Переадресация вызова Если связь активна, выберите номер устройства, на который нужно перевести вызов.
- Page 55 Для активации аудиосвязи между двумя абонентскими устройствами, нажмите данную кнопку вызываемого абонентского устройства. Вызывная панель будет работать в режиме ожидания. Инт. 2 Инт. 1 Для обеспечения связи абонента 2 с вызывной панелью, необходим нажать эту кнопку абонента 1. Абонент 2 устанавливает связь с вызывной панелью. ☞...
- Page 56 Функции консьержа Данные функции доступны только в системах, оснащенных пультом консьержа. Оповещение о вызове с пульта консьержа CONTACT ME Включение светодиодного индикатора этой кнопки указывает на то, что консьерж просит перезвонить ему. ☞ Светодиодный индикатор выключается после звонка консьержу. Запрос о вызове консьержа Нажимая...
- Page 57 Отправка сигнала Паники консьержу Удерживайте данную кнопку в течение 2 секунд для отправки сигнала ПАНИКИ консьержу. PANIC! Белый светодиодный индикатор указывает на получение сигнала от консьержа. Сигнал тревоги Активация контакта тревожной сигнализации, соединенного со специальным входом внутреннего абонентского устройства, вызовет передачу сигнала тревоги...
- Page 58 Функция открытия ворот/статуса открытия ворот Удерживая кнопку в течение длительного времени, можно отправить команду открытия/закрытия автоматики. Светодиодный индикатор указывает на состояние автоматики. ☞ Система должна быть сконфигурирована и подготовлена соответствующим образом ☞ Функция должна быть активирована на абонентском устройстве на стадии...
- Page 59 Настройка мелодий ☞ Необходимо последовательно выполнить все этапы настройки, описанные ниже: Вход в режим настройки Нажмите и удерживайте кнопку в течение 3 секунд. Короткий звуковой сигнал и красный мигающий светодиодный индикатор подтвердят вход в режим настройки. 3 sec ... beep! Настройка...
- Page 60 Нажмите эту кнопку для выбора мелодии и выхода из режима настройки. Нажмите эту кнопку для выбора мелодии и продолжения настройки. ☞ Два коротких звуковых сигнала подтверждают вход в программирование мелодии вызова с лестничной площадки. Настройка мелодии при вызове с лестничной площадки. Нажмите...
- Page 61 Нажмите эту кнопку для выбора мелодии и выхода из режима настройки. Нажмите эту кнопку для выбора мелодии и продолжения настройки. ☞ Три коротких звуковых сигнала подтверждают вход в программирование количества звонков во время вызова. Настройка количества звонков во время вызова. Нажмите...
- Page 62 Нажмите эту кнопку для выхода из режима настройки. Технические характеристики Тип PLX A Напряжение электропитания от шины (=В) 15 ÷ 20 Потребление в режиме ожидания (мА) <1 Макс. потребляемый ток (мА) Потребление тока одним светодиодом (А) Диапазон температур хранения (°C)* -25 ÷...
- Page 63 Нормы и стандарты Изделие соответствует требованиям применимых директив, действовавших на момент изготовления. FCC - Это устройство соответствует требованиям части 15 стандартов электронного и телекоммуникационного оборудования FCC. Работа устройства должна осуществляться в соответствии с двумя нижеприведенными условиями: (1) устройство не должно создавать вредных помех / (2) устройство должно быть...
- Page 64 CAME S.p.A. Via Martiri Della Libertà, 15 31030 Dosson di Casier - Treviso - Italy tel. (+39) 0422 4940 - fax. (+39) 0422 4941 info@came.com - www.came.com...