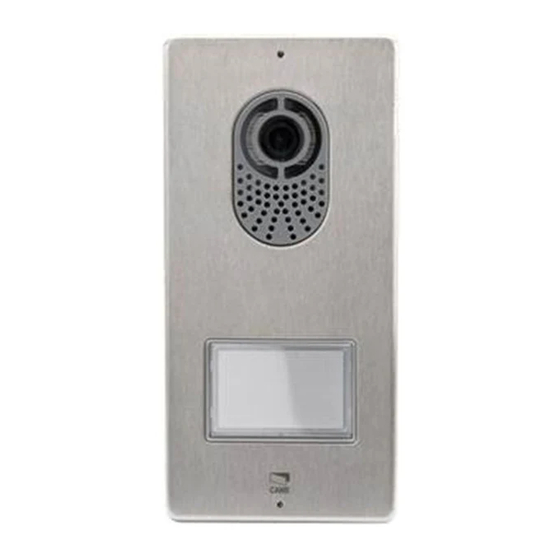
CAME PLACO-VC 001CS2PLC0 Manuel D'installation
Masquer les pouces
Voir aussi pour PLACO-VC 001CS2PLC0:
- Manuel de programmation (16 pages) ,
- Manuel d'installation (8 pages) ,
- Manuel de programmation (16 pages)
Table des Matières
Publicité
Les langues disponibles
Les langues disponibles
Liens rapides
Publicité
Table des Matières

Sommaire des Matières pour CAME PLACO-VC 001CS2PLC0
- Page 1 PLACO-VC PLACO-C 001CS2PLC0 001CS1PLC0 Manuale d’Installazione Installation Manual Handbuch für den Installateur Manuel d’Installation Manual de Instalación Manual de instalação Installatiehandleiding 24804672/19-07-2013...
-
Page 2: Avvertenze Generali All'apertura Dell'imballo
• In caso di guasto e/o cattivo funzionamento di un dispositivo, distaccarlo dall’alimentazione e non tentare nessuna riparazione; • Per l’eventuale riparazione rivolgersi solamente ad un centro di assistenza tecnica autorizzato dal costruttore e comunque utilizzare sempre i ricambi forniti da CAME S.p.A. -
Page 3: Installazione A Parete
Installazione a parete Tramite la chiave a brugola svitare le viti di bloccaggio e togliere la placca (figura 1). Fissare i tasselli in dota- zione e avvitare il posto esterno (figura 2) all’altezza desiderata tenendo conto del posizionamento dell’obiet- tivo della telecamera (figura 3). Far passare la tubazione con i conduttori d’impianto come indicato in figura 2. Estrarre il coprimorsetto in plastica ed effettuare i collegamenti (figura 4). -
Page 4: General Warnings
• In the case of device failure or malfunction, disconnect it from the power supply and do not tamper with it; • Should the unit be in need of repair, contact only a technical support centre authorised by the manufacturer and always use spare parts provided by CAME S.p.A. -
Page 5: Wall Mounting
Wall mounting With the Allen wrench, unscrew the blocking screws and remove the plate (figure 1). Fix the given plugs and screw the entry panel (figure 2) at the desired height considering the position of the lens of the camera (figure 3). -
Page 6: Allgemeine Hinweise
• Im Fall einer Störung und/oder des fehlerhaften Betriebs eines Geräts, den Netzstecker aus der Dose ziehen und keine eigenständigen Reparaturen durchführen; • Für etwaige Reparaturen wenden Sie sich ausschließlich an eine vom Hersteller genehmigte Kundendienststelle. In jedem Fall immer von der CAME S.p.A. gelieferte Ersatzteile verwenden Die Geräte dürfen nur für den Zweck, für den sie entwickelt wurden, verwendet werden. -
Page 7: Aufputz-Montage
Aufputz-Montage Mit dem Inbusschlüssel die Befestigungsschrauben lösen und die Blende abnehmen (Abbildung 1). Die mit- gelieferten Dübel einstecken und die Außenstation (Abbildung 2) unter Berücksichtigung der Objektivstel- lung der Telekamera in gewünschter Höhe anschrauben (Abbildung 3). Wie in Abbildung 2 dargestellt, die Rohrleitung mit den Anlagenleitern hindurchführen. -
Page 8: Avertissements Généraux
• Pour toute réparation, adressez-vous uniquement à un centre d’assistance technique agréé par le fabricant et dans tous les cas utilisez toujours des pièces de re- change fournies par CAME s.p.a. ; Les appareils devront être destinés uniquement à l’usage pour lequel ils ont expressément été conçus . -
Page 9: Installation Murale
Installation murale À l’aide de la clé à six pans, dévisser les vis de blocage et retirer la plaque (figure 1). Fixer les chevilles fournies et visser le poste extérieur (figure 2) à la hauteur souhaitée en tenant compte du positionnement de l’objectif de la caméra (figure 3). -
Page 10: Advertencias Generales
• Si es necesario efectuar reparaciones, acuda únicamente a un centro de asistencia técnica autorizado por el fabricante, y en cualquier caso utilice siempre los recam- bios suministrados CAME S.p.A. Los aparatos deberá destinarse únicamente al uso para el que han sido expresamente diseñados. -
Page 11: Instalación De Pared
Instalación de pared Usando la llave Allen, desenrosque los tornillos de fijación y quite la placa (figura 1). Fije los tacos suministrados y atornille la placa externa (figura 2) a la altura deseada, teniendo en cuenta la colocación del objetivo de la cámara(figura 3). -
Page 12: Advertências Gerais
• Em caso de reparos, dirija-se somente a um centro de assistência técnica autorizado pelo fabricante e em todo modo, use sempre peças de reposição fornecidos pela CAME S.p.A. Os aparelhos devem ser destinados somente para o uso ao qual foram expressamente concebidos. -
Page 13: Instalação De Parede
Instalação de parede Com uma chave Allen, desatarraxe os parafusos de bloqueio e retire a placa (figura 1). Fixe as buchas forneci- das e aparafuse o posto externo na altura desejada (figura 2), considerando a posição do objectivo da câmara (figura 3). -
Page 14: Inhoud Van De Verpakking
• In geval van defecten en/of problemen met een apparaat, schakelt u het los van het stroomnet en probeert u het op geen enkele manier te reperaren; • Wend u voor de eventuele reparatie uitsluitend tot een door de fabrikant erkende technische service en zorg ervoor dat altijd originele onderdelen van CAME S.p.A. -
Page 15: Montage Knoppenmodules
Opbouwversie Verwijder met een inbussleutel de borgschroeven en verwijder de plaat (afbeelding 1). Monteer de meegele- verde pluggen en zet de buitenpost vast (afbeelding 2) op de gewenste hoogte, rekening houdend met de cameralens (afbeelding 3). Haal de buis met de systeemgeleiders erdoor zoals op de afbeelding 2. Verwijder de plastic bedekking op de aansluitcontacten en maak de aansluitingen (afbeelding 4). - Page 16 CAME Group S.p.A Viale delle Industrie, 89/c 31030 Dosson di Casier-TREVISO-Italy www.came.it-info@came.it...


