Publicité
Les langues disponibles
Les langues disponibles
Liens rapides
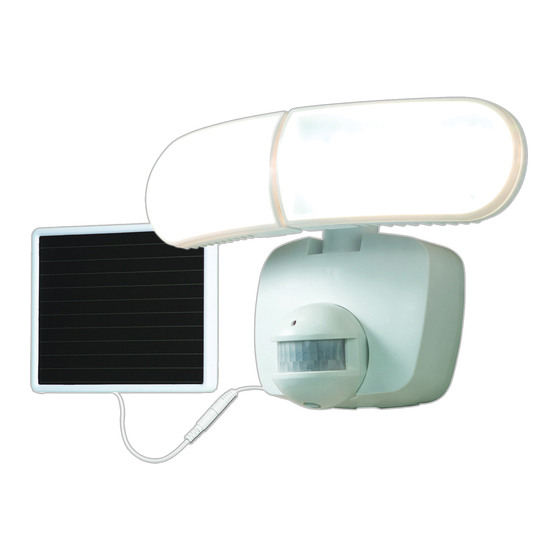
MST800LW
MST800L
ENGLISH
ITEMS REQUIRED
(Purchase separately)
• Phillips screwdriver
HOW IT WORKS
During the daylight hours, the solar panel turns the sunlight
into energy that is stored in the rechargeable battery pack.
Your light features a motion sensor that turns the light ON
at night when motion is detected. This light is equipped
with a photocell, which only allows the fixture to turn ON
during the nighttime hours.
WARNINGS AND CAUTIONS
INSTRUCTIONS PERTAINING TO A RISK OF FIRE OR INJURY TO PERSONS.
To reduce the risk of fire or injury to persons, read and follow these instructions:
• DO NOT replace batteries.
• DO NOT dispose of this product in fire. Batteries inside this product may explode or leak.
• DO NOT puncture this battery pack. DO NOT work on this battery pack
• DO NOT disassemble fixture. The fixture does not have any user serviceable parts.
• For outdoor use only.
• Lithium-Ion batteries must be disposed of in accordance with local waste ordinances and
regulations.
• Do not operate a luminaire with a missing or damaged lens.
• Fixture is suitable for wall mount only. NOT suitable for ground mount installation.
• Do not cut the solar panel wire. Discontinue use if the wire becomes frayed or broken.
SAVE THESE INSTRUCTIONS.
FOR BEST RESULTS
• Allow fixture to receive four full days of sunlight before turning fixture ON.
• Locate solar panel in an area that will receive the
maximum amount of sunlight during the daylight
hours. Locate panel to receive at least 3-4 hours of
direct sunlight daily.
• Test your charged unit before permanently installing.
• Install the motion sensor 8-12 feet above the ground.
(Motion sensor is less sensitive above 12 feet.)
• Locate motion sensor so motion moves across the
detection zone (Fig. 1).
• Locate sensor away from heat producing sources to
• prevent false triggering. Also be very careful not to
include objects such as windows, white walls and
water in the detection zone.
Questions?/Des questions?/ ¿Preguntas? 1-800-334-6871 ConsumerProducts@eaton.com
PACKAGING CONTENTS/ CONTENIDO DEL PAQUETE
A. Light fixture with 12 in. lead wire connector
Accesorio para la luz con conector de cable de 12 pulg
Luminaire avec fil de sortie et capuchon de connexion
de 30,5 cm (12 po)
(Single head position)
(Twin head position)
(Posición de cabezal simple)
(Posición de cabezal doble)
(Position à tête regroupée)
(Position à tête séparée)
180 degrees
Fig. 1
Instruction Manual/Manuel d'instructions/ Instrucciones
B. Solar panel with 15 ft. cord
Panel solar con cable de 15 pies
Panneau solaire avec cordon
de 4,6 m (15 pi)
D. (4) Solar panel mounting screws
(4) Tornillos de montaje
del panel solar
(4) Vis de montage de panneau
solaire
• Locate sensor away from moving objects such as trees, large shrubs and street traffic.
• You will need to adjust the angle of the solar panel throughout the year as seasons change
in order to keep it at the best possible angle to the sun.
• Keep solar panel clear of any objects that will block the sunlight. It will be necessary to
periodically clean the solar panel with soft wet cloth.
• During periods of several cloudy days, the battery may fall below the operating level and
Up to
will need to be recharged with sunlight.
70 feet
MOUNTING YOUR FIXTURE
1. Locate area in which you would like to install your
light fixture.
NOTE: For fixture to operate properly, the solar panel (B)
must be located in an area that will receive the maximum
amount of sunlight and is free from obstructions.
2. Using the fixture mounting screws (C) provided,
mount the snap-in mounting bracket (E) to a solid
surface 8-12 feet above the ground by placing the
screws through the center holes of the bracket.
Make sure the arrow on the bracket is pointing up.
(Fig. 2).
3. Slide fixture down over the snap-in mounting
bracket, making sure that the fixture engages the
guide ribs. Continue sliding down until the fixture
snaps into the locking tab.
4. Using the solar panel mounting screws (D) provided,
mount solar panel (B) to a solid surface (Fig. 3).
Adjust the angle of the solar panel (B) so that it will
receive the maximum amount of direct sunlight
during the daylight hours.
NOTE: For best results, locate panel to receive at least
3-4 hours of direct sunlight daily.
5. Carefully route the wire from the solar panel (B)
to the fixture (A) and plug it into the connector
extending from the side of the fixture housing (A)
(Fig. 4). Make sure to push the connector plugs
tightly together until you hear two clicks to ensure
they are fully engaged.
1
C. (2) Fixture mounting screws
(2) Tornillos de montaje del accesorio
(2) Vis de montage du luminaire
E. Snap-in mounting bracket
Soporte de montaje de sujeción
a presión
Support de montage encastrable
Fig. 2
E
C
C
Fig. 3
D
D
B
D
D
Fig. 4
A
B
Publicité

Manuels Connexes pour Eaton ALL-PRO MST800LW


Sommaire des Matières pour Eaton ALL-PRO MST800LW
- Page 1 Instruction Manual/Manuel d’instructions/ Instrucciones Questions?/Des questions?/ ¿Preguntas? 1-800-334-6871 ConsumerProducts@eaton.com PACKAGING CONTENTS/ CONTENIDO DEL PAQUETE A. Light fixture with 12 in. lead wire connector B. Solar panel with 15 ft. cord C. (2) Fixture mounting screws Accesorio para la luz con conector de cable de 12 pulg...
- Page 2 WARRANTY OF MERCHANTABILITY OR FITNESS FOR ANY PARTICULAR PURPOSE. DURATION 1 min 1. Slide power switch ON. Eaton warrants to customers that, for a period of one year from the date of purchase, Test 3 min 2. Rotate knob on bottom of the sensor Eaton products will be free from defects in materials and workmanship.
- Page 3 PARA OBTENER LOS MEJORES RESULTADOS NOTA: El accesorio tiene un período de calentamiento de alrededor de un minuto. Durante este período, se • Deje que el accesorio capte luz solar durante cuatro días completos antes de encenderlo. encenderá la luz y el accesorio puede ser probado. •...
- Page 4 Esta garantía se extiende sólo para el comprador original del producto. Un • Placez le détecteur de mouvements pour avoir un recibo del comprador u otra prueba de la fecha de compra original aceptable para Eaton. Esto mouvement à travers la zone de détection (Fig. 1).
- Page 5 PARTICULIER. nouvel essai. Eaton garantit à ses clients, pendant une période de une ans à compter de la date d’achat, 6. Faites tourner le bouton au bas du capteur pendant une durée de 3 m. La lumière que ses produits Eaton sont exempts de tout défaut de matériaux et de fabrication. En vertu s’allume la nuit lorsqu’un mouvement est détecté...