Publicité
Les langues disponibles
Les langues disponibles
Liens rapides
Publicité

Manuels Connexes pour Lamona LAM1805


Sommaire des Matières pour Lamona LAM1805
- Page 1 LAM1805 www.howdens.com/appliance-registration...
- Page 3 CONTENTS 1. SAFETY INFORMATION...................3 2. SAFETY INSTRUCTIONS.................5 3. INSTALLATION....................7 4. PRODUCT DESCRIPTION................9 5. DAILY USE...................... 10 6. HINTS AND TIPS.................... 12 7. CARE AND CLEANING...................13 8. TROUBLESHOOTING..................14 9. TECHNICAL DATA..................15 10. ENERGY EFFICIENCY................. 16 11. GUARANTEE....................17 12. ENVIRONMENTAL CONCERNS..............17 Subject to change without notice.
- Page 4 WARNING: The appliance and its accessible parts become • hot during use. Keep children and pets away from the appliance when in use and when cooling down. If the appliance has a child safety device, it should be • activated. Children shall not carry out cleaning and user maintenance •...
- Page 5 After use, switch off the hob element by its control and do • not rely on the pan detector. If the glass ceramic surface / glass surface is cracked, • switch off the appliance and unplug it from the mains. In case the appliance is connected to the mains directly using junction box, remove the fuse to disconnect the appliance from power supply.
- Page 6 • Before carrying out any operation make • Do not change the specification of this sure that the appliance is disconnected appliance. from the power supply. • Remove all the packaging, labelling and • Make sure that the parameters on the protective film (if applicable) before first rating plate are compatible with the use.
- Page 7 • Do not keep hot cookware on the control • Concerning the lamp(s) inside this product panel. and spare part lamps sold separately: • Do not put a hot pan cover on the glass These lamps are intended to withstand surface of the hob.
- Page 8 3.4 Connection diagram 380 - 415V 2N ~ 220 - 240V 1N ~ 220 - 240V ~ 220 - 240V ~ 220 - 240V ~ 220 - 240V ~ 220 - 240V ~ 220 - 240V ~ Wiring colours Blue Blue - Gray Brown Black...
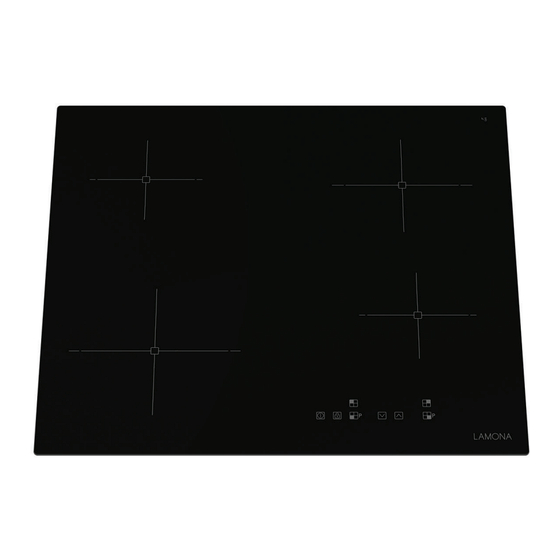
- Page 9 4. PRODUCT DESCRIPTION 4.1 Cooking surface layout Induction cooking zone Control panel 4.2 Control panel layout Use the sensor fields to operate the appliance. The displays, indicators and sounds tell which functions operate. Sensor Function Comment field On / Off To activate and deactivate the hob.
- Page 10 Display Description Booster operates. There is a malfunction. + digit A cooking zone is still hot (residual heat). Lock / Child Safety Device operates. Incorrect or too small cookware or no cookware on the cooking zone. Automatic Switch Off operates. 5.
- Page 11 directly in the bottom of the cookware. The To activate the function: activate the hob glass ceramic is heated by the heat of the with . Do not set any heat setting. Touch cookware. for 4 seconds. comes on. Deactivate The indicator appears when a cooking the hob with...
- Page 12 • The heat setting display of the reduced zone selected last. The cooking zones will zones changes between the initially continue operating with the reduced heat selected heat setting and the reduced heat setting. Change the heat settings of the setting.
- Page 13 Heat setting Use to: Time Hints (min) Keep cooked food warm. as nec‐ Put a lid on the cookware. essary 1 - 2 Hollandaise sauce, melt: butter, 5 - 25 Mix from time to time. chocolate, gelatine. Solidify: fluffy omelettes, baked 10 - 40 Cook with a lid on.
- Page 14 stains, shiny metallic discoloration. Clean • Remove shiny metallic discoloration: the hob with a moist cloth and a non- use a solution of water with vinegar and abrasive detergent. After cleaning, wipe clean the glass surface with a cloth. the hob dry with a soft cloth. 8.
- Page 15 Service Centre. Give the data from the rating plate. Give also three digit letter code for the 9. TECHNICAL DATA 9.1 Rating plate Model LAM1805 PNC 949 492 609 00 Typ 64 B4A 00 AA 220 - 240 V / 400 V 2N, 50 / 60 Hz Induction 6.9 kW...
- Page 16 It changes with the material and dimensions of the cookware. 10. ENERGY EFFICIENCY 10.1 Product Information Sheet according to Ecodesign Regulation Model identification LAM1805 Type of hob Built-In Hob Number of cooking zones Heating technology Induction Diameter of circular cooking zones (Ø)
- Page 17 MUST BE ACCOMPANIED BY THE PROOF OF PURCHASE. • The product must be correctly installed Call the LAMONA Service Line on: and operated in accordance with the Within UK 0344 460 0006 manufacturer's instructions and used for normal domestic purposes.
- Page 18 TABLE DES MATIÈRES 1. INFORMATIONS DE SÉCURITÉ..............18 2. CONSIGNES DE SÉCURITÉ................20 3. INSTALLATION....................23 4. DESCRIPTION DE L'APPAREIL..............24 5. UTILISATION QUOTIDIENNE.................25 6. CONSEILS.......................28 7. ENTRETIEN ET NETTOYAGE................29 8. DÉPANNAGE....................30 9. CARACTÉRISTIQUES TECHNIQUES............32 10. RENDEMENT ÉNERGÉTIQUE..............32 11. EN MATIÈRE DE PROTECTION DE L'ENVIRONNEMENT......33 Sous réserve de modifications.
- Page 19 AVERTISSEMENT : L'appareil et ses parties accessibles • deviennent chauds pendant l'utilisation. Tenez les enfants et les animaux éloignés de l’appareil lorsqu’il est en cours d’utilisation et de refroidissement. Si l'appareil est équipé d'un dispositif de sécurité enfants, • nous vous recommandons de l'activer. Le nettoyage et l'entretien par l'usager ne doivent pas être •...
- Page 20 Les objets métalliques tels que les couteaux, les • fourchettes, les cuillères et les couvercles ne doivent pas être placés sur la surface de la table de cuisson car ils peuvent devenir chauds. N'utilisez pas l'appareil avant de l'avoir installé dans la •...
- Page 21 éviter que la moisissure cause des l'appareil ou les récipients brûlants lorsque gonflements. vous branchez l'appareil à une prise • Protégez la partie inférieure de l'appareil électrique. de la vapeur et de l'humidité. • N'utilisez pas d'adaptateurs multiprise et • N'installez pas l'appareil à proximité d'une de rallonges.
- Page 22 • Ne posez pas de couverts ou de • Prenez soin de ne pas laisser tomber couvercles de casseroles sur les zones de d’objets ou de récipients sur l’appareil. La cuisson. Ils peuvent devenir très chauds. surface risque d’être endommagée. •...
- Page 23 • Coupez le câble d'alimentation au ras de l'appareil et mettez-le au rebut. 3. INSTALLATION 3.3 Câble de connexion AVERTISSEMENT! • La table de cuisson est fournie avec un Reportez-vous aux chapitres concernant câble d’alimentation. Le câble de la sécurité. raccordement ne peut être remplacé...
- Page 24 3.5 Assemblage chauffer les éléments rangés dans le tiroir durant la cuisson. Si vous installez la table de cuisson sous une hotte, reportez-vous aux instructions d’installation de la hotte pour connaître la distance minimale entre les appareils. min. min. 500mm 50mm Si l'appareil est installé...
- Page 25 Les touches sensitives permettent de faire fonctionner l'appareil. Les affichages, les voyants et les signaux sonores indiquent les fonctions activées. Touche Fonction Commentaire sensiti‐ En fonctionnement / A l’ar‐ Pour allumer et éteindre la table de cuisson. rêt Touches Verrouil / Disposi‐ Pour verrouiller ou déverrouiller le bandeau de com‐...
- Page 26 5.5 Indicateur de chaleur résiduelle • vous avez renversé quelque chose ou placé un objet sur le bandeau de commande pendant plus de 10 secondes AVERTISSEMENT! (une casserole, un torchon, etc.). Un signal sonore retentit et la table de Tant que l’indicateur est allumé, il cuisson s'éteint.
- Page 27 modification accidentelle du réglage du pendant 3 secondes. apparaît sur le côté niveau de cuisson. avant gauche et avant droit de Réglez d'abord le niveau de cuisson. l’écran. Appuyez sur la partie tactile de la zone arrière droite pour choisir l’une des Pour activer la fonction : appuyez sur options suivantes : s'affiche pendant 4 secondes.
- Page 28 6. CONSEILS pas de récipient plus grand qu’indiqué AVERTISSEMENT! dans la section « Caractéristiques des zones de cuisson ». Évitez de garder les Reportez-vous aux chapitres concernant récipients à proximité du bandeau de la sécurité. commande durant la cuisson. Cela peut affecter le fonctionnement du bandeau de 6.1 Récipients de cuisson commande ou activer accidentellement les...
- Page 29 Réglages de Utilisez pour : Durée Conseils la tempéra‐ (min) ture Gardez au chaud les aliments cuits. si né‐ Placez un couvercle sur le réci‐ cessai‐ pient. 1 - 2 Sauce hollandaise, faire fondre : 5 - 25 Mélangez de temps en temps. beurre, chocolat, gélatine.
- Page 30 7.2 Nettoyage de la table de cuisson calcaire, traces d'eau, taches de graisses, décoloration métallique brillante. Nettoyez • Enlevez immédiatement : le plastique la table de cuisson à l'aide d'un chiffon fondu, les feuilles de plastique, le sel, le humide et d'un détergent non abrasif. sucre et les aliments contenant du sucre, Après le nettoyage, essuyez la table de car la saleté...
- Page 31 Problème Cause possible Solution Un signal sonore retentit et la Vous avez posé quelque chose Retirez l’objet des touches sensiti‐ table de cuisson se met à l’ar‐ sur une ou plusieurs touches sen‐ ves. rêt. sitives. Un signal sonore retentit lors‐ que la table de cuisson est à...
- Page 32 9. CARACTÉRISTIQUES TECHNIQUES 9.1 Plaque signalétique Modèle LAM1805 PNC 949 492 609 00 Type 64 B4A 00 AA 220 - 240 V / 400 V 2N, 50 / 60 Hz Induction 6.9 kW Fabriqué...
- Page 33 Diamètre des zones de cuisson circulaires (Ø) Avant gauche 21.0 cm Arrière gauche 14.5 cm Avant droite 14.5 cm Arrière droite 18.0 cm Consommation d’énergie par zone de cuisson Avant gauche 174.2 Wh/kg (EC electric cooking) Arrière gauche 183.9 Wh/kg Avant droite 177.2 Wh/kg Arrière droite...
- Page 36 Product serial number (Place sticker here) ISSUE V2 141223...