Publicité
Les langues disponibles
Les langues disponibles
Liens rapides
ATSC CERTIFIED *
DIGITAL TELEVISION
Before connecting, operating or adjusting this product, please read the instructions completely.
Please keep this manual for future reference.
All manuals and user guides at all-guides.com
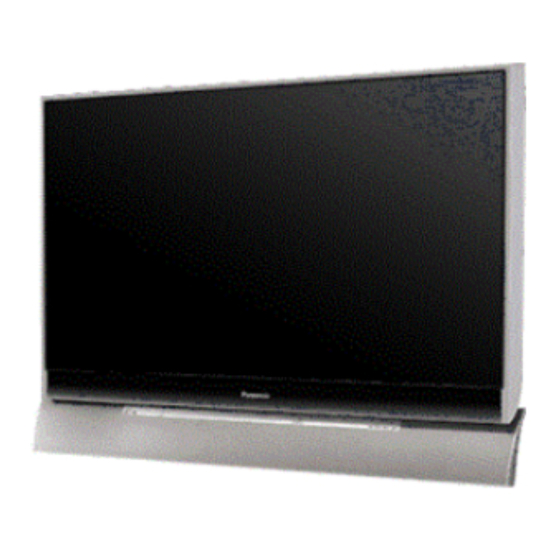
Multimedia Projection HDTV
Operating Instructions
Model No.
* The presence of the DTV certification mark indicates that this product will successfully
receive digital television transmissions that conform to any and all of the video formats
described in the ATSC Digital Television Standard.
PT-52LCX15K
LSQT1132 A
Publicité

Manuels Connexes pour Panasonic PT-52LCX15K


Sommaire des Matières pour Panasonic PT-52LCX15K
- Page 1 All manuals and user guides at all-guides.com Multimedia Projection HDTV Operating Instructions PT-52LCX15K Model No. * The presence of the DTV certification mark indicates that this product will successfully receive digital television transmissions that conform to any and all of the video formats described in the ATSC Digital Television Standard.
- Page 2 All manuals and user guides at all-guides.com IMPORTANT SAFETY INSTRUCTIONS CAUTION RISK OF ELECTRIC SHOCK DO NOT OPEN WARNING: To reduce the risk of electric shock, do not remove cover or back. No user-serviceable parts inside. Refer servicing to qualified service personnel. This symbol warns the This symbol alerts the The pictorial...
- Page 3 THIS APPARATUS. CAUTION (1) This Projection Display is intended to be used with the following TV stand: model TY-52LC65C for the PT-52LCX15K. Use with other stands may result in the Projection Display becoming unstable, possibly causing injury. (2) This Projection Display should not be exposed to direct sunlight, extreme temperatures or moisture, as this can result in serious irreparable damage.
- Page 4 All manuals and user guides at all-guides.com Dear Panasonic Customer Welcome to the Panasonic family of customers. We hope that you will have many years of enjoyment from your new Projection Display. To obtain maximum benefit from your set, please read these Instructions before making any adjustments, and retain them for future reference.
- Page 5 Other Remote Control Quick Reference Guide (Operating peripheral equipment) ..58 Warning Indicators ..................65 Information ! Replacing the lamp unit ................66 Troubleshooting ..................68 Specifications ..................69 Cleaning / Panasonic Friendly Recommendations to Customer ..70 Limited Warranty ..................71 Other Information ..................72 Index ......................79...
- Page 6 All manuals and user guides at all-guides.com Before Using Receiver Location Accessories Locate for comfortable viewing. Avoid placing where 1. Remote Control (EUR7627Z70) sunlight or other bright light (including reflections) will fall 2. Batteries 2 “AA” on the screen. Use of some types of fluorescent lighting can reduce Remote Control transmitter range.
- Page 7 All manuals and user guides at all-guides.com Remote Control Battery Installation Helpful Hints: Requires two AA batteries (supplied). (1) For frequent remote control users, replace old batteries with Alkaline batteries for longer battery . While pressing in on the catch, open cover in life.
- Page 8 All manuals and user guides at all-guides.com Before Using (continued) Glossary and Acronyms CC (Closed Captioning) ATSC (Advanced Television Systems Committee) Standardization body that developed the Digital Television Terrestrial formats. OSD (On-Screen Display) HDMI (High Definition Multimedia Interface) Interface that supports every uncompressed digital MSO (Multiple system owner/operator) format as well as all existing multi-channel audio format on a single cable.
- Page 9 All manuals and user guides at all-guides.com Location of Controls Illuminated Remote Control Press to switch to previously 11 R-TUNE viewed channel or input modes. While remote is in VCR or DVD 12 REW mode, press to rewind. While remote is in VCR or DVD POWER 13 PLAY mode, press to play.
- Page 10 All manuals and user guides at all-guides.com Location of Controls (continued) Controls and Terminals on the Projection Display Front View Press to display Main 1 MENU Menu. Press to select menu and 2 OK sub-menu items. 3 TV/VIDEO Changes Input source. Press to adjust TV sound 4 VOL -+ / ◄►...
- Page 11 All manuals and user guides at all-guides.com Rear View Vent Vent Input terminal for an Video Out Output video signal Connector 1 VHF/UHF Cable In antenna or cable box signal. Audio Out Output audio signal Connector (Analog) DIGITAL AUDIO Output audio signal (Digital) Component Video Connect from other...
- Page 12 All manuals and user guides at all-guides.com Installation Notes on con nec tions • Turn off the power supply for all com po nents before making any connections. • If the cables necessary for connecting a component to the system are not included with the component or available as an option, you may need to fashion a cable to suit the component concerned.
- Page 13 All manuals and user guides at all-guides.com Cable Connection For proper reception of analog or digital cable channels, a cable service connection is required. Use this confi guration when connecting the projection display to a cable TV system. Cable Box Terminal on the back of the Connect the cable from the antenna or Cable Box...
- Page 14 All manuals and user guides at all-guides.com Installation (continued) How to connect to Input Terminals 1, 2 and 3 Connect a VCR or other peripheral equipment (S-VHS VCR) S-VIDEO AUDIO Similar connections are available at input terminals 1-3. (PP. 10-11)
- Page 15 All manuals and user guides at all-guides.com (VHS VCR) VIDEO AUDIO Similar connections are available at input terminals 1-3. (PP. 10-11) Notes: • Input 3 is located on the front of the unit. (P. 10) • Select the desired VIDEO input position by pressing the TV/VIDEO button. (P. 32) •...
- Page 16 All manuals and user guides at all-guides.com Installation (continued) How to con nect the COMPONENT VIDEO Input Terminals Because each Y, P , and P signal is input independently, the Component signal allows for more accurate color reproduction. Please refer to the operating instructions for the jack configuration, of the DVD Player or other device, to be connected to this unit.
- Page 17 All manuals and user guides at all-guides.com How to connect the AV OUT Terminals You can connect a VCR to the AV OUT terminal to record the program you are viewing on-screen. An external monitor can also be connected to the AV OUT terminals. Connect the VCR as shown below. Recording Equipment (S-VHS /VHS VCR) VIDEO...
- Page 18 All manuals and user guides at all-guides.com Installation (continued) How to connect the Amplifier Analog Audio Out To listen to the audio through a separate stereo system, connect an external audio amplifier to AUDIO OUT on back of unit. Stereo System (A Stereo Amplifier and Speakers) AUDIO Audio Adjustments...
- Page 19 All manuals and user guides at all-guides.com Digital Audio Out Use the diagram below to connect the Digital Audio Output of your Projection Display to a Dolby Digital decoder. Dolby Digital 5.1 channel surround sound delivers digital-quality sound. Dolby Digital provides five discrete full-bandwidth channels for front left, front right, center, surround left and surround right, plus a LFE (Low Frequency Effect) subwoofer channel, For a full Home Theater sound experience, an external Dolby Digital decoder and a multichannel amplifier must be connected to the Digital Audio Out jack on the unit.
- Page 20 All manuals and user guides at all-guides.com Installation (continued) How to connect the PC IN Terminals Connecting a PC to PC IN COMPUTER RGB OUT AUDIO OUT Connect a cable which matches the audio output terminal on the computer. Audio cable (M3 stereo mini pin-PIN cable) Conversion adapter (If necessary)
- Page 21 All manuals and user guides at all-guides.com RGB signals that can be input The table below lists the different types of RGB signals that can be input. If a signal which differs greatly from the types listed below is input, the picture may not be displayed correctly, or a black background may be displayed.
- Page 22 All manuals and user guides at all-guides.com Installation (continued) How to connect the HDMI input terminal About HDMI HDMI is the first all digital consumer electronics A/V interface that supports several uncompressed standards, enhanced and high definition video formats as well as all existing multi-channel audio formats. One jack supports both video and audio information.
- Page 23 All manuals and user guides at all-guides.com Procedure Connect the HDMI output from the set top box or a DVD player to the HDMI input on the back of the unit. • If you cannot display the picture because your Digital Set Top Box does not have a Digital Out terminal setting, use the Component Video Input (or the S-Video Input or Video Input).
- Page 24 All manuals and user guides at all-guides.com Power ON / OFF The Power Indicator ACTION POWER POWER Power – OFF LIGHT Red (blinking) Power – OFF (Now cooling) RCVR DBS/CBL TV/VIDEO SLEEP EXIT Green Power – ON Green (blinking) Power – ON (Preparing to light lamp) Notes: •...
- Page 25 All manuals and user guides at all-guides.com First Time Setup Press to select “ANT In”. For your convenience, First Time Set up menu will be displayed on screen when the set is turned on for the first time. If needed, follow the menus and Press to select “Cable”...
- Page 26 All manuals and user guides at all-guides.com Basic Menu Navigation Button operation during Menu display (Menu navigation) POWER Return to Main Menu. LIGHT MENU Press to display Main menu. RCVR DBS/CBL TV/VIDEO SLEEP EXIT EXIT Picture Audio Timer (PC input menu) Lock Memory Card MENU...
- Page 27 All manuals and user guides at all-guides.com Other Adjust sub-menu. Press to select Other Adjust. Press to enter the menu. P i c t u r e C o l o r T e m p N o r m a l P i c t u r e P C A d j u s t N o r m a l...
- Page 28 All manuals and user guides at all-guides.com Tuning channels Press to select “Language”. POWER LIGHT Press to display Language RCVR DBS/CBL screen. TV/VIDEO SLEEP EXIT S e t u p C H s c a n A l l L a n g u a g e P r o g r a m c h a n n e l I n p u t l a b e l s MENU...
- Page 29 All manuals and user guides at all-guides.com Automatic program setting Press to select “ANT In”. Automatically searches and adds receivable channels to memory. Press MENU to display the Main Menu screen. Press to select “Antenna” or “Cable”. A u t o p r o g r a m Press to select “Setup”...
- Page 30 All manuals and user guides at all-guides.com Tuning channels (continued) Manual program setting Press to select “Edit”. Use this procedure when changing setting of receiving channels or changing the channel dis play. Also, use to add or delete channels from channel list manually.
- Page 31 All manuals and user guides at all-guides.com Press to select “Caption Press to select “Favorite”. detail”. Press to display the Press to select Favorite Caption input screen. number. Favorite Apply Favorite Press to move cursor to “Caption”. Press to move cursor to “Apply”.
- Page 32 All manuals and user guides at all-guides.com Projection Display operation I n p u t s e l e c t [ 1 ] T V [ 2 ] C o m p o n e n t 1 POWER [ 3 ] C o m p o n e n t 2 [ 4 ] C o m p o n e n t 3 LIGHT...
- Page 33 All manuals and user guides at all-guides.com Direct Tuning Example Using the CH/ VOL Button Channel Banner Step Action Select desired channel: Display Press 1 Press CH or NUMBER keys. Press 5 Adjust to desired volume level: Press - Press VOL + or VOL -. Press 1 15-1 Notes:...
- Page 34 All manuals and user guides at all-guides.com Projection Display operation (continued) To delete a favorite channel Audio Mute A memorized channel can be removed from the Press MUTE to instantly mute the sound. Press again to list by holding down FAVORITE while it’s position restore the previous sound level.
- Page 35 All manuals and user guides at all-guides.com MTS Stereo broadcast Select Audio Mode for TV Viewing Multi-channel Television Sound Stereo broadcast. Se lect STEREO audio mode. Digital mode • If stereo broadcast is weak and the display flickers, select MONO audio mode for pos si bly better results. Press SAP to select the next audio track (if available) when receiving a digital channel.
- Page 36 All manuals and user guides at all-guides.com ASPECT Con trols Notes: • When a 1080i or 720p signal is being received, the mode is set to FULL, and aspect switching is not possible. POWER • If the mode selected does not match the aspect ratio of the input signal, the original picture quality may be affected.
- Page 37 All manuals and user guides at all-guides.com Split screen Returning to one screen (Left screen) SPLIT SWAP POWER DVD/VCR CH Press to return. LIGHT RCVR DBS/CBL TV/VIDEO TV/VIDEO SLEEP EXIT Notes: • Sound from the Left screen is output from the speakers on the Projection Display set.
- Page 38 All manuals and user guides at all-guides.com Split screen (continued) Select desired input mode of the Right screen Press to select the desired input TV/VIDEO mode. Component 1* Video 3* Component 2* Video 2* Component 3* Video 1* HDMI* * If SKIP is set as the Input Label setting, the mode will not be changed.
- Page 39 All manuals and user guides at all-guides.com Picture Adjustments Normal / Picture / Brightness / Color / Tint / Sharpness / Color Temp POWER LIGHT Press to select each item. RCVR DBS/CBL TV/VIDEO SLEEP EXIT Press to adjust each item. MENU MENU RETURN...
- Page 40 All manuals and user guides at all-guides.com Picture Adjustments (continued) Picture Mode PC Adjust Lets you choose one of three pre-set Picture Modes You can adjust the picture when viewing a signal from a that best suits the program to which you are viewing. Selecting this feature will also affect Color Temperature setting.
- Page 41 All manuals and user guides at all-guides.com Depending on the signal being input, some menu items may or may not be adjustable and some functions may or may not be available. Other Adjust Item Explanations 3D I/P Film media (taken at 24 frames per second) is faithfully reproduced on the unit.
- Page 42 All manuals and user guides at all-guides.com Audio Ad just ments Normal / Bass / Treble / Balance POWER Press to select each item. LIGHT RCVR DBS/CBL TV/VIDEO SLEEP EXIT Press to adjust each item. A u d i o N o r m a l A u d i o M o d e S t a n d a r d...
- Page 43 All manuals and user guides at all-guides.com Depending on the signal being input, some menu items may or may not be adjustable and some functions may or may not be available. Other Adjust Other detailed audio adjustments can be made. You can hear a deeper, 3-D sound effect using just the unit’s two front speakers.
- Page 44 All manuals and user guides at all-guides.com Sleep Timer Feature Set Sleep Timer Press to set unit to shut itself off after a preselected POWER amount of time. LIGHT RCVR DBS/CBL TV/VIDEO SLEEP SLEEP EXIT Press to select “0,” “30,” “60,” or “90”.
- Page 45 All manuals and user guides at all-guides.com Lock Feature This Projection Display incorporates V-CHIP technology to block the viewing of movies and television programs POWER according to the rating category. There are four (4) Content Advisory Categories: MPAA (Motion Picture LIGHT Association of America), TV Parental Guidelines Ratings, Canadian English Language Ratings and...
- Page 46 All manuals and user guides at all-guides.com Lock Feature (continued) Lock Set Block program This television incorporates V-Chip technology to block Select Lock mode to prevent viewing of video games, the viewing of movies and television programs according VCR tapes, channels and Video modes. to the rating category.
- Page 47 All manuals and user guides at all-guides.com U.S. TV PROGRAMS RATINGS Monitor out setting CHART Press to select “Program”. The TV Parental Guidelines has 7 levels of age-based ratings that can be selected. These 7 levels are split into 2 age-based groups: Youth Age-based Ratings and Guidance Age-based Press to enter program lock Ratings.
- Page 48 All manuals and user guides at all-guides.com Lock Feature (continued) CANADIAN ENGLISH RATINGS CHART Blocking Messages Various Blocking messages are displayed on-screen Exempt - Exempt programming includes: news, depending upon the type of blocking you have selected sports, documentaries and other information in the Lock menu.
- Page 49 All manuals and user guides at all-guides.com Photo Viewer Still image data ( JPEG) made with a digital camera or Insert/Remove the Card digital video camera can be played back using an SD Card. CAUTION WARNING Only insert or remove the SD Card after turning the unit off.
- Page 50 All manuals and user guides at all-guides.com Photo Viewer (continued) JPEG thumbnail The screen below is displayed automatically while a card POWER is inserted. If “Is memory card in?” appears, check if a LIGHT card is inserted. If not, turn the unit power off, correctly insert a card, then turn the unit back on.
- Page 51 All manuals and user guides at all-guides.com Card Warning Messages Exit Photo Viewer Pressing SD while a JPEG thumbnail is displayed If there is a problem with the card or card data, the redisplays the last viewed input. following messages will appear. Message description Is memory card in? A card may not be inserted, or the card...
- Page 52 All manuals and user guides at all-guides.com Photo Viewer (continued) Single Play Mode Rotate image Pressing the ◄► buttons rotates the image 90° at a Press ▲▼◄► to move cursor to desired file in INDEX time. AREA. Press OK to display file in full screen size. Press ►...
- Page 53 All manuals and user guides at all-guides.com Slide Show Mode Navigation Display Pressing RECALL during Slide Show mode allows you to display or remove the Navigation Area. Press during Single Play Mode. Select Rotate MENU RETURN Navigation Area Press to select each item. Exit Slide Show mode Pressing RETURN during Slide Show mode allows you Press to set each item.
- Page 54 All manuals and user guides at all-guides.com Setup Features CH scan You may choose the way in which channels are selected POWER with CH LIGHT Press to select “CH scan”. RCVR DBS/CBL TV/VIDEO SLEEP EXIT Press to select “Fav.” or “All”. S e t u p Fav.: CH only displays programs...
- Page 55 All manuals and user guides at all-guides.com Input labels CC Mode To label video input connections for on-screen display. Press to select “Mode”. Press to select “Input labels”. Press to select the setting. Press to enter the sub-menu Off : Recommended mode when M o d e ◄...
- Page 56 All manuals and user guides at all-guides.com Setup Features (continued) CC Mode for Digital D i g i t a l s e t t i n g S i z e The Digital Closed Caption menu lets you configure the ◄...
- Page 57 All manuals and user guides at all-guides.com Other adjust (Setup) About You can set your preference as to the way the picture is Display the TV set Version and Software License. displayed. Press to select “About”. Press to select “Other Adjust”. Press to display the About screen.
- Page 58 POWER to test the component. If the procedure was successful, the component will MENU RETURN turn on. Device Operates Default TV (Panasonic Only) Panasonic Code VCR (Preset) Panasonic Code DVD/CD DVD and CD (Preset) Panasonic Code DTV (Panasonic Only) Panasonic Code R-TUNE...
- Page 59 338, 340, 341, 347, 348 Minolta 300, 345 Other Component Mitsubishi 338, 340, 341, 347, 348 Multitech 304, 347 310, 311, 334, 339 Olympic 323, 324 Other Component Optimus 306, 321, 328, 335 Orion 320, 326 Panasonic 321, 322, 323, 324...
- Page 60 300, 311, 345 Movietime 105, 132 Philco 320, 323, 324, 326, 331, 343 102, 137, 139 Philips 323, 324, 331 Panasonic 109, 110, 114 Pioneer Philips 106, 107, 128, 129, 130 Proscan 300, 301, 302, 323, 324, 331, 333, 345, 346 Pioneer...
- Page 61 219, 220, 221, 223 Yamaha 201, 202 Hitachi Jensen Codes For Personal Video Recorders 240, 241, 245 Kardon Brand Code Kenwood 200, 201, 211, 245 Panasonic Replay LXI/Sears Magnavox 229, 232 Philips Tivo Marantz Sony Tivo McIntosh Nakamichi RCVR Onkyo 214, 215...
- Page 62 G. E. G.I. (General Instrument) Gradiente Hitachi 103, 111, 112 HNS (Hughes) Change Channels Up/Down Magnavox 101, 102 Panasonic Philips 101, 102 Primestar R-TUNE Back to previous channel Proscan 106, 109, 110, 113 106, 109, 110, 113 Sony Operating a DBS...
- Page 63 All manuals and user guides at all-guides.com Operating a DVD Operating a Receiver Program the Remote Control to use with DVD. Program the Remote Control to operate audio receiver. TO DO THIS... PRESS TO DO THIS... PRESS POWER POWER Turn on/off Turn on/off Audio Mute Next/Previous Chapter...
- Page 64 All manuals and user guides at all-guides.com Remote Control Quick Reference Guide (continued) Operating a PVR (Personal Video Recorder) Program the Remote Control to use with a PVR. TO DO THIS... PRESS POWER Turn on/off MENU Display PVR menu PVR Navigation Select a Channel PLAY Play...
- Page 65 All manuals and user guides at all-guides.com Warning Indicators This unit has indicators (lights on the front) to let you know the unit’s internal condition. (P. 10.) Depending on the condition, the Lamp, Power, or Temp indicator will flash to alert you. In this case, turn unit off and follow the measures below.
- Page 66 Disposal of these materials may be regulated in your on individual usage. Panasonic warranties the original Lamp for a period of 90 (ninety) days from the date of community due to environmental considerations.
- Page 67 All manuals and user guides at all-guides.com (1) Insert the new Lamp Unit being careful of the Grasp both sides of the Front Cover with your insertion direction. fingertips and pull it from the Projection Display • Press on the arrow mark to make sure to remove it.
- Page 68 All manuals and user guides at all-guides.com Troubleshooting Before you call for service, determine the symptoms and make a few simple checks as shown below. Symptoms Checks Page Power does not turn ON. • Is the power cord plugged in? No picture even if the power is turned ON.
- Page 69 All manuals and user guides at all-guides.com Specifications Power Source AC 120 V, 60 Hz Power ON: Approx. 180 W (When audio is at maximum) Power Consumption Power OFF: Approx. 0.3 W (When cooling fan is stopped) 0.7″ Poly silicon TFT LCD panel × 3 LCD panels 921 600 (1 280 ×...
- Page 70 3) Avoid connecting the unit to an AC outlet wired to wall switch. Do not power off the unit by using the wall switch in case it is the only connection available. 4) For more information about your product maintenance please contact our Panasonic Customer Care Center Canada:...
- Page 71 Panasonic Canada Inc. PANASONIC PRODUCT – LIMITED WARRANTY Panasonic Canada Inc. warrants this product to be free from defects in materials and workmanship and agrees to remedy any such defect for a period as stated below from the date of original purchase.
- Page 72 All manuals and user guides at all-guides.com Other Information This product utilizes the following so called “open source” software: (1) the software which is licensed under the GNU GENERAL PUBLIC LICENSE, (2) the software which is licensed under the GNU LESSER GENERAL PUBLIC LICENSE, and (3) software developed by the third parties and available under certain terms and conditions.
- Page 73 All manuals and user guides at all-guides.com These requirements apply to the modified work as a whole. If identifiable 5. You are not required to accept this License, since you have not signed sections of that work are not derived from the Program, and can be it.
- Page 74 All manuals and user guides at all-guides.com Other Information (continued) 10. If you wish to incorporate parts of the Program into other free programs END OF TERMS AND CONDITIONS whose distribution conditions are different, write to the author to ask for permission.
- Page 75 All manuals and user guides at all-guides.com GNU LESSER GENERAL PUBLIC LICENSE When a program is linked with a library, whether statically or using a shared Version 2.1, February 1999 library, the combination of the two is legally speaking a combined work, Copyright ©...
- Page 76 All manuals and user guides at all-guides.com Other Information (continued) TERMS AND CONDITIONS FOR COPYING, These requirements apply to the modified work as a whole. If identifiable sections of that work are not derived from the Library, and can be DISTRIBUTION AND MODIFICATION reasonably considered independent and separate works in themselves, then this License, and its terms, do not apply to those sections when you...
- Page 77 All manuals and user guides at all-guides.com If such an object file uses only numerical parameters, data structure layouts It may happen that this requirement contradicts the license restrictions of other and accessors, and small macros and small inline functions (ten lines or less proprietary libraries that do not normally accompany the operating system.
- Page 78 All manuals and user guides at all-guides.com Other Information (continued) 12. If the distribution and/or use of the Library is restricted in certain countries END OF TERMS AND CONDITIONS either by patents or by copyrighted interfaces, the original copyright holder who places the Library under this License may add an explicit geographical How to Apply These Terms to Your New Libraries distribution limitation excluding those countries, so that distribution is...
- Page 79 All manuals and user guides at all-guides.com Index 1080i ................16, 23 480i .................. 16, 23 NTSC ..................8 480p ................16, 23 Number keys ..............9, 33 720p ................16, 23 OK button ................9 ASPECT button ..............9, 36 ATSC ..................
- Page 80 Warranty Service purposes. Model Number Serial Number Panasonic Canada Inc. 5770 Ambler Drive, Mississauga, Ontario L4W 2T3 Printed in U.S.A.
- Page 81 All manuals and user guides at all-guides.com Téléprojecteur multimédia à haute définition Manuel d’utilisation PT-52LCX15K Modèle * La présence du symbole d’homologation DTV (télévision numérique) confirme que cet appareil peut capter des émissions de télévision numérique conformes à un ou à tous les formats vidéo décrits dans les normes de télévision numérique de l’ATSC.
- Page 82 All manuals and user guides at all-guides.com MESURES DE SÉCURITÉ Le symbole de l’éclair Le point d’exclamation dans un Le symbole de chaleur dans un triangle triangle équilatéral indique que le dans un triangle équilatéral indique la manuel d’utilisation inclus avec équilatéral indique la présence d’une tension l’appareil contient d’importantes...
- Page 83 ATTENTION Cet écran de projection est conçu pour être utilisé avec le meuble télé suivant : modèle TY-52LC65C pour le PT-52LCX15K. L’utilisation d’un meuble autre que celui recommandé peut entraîner de l’instabilité et un risque de blessures. Ne pas exposer l’appareil aux rayons solaires directs ni à des températures ou à une humidité extrêmes ; cela pourrait causer de graves dommages irrémédiables.
- Page 84 All manuals and user guides at all-guides.com Cher client Panasonic Bienvenue parmi les clients Panasonic. Nous espérons que ce nouveau téléprojecteur vous apportera de nombreuses années de divertissement. Pour profiter au mieux de votre acquisition, lire attentivement le manuel d’utilisation avant d’effectuer quelque réglage que ce soit;...
- Page 85 Fonction de réglage ................54 Autre Guide de référence rapide pour la télécommande (utilisation des périphériques) ...............58 information Voyants ....................65 Remplacement de la lampe ..............66 Guide de dépannage ................68 Spécifications ..................69 Nettoyage/Recommandations aux clients de Panasonic ......70 Garantie ....................71 Divers .......................72 Index ......................79...
- Page 86 All manuals and user guides at all-guides.com Préparatifs Emplacement de l’appareil Accessoires Choisir un emplacement offrant la meilleure 1. Télécommande (EUR7627Z70) visualisation. Éviter un lieu exposé aux rayons du soleil 2. 2 piles “AA” ou à une source lumineuse (incluant les réflexions). L’usage de certains tubes fluorescents pour l’éclairage peut réduire la portée de la télécommande.
- Page 87 All manuals and user guides at all-guides.com Installation des piles dans la télécommande Conseils pratiques: Utiliser deux piles AA (fournies). (1) Si un usage intensif est fait de la télécommande, remplacer les piles par des piles alcalines qui ont une durée de vie plus grande. .
- Page 88 All manuals and user guides at all-guides.com Préparatifs (suite) Glossaire et acronymes CC (Sous-titrage codé) ATSC (Advanced Television Systems Committee – États-Unis) Dolby Digital Organisme de normalisation qui a défini les formats de Méthode de codage de signaux numériques développée la télévision numérique terrestre.
- Page 89 All manuals and user guides at all-guides.com Emplacement des commandes Télécommande éclairée Appuyer sur cette touche pour revenir au canal R-TUNE précédent ou aux modes d’entrée précédemment activés. Lorsque la télécommande est en mode magnétoscope ou lecteur DVD, appuyer sur cette touche pour effectuer une marche arrière.
- Page 90 All manuals and user guides at all-guides.com Emplacement des commandes (suite) Commandes et prises de raccordement sur le téléprojecteur Vue avant Appuyer sur cette touche pour MENU afficher le menu principal. Appuyer sur cette touche pour sélectionner les rubriques des menus et sous-menus.
- Page 91 All manuals and user guides at all-guides.com Vue arrière Évent Évent Prise d’entrée pour la Prise d’entrée Pour le raccordement à un Entrée câble VHF/ réception du signal d’antenne audio 2 autre appareil. (Vidéo 2) ou d’un câblosélecteur. Prise de sortie Achemine le signal de sortie vidéo vidéo.
- Page 92 All manuals and user guides at all-guides.com Installation Nota concernant les raccordements • Couper l’alimentation sur tous les appareils avant d’effectuer les raccordements. • Si les câbles nécessaires au raccordement d’un appareil auxiliaire ne sont pas fournis avec l’appareil ou sont vendus séparément, il peut être nécessaire de fabriquer ou d’acheter le câble approprié.
- Page 93 All manuals and user guides at all-guides.com Raccordement du câble Pour une réception adéquate des canaux analogiques ou numériques câblodistribués, l’abonnement à un service de câblodistribution est nécessaire. Utiliser cette confi guration pour raccorder l’appareil à la câblodistribution. Câblosélecteur Prise à l’arrière du Raccorder le câble de l’antenne ou du câblosélecteur câblosélecteur à...
- Page 94 All manuals and user guides at all-guides.com Installation (suite) Raccordement aux prises d’entrée 1, 2 et 3 Ces prises acceptent les magnétoscopes et autres périphériques. Magnétoscope S-VHS S-VIDÉO AUDIO Les prises d’entrée 1, 2 et 3 offrent des raccordements semblables. (P.
- Page 95 All manuals and user guides at all-guides.com Magnétoscope VHS VIDÉO AUDIO Les prises d’entrée 1, 2 et 3 offrent des raccordements semblables. (P. 10-11) Nota: • La prise d’entrée 3 est située sur le panneau avant de l’appareil. (P. 10) •...
- Page 96 All manuals and user guides at all-guides.com Installation (suite) Raccordement aux prises d’entrée “COMPONENT VIDEO” Étant donné que les signaux Y, P et P sont acheminés séparément, les signaux vidéo composant offrent une reproduction plus fidèle des couleurs. Pour la configuration des prises, consulter le manuel d’utilisation de l’appareil, lecteur DVD ou autre, raccordé...
- Page 97 All manuals and user guides at all-guides.com Raccordement aux prises de sortie “AV OUT” Il est possible de connecter un magnétoscope aux prises de sortie AV OUT pour enregistrer l’émission regardée. Il est également possible de connecter un moniteur externe aux prises AV OUT. Faire les raccordements du magnétoscope de la manière indiquée ci-dessous.
- Page 98 All manuals and user guides at all-guides.com Installation (suite) Raccordement d’un amplificateur Sortie audio analogique Pour reproduire le signal sonore sur une chaîne stéréo, raccorder un amplificateur externe à la prise AUDIO OUT située sur le panneau arrière du téléprojecteur. Chaîne stéréo (Un amplificateur stéréo avec des enceintes acoustiques)
- Page 99 All manuals and user guides at all-guides.com Sortie audio numérique Suivre les instructions ci-dessous pour le raccordement d’un décodeur Dolby Digital à la prise de sortie audio numérique du téléprojecteur. Le signal ambiophonique Dolby Digital 5.1 offre un rendu sonore de très haute qualité. Le signal Dolby Digital comporte cinq canaux discrets à...
- Page 100 All manuals and user guides at all-guides.com Installation (suite) Raccordement à la prise d’entrée “PC IN” Raccordement d’un ordinateur personnel à la prise PC IN ORDINATEUR RGB OUT AUDIO OUT Brancher un câble qui s’adapte à la prise de sortie audio de l’ordinateur. Câble audio (Câble avec mini-fiche PIN M3 stéréo) Adaptateur de conversion...
- Page 101 All manuals and user guides at all-guides.com Signaux RVB (RGB) à l’entrée Le tableau ci-dessous énumère les divers types de signaux RVB. Si le signal acheminé est très différent de ceux identifiés ci-dessous, l’image pourrait ne pas pouvoir s’afficher adéquatement ou un fond noir pourrait apparaître. Le cas échéant, l’indication “signal” clignote à l’écran pendant environ 5 secondes.
- Page 102 All manuals and user guides at all-guides.com Installation (suite) Comment raccorder la prise d’entrée HDMI À propos de l’interface HDMI HDMI est la première interface audio/vidéo conçue pour les appareils numériques grand public qui prenne en compte plusieurs formats vidéo standard, évolués et haute définition sans compression ainsi que le format audio multi-canal déjà...
- Page 103 All manuals and user guides at all-guides.com Marche à suivre Raccorder la prise de sortie HDMI du décodeur ou du lecteur DVD à la prise d’entrée HDMI sur le panneau arrière de l’appareil. • Si aucune image ne peut être affichée parce que le décodeur numérique ou le lecteur DVD ne possède pas de réglage de sortie numérique, utiliser l’entrée pour les composantes vidéo (ou bien l’entrée S-Vidéo, ou encore l’entrée pour la vidéo standard).
- Page 104 All manuals and user guides at all-guides.com Établissement/coupure du contact Voyant POWER Voyant DESCRIPTION POWER POWER Éteint Hors contact LIGHT Rouge Hors contact (refroidissement en cours) RCVR DBS/CBL (clignotant) TV/VIDEO SLEEP EXIT Vert En contact Vert (clignotant) En contact (en attente d’allumer la lampe) Nota: •...
- Page 105 All manuals and user guides at all-guides.com Configuration initiale Appuyer pour sélectionner Pour faciliter la tâche de l’utilisateur, le menu “Entr. ANT”. Réglage initial s’affiche lors de la première mise en marche de l’appareil. Au besoin, suivre les menus Appuyer pour sélectionner et les instructions qui s’affichent à...
- Page 106 All manuals and user guides at all-guides.com Navigation dans les menus Marche à suivre pendant l’affichage du menu (navigation) POWER Retour au menu principal LIGHT MENU Appuyer sur pour afficher le menu principal. RCVR DBS/CBL TV/VIDEO SLEEP EXIT EXIT Image Audio Minuterie Blocage...
- Page 107 All manuals and user guides at all-guides.com Sous-menu Autres réglages Appuyer pour sélectionner Appuyer pour entrer dans le Autres réglages. menu. I m a g e T e m p . c o u l . N o r m . I m a g e R é...
- Page 108 All manuals and user guides at all-guides.com Syntonisation des canaux Appuyer pour sélectionner “Langue”. POWER LIGHT Appuyer pour afficher l’écran RCVR DBS/CBL Langue. TV/VIDEO SLEEP EXIT R é g l a g e B a l . C A T o u s L a n g u e P r o g r a m .
- Page 109 All manuals and user guides at all-guides.com Réglage automatique des canaux Appuyer pour sélectionner Recherche automatique des canaux et ajout des “Entr. ANT”. canaux accessibles dans la mémoire. Appuyer sur MENU pour afficher le menu principal. Appuyer pour sélectionner “Câble” ou “Antenne”. P r o g r a m .
- Page 110 All manuals and user guides at all-guides.com Syntonisation des canaux (suite) Réglage manuel des canaux Appuyer pour sélectionner “Modifier”. Utiliser ce réglage pour changer les réglages de réception des canaux ou pour changer l’affichage des canaux. Appuyer pour entrer dans le Il est également possible d’utiliser ce réglage pour mode édition.
- Page 111 All manuals and user guides at all-guides.com Appuyer pour Appuyer pour sélectionner “Favori”. sélectionner “Sigle manuel”. Appuyer pour afficher Appuyer pour l’écran de saisie de sélectionner le numéro sigle. de Favori. Favori Appliquer Appuyer pour amener le Favori curseur sur “Sigle”. Appuyer pour amener le curseur sur “Appliquer”.
- Page 112 All manuals and user guides at all-guides.com Fonctionnement du téléprojecteur S é l e c t i o n d ’ e n t r é e [ 1 ] T V [ 2 ] C o m p o s a n t 1 POWER [ 3 ] C o m p o s a n t 2 [ 4 ] C o m p o s a n t 3...
- Page 113 All manuals and user guides at all-guides.com Exemple de syntonisation directe Réglage de canal/ volume Bannière du Étape Action Sélectionner le canal désiré: canal Appuyer sur CH▲▼ ou utiliser les touches Appuyer sur 1 numériques. Appuyer sur 5 Modifi er le niveau du volume: Appuyer sur - Appuyer sur VOL+ ou VOL-.
- Page 114 All manuals and user guides at all-guides.com Fonctionnement du téléprojecteur (suite) Suppression d’un canal de la liste des Sourdine favoris Appuyer sur MUTE pour couper instantanément le son. Pour supprimer un canal de la liste des favoris, Appuyer de nouveau pour rétablir le son à son volume mettre sa position sur la liste en surbrillance et d’origine.
- Page 115 All manuals and user guides at all-guides.com Émission stéréo et seconde voie audio Sélection du mode audio lors de la Le son stéréo de télé à canaux multiples (langue visualisation de la télévision principale) et la seconde voie audio (autre langue) sont captés simultanément.
- Page 116 All manuals and user guides at all-guides.com Commandes du format Nota: • À la réception d’un signal 1080i ou 720p, le mode PLEIN ÉCRAN est validé et la commutation du format n’est pas POWER possible. • Si le mode sélectionné ne correspond pas au format du signal LIGHT d’entrée, la qualité...
- Page 117 All manuals and user guides at all-guides.com Écran partagé Retour à un écran simple SPLIT SWAP POWER DVD/VCR CH Appuyer pour revenir à un écran simple. LIGHT RCVR DBS/CBL TV/VIDEO TV/VIDEO SLEEP EXIT Nota: • Le son accompagnant l’image de gauche est émis par les haut-parleurs de l’appareil.
- Page 118 All manuals and user guides at all-guides.com Écran partagé (suite) Sélection du mode d’entrée désiré pour l’écran de droite Appuyer pour sélectionner le mode TV/VIDEO d’entrée désiré. BLC ACCORD Composant 1* Vidéo 3* Composant 2* Vidéo 2* Composant 3* Vidéo 1* HDMI* * Si OMETTRE a été...
- Page 119 All manuals and user guides at all-guides.com Réglages de l’image Norm. / Image / Brillance / Couleur / Nuances / Netteté / Temp. coul. POWER LIGHT Appuyer pour sélectionner RCVR DBS/CBL TV/VIDEO SLEEP EXIT chaque rubrique. Appuyer pour régler chaque rubrique.
- Page 120 All manuals and user guides at all-guides.com Réglages de l’image (suite) Mode Image Réglage PC Permet de choisir parmi les trois modes d’image Dans ce mode, il est possible de régler l’image obtenue préétablis celui qui convient le mieux au programme à...
- Page 121 All manuals and user guides at all-guides.com Selon le signal à l’entrée, certains éléments peuvent ne pas être réglables et certaines fonctions peuvent ne pas être accessibles. Autres réglages Réglage Description 3D I/P Le signal de type cinéma (24 images à la seconde) Dans ce mode, il est possible d’effectuer d’autres est fidèlement reproduit à...
- Page 122 All manuals and user guides at all-guides.com Réglages audio Norm. / Graves / Aigus / Équilibre POWER Appuyer pour sélectionner LIGHT chaque rubrique. RCVR DBS/CBL TV/VIDEO SLEEP EXIT Appuyer pour régler chaque rubrique. A u d i o N o r m . N o n M o d e S t a n d a r d...
- Page 123 All manuals and user guides at all-guides.com Selon le signal à l’entrée, certains éléments peuvent ne pas être réglables et certaines fonctions peuvent ne pas être accessibles. Autres réglages Dans ce mode, il est possible d’effectuer d’autres Dans ce mode, il est possible d’obtenir un effet sonore tridimensionnel plus profond avec seulement les deux haut- réglages du rendu sonore.
- Page 124 All manuals and user guides at all-guides.com Minuterie-sommeil Réglage de la minuterie Appuyer sur la touche pour que l’appareil se mette POWER automatiquement hors marche après un certain laps de LIGHT temps. RCVR DBS/CBL TV/VIDEO SLEEP SLEEP EXIT Appuyer pour sélectionner “0,” “30,”...
- Page 125 All manuals and user guides at all-guides.com Fonction de verrouillage Ce téléprojecteur incorpore une puce antiviolence qui permet de bloquer le visionnement de films ou la réception d’émissions de télévision en fonction de leur classification. POWER Il existe quatre types de classification, chacune avec son organisme responsable : MPAA (Motion Picture Association LIGHT of America), TV Parental Guidelines Ratings (États-Unis),...
- Page 126 All manuals and user guides at all-guides.com Fonction de verrouillage (suite) Paramétrage du blocage Blocage d’émissions Ce téléprojecteur incorpore une puce antiviolence Sélectionner le mode Blocage pour empêcher le qui permet de bloquer le visionnement de films ou la visionnement de jeux vidéo, bandes magnétoscopiques, réception d’émissions de télévision en fonction de leur canaux de télévision et modes Vidéo.
- Page 127 All manuals and user guides at all-guides.com Tableau des classifications des Réglage du signal de sortie sur le moniteur émissions télé américaines Appuyer pour sélectionner Le système de classification américain des émissions “Émission”. de télévision comporte 7 classifications en fonction du groupe d’âge.
- Page 128 All manuals and user guides at all-guides.com Fonction de verrouillage (suite) Tableau des classifications canadiennes Message de verrouillage Divers messages de verrouillage s’affichent à l’écran Exempté - Émissions contenant des éléments qui selon le type de blocage sélectionné dans le menu ne font pas l’objet d’une classification, par exemple : Blocage.
- Page 129 Il est à noter que Panasonic décline toute responsabilité Fente de carte sur concernant des dommages ou des pertes de données panneau avant (P.
- Page 130 All manuals and user guides at all-guides.com Visualiseur de photos (suite) Imagette JPEG L’écran ci-dessous apparaît lorsqu’une carte est insérée. POWER Si le message “Carte mémoire insérée?” apparaît, LIGHT vérifiez si la carte est correctement insérée. Sinon, mettez l’appareil hors marche, remettez la carte en RCVR DBS/CBL TV/VIDEO...
- Page 131 All manuals and user guides at all-guides.com Messages d’avertissement concernant la carte Fermeture du Visualiseur de photos Une pression sur la touche SD pendant l’affichage Dans l’éventualité où il y aurait un problème avec la d’imagettes JPEG rappelle l’affichage de la source carte ou les données qu’elle contient, l’un des messages précédente.
- Page 132 All manuals and user guides at all-guides.com Visualiseur de photos (suite) Mode visionnement d’une image Rotation de l’image Sur chaque pression des touches ◄► l’image tourne Appuyer sur ▲▼◄► pour déplacer le curseur sur le sur 90°. fichier désiré dans la zone d’index. Appuyer sur OK pour afficher le fichier en grandeur plein Appuyer sur ►...
- Page 133 All manuals and user guides at all-guides.com Lancement d’un diaporama Affichage de la zone de navigation Dans le mode Écran simple, appuyer sur RECALL pour activer ou désactiver l’affichage de la zone de navigation. Appuyer dans le mode Écran simple. Sélection Rotation MENU...
- Page 134 All manuals and user guides at all-guides.com Fonction de réglage Bal. CA Il est possible de sélectionner la manière par laquelle les POWER canaux sont sélectionnés (balayés) avec les touches CH LIGHT Appuyer pour sélectionner “Bal. RCVR DBS/CBL CA”. TV/VIDEO SLEEP EXIT Appuyer pour sélectionner...
- Page 135 All manuals and user guides at all-guides.com Identification de la source Mode CC (sous-titres) Cette fonction permet l’affichage des étiquettes des Appuyer pour sélectionner prises d’entrée vidéo. “Mode”. Appuyer pour sélectionner Appuyer pour sélectionner le “Ident. prises”. réglage. Appuyer pour entrer dans le HF : Mode recommandé...
- Page 136 All manuals and user guides at all-guides.com Fonction de réglage (suite) Mode CC pour source numérique R é g l a g e n u m é r i . F o r m a t Le menu CC pour source numérique permet de ◄...
- Page 137 All manuals and user guides at all-guides.com Autres réglages (Réglage) À propos de Il est possible de régler l’affichage selon ses Affichage de la Licence et de la Version du téléviseur préférences. Appuyer pour sélectionner “À Appuyer pour sélectionner propos”. “Autres réglages”.
- Page 138 Si la programmation a réussi, le contact sera établi sur l’appareil auxiliaire. MENU RETURN Appareil Télécommande Par défaut Téléviseur (Panasonic Téléviseur Code Panasonic seulement) Magnétoscope Magnétoscope (préréglé) Code Panasonic Lecteur DVD/ Lecteur DVD et CD Code Panasonic (préréglé)
- Page 139 338, 340, 341, 347, 348 Minolta 300, 345 Autre appareil Mitsubishi 338, 340, 341, 347, 348 Multitech 304, 347 310, 311, 334, 339 Autre appareil Olympic 323, 324 Optimus 306, 321, 328, 335 Orion 320, 326 Autre appareil Panasonic 321, 322, 323, 324...
- Page 140 300, 311, 345 Movietime 105, 132 Philco 320, 323, 324, 326, 331, 343 102, 137, 139 Philips 323, 324, 331 Panasonic 109, 110, 114 Pioneer Philips 106, 107, 128, 129, 130 Proscan 300, 301, 302, 323, 324, 331, 333, 345, 346 Pioneer...
- Page 141 219, 220, 221, 223 Yamaha 201, 202 Hitachi Jensen Codes pour enregistreurs vidéo personnels 240, 241, 245 Kardon Marque Code Kenwood 200, 201, 211, 245 Panasonic Replay LXI/Sears Magnavox 229, 232 Philips Tivo Marantz Sony Tivo McIntosh Nakamichi Récepteur Onkyo 214, 215...
- Page 142 G. E. G.I. (General Instrument) Gradiente Hitachi 103, 111, 112 HNS (Hughes) Magnavox 101, 102 Sélection de canal Panasonic Philips 101, 102 Primestar Proscan 106, 109, 110, 113 R-TUNE Retour au canal précédent 106, 109, 110, 113 Sony Star Choice 103, 108 Utilisation d’un récepteur de télévision...
- Page 143 All manuals and user guides at all-guides.com Utilisation d’un lecteur DVD Utilisation d’un récepteur Programmation de la télécommande pour utilisation avec Programmation de la télécommande pour utilisation un lecteur DVD. avec un récepteur. Action désirée Appuyer sur Action désirée Appuyer sur POWER POWER Mise sous/hors tension...
- Page 144 All manuals and user guides at all-guides.com Guide de référence rapide pour la télécommande (suite) Utilisation d’un enregistreur vidéo personnel (PVR) Programmation de la télécommande pour utilisation avec un enregistreur vidéo personnel. Action désirée Appuyer sur POWER Mise sous/hors tension Affichage du menu de l’enregistreur vidéo MENU personnel...
- Page 145 All manuals and user guides at all-guides.com Voyants Cet appareil comporte des voyants (sur le devant) pour informer l’utilisateur de son état de fonctionnement (voir à la page 10). Selon la situation, le voyant de la lampe, d’alimentation ou de la température clignotera. Dans une telle éventualité, mettre l’appareil hors marche et prendre les mesures décrites ci-dessous.
- Page 146 Bloc de la lampe : TY-LA1000-K suivante. Autonomie de la lampe La durée de vie de la lampe varie selon l’utilisation. Panasonic Cet appareil comporte une lampe à décharge à garantit la lampe originale pendant 90 (Quatre-vingt-dix) jours haute intensité qui contient une petite quantité de à...
- Page 147 All manuals and user guides at all-guides.com (1) Mettre en place la lampe de remplacement en Saisir les deux côtés du couvercle avant avec le prenant soin de bien la diriger. bout des doigts et le tirer hors du téléprojecteur. •...
- Page 148 All manuals and user guides at all-guides.com Guide de dépannage Avant d’appeler un centre de service, faire les vérifications décrites ci-dessous. Page Difficulté Vérification Absence d’alimentation. • Le cordon d’alimentation est-il branché? Aucune image ne s’affiche même si l’écran • Remplacer la lampe. Si, malgré le remplacement de la lampe, le est en marche.
- Page 149 All manuals and user guides at all-guides.com Spécifications Alimentation 120 V c.a., 60 Hz En contact: Environ 180 W (audio au niveau maximum) Consommation Hors contact: Environ 0,3 W (ventilateur arrêté ) 3 × écrans à cristaux liquides 0,7 po à matrice active au silicium polycristallin Écrans à...
- Page 150 1-800-561-5505 N° de télécopieur : (905) 238-2360 Lien courriel : « Support à la clientèle » à www.panasonic.ca AVIS IMPORTANT LORS DU REMPLACEMENT DE LA LAMPE : Faire parvenir la lampe défectueuse au Département des pièces : Panasonic Canada Inc.
- Page 151 Certificat de garantie limitée Panasonic Panasonic Canada Inc. garantit cet appareil contre tout vice de fabrication et accepte, le cas échéant, de remédier à toute défectuosité pendant la période indiquée ci-dessous et commençant à partir de la date d’achat original.
- Page 152 All manuals and user guides at all-guides.com Divers Cet appareil utilise les logiciels “libres” suivants : (1) le logiciel autorisé en vertu de la Licence publique générale GNU ; (2) le logiciel autorisé en vertu de Licence publique générale limitée GNU, et (3) les logiciels développés par de tierces parties et disponibles sous certaines conditions et modalités.
- Page 153 All manuals and user guides at all-guides.com c) Si le Programme modifié lit des commandes de manière interactive La diffusion d’un Programme (ou de tout travail dérivé) suppose l’envoi lors de son exécution, faire en sorte qu’il affiche, lors d’une invocation simultané...
- Page 154 All manuals and user guides at all-guides.com Divers (suite) 12. SAUF LORSQUE EXPLICITEMENT PRÉVU PAR LA LOI OU ACCEPTÉ La Licence publique générale ne permet pas d’inclure votre programme dans PAR ÉCRIT, NI LE DÉTENTEUR DES DROITS, NI QUICONQUE des logiciels sous licence commerciale spécifique. Si votre programme est une AUTORISÉ...
- Page 155 All manuals and user guides at all-guides.com Licence publique générale limitée GNU Pour protéger chaque distributeur, nous voulons établir de façon très claire qu’il n’y a aucune garantie pour la Librairie libre. Aussi, si la Librairie est modifiée Version 2.1, février 1999. par quelqu’un d’autre qui la redistribue ensuite, ses bénéficiaires devraient Copyright ©...
- Page 156 All manuals and user guides at all-guides.com Divers (suite) TERMES ET CONDITIONS POUR LA COPIE, LA Ces obligations s’appliquent au travail modifié dans son entier. Si des sections identifiables de ce travail ne sont pas dérivées de la Librairie, DISTRIBUTION ET LA MODIFICATION. et peuvent être raisonnablement considérées comme des travaux indépendants et séparés par eux-mêmes, alors cette Licence et ses termes ne s’appliquent pas à...
- Page 157 All manuals and user guides at all-guides.com Autrement, si le travail est un dérivatif de la Librairie, vous pouvez distribuer Vous ne pouvez pas copier, modifier, accorder des sous-licences, lier, ou le code objet pour le travail suivant les termes de la Section 6. Tout distribuer la Librairie autrement que d’une façon décrite expressément exécutable contenant ce travail tombe aussi sous les règles de la Section 6, dans cette Licence.
- Page 158 All manuals and user guides at all-guides.com Divers (suite) Chaque version reçoit un numéro de version distinctif. Si la Librairie spécifie Cette librairie est distribuée dans l’espoir qu’elle sera utile, mais un numéro de version de cette Licence qui s’applique à celle-ci et à “toute SANS AUCUNE GARANTIE : sans même la garantie implicite de autre version future”, vous avez l’option de suivre les termes et conditions COMMERCIABILISABILITÉ...
- Page 159 All manuals and user guides at all-guides.com Index 1080i ................16, 23 480i .................. 16, 23 PCM (Modulation par codage d’impulsions) ....8, 19, 23 480p ................16, 23 Position PC ..............32, 38, 40 720p ................16, 23 Prises acceptent les magnétoscopes ......14-15, 17 Prises d’entrée 1, 2 et 3 ........
- Page 160 Il est recommandé de noter, dans l’espace prévu ci-dessous, le numéro de modèle et le numéro de série inscrits à l’arrière, et de conserver ce manuel pour référence ultérieure. Numéro de modèle : Numéro de série : Panasonic Canada Inc. 5770 Ambler Drive, Mississauga, Ontario L4W 2T3 Imprimé aux États-Unis...