
Manuels Connexes pour Eurocave CL-A


Sommaire des Matières pour Eurocave CL-A
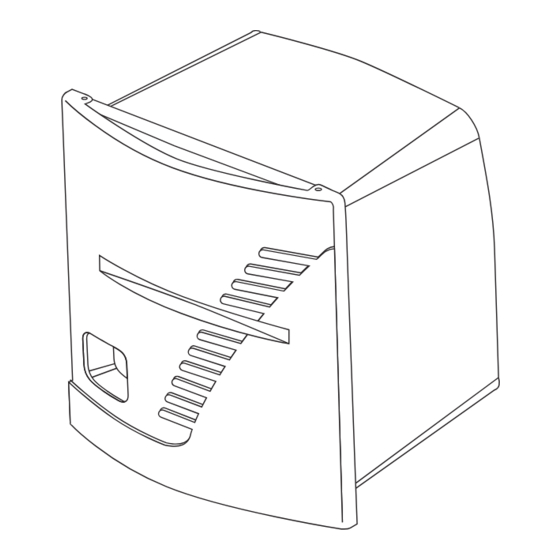
- Page 1 GUIDE D’UTILISATION de votre CLIMATISEUR DE CAVE USER GUIDE to your CELLAR AIR CONDITIONER ANWENDERHANDBUCH für Ihr KLIMAGERÄT FÜR DEN WEINKELLER GUÍA DE UTILIZACIÓN del CLIMATIZADOR DE BODEGA CL-A CL-B...
- Page 2 Important : Lors de la livraison de votre appareil, assurez-vous que celui-ci ne présente aucun défaut d’aspect extérieur (choc, déformation...). Sommaire 1 • La maîtrise des conditions de vieillissement de vos vins 2 • Comment fonctionne votre climatiseur de cave ? 3 •...
- Page 3 => Grâce à son système de régulation électronique, votre climatiseur EuroCave CL-A/B s’enclenche dès que la cave s’élève d’un degré par rapport à la température programmée. De plus, la présence d’un chauffage intégré dans le distributeur d’air...
- Page 4 Le climatiseur EuroCave CL-A/B est un groupe à froid ventilé. Le froid ventilé consiste à faire circuler l’air autour des bouteilles à l’intérieur de votre cave. L’air est ensuite aspiré vers l‘évaporateur sur lequel il se refroidit à nouveau et dépose une partie de l’humidité...
- Page 5 Etape 2 Etape 3 Etape 4 La fonction «réchauffeur» Le climatiseur EuroCave CL-A/B est muni d’un réchauffeur (500 W) permettant de maintenir la température de votre cave, dès que sa température est inférieure à la température programmée. L’éclairage Un interrupteur lumineux rouge contrôle l’éclairage (tube fluorescent 14 W) à...
- Page 6 Les consignes importantes de sécurité • Lorsque vous utilisez le climatiseur, observez toujours certaines précautions de base, notamment : N’utiliser le climatiseur que pour l’usage prévu, comme décrit dans le présent guide. Ne jamais débrancher le climatiseur en tirant sur le cordon d’alimentation. Saisir fermement la fiche du cordon et tirer droit pour la retirer de la prise.
- Page 7 Si la cloison est plus épaisse, elle doit être taillée en biseau. • Ouverture murale : Ouverture murale nécessaire à l’installation de l’appareil : FAIRE LE TROU DE NIVEAU CL-A : HAUTEUR : 495 mm LARGEUR : 460 mm...
- Page 8 • Dimensions de l’appareil CL-A CL-B • Montage AIR FRAIS...
- Page 9 Pièces jointes : • Joint isolant adhésif de mousse plastifiée: 10 x 100 x 460 mm • Joint isolant adhésif de mousse (D-Strip) 5 x 10 x 1 840 mm • Quatre vis : 3,5 x 30 mm (fixation de l’appareil) •...
- Page 10 L’entretien Débrancher votre appareil. Retirer la face avant du climatiseur en dévissant les 4 vis (11). Dépoussiérer et nettoyer le condenseur (7), ainsi que la partie intérieure des ailettes des échangeurs, au minimum 2 fois par an. Ceci se fait simplement avec une brosse ou un aspirateur.
- Page 11 Les caractéristiques techniques Réf. Alimentation Volume Puissance Puissance Résistance Poids électrique indicatif frigorifique électrique réchauffage CL-A 230-240V jusqu’à 230** 31,5 50 Hz 10 m CL-B 230-240V jusqu’à 460** 50 Hz 20 m *en local parfaitement isolé **pour une température intérieure de 12°C et extérieure de 32°C Fluide écologique (R134a) respectant la couche d’ozone (sans CFC)
- Page 12 Date : 23/06/2014 Révision : 0 Page : 1 sur 2 Objet : Réglage température de consigne suite remplacement régulateur APPAREILS CONCERNÉS : Climatiseurs CL-A et CL-B NUMÉRO DE SERIE : Tous DATE D’APPLICATION : Depuis fin juin 2014 Le tableau de commande : L’afficheur indique...
- Page 13 SERVICE APRÈS-VENTE ADDITIF MODE D’EMPLOI Date : 23/06/2014 Révision : 0 Page : 2 sur 2 Objet : Réglage température de consigne suite remplacement régulateur LED 1 clignotante : affichage de la consigne. LED 2 allumée : réchauffage en cours. LED 3 allumée : refroidissement en cours.
- Page 14 Important : When you take delivery of your air conditioner, check to make sure its appearance has not been damaged in any way (dented, knocked out of shape, etc.). Contents 1 • Ensuring the Right Conditions for Maturing your Wine 2 •...
- Page 15 • Hygrometry: for the corks to continue to provide an effective seal, it is essential to provide the right moisture conditions. => That is why, in your EuroCave CL-A/B air conditioner, the condensation produced when the air cools in your cellar is collected in a tray and then used if necessary to humidify the cellar.
- Page 16 The EuroCave CL-A/B air conditioner is a cooling unit with a fan that causes the air to flow around the bottles in your cellar. The air is then sucked up into the evaporator where it cools down again and loses part of the moisture it contains before starting a new cycle.
- Page 17 Step 3 Step 4 The Heating Function The EuroCave CL-A/B air conditioner includes a 500W heater designed to raise the temperature in your cellar as soon as it drops below the set temperature. Lighting The lighting (a 14W fluorescent tube) is controlled by a luminous red switch...
- Page 18 Safety Precautions • When you use your air conditioner, you must always take the following basic safety precautions: Only use the air conditioner for the purpose for which it is designed, as described in the user guide. Never unplug the air conditioner by pulling out the power cord. Firmly grasp the plug and pull it cleanly out of the socket outlet.
- Page 19 The wall which will house the unit must be no more than 300 mm thick. If it is any thicker, it will have to be chamfered. • Wall Opening Opening required in order to house the unit: MAKE SURE THE HOLE IS COMPLETELY LEVELLED. CL-A : HEIGHT: 495 mm WIDTH: 460 mm CL-B :...
- Page 20 • Air Conditioner Dimensions CL-A CL-B • Installation FRESH AIR...
- Page 21 Parts : • Plasticised foam adhesive insulating strip 10 x 100 x 460 mm • Foam adhesive insulating strip (D-strip) 5 x 10 x 1840 mm • Four screws 3.5 x 30 mm (for fixing the unit) • Four screws 4 x 13 mm (for securing the front panel) Ceiling/Air Conditioner Clearance: min.
- Page 22 Maintenance Unplug the unit. Undo the four screws (11) holding the front panel and remove it. At least twice a year dust and clean the condenser (7) and inside the exchanger fins. You just need to use a brush or a vacuum cleaner. Changing the Neon Tube Unplug the unit.
- Page 23 Typical Cooling Electrical Weight Heating Supply Volume Capacity Power resistance 230-240V Up to CL-A 230** 31,5 50 Hz 10 m 230-240V Up to CL-B 230** 50 Hz 20 m * In a fully insulated area **For an inside temperature of 12ºC, outside temperature of 32°C.
- Page 24 Date : 23/06/2014 Version : 0 Page : 1 of 2 Subject: Temperature setting adjustment after controller replacement UNITS AFFECTED: CL-A and CL-B air conditioners SERIAL NUMBER: DATE OF PRODUCTION: Since the end of June 2014 The control panel: display Replacement controller: : increase the setting value.
- Page 25 AFTER SALES DEPARTMENT ADDITIONAL USER MANUAL Date : 23/06/2014 Version : 0 Page : 2 of 2 Subject: Temperature setting adjustment after controller replacement Temperature setting adjustment: Important: when the unit is working, and if you are not changing any settings, the value shown on the display is always the actual temperature inside the cellar.