Abus AirSecure CO2WM110 Manuel D'utilisation
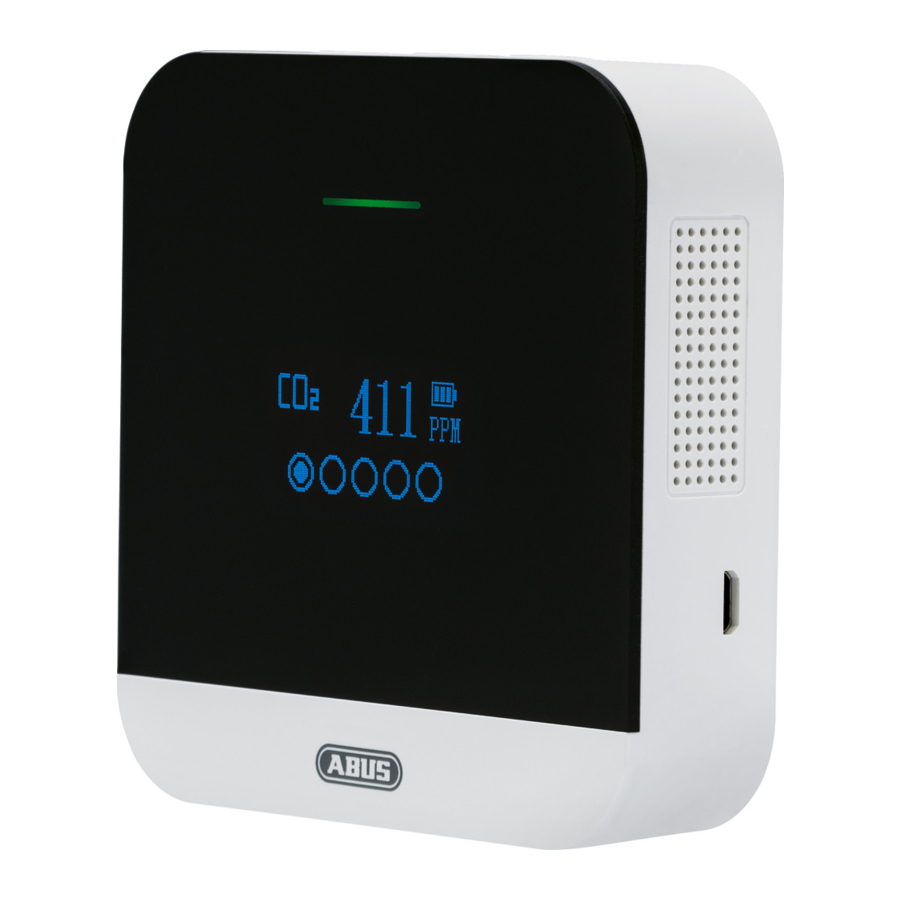
Détecteur de dioxyde de carbone
Masquer les pouces
Voir aussi pour AirSecure CO2WM110:
- Manuel d'utilisation (85 pages) ,
- Mode d'emploi (6 pages) ,
- Manuel d'utilisation (8 pages)
Table des Matières
Publicité
Les langues disponibles
Les langues disponibles
Liens rapides
AirSecure
CO2WM110
TM
Kohlendioxid-Warnmelder
Bedienungsanleitung
Kohlendioxid-Warnmelder
User manual
Carbon dioxide alarm
Manuel d'utilisation
Détecteur de dioxyde de
Gebruikershandleiding
Istruzioni per l'uso
Rilevatore di CO
Instrucciones de
funcionmiento
Alarma de dióxido de carbono
DE
GB
FR
carbone
NL
Co
-melder
2
IT
2
ES
Publicité
Table des Matières

Manuels Connexes pour Abus AirSecure CO2WM110


Sommaire des Matières pour Abus AirSecure CO2WM110
- Page 1 AirSecure CO2WM110 Kohlendioxid-Warnmelder Bedienungsanleitung Kohlendioxid-Warnmelder User manual Carbon dioxide alarm Manuel d'utilisation Détecteur de dioxyde de carbone Gebruikershandleiding -melder Istruzioni per l'uso Rilevatore di CO Instrucciones de funcionmiento Alarma de dióxido de carbono...
-
Page 2: Lieferumfang
Seite 3 - 18 Page 19 - 34 Merci d’avoir choisi ce produit Hartelijk dank dat u hebt ABUS ! gekozen voor dit ABUS-product! Eingangs- Veuillez lire cette notice attentive- Lees voorafgaand aan de montage öffnungen ment avant le montage et la mise en en ingebruikname deze handleiding für CO... -
Page 3: Bestimmungsgemäße Verwendung
Bestimmungsgemäße Verwendung, Inbetriebnahme Montage Bestimmungsgemäße Verwendung Lufteinlässe nicht, während der Melder aktiv ist 5. Halten Sie Wasser und andere Flüssigkeiten vom Melder fern, da er nicht Verwenden Sie das Gerät ausschließlich für den Zweck für den es gebaut und wasserdicht ist konzipiert wurde! Jede andere Verwendung gilt als nicht bestimmungsgemäß! 6. - Page 4 Montage, Anzeige und Bedienelemente Anzeige und Bedienelemente Standmontage: Symbole der OLED-Anzeige • den Tischfuß an der Unterseite des Gehäuses ausklappen und den Melder auf Lufttemperatur Sprache einstellen eine ebene und staubfreie Unterlage stellen -Level einstellen Relative Luftfeuchtigkeit • sicherstellen, dass der Melder stabil steht und keine Gegenstände das Eindringen von CO in den Melder stören Grad Celsius...
- Page 5 Anzeige und Bedienelemente Anzeige und Bedienelemente Menü-Seiten der OLED-Anzeige LED-Anzeige und Töne 1. Nach dem Einschaltes des Melders erscheint das Menü "Temperatur und 1. Bei Versorgung über AC-Adapter: Luftfeuchtigkeit" als erstes Zustand Display 2. Im Standby-Modus durch Drücken der "+" oder "-" Taste zur nächsten / Bildschirm aus, CO grün blinkt alle vorigen Seite wechseln...
- Page 6 Anzeige und Bedienelemente Einstellungen 2. Bei Versorgung über Batterie: Menü-Einstellungen bearbeiten Wenn der Kohlendioxid-Gehalt auf „schlecht“ wechselt, schaltet sich das 1. Melder einschalten, für drei Sekunden die Taste Display ein, die rote LED und das Display blinken und der Alarmton ertönt "Einstellungen"...
- Page 7 Einstellungen Einstellungen, Fehlerbehebung Max. und Min.-Wert für CO -Alarm einstellen Alarmprotokoll einsehen blinkt während der Einstellung 1. Durch Drücken der Taste zum vorigen Eintrag und durch Drücken der Taste zum nächsten Eintrag 2. Durch Drücken der Taste den Wert verringern und wechseln durch Drücken der Taste den Wert erhöhen...
- Page 8 Fehlerbehebung, Reinigen Technische Daten 5. manuelle Kalibrierung Technische Daten → Für die manuelle Kalibrierung ist frische und trockene Außenluft Spannungsversorgung AC Adapter Eingang: AC 100~240V erforderlich, wenn der CO -Wert ca. 500 ppm beträgt. Kalibrieren Sie den Ausgang DC 5V/1A Micro-USB Melder nicht bei Regen.
-
Page 9: Entsorgung
Hiermit erklärt ABUS August Bremicker Söhne KG, dass das Gerät AirSecure • ABUS haftet nicht für Mängel und Schäden, die durch äußere Einwirkungen CO2WM110 den Richtlinien 2014/35/EU, 2014/30/EU und 2011/65/EU entspricht. (z. B. durch Transport, Gewalteinwirkung, Fehlbedienung), unsachgemäße Der vollständige Text der EU-Konformitätserklärung kann unter info@abus.de... -
Page 10: Display And Controls
Scope of delivery, Display and controls Scope of delivery • ABUS AirSecure • 1000 mAh 3,7 V lithium-ion battery carbon dioxide alarm CO2WM110 (built in backup battery) • Micro-USB-cable • AC adapter (5 V/1 A output) • This manual • Installation material: Screws, dowels... -
Page 11: Intended Use
Intended use, Start-up Installation Intended use the detector is active 5. Keep water and other liquids away from the detector as it is not waterproof Only use the device for the purpose for which it was built and designed. Any other use is not considered to be the intended use! 6. -
Page 12: Stand Mounting
Installation, Operating buttons and display symbols Operating buttons and display symbols Stand mounting: OLED display symbols • fold out the table base on the underside of the housing and place the Air temperature Manual language selection detector on a flat and dust-free surface Relative humidity Set CO level... - Page 13 Operating buttons and display symbols Operating buttons and display symbols Menu pages of the OLED display LED display and tones 1. When the detector is switched on, the "Temperature and humidity" menu 1. When powered via AC adapter: wil appear first Status Display Sound...
- Page 14 Operating buttons and display symbols Settings 2. When supplied by battery: Edit menu settings When the carbon dioxide level changes to " poor ", the display turns on, the 1. Switch on the detector, press the "Settings" button red LED and the display flash, and the alarm tone sounds for 30 seconds. After for three seconds that, the red LED and display continue to light for 1 minute;...
-
Page 15: Troubleshooting Tips
Settings Settings, Troubleshooting View alarm history Set max. and min. value for CO alarm flashes during setting 1. Move to the previous entry by pressing the button and to the next entry by pressing the button 2. Decrease the value by pressing the button and increase the value by pressing the button... -
Page 16: Technical Data
Troubleshooting, Cleaning Technical data Technical data 5. Manual calibration → Fresh and dry outdoor air is required for manual calibration when the CO Power supply AC adapter input: AC 100~240V value is approx. 500 ppm. Do not calibrate the detector in the rain. Output DC 5V/1A Micro-USB High humidity increases the CO content in the air. -
Page 17: Information On The Battery
2 years. Any further claims are expressly excluded. Declaration of conformity • ABUS assumes no liability for defects or damage that has been caused by ABUS August Bremicker Söhne KG hereby declares that the device type external influences (e.g. transport, external forces), improper use, normal... -
Page 18: Affichage Et Éléments De Commande
Contenu de la livraison, Affichage et éléments de commande Contenu de la livraison • Détecteur de dioxyde de carbone ABUS • Batterie lithium-ion de mAh AirSecure CO2WM110 3,7 V (batterie de secours • Câble Micro-USB intégrée) • Instructions d’utilisation • Matériel d'installation : •... -
Page 19: Utilisation Conforme
Utilisation conforme, Mise en service Montage Utilisation conforme 3. Afin de maintenir la meilleure performance de votre détecteur, veuillez l'utiliser pendant au moins 24 heures de fonctionnement permanent Utilisez l’appareil exclusivement aux fins pour lesquelles il a été construit et 4. -
Page 20: Touches De Commande
Montage et Touches de commande Symboles Montage sur pied : Symboles • déployez le pied de table sur la face inférieure du boîtier et placez le Température de l'air Sélection détecteur sur une surface plane et sans poussière Réglage de l'heure et de la Humidité... -
Page 21: Affichages Sur L'écran
Affichages Affichages et avertissements Affichages sur l'écran Affichage LED et sons 1. Après avoir allumé le détecteur, le menu "Température et humidité" apparaît 1. Alimentation via un adaptateur AC : en premier État Display 2. En mode veille, appuyez sur le bouton "+" ou "-" pour passer à la page Écran éteint, bonne Clignotement suivante/ précédente... -
Page 22: Modifier Les Paramètres Du Menu
Affichages et avertissements Réglage 2. Alimentation par batterie : Modifier les paramètres du menu Lorsque le niveau de dioxyde de carbone passe à "mauvais", l'écran s'allume, 1. Allumez le détecteur, appuyez sur le bouton « la LED rouge et l'affichage clignotent et le signal d'alarme retentit pendant Paramètres »... - Page 23 Réglage Réglage, Dépannage Réglage des valeurs max. et min. pour l'alarme de CO Consultation du journal des alarmes clignote pendant le réglage 1. Passez à l'entrée précédente en appuyant sur la touche et à l'entrée suivante en appuyant 2. Diminuez la valeur en appuyant sur le bouton sur la touche augmentez la valeur en appuyant sur le bouton 2.
-
Page 24: Données Techniques
Dépannage, Nettoyage Données techniques 5. Étalonnage manuel Données techniques → De l’air extérieur frais et sec est nécessaire pour l'étalonnage manuel Tension d’alimentation Entrée de l'adaptateur AC : AC 100~240 V lorsque la valeur de CO est d'environ 500 ppm. Ne calibrez pas le détecteur Sortie DC 5 V/1 A Micro-USB en cas de pluie. -
Page 25: Garantie
WEEE-Reg.-Nr. DE79663011 Nr adhérent DEEE-Fr : M1155 • ABUS décline toute responsabilité pour des vices et dommages résultant du milieu ambiant (p. ex. avaries de transport, emploi de la force, manutention Déclaration de conformité incorrecte), d’une utilisation incorrecte, de l’usure normale ou de la La société... -
Page 26: Inhoud Van De Levering
© ABUS 2021 • Deze gebruiksaanwijzing • AC-adapter (5 V/1 A uitgang) ABUS August Bremicker Söhne KG | D 58292 Wetter | Germany. • Installatiemateriaal: schroeven, pluggen Tel.: +49 (0) 23 35 63 40 | Display en bedieningselementen Inlaat-... -
Page 27: Beoogd Gebruik
Beoogd gebruik, Ingebruikname Montage Beoogd gebruik 4. Dek de melder niet af en blokkeer vooral de luchtinlaten niet terwijl de melder actief is Gebruik het apparaat uitsluitend voor het doel waarvoor het werd gebouwd en 5. Houd water en andere vloeistoffen uit de buurt van de melder, want hij is ontworpen! Elk ander gebruik wordt als oneigenlijk gebruik beschouwd! niet waterdicht Dit toestel mag alleen als volgt gebruikt worden:... - Page 28 Montage, Display en bediening Display en bediening Vrijstaande montage: OLED-displaysymbolen • klap de tafelvoet aan de onderzijde van de behuizing uit en plaats de melder Luchttemperatuur Taal instellen op een vlakke en stofvrije ondergrond Relatieve luchtvochtigheid -niveau instellen • zorg ervoor dat de melder stabiel staat en dat er geen voorwerpen zijn die het binnendringen van CO in de melder belemmeren Graden Celsius...
- Page 29 Display en bediening Display en bediening Menupagina's van het OLED-scherm LED-display en geluiden 1. Na het inschakelen van de melder verschijnt eerst het menu "Temperatuur en 1. Bij voeding via netstroomadapter: luchtvochtigheid" Toestand Display Toon 2. Druk in stand-by op de toets "+" of "-" om naar de volgende/vorige pagina te gaan Scherm uit, CO groen knippert...
- Page 30 Display en bediening Instellingen 2. Indien gevoed door batterij: Menu-instellingen bewerken Wanneer het kooldioxideniveau verandert in "slecht", gaat het display aan, 1. Schakel de melder in, druk drie seconden op de knop "Instellingen" knipperen de rode LED en het display, en klinkt er gedurende 30 seconden een alarmtoon.
- Page 31 Instellingen Instellingen, Oplossen van problemen Max. en min. waarde voor CO alarm instellen Alarm log bekijken knippert tijdens het instellen 1. Ga naar de vorige vermelding door op de toets te drukken en naar de volgende vermelding door op de 2.
- Page 32 Oplossen van problemen, Schoonmaken Technische gegevens 5. handmatige kalibratie Technische gegevens → Verse en droge buitenlucht is vereist voor handmatige kalibratie wanneer Voeding AC-adapter Input: AC 100~240V de CO -waarde ca. 500 ppm bedraagt. Kalibreer de melder niet in de regen. Uitgang DC 5V/1A Micro-USB Een hoge luchtvochtigheid verhoogt het CO -gehalte in de lucht.
-
Page 33: Aanwijzingen Over De Batterij
WEEE-Reg.-Nr. DE79663011 uitgesloten. Conformiteitsverklaring • ABUS is niet aansprakelijk voor gebreken en schade die zijn veroorzaakt door inwerkingen van buitenaf (bijvoorbeeld door transport, inwerking van Hiermee verklaart ABUS August Bremicker Söhne KG, dat het apparaat type Air- geweld, onjuiste bediening), onjuist gebruik, normale slijtage of het niet in... - Page 34 Dotazione, Display e comandi © ABUS 2021 Dotazione ABUS August Bremicker Söhne KG | D 58292 Wetter | Germany. • Allarme anidride carbonica ABUS • Batteria agli ioni di litio da 1000 mAh Tel.: +49 (0) 23 35 63 40 |...
-
Page 35: Messa In Funzione
Conformità d’uso, Messa in funzione Montaggio Conformità d’uso 4. Non coprire il rivelatore e soprattutto non bloccare le prese d'aria quando il rivelatore è attivo Usare il dispositivo esclusivamente per lo scopo per cui è stato costruito e 5. Tenere l'acqua e altri liquidi lontano dal rilevatore, poiché non è progettato! Qualsiasi altro uso è... -
Page 36: Tasti Operativi
Montaggio, Display OLED e tasti operativi Display OLED e tasti operativi Montaggio del supporto: Simboli del display OLED • Piegare la base sul lato inferiore dell'involucro e posizionare il rilevatore su Temperatura dell'aria Selezione una superficie piana e priva di polvere Umidità... - Page 37 Display OLED e tasti operativi Display OLED e tasti operativi Pagine di menu del display OLED Display a LED e suoni 1. Dopo l'accensione del rilevatore, il menu "Temperatura e umidità" appare 1. Se alimentato tramite adattatore CA: per primo Stato Display Suono...
- Page 38 Display OLED e tasti operativi Impostazioni 2. Quando è alimentato a batteria: Modificare le impostazioni del menu Quando il livello di anidride carbonica passa a "cattivo", il display si accende, 1. Accendere il rilevatore, premere il pulsante il LED rosso e il display lampeggiano e il tono di allarme suona per 30 secondi. "Impostazioni”...
-
Page 39: Suggerimenti Per La Risoluzione Dei Problemi
Impostazioni Impostazioni, Risoluzione dei problemi Impostare il valore massimo e minimo per l'allarme CO Visualizzare il registro degli allarmi lampeggia durante l'impostazione 1. Passa alla voce precedente premendo il tasto alla voce successiva premendo il tasto 2. Diminuire il valore premendo il pulsante aumentare il valore premendo il pulsante 2. -
Page 40: Dati Tecnici
Risoluzione dei problemi, Pulizia Dati tecnici 5. Calibrazione manuale Dati tecnici → L'aria esterna fresca e secca è necessaria per la calibrazione manuale Alimentazione di tensione Ingresso adattatore CA: CA 100~240V quando il valore di CO è circa 500 ppm. Non calibrare il rilevatore sotto la Uscita CC 5V/1A Micro-USB pioggia. -
Page 41: Avvertenze Sulla Batteria
Garanzia smaltimento. Le informazioni sui punti di raccolta per i vostri vecchi apparecchi • I prodotti ABUS sono progettati e realizzati con la massima cura e testati possono essere ottenute, per esempio, dalle amministrazioni comunali o secondo le disposizioni vigenti. -
Page 42: Volumen De Entrega
Volumen de entrega, Pantalla y controles Volumen de entrega • Alarma de dióxido de carbono • Batería de iones de litio de 1000 mAh y 3,7 V ABUS AirSecure (batería de reserva instalada de forma fija) • Cable micro USB •... - Page 43 Uso adecuado, Puesta en marcha Montaje Uso adecuado el detector esté activo 5. Mantenga el detector alejado del agua y otros líquidos, ya que no es Utilice el aparato únicamente para la finalidad para la que ha sido concebido y impermeable fabricado.
-
Page 44: Teclas De Manejo
Montaje, Teclas de manejo Símbolos de la pantalla Montaje de pie: Símbolos de la pantalla OLED • Despliegue el soporte para mesa de la parte inferior de la carcasa y coloque el Temperatura del aire Selección detector sobre una superficie plana y libre de polvo Humedad relativa Fijar fecha y hora •... - Page 45 Páginas del menú de la pantalla Páginas del menú de la pantalla Páginas del menú de la pantalla OLED Indicadores LED y sonidos 1. Tras encender el detector, aparece primero el menú "Temperatura y 1. En caso de alimentación mediante adaptador de CA: humedad"...
- Page 46 Páginas del menú de la pantalla Ajustes 2. En caso de alimentación con batería: Editar los ajustes del menú Cuando el nivel de dióxido de carbono cambia a "desfavorable", la pantalla 1. Encienda el detector, pulse el botón "Ajustes" se enciende, el LED rojo y la pantalla parpadean y la alarma suena durante durante tres segundos 30 segundos.
- Page 47 Ajustes Ajustes, Resolución de problemas Ajustar el valor máximo y mínimo de la alarma de CO Ver el registro de alarmas Parpadeo durante el ajuste 1. Desplácese a la entrada anterior pulsando el botón y a la siguiente pulsando el botón 2.
-
Page 48: Datos Técnicos
Resolución de problemas, Limpieza Datos técnicos 5. Calibración manual Datos técnicos → Para la calibración manual, se requiere aire exterior fresco y seco si el valor Alimentación de tensión Entrada del adaptador de CA: CA 100-240 V de CO es de aprox. 500 ppm. No calibre el detector bajo la lluvia. La Salida CC 5 V/1 A micro USB humedad alta aumenta el contenido de CO en el aire. -
Page 49: Declaración De Conformidad
• La garantía cubrirá exclusivamente los defectos que estén originados por errores en los materiales o en la fabricación. En caso de que se pueda WEEE-Reg.-Nr. DE79663011 demostrar un error en los materiales o la fabricación, ABUS decidirá si reparar o reemplazar el producto. Declaración de conformidad •... - Page 50 – 98 – – 99 –...
- Page 51 © ABUS 2021 ABUS August Bremicker Söhne KG | D 58292 Wetter | Germany. Tel.: +49 (0) 23 35 63 40 | – 100 –...