Abus AirSecure CO2WM110 Manuel D'utilisation

Détecteur de dioxyde de carbone
Masquer les pouces Voir aussi pour AirSecure CO2WM110:

Publicité

Les langues disponibles
  • FR

Les langues disponibles

Liens rapides

AirSecure
Kohlendioxid-Warnmelder
Kohlendioxidmelder_CO2WM110_Manual_3.indd 1
All manuals and user guides at all-guides.com
CO2WM110
TM
Bedienungsanleitung
Kohlendioxid-Warnmelder
User manual
Carbon dioxide alarm
Manuel d'utilisation
Détecteur de dioxyde de
carbone
Gebruikershandleiding
Co
-melder
2
Istruzioni per l'uso
Rilevatore di CO
DE
GB
FR
NL
IT
2
04.03.2021 16:46:38
04.03.2021 16:46:38

Publicité

Table des Matières
loading

Sommaire des Matières pour Abus AirSecure CO2WM110

  • Page 1 All manuals and user guides at all-guides.com AirSecure CO2WM110 Kohlendioxid-Warnmelder Bedienungsanleitung Kohlendioxid-Warnmelder User manual Carbon dioxide alarm Manuel d'utilisation Détecteur de dioxyde de carbone Gebruikershandleiding -melder Istruzioni per l'uso Rilevatore di CO Kohlendioxidmelder_CO2WM110_Manual_3.indd 1 Kohlendioxidmelder_CO2WM110_Manual_3.indd 1 04.03.2021 16:46:38 04.03.2021 16:46:38...
  • Page 2 All manuals and user guides at all-guides.com Bitte lesen diese Please read this guide Anleitung vor der Montage und carefully before installation and Inbetriebnahme sorgfältig durch. use. Keep these instructions and Bewahren Sie die Anleitung auf provide all users with instruction und weisen Sie jeden Nutzer auf on how to use it.
  • Page 3: Lieferumfang

    All manuals and user guides at all-guides.com Lieferumfang, Anzeige und Bedienelemente Lieferumfang • ABUS AirSecure • 1000 mAh 3,7 V Lithium-Ion Batterie Kohlendioxid-Warnmelder CO2WM110 (fest verbaute Backup-Batterie) • Micro-USB-Kabel • AC-Adapter (5 V/1 A Ausgang) • Diese Bedienungsanleitung • Montagematerial: Schrauben, Dübel...
  • Page 4: Bestimmungsgemäße Verwendung

    All manuals and user guides at all-guides.com Bestimmungsgemäße Verwendung, Inbetriebnahme Bestimmungsgemäße Verwendung Verwenden Sie das Gerät ausschließlich für den Zweck für den es gebaut und konzipiert wurde! Jede andere Verwendung gilt als nicht bestimmungsgemäß! Dieses Gerät darf nur für folgenden Zweck verwendet werden: ·...
  • Page 5 All manuals and user guides at all-guides.com Montage Lufteinlässe nicht, während der Melder aktiv ist 5. Halten Sie Wasser und andere Flüssigkeiten vom Melder fern, da er nicht wasserdicht ist 6. Führen Sie keine scharfen, brennbaren oder metallischen Gegenstände in die Lufteinlässe, da dies zu einem elektrischen Schlag oder Verbrennungen führen kann 7.
  • Page 6 All manuals and user guides at all-guides.com Montage, Anzeige und Bedienelemente Standmontage: • den Tischfuß an der Unterseite des Gehäuses ausklappen und den Melder auf eine ebene und staubfreie Unterlage stellen • sicherstellen, dass der Melder stabil steht und keine Gegenstände das Eindringen von CO in den Melder stören Bedientasten...
  • Page 7 All manuals and user guides at all-guides.com Anzeige und Bedienelemente Symbole der OLED-Anzeige Lufttemperatur Sprache einstellen -Level einstellen Relative Luftfeuchtigkeit Grad Celsius Temperatur- und Luftfeuchtig- keits- Level einstellen Grad Fahrenheit Kohlendioxid (CO Nicht stören -Alarmprotokoll -Gehalt in parts per million (Anteile CO pro Million Temperatureinheit einstellen...
  • Page 8 All manuals and user guides at all-guides.com Anzeige und Bedienelemente Menü-Seiten der OLED-Anzeige 1. Nach dem Einschaltes des Melders erscheint das Menü "Temperatur und Luftfeuchtigkeit" als erstes 2. Im Standby-Modus durch Drücken der "+" oder "-" Taste zur nächsten / vorigen Seite wechseln Menü...
  • Page 9 All manuals and user guides at all-guides.com Anzeige und Bedienelemente LED-Anzeige und Töne 1. Bei Versorgung über AC-Adapter: Zustand Display Bildschirm aus, CO grün blinkt alle Gehalt gut 5 Sekunden Bildschirm an, CO grün leuchtet normal Gehalt gut Bildschirm aus, CO gelb blinkt alle Gehalt normal 5 Sekunden...
  • Page 10 All manuals and user guides at all-guides.com Anzeige und Bedienelemente 2. Bei Versorgung über Batterie: Wenn der Kohlendioxid-Gehalt auf „schlecht“ wechselt, schaltet sich das Display ein, die rote LED und das Display blinken und der Alarmton ertönt 30 Sekunden lang. Danach leuchten die rote LED und das Display weiter für 1 Minute;...
  • Page 11 All manuals and user guides at all-guides.com Einstellungen Menü-Einstellungen bearbeiten 1. Melder einschalten, für drei Sekunden die Taste "Einstellungen" drücken 2. Taste "Einstellungen" kurz drücken um das aktuelle Symbol auszuwählen 3. Durch Drücken der Taste nach links und durch Drücken der Taste nach rechts bewegen 4.
  • Page 12 All manuals and user guides at all-guides.com Einstellungen Max. und Min.-Wert für CO -Alarm einstellen blinkt während der Einstellung 2. Durch Drücken der Taste den Wert verringern und durch Drücken der Taste den Wert erhöhen 3. Zum Beenden und Speichern der gewählten Einstellungen die Taste drücken 4.
  • Page 13 All manuals and user guides at all-guides.com Einstellungen, Fehlerbehebung Alarmprotokoll einsehen 1. Durch Drücken der Taste zum vorigen Eintrag und durch Drücken der Taste zum nächsten Eintrag wechseln 2. Zum Beenden und zurückkehren ins Hauptmenü der Einstellungen die Taste drücken Temperatureinheit einstellen 1.
  • Page 14 All manuals and user guides at all-guides.com Fehlerbehebung, Reinigen 5. manuelle Kalibrierung → Für die manuelle Kalibrierung ist frische und trockene Außenluft erforderlich, wenn der CO -Wert ca. 500 ppm beträgt. Kalibrieren Sie den Melder nicht bei Regen. Hohe Luftfeuchtigkeit erhöht den CO -Gehalt in der Luft.
  • Page 15: Technische Daten

    All manuals and user guides at all-guides.com Technische Daten Technische Daten Spannungsversorgung AC Adapter Eingang: AC 100~240V Ausgang DC 5V/1A Micro-USB Notstrom-Versorgung 1000mAh 3,7V Lithium-Ion Batterie (fest verbaut) -Sensortyp nicht-dispersiver Infrarot (NDIR)-Sensor -Sensorlebensdauer* max. 10 Jahre Betriebstemperatur -10° bis 40° C Luftfeuchtigkeit 0 % bis 95 % (nicht kondensierend) Montageort...
  • Page 16 • Die Gewährleistung endet in diesen Fällen mit dem Ablauf der ursprünglichen Gewährleistungszeit von 2 Jahren. Weitergehende Ansprüche sind ausdrücklich ausgeschlossen. • ABUS haftet nicht für Mängel und Schäden, die durch äußere Einwirkungen (z. B. durch Transport, Gewalteinwirkung, Fehlbedienung), unsachgemäße Anwendung, normalen Verschleiß oder durch Nichtbeachtung dieser Anleitung entstanden sind.
  • Page 17: Entsorgung

    Produkte über die kommunale Sammelstelle für Elektroschrott. WEEE-Reg.-Nr. DE79663011 Konformitätserklärung Hiermit erklärt ABUS August Bremicker Söhne KG, Altenhofer Weg 25, 58300 Wetter, dass sich das Gerät CO2WM110 bei bestimmungsgemäßer Verwendung in Übereinstimmung mit den grundlegenden Anforderungen und den übrigen einschlägigen Bestimmungen der Richtlinien 2014/30/EU und 2011/65/EU be- findet.
  • Page 18 All manuals and user guides at all-guides.com – 18 – Kohlendioxidmelder_CO2WM110_Manual_3.indd 18 Kohlendioxidmelder_CO2WM110_Manual_3.indd 18 04.03.2021 16:46:44 04.03.2021 16:46:44...
  • Page 19: Scope Of Delivery

    All manuals and user guides at all-guides.com Scope of delivery, Display and controls Scope of delivery • ABUS AirSecure • 1000 mAh 3,7 V lithium-ion battery carbon dioxide alarm CO2WM110 (built in backup battery) • Micro-USB-cable • AC adapter (5 V/1 A output) •...
  • Page 20: Intended Use

    All manuals and user guides at all-guides.com Intended use, Start-up Intended use Only use the device for the purpose for which it was built and designed. Any other use is not considered to be the intended use! This device may only be used for the following purpose: ·...
  • Page 21 All manuals and user guides at all-guides.com Installation the detector is active 5. Keep water and other liquids away from the detector as it is not waterproof 6. Do not insert sharp, flammable or metallic objects into the air inlets as this can result in an electric shock or burns 7.
  • Page 22: Operating Buttons

    All manuals and user guides at all-guides.com Installation, Operating buttons and display symbols Stand mounting: • fold out the table base on the underside of the housing and place the detector on a flat and dust-free surface • ensure that the detector is stable and that no objects interfere with the penetration of CO into the detector Operating buttons...
  • Page 23 All manuals and user guides at all-guides.com Operating buttons and display symbols OLED display symbols Air temperature Manual language selection Relative humidity Set CO level Degrees Celsius Set temperature and humidity levels Degrees Fahrenheit Do not disturb Carbon dioxide (CO alarm history content in parts per million (proportions of CO...
  • Page 24 All manuals and user guides at all-guides.com Operating buttons and display symbols Menu pages of the OLED display 1. When the detector is switched on, the "Temperature and humidity" menu wil appear first 2. In standby mode, press the "+" or "-" button to go to the next / previous page Menu 1: Temperature Menu 2: Carbon...
  • Page 25 All manuals and user guides at all-guides.com Operating buttons and display symbols LED display and tones 1. When powered via AC adapter: Status Display Sound Screen off, CO flashes green content good every 5 seconds Screen on, CO lights up green normal content good Screen off, CO...
  • Page 26 All manuals and user guides at all-guides.com Operating buttons and display symbols 2. When supplied by battery: When the carbon dioxide level changes to " poor ", the display turns on, the red LED and the display flash, and the alarm tone sounds for 30 seconds. After that, the red LED and display continue to light for 1 minute;...
  • Page 27 All manuals and user guides at all-guides.com Settings Edit menu settings 1. Switch on the detector, press the "Settings" button for three seconds 2. Press the "Settings" button briefly to select the current symbol 3. Move to the left by pressing the button and to the right by pressing the button...
  • Page 28 All manuals and user guides at all-guides.com Settings Set max. and min. value for CO alarm flashes during setting 2. Decrease the value by pressing the button and increase the value by pressing the button 3. To exit and save the selected settings, press the button 4.
  • Page 29: Troubleshooting Tips

    All manuals and user guides at all-guides.com Settings, Troubleshooting View alarm history 1. Move to the previous entry by pressing the button and to the next entry by pressing the button 2. Press the button to exit and return to the main settings menu Set temperature unit 1.
  • Page 30 All manuals and user guides at all-guides.com Troubleshooting, Cleaning 5. Manual calibration → Fresh and dry outdoor air is required for manual calibration when the CO value is approx. 500 ppm. Do not calibrate the detector in the rain. High humidity increases the CO content in the air.
  • Page 31: Technical Data

    All manuals and user guides at all-guides.com Technical data Technical data Power supply AC adapter input: AC 100~240V Output DC 5V/1A Micro-USB Emergency power supply 1000mAh 3.7V lithium-ion battery (built in) sensor type non-dispersive infrared (NDIR) sensor sensor lifespan* max. 10 years Operating temperature -10°...
  • Page 32: Information On The Battery

    • In such cases, the warranty ends with the termination of the original warranty period of 2 years. Any further claims are expressly excluded. • ABUS assumes no liability for defects or damage that has been caused by external influences (e.g. transport, external forces), improper use, normal wear and tear or non-compliance with this operating and installation instructions document.
  • Page 33: Declaration Of Conformity

    WEEE-Reg.-Nr. DE79663011 Declaration of conformity ABUS August Bremicker Söhne KG, Altenhofer Weg 25, 58300 Wetter hereby declares that the device CO2WM110 is in compliance with the essential requirements and other relevant provisions of Directives 2014/30/EU and 2011/65/EU.
  • Page 34 All manuals and user guides at all-guides.com – 34 – Kohlendioxidmelder_CO2WM110_Manual_3.indd 34 Kohlendioxidmelder_CO2WM110_Manual_3.indd 34 04.03.2021 16:46:47 04.03.2021 16:46:47...
  • Page 35: Contenu De La Livraison

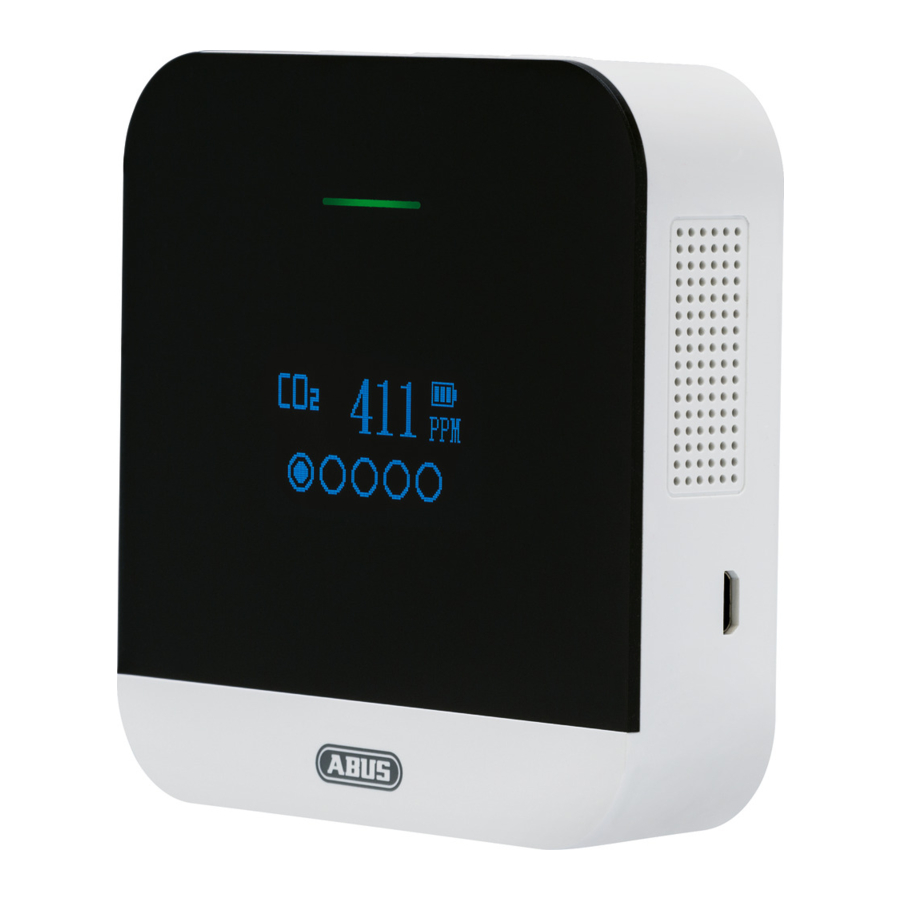
    All manuals and user guides at all-guides.com Contenu de la livraison, Affichage et éléments de commande Contenu de la livraison • Détecteur de dioxyde de carbone ABUS • Batterie lithium-ion de mAh AirSecure CO2WM110 3,7 V (batterie de secours • Câble Micro-USB installée à...
  • Page 36: Utilisation Conforme

    All manuals and user guides at all-guides.com Utilisation conforme, Mise en service Utilisation conforme Utilisez l’appareil exclusivement aux fins pour lesquelles il a été construit et conçu ! Toute autre utilisation est considérée comme non conforme ! Cet appareil est destiné uniquement à l’usage suivant : ·...
  • Page 37 All manuals and user guides at all-guides.com Montage 3. Afin de maintenir la meilleure performance de votre détecteur, veuillez l'utiliser pendant au moins 24 heures de fonctionnement permanent 4. Ne couvrez pas le détecteur et ne bloquez pas les entrées d'air lorsque le détecteur est actif 5.
  • Page 38: Touches De Commande

    All manuals and user guides at all-guides.com Montage, Touches de commande et symboles de l'écran Montage sur pied : • déployez le pied de table sur la face inférieure du boîtier et placez le détecteur sur une surface plane et sans poussière •...
  • Page 39 All manuals and user guides at all-guides.com Touches de commande et symboles de l'écran Symboles de l'écran OLED Température de l'air Sélection Réglage de l'heure et de la Humidité relative de l’air date Degrés Celsius Réglage de la langue Degrés Fahrenheit Réglage du niveau de CO Dioxyde de carbone (CO Réglage des niveaux de...
  • Page 40 All manuals and user guides at all-guides.com Touches de commande et symboles de l'écran Pages de menu de l'écran OLED 1. Après avoir allumé le détecteur, le menu "Température et humidité" apparaît en premier 2. En mode veille, appuyez sur le bouton "+" ou "-" pour passer à la page suivante/ précédente Menu 1 : Température Menu 2 : Teneur en...
  • Page 41 All manuals and user guides at all-guides.com Touches de commande et symboles de l'écran Affichage LED et sons 1. Alimentation via un adaptateur AC : État Display Écran éteint, bonne Clignotement teneur en CO vert toutes les 5 secondes Écran allumé, bonne Allumée en normal teneur en CO...
  • Page 42 All manuals and user guides at all-guides.com Touches de commande et symboles de l'écran 2. Alimentation par batterie : Lorsque le niveau de dioxyde de carbone passe à "mauvais", l'écran s'allume, la LED rouge et l'affichage clignotent et le signal d'alarme retentit pendant 30 secondes.
  • Page 43: Modifier Les Paramètres Du Menu

    All manuals and user guides at all-guides.com Réglage Modifier les paramètres du menu 1. Allumez le détecteur, appuyez sur le bouton « Paramètres » pendant trois secondes 2. Appuyez brièvement sur le bouton « Paramètres » pour sélectionner le symbole actuel 3.
  • Page 44 All manuals and user guides at all-guides.com Réglage Réglage des valeurs max. et min. pour l'alarme de CO clignote pendant le réglage 2. Diminuez la valeur en appuyant sur le bouton augmentez la valeur en appuyant sur le bouton 3. Appuyez sur le bouton pour quitter et enregistrer les paramètres sélectionnés 4.
  • Page 45: Conseils De Dépannage

    All manuals and user guides at all-guides.com Réglage, Dépannage Consultation du journal des alarmes 1. Passez à l'entrée précédente en appuyant sur la touche et à l'entrée suivante en appuyant sur la touche 2. Appuyez sur le bouton pour quitter et revenir au menu principal des paramètres Réglage des unités de température 1.
  • Page 46: Nettoyage

    All manuals and user guides at all-guides.com Dépannage, Nettoyage 5. Étalonnage manuel → De l’air extérieur frais et sec est nécessaire pour l'étalonnage manuel lorsque la valeur de CO est d'environ 500 ppm. Ne calibrez pas le détecteur en cas de pluie. Une humidité de l’air élevée augmente la teneur en CO l'air.
  • Page 47: Données Techniques Tension D'alimentation

    All manuals and user guides at all-guides.com Données techniques Données techniques Tension d’alimentation Entrée de l'adaptateur CA : AC 100~240 V Sortie DC 5 V/1 A Micro-USB Alimentation électrique de Batterie Lithium-Ion 1 000 mAh 3,7 V secours (installée en permanence) Type de capteur de CO capteur infrarouge non dispersif (NDIR) Durée de vie du capteur de CO...
  • Page 48: Garantie

    2 ans. Toute revendication au-delà de cette date est explicitement exclue. • ABUS décline toute responsabilité pour des vices et dommages résultant du milieu ambiant (p. ex. avaries de transport, emploi de la force, manutention incorrecte), d’une utilisation incorrecte, de l’usure normale ou de la non-observation des présentes instructions.
  • Page 49: Elimination

    Nr adhérent DEEE-Fr : M1155 Déclaration de conformité La société ABUS August Bremicker Söhne KG déclare par la présente que l‘appareil CO2WM110 lorsqu‘il est utilisé selon les directives est conforme aux exigences fondamentales et aux dispositions en vigueur des directives 2014/30/ EU et 2011/65/EU.
  • Page 50 All manuals and user guides at all-guides.com – 50 – Kohlendioxidmelder_CO2WM110_Manual_3.indd 50 Kohlendioxidmelder_CO2WM110_Manual_3.indd 50 04.03.2021 16:47:03 04.03.2021 16:47:03...
  • Page 51: Inhoud Van De Levering

    All manuals and user guides at all-guides.com Inhoud van de levering, Display en bedieningselementen Inhoud van de levering • ABUS AirSecure kooldioxide- • 1000 mAh 3,7 V Lithium-Ion batterij alarm CO2WM110 (permanent geïnstalleerde backup- • Micro-USB-kabel batterij) • Deze gebruiksaanwijzing •...
  • Page 52: Beoogd Gebruik

    All manuals and user guides at all-guides.com Beoogd gebruik, Ingebruikname Beoogd gebruik Gebruik het apparaat uitsluitend voor het doel waarvoor het werd gebouwd en ontworpen! Elk ander gebruik wordt als oneigenlijk gebruik beschouwd! Dit toestel mag alleen als volgt gebruikt worden: ·...
  • Page 53 All manuals and user guides at all-guides.com Montage 4. Dek de melder niet af en blokkeer vooral de luchtinlaten niet terwijl de melder actief is 5. Houd water en andere vloeistoffen uit de buurt van de melder, want hij is niet waterdicht 6.
  • Page 54 All manuals and user guides at all-guides.com Montage, Display en bediening Vrijstaande montage: • klap de tafelvoet aan de onderzijde van de behuizing uit en plaats de melder op een vlakke en stofvrije ondergrond • zorg ervoor dat de melder stabiel staat en dat er geen voorwerpen zijn die het binnendringen van CO in de melder belemmeren Bedieningstoetsen...
  • Page 55 All manuals and user guides at all-guides.com Display en bediening OLED-displaysymbolen Luchttemperatuur Taal instellen Relatieve luchtvochtigheid -niveau instellen Graden Celsius Temperatuur- en vochtigheids- niveaus instellen Graden Fahrenheit Niet storen Kooldioxide (CO -gehalte in delen per miljoen alarmprotocol (deeltjes CO per miljoen molecu- Temperatuureenheid instellen len in de lucht) (°C/ °F)
  • Page 56 All manuals and user guides at all-guides.com Display en bediening Menupagina's van het OLED-scherm 1. Na het inschakelen van de melder verschijnt eerst het menu "Temperatuur en luchtvochtigheid" 2. Druk in stand-by op de toets "+" of "-" om naar de volgende/vorige pagina te gaan Menu 1: Temperatuur Menu 2:...
  • Page 57 All manuals and user guides at all-guides.com Display en bediening LED-display en geluiden 1. Bij voeding via netstroomadapter: Toestand Display Toon Scherm uit, CO groen knippert gehalte goed om de 5 sec. Scherm aan, CO groene brandt normaal gehalte goed Scherm uit, CO geel knippert gehalte normaal...
  • Page 58 All manuals and user guides at all-guides.com Display en bediening 2. Indien gevoed door batterij: Wanneer het kooldioxideniveau verandert in "slecht", gaat het display aan, knipperen de rode LED en het display, en klinkt er gedurende 30 seconden een alarmtoon. Daarna blijven de rode LED en het scherm gedurende 1 minuut branden;...
  • Page 59 All manuals and user guides at all-guides.com Instellingen Menu-instellingen bewerken 1. Schakel de melder in, druk drie seconden op de knop "Instellingen" 2. Druk kort op de toets "Instellingen" om het huidige symbool te selecteren 3. Ga naar links door op de toets te drukken en naar rechts door op de toets te drukken...
  • Page 60 All manuals and user guides at all-guides.com Instellingen Max. en min. waarde voor CO alarm instellen knippert tijdens het instellen 2. Verlaag de waarde door op de toets te drukken en verhoog de waarde door op de toets te drukken 3.
  • Page 61: Tips Voor Het Oplossen Van Problemen

    All manuals and user guides at all-guides.com Instellingen, Oplossen van problemen Alarm log bekijken 1. Ga naar de vorige vermelding door op de toets te drukken en naar de volgende vermelding door op de toets te drukken 2. Druk op de toets om af te sluiten en terug te keren naar het hoofdinstellingenmenu Temperatuureenheid instellen...
  • Page 62 All manuals and user guides at all-guides.com Oplossen van problemen, Schoonmaken 5. handmatige kalibratie → Verse en droge buitenlucht is vereist voor handmatige kalibratie wanneer de CO -waarde ca. 500 ppm bedraagt. Kalibreer de melder niet in de regen. Een hoge luchtvochtigheid verhoogt het CO -gehalte in de lucht.
  • Page 63: Technische Gegevens

    All manuals and user guides at all-guides.com Technische gegevens Technische gegevens Voeding AC-adapter Input: AC 100~240V Uitgang DC 5V/1A Micro-USB Noodstroomvoorziening 1000mAh 3.7V Lithium-Ion batterij (vast geïnstalleerd) Type CO -sensor niet-dispersieve infrarood (NDIR) -sensorlevensduur* max. 10 jaar Bedrijfstemperatuur -10° tot 40° C Luchtvochtigheid 0 % tot 95% (niet-condenserend) Bevestiging aan de muur of vrijstaande...
  • Page 64: Aanwijzingen Over De Batterij

    2 jaar. Verdergaande aanspraken zijn uitdrukkelijk uitgesloten. • ABUS is niet aansprakelijk voor gebreken en schade die zijn veroorzaakt door inwerkingen van buitenaf (bijvoorbeeld door transport, inwerking van geweld, onjuiste bediening), onjuist gebruik, normale slijtage of het niet in acht nemen van deze handleiding.
  • Page 65: Conformiteitsverklaring

    WEEE-Reg.-Nr. DE79663011 Conformiteitsverklaring Hiermee verklaart ABUS August Bremicker Söhne KG, dat het apparaat type CO2WM110 voldoet aan de essentiële eisen en overige geldende bepalingen van de richtlijnen 2014/30/EU en 2011/65/EU. De volledige tekst van de EU-conformit- eitsverklaring kan worden aangevraagd op: info@abus.de...
  • Page 66 All manuals and user guides at all-guides.com – 66 – Kohlendioxidmelder_CO2WM110_Manual_3.indd 66 Kohlendioxidmelder_CO2WM110_Manual_3.indd 66 04.03.2021 16:47:18 04.03.2021 16:47:18...
  • Page 67: Display E Comandi

    All manuals and user guides at all-guides.com Dotazione, Display e comandi Dotazione • Allarme anidride carbonica ABUS • Batteria agli ioni di litio da 1000 mAh AirSecure CO2WM110 3,7 V (batteria di riserva installata in • Cavo micro-USB modo permanente) •...
  • Page 68: Messa In Funzione

    All manuals and user guides at all-guides.com Conformità d’uso, Messa in funzione Conformità d’uso Usare il dispositivo esclusivamente per lo scopo per cui è stato costruito e progettato! Qualsiasi altro uso è considerato improprio! Utilizzare questo apparecchio esclusivamente per il seguente scopo: ·...
  • Page 69 All manuals and user guides at all-guides.com Montaggio 4. Non coprire il rivelatore e soprattutto non bloccare le prese d'aria quando il rivelatore è attivo 5. Tenere l'acqua e altri liquidi lontano dal rilevatore, poiché non è impermeabile 6. Non inserire oggetti appuntiti, infiammabili o metallici nelle prese d'aria, poiché...
  • Page 70: Tasti Operativi

    All manuals and user guides at all-guides.com Montaggio, Display OLED e tasti operativi Montaggio del supporto: • Piegare la base sul lato inferiore dell'involucro e posizionare il rilevatore su una superficie piana e priva di polvere • Assicurarsi che il rivelatore sia stabile e che nessun oggetto interferisca con la penetrazione della CO nel rivelatore Tasti operativi...
  • Page 71 All manuals and user guides at all-guides.com Display OLED e tasti operativi Simboli del display OLED Temperatura dell'aria Selezione Umidità relativa Impostare l'ora e la data Gradi Celsius Impostare la lingua Gradi Fahrenheit Impostare il livello di CO Anidride carbonica (CO Impostare i livelli di temperatura e umidità...
  • Page 72 All manuals and user guides at all-guides.com Display OLED e tasti operativi Pagine di menu del display OLED 1. Dopo l'accensione del rilevatore, il menu "Temperatura e umidità" appare per primo 2. In modalità standby, premere il pulsante "+" o "-" per passare alla pagina successiva/precedente Menu 1: Temperatura Menu 2: Livello di...
  • Page 73 All manuals and user guides at all-guides.com Display OLED e tasti operativi Display a LED e suoni 1. Se alimentato tramite adattatore CA: Stato Display Suono Schermo spento, il verde lampeggia livello di CO buono ogni 5 secondi Schermo acceso, Il verde lampeggia normale livello di CO...
  • Page 74 All manuals and user guides at all-guides.com Display OLED e tasti operativi 2. Quando è alimentato a batteria: Quando il livello di anidride carbonica passa a "cattivo", il display si accende, il LED rosso e il display lampeggiano e il tono di allarme suona per 30 secondi. Dopodiché, il LED rosso e il display continuano a illuminarsi per 1 minuto;...
  • Page 75 All manuals and user guides at all-guides.com Impostazioni Modificare le impostazioni del menu 1. Accendere il rilevatore, premere il pulsante "Impostazioni” per tre secondi 2. Premere brevemente il pulsante "Impostazioni" per selezionare il simbolo corrente 3. Spostarsi a sinistra premendo il pulsante destra premendo il pulsante 4.
  • Page 76 All manuals and user guides at all-guides.com Impostazioni Impostare il valore massimo e minimo per l'allarme CO lampeggia durante l'impostazione 2. Diminuire il valore premendo il pulsante aumentare il valore premendo il pulsante 3. Premere il pulsante per uscire e salvare le impostazioni selezionate 4.
  • Page 77: Suggerimenti Per La Risoluzione Dei Problemi

    All manuals and user guides at all-guides.com Impostazioni, Risoluzione dei problemi Visualizzare il registro degli allarmi 1. Passa alla voce precedente premendo il tasto alla voce successiva premendo il tasto 2. Premere il pulsante per uscire e tornare al menu principale delle impostazioni Impostare l'unità...
  • Page 78 All manuals and user guides at all-guides.com Risoluzione dei problemi, Pulizia 5. Calibrazione manuale → L'aria esterna fresca e secca è necessaria per la calibrazione manuale quando il valore di CO è circa 500 ppm. Non calibrare il rilevatore sotto la pioggia.
  • Page 79 All manuals and user guides at all-guides.com Dati tecnici Dati tecnici Alimentazione di tensione Ingresso adattatore CA: CA 100~240V Uscita CC 5V/1A Micro-USB Alimentazione di emergenza Batteria agli ioni di litio da 1000mAh 3.7V (installata in modo permanente) Tipo di sensore di CO sensore a infrarossi non dispersivo (NDIR) Durata del sensore di CO massimo 10 anni...
  • Page 80: Avvertenze Sulla Batteria

    (alimentatore 5V DC) per la ricarica! Non lasciare incustodito l’apparecchio durante la carica! Garanzia • I prodotti ABUS sono progettati e realizzati con la massima cura e testati secondo le disposizioni vigenti. • La garanzia copre esclusivamente i difetti dei materiali o i difetti di produzione presenti al momento dell’acquisto.
  • Page 81: Smaltimento

    WEEE-Reg.-Nr. DE79663011 Dichiarazione di conformità ABUS August Bremicker Söhne KG, Altenhofer Weg 25, 58300 Wetter dichiara con la presente che il dispositivo CO2WM110, quando utilizzato in modo appropriato, è conforme ai requisiti essenziali e alle disposizioni vigenti della direttive 2014/30/EU e 2011/65/EU.
  • Page 82 All manuals and user guides at all-guides.com – 82 – Kohlendioxidmelder_CO2WM110_Manual_3.indd 82 Kohlendioxidmelder_CO2WM110_Manual_3.indd 82 04.03.2021 16:47:33 04.03.2021 16:47:33...
  • Page 83 All manuals and user guides at all-guides.com – 83 – Kohlendioxidmelder_CO2WM110_Manual_3.indd 83 Kohlendioxidmelder_CO2WM110_Manual_3.indd 83 04.03.2021 16:47:33 04.03.2021 16:47:33...
  • Page 84 All manuals and user guides at all-guides.com © ABUS 2021 ABUS August Bremicker Söhne KG | D 58292 Wetter | Germany. Tel.: +49 (0) 23 35 63 40 | – 84 – Kohlendioxidmelder_CO2WM110_Manual_3.indd 84 Kohlendioxidmelder_CO2WM110_Manual_3.indd 84 04.03.2021 16:47:36 04.03.2021 16:47:36...

Table des Matières