Table des Matières
Publicité
Les langues disponibles
Les langues disponibles
Liens rapides
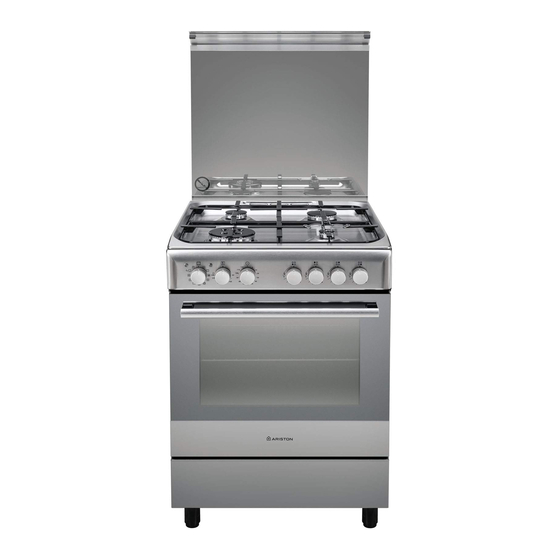
A6TMH2AF EX
A6TMH2AF EX
A6TMH2AF EX
English
English
English
GB
Operating Instructions
COOKER AND OVEN
Contents
Operating Instructions,1
WARNING,2
Description of the appliance-Control Panel,7
Installation,8
Start-up and use,12
Using the hob,12
Cooking modes,13
Precautions and tips,16
Care and maintenance,17
Assistance,17
Français
FR
Mode d'emploi
CUISINIERE ET FOUR
Sommaire
Mode d'emploi,1
ATTENTION,3
Installation,19
Programmes du four,25
Assistance,29
All manuals and user guides at all-guides.com
PT
Instruções para a utilização
FOGÃO E FORNO
Índice
Instruções para a utilização,1
ATTENTACAO,4
Descrição do aparelho-Vista de conjunto,6
Descriçao do aparelho-Painel de comandos,7
Instalaçao,31
ES
Manual de instrucciones
COCINA Y HORNO
Sumario
Manual de instrucciones,1
ATTENTION,5
Descripción del aparato-Vista de conjunto,6
Descripción del aparato-Panel de control,7
Instalación,43
Asistencia,53
AR
Português
Español
Publicité
Table des Matières

Manuels Connexes pour Ariston A6TMH2AF EX


Sommaire des Matières pour Ariston A6TMH2AF EX
-
Page 1: Table Des Matières
All manuals and user guides at all-guides.com A6TMH2AF EX A6TMH2AF EX A6TMH2AF EX English English English Português Operating Instructions Instruções para a utilização COOKER AND OVEN FOGÃO E FORNO Contents Índice Operating Instructions,1 Instruções para a utilização,1 WARNING,2 ATTENTACAO,4 Description of the appliance-Overall view,6 Descrição do aparelho-Vista de conjunto,6... -
Page 2: Warning
All manuals and user guides at all-guides.com WARNING The internal surfaces of the WARNING: The appliance and its compartment (where present) may accessible parts become hot during become hot. use. Never use steam cleaners or Care should be taken to avoid pressure cleaners on the appliance. - Page 3 All manuals and user guides at all-guides.com ATTENTION ATTENTION: cet appareil ainsi que Ne pas utiliser de produits abrasifs ses parties accessibles deviennent ni de spatules métalliques coupan- très chauds pendant leur fonctionne- tes pour nettoyer la porte du four en ment.
- Page 4 All manuals and user guides at all-guides.com ATENÇÃO Não utilizar produtos abrasivos ATENÇÃO: Este aparelho e as suas nem espátulas de metal cortantes partes acessíveis aquecem muito para limpar a porta em vidro do for- durante a utilização. no, uma vez que pode riscar a su- perfície, provocando a ruptura do É...
- Page 5 All manuals and user guides at all-guides.com ATENCIÓN ATENCIÓN ATENCIÓN ATENCIÓN: Este aparato y sus partes No utilice productos abrasivos ni accesibles se calientan mucho durante espátulas de metal cortantes para el uso. limpiar la puerta de cristal del horno ya Por lo tanto, es importante evitar tocar que podrían rayar la superficie y qu- los elementos calentadores.
-
Page 6: Descrição Do Aparelho
All manuals and user guides at all-guides.com Descrição do aparelho Description of the appliance Vista de conjunto Overall view 1. Queimador a gás 1 Hob burner 2. Grade do piano de trabalho 2 Hob Grid 3. Painel de comandos 3.Control panel 4. -
Page 7: Description De L'appareil-Tableau De Bord
All manuals and user guides at all-guides.com Description of the appliance Description de l’appareil Control panel Tableau de bord 1.THERMOSTAT knob 1.Manette du THERMOSTAT 2.SELECTOR knob 2.Manette PROGRAMMES 3.THERMOSTAT Indicator light 3.Voyant lumineux THERMOSTAT 4.Hob BURNER control knob 4.Manette BRULEURS 5.OVEN Indicator light 5.Voyant lumineux FOUR 6.TIMER knob... -
Page 8: Positioning And Levelling
All manuals and user guides at all-guides.com Installation Disposing of combustion fumes ! Before operating your new appliance please read this instruction booklet carefully. It contains important The disposal of combustion fumes should be guaranteed information concerning the safe installation and operation using a hood connected to a safe and efficient natural of the appliance. -
Page 9: Electrical Connection
All manuals and user guides at all-guides.com • Do not position blinds ! Once the appliance has been installed, the power behind the cooker or less HOOD than 200 mm away from supply cable and the electrical socket must be easily Min. -
Page 10: Adapting To Different Types Of Gas
All manuals and user guides at all-guides.com 3. While the burner is alight, quickly change the position of the knob from minimum to maximum and vice versa several times, checking that the flame is not extinguished. ! The hob burners do not require primary air adjustment. ! After adjusting the appliance so it may be used with a different type of gas, replace the old rating label with a new one that corresponds to the new type of gas (these... - Page 11 All manuals and user guides at all-guides.com 5. Once the adjustment has been made, replace the seals A6TMH2AF EX A6TMH2AF EX A6TMH2AF EX on the by-passes using sealing wax ! If the appliance is connected to liquid gas, the regulation screw must be fastened as tightly as possible.
-
Page 12: Start-Up And Use
All manuals and user guides at all-guides.com Start-up and use Practical advice on using the burners Using the hob Lighting the burners For the burners to work in the most efficient way possible For each BURNER knob there is a complete ring showing and to save on the amount of gas consumed, it is the strength of the flame for the relevant burner. -
Page 13: Cooking Modes
All manuals and user guides at all-guides.com • Stop cooking by turning the SELECTOR knob to the MULTI-COOKING mode “0” position. All the heating elements (top, bottom and circular) switch ! Always place cookware on the rack(s) provided. on and the fan begins to operate. Since the heat remains constant throughout the oven, the air cooks and browns THERMOSTAT indicator light food in a uniform manner. -
Page 14: Practical Cooking Advice
All manuals and user guides at all-guides.com WARNING! The oven is provided with BOTTOM VENTILATED mode a stop system to extract the racks and prevent them from coming out of the The bottom heating element and the fan is activated, oven.(1) which allows for the heat distribution within the whole As shown in the drawing, to extract... -
Page 15: Oven Cooking Advice Table
All manuals and user guides at all-guides.com Oven cooking advice table Cooking Foods Weight Rack Position Pre-heating Recommended Cooking modes (in kg) time temperature time (minutes) (minutes) Duck 65-75 Roast veal or beef 70-75 Traditional Pork roast 70-80 Oven Biscuits (short pastry) 15-20 Tarts 30-35... -
Page 16: Precautions And Tips
All manuals and user guides at all-guides.com Precautions and tips ! This appliance has been designed and manufactured • Do not rest heavy objects on the open oven door. in compliance with international safety standards. • The appliance should not be operated by people The following warnings are provided for safety reasons (including children) with reduced physical, sensory and must be read carefully. -
Page 17: Care And Maintenance
All manuals and user guides at all-guides.com Care and maintenance Switching the appliance off Replacing the oven light bulb 1. After disconnecting the oven Disconnect your appliance from the electricity supply from the electricity mains, remove before carrying out any work on it. the glass lid covering the lamp socket (see fi gure). - Page 18 All manuals and user guides at all-guides.com 40° 4.Press the two buttons on the upper profile and extract the profile (see photo) 10.Now the door can be completely closed and the oven can be started for normal use. Steam-Assisted Oven Cleaning This method of cleaning is recommended especially after cooking very fatty (roasted)meats.
-
Page 19: Installation
All manuals and user guides at all-guides.com Installation ! Conservez ce mode d’emploi pour pouvoir le consulter Evacuation des fumées de combustion à tout moment. En cas de vente, de cession ou de La pièce doit prévoir un système d’évacuation vers déménagement, veillez à... -
Page 20: Raccordement Électrique
All manuals and user guides at all-guides.com ! Après installation de l’appareil, le câble électrique et si les éléments suspendus la prise de courant doivent être facilement accessibles sont inflammables (voir HOOD fi gure); ! Le câble ne doit être ni plié ni excessivement écrasé. Min. -
Page 21: Adaptation Aux Différents Types De Gaz
All manuals and user guides at all-guides.com 1. placez le robinet sur la position minimum; Point de SURFACE CHAUDE raccordement 2. enlevez le bouton et tournez la vis de réglage Point de Bouchon Bouchon d'isolation raccordement d'isolation positionnée à l’intérieur ou sur le côté de la tige du Tuyau Tuyau robinet jusqu’à... - Page 22 All manuals and user guides at all-guides.com l’appareil. Si la vis présente un diamètre inférieur à 9 5. Als de regeling voltooid is moet u de zegels op de bypass schroefjes weer op hun plaats brengen met mm, utilisez une rondelle. En présence d’un mur en béton, la vis doit faire au moins 8 mm de diamètre et zegellak of dergelijk materiaal.
- Page 23 Tableau Caractéristiques des brûleurs et des injecteurs Triple Couronne 3.25 1.50 2x65 2x99 (TC) 58 l TC A A6TMH2AF EX A6TMH2AF EX A6TMH2AF EX L’étiquette collée est à l’intérieur du portillon ou sur la paroi intérieure gauche (visible après avoir sorti le tiroir chauffe-plats).
-
Page 24: Mise En Marche Et Utilisation
All manuals and user guides at all-guides.com Mise en marche et utilisation Utilisation du plan de cuisson Conseils pratiques pour l’utilisation des brûleurs Pour un meilleur rendement des brûleurs et une moindre Allumage des brûleurs consommation de gaz, utilisez des casseroles à fond plat, Un petit cercle plein près de chaque bouton BRULEUR munies de couvercle et d’un diamètre adapté... -
Page 25: Programmes De Cuisson
All manuals and user guides at all-guides.com Programme GRIL Eclairage du four Mise en marche de la partie centrale de la résistance de Pour l’allumer, amener le bouton PROGRAMMES sur voûte et du tournebroche (si l’appareil en est équipé). La une position autre que la position “0”. -
Page 26: Conseils De Cuisson
All manuals and user guides at all-guides.com déjà bien cuits à la surface mais encore mous à La manette du minuteur fin de cuisson l.intérieur ou pour des gâteaux garnis de fruits ou de confiture qui ont besoin de se colorer modérément à Certains modèles sont équipés d’un programmateur fin leur surface. - Page 27 All manuals and user guides at all-guides.com ATTENTION ! Le four est équipé d’un système d’arrêts de grilles qui permet de les retirer sans que ces dernières sortent entièrement du four.(1) Pour sortir complètement les grilles il suffi t, comme illustré, de les soulever en les saisissant par l’avant et de les tirer (2).
-
Page 28: Précautions Et Conseils
All manuals and user guides at all-guides.com Précautions et conseils ! Cet appareil a été conçu et fabriqué conformément aux normes • N’utilisez pas de casseroles instables ou déformées. internationales de sécurité. Ces conseils sont fournis pour des • Les surfaces intérieures du tiroir (s’il y en a un) peuvent raisons de sécurité... -
Page 29: Nettoyage Et Entretien
All manuals and user guides at all-guides.com Nettoyage et entretien Mise hors tension Entretien robinets gaz Avant toute opération de nettoyage ou d’entretien coupez Il peut arriver qu’au bout d’un certain temps, un robinet se l’alimentation électrique de l’appareil. bloque ou tourne difficilement. Il faut alors le remplacer. ! Cette opération doit être effectuée par un technicien Nettoyage de l’appareil agréé... -
Page 30: Démontage Et Remontage De La Porte Du Four
All manuals and user guides at all-guides.com Démontage et remontage de la porte du 6. Remonter la vitre. four : A T T E N T I O N ! F o u r n e d o i t p a s ê t r e u t i l i s é 1. -
Page 31: Instalaçao
All manuals and user guides at all-guides.com Instalação ! É importante guardar este folheto para poder consultá- Descarga dos fumos de combustão A descarga dos fumos de combustão deve ser garantida lo a qualquer momento. No caso de venda, cessão ou por meio de um exaustor ligado a uma chaminé... -
Page 32: Ligação Eléctrica
All manuals and user guides at all-guides.com • não colocar cortinas ! Depois de ter instalado o aparelho, o acesso ao cabo atrás do fogão ou a eléctrico e à tomada da corrente deve ser fácil. HOOD menos de 200 mm dos ! O cabo não deve ser dobrado nem comprimido. - Page 33 All manuals and user guides at all-guides.com Regulação do mínimo dos queimadores do plano: Ponto de SUPERFÍCIE QUENTE ligação 1. coloque a torneira na posição de mínimo; Ponto de Fita Fita isoladora ligação isoladora 2. retire o selector e ajuste o parafuso de regulação Conjunto situado no interior ou ao lado da haste da torneira até...
- Page 34 All manuals and user guides at all-guides.com Substituição dos bicos do queimador de tripla coroa 1. retire as grelhas e extraia os queimadores das suas sedes. O queimador é composto por duas partes separadas (ver figuras); 2. desenrosque os bicos, utilizando uma chave de tubo de 7 mm.
- Page 35 Tripla Corona 1.50 2x65 2x99 3.25 (TC) TC A A6TMH2AF EX A6TMH2AF EX A6TMH2AF EX O placa de identificaç o e’ situada no interior da parte escamoteável ou, uma vez aberto o compartimento aquecedor de alimentos, na parede interna esquerda...
-
Page 36: Início E Utilizaçao
All manuals and user guides at all-guides.com Início e utilização Utilização do plano de cozedura Conselhos práticos para utilização dos queimadores Para um melhor rendimento dos queimadores e um Acendimento dos queimadores consumo mínimo de gás é necessário usar recipientes Em correspondência com cada selector de QUEIMADOR de fundo chato, dotados de tampa e proporcionados está... -
Page 37: Programas De Cozedura
All manuals and user guides at all-guides.com ! Coloque sempre os recipientes de cozedura sobre a Programa de COZEDURA MÚLTIPLA grade fornecida. Activam-se todos os elementos aquecedores (superior, inferior e circular) e entra em funcionamento a ventoinha. Como o calor é constante e uniforme em todo o forno, Indicador do TERMÓSTATO o ar coze e cora os alimentos de maneira uniforme. -
Page 38: Conselhos Práticos Para Cozedura
All manuals and user guides at all-guides.com ATENÇÃO! O forno está equipado com um sistema de bloqueio das grelhas que permite Programa INFERIOR retirá-las sem que estas ressaiam Transforma o elemento de aquecimento abaixo. este do forno(1). posição de toque é recomendado para cozinhar Para retirar completamente as a l i m e n t o s ( c o l o c a d o s... - Page 39 All manuals and user guides at all-guides.com Tabela de cozedura no forno Base Base Ventilada Ventilada Forno Base Forno Base Para aperfeiçoar cozinhar...
-
Page 40: Precauçoes E Conselhos
All manuals and user guides at all-guides.com Precauções e conselhos ! Este aparelho foi projectado e fabricado em conformidade por pessoas (incluso crianças) com reduzidas com as normas internacionais de segurança. capacidades físicas, sensoriais ou mentais, por pessoas inexperientes ou que não tenham familiaridade Estas advertências são fornecidas por razões de com o produto, a não ser que seja vigiadas por uma segurança e devem ser lidas com atenção. -
Page 41: Manutençao E Cuidados
All manuals and user guides at all-guides.com Manutenção e cuidados Desligar a corrente eléctrica Manutenção das torneiras do gás Antes de realizar qualquer operação, desligue o aparelho Com o tempo pode ocorrer que uma torneira se bloqueie da alimentação eléctrica. ou apresente dificuldades na rotação, portanto será... - Page 42 All manuals and user guides at all-guides.com Desmontagem e montagem da porta do 6. Volte a montar o vidro. forno: ATENÇÃO! Forno não deve ser operado com interior 1. Abrir a porta porta de vidro removido! 2. Rode completamente para trás os ganchos das ATENÇÃO! Ao remontar a porta interna vidro inserir o painel de vidro correctamente para que o texto por escrito no painel não é...
-
Page 43: Instalación
All manuals and user guides at all-guides.com Instalación ! Es importante conservar este manual para poder Descarga de los humos de la combustión consultarlo en todo momento. En caso de venta, cesión La descarga de los humos de la combustión debe estar o traslado, controle que permanezca junto al aparato. -
Page 44: Conexión De Gas
All manuals and user guides at all-guides.com • no coloque cortinas ! Una vez instalado el aparato, el cable eléctrico y la toma detrás de la cocina o a de corriente deben ser fácilmente accesibles. HOOD menos de 200 mm. de Min. - Page 45 All manuals and user guides at all-guides.com 1. lleve la llave a la posición de mínimo; SUPERFICIE CALIENTE Punto de conexión 2. extraiga el mando y accione el tornillo de regulación Punto de Llave aislante Llave aislante conexión situado en el interior o al costado de la varilla de la llave Montaje manguera Montaje...
- Page 46 All manuals and user guides at all-guides.com Cambio de los picos en el quemador Triple corona 1. quitar las rejillas y extraer los quemadores. El quemador está compuesto por dos partes separadas (ver las figuras) ; 2. desenrosque los inyectores utilizando una llave tubular de 7 mm.
- Page 47 Tabla de características de quemadores e inyectores Corona Triple (TC) 3.25 1.50 2x65 2x99 58 l TC A A6TMH2AF EX A6TMH2AF EX A6TMH2AF EX Forced-- Toberas de metano son disponibles únicamente por encargo y no están incluidas en el paquete de accesorios...
-
Page 48: Puesta En Funcionamiento Y Uso
All manuals and user guides at all-guides.com Puesta en funcionamiento y uso Uso de la encimera plano, con tapa y de dimensiones apropiadas para ese quemador. Encendido de los quemadores Coincidiendo con cada mando de QUEMADOR, existe Quemador Diámetro Recipientes (cm) un círculo lleno que indica el quemador correspondiente. -
Page 49: Programas De Cocción
All manuals and user guides at all-guides.com Piloto TERMOSTATO niveles simultáneamente. Si está encendido, indica que el horno está produciendo Programa HORNO PIZZA calor. Se apaga cuando en el interior del horno se Se encienden los elementos calentadores inferior y alcanza la temperatura seleccionada. -
Page 50: Consejos Prácticos Para Cocinar
All manuals and user guides at all-guides.com con cobertura de fruta o mermelada, que requieren El botón del cuentaminutos programador de final de un moderado color superficial. Es importante destacar cocción que esta función no permite que se alcance la máxima Algunos modelos poseen un programador de final de temperatura en el interior del horno (250°C), por lo cocción. -
Page 51: Tabla De Cocción En El Horno
All manuals and user guides at all-guides.com Tabla de cocción en el horno Programas A lim en to s Pe so Po sición de Prec alen ta Te mp er atura Du ra ci ón (Kg) la s band ejas mi en to ac on sej ad a de la... -
Page 52: Precauciones Y Consejos
All manuals and user guides at all-guides.com Precauciones y consejos ! El aparato ha sido proyectado y fabricado en • En caso de avería, no acceda nunca a los mecanismos conformidad con las normas internacionales sobre internos para intentar una reparación. Llame al seguridad. -
Page 53: Mantenimiento Y Cuidados
All manuals and user guides at all-guides.com Mantenimiento y cuidados Cortar la corriente eléctrica Controlar las juntas del horno Antes de realizar cualquier operación, desconecte el Controle periódicamente el estado de la junta que rodea aparato de la red de alimentación eléctrica. la puerta del horno. - Page 54 All manuals and user guides at all-guides.com Desmontaje y montaje de la puerta del 6. Volver a colocar el vidrio. horno: ADVERTENCIA! El horno no debe ser operado con el 1. Abrir la puerta. interior cristal de la puerta quitada! 2.
- Page 55 All manuals and user guides at all-guides.com Limpieza vapor asistida del horno: Este método de limpieza se recomienda especialmente después de cocinar muy grasos (carne asada). Este proceso de limpieza permite facilitar la eliminación de la suciedad de las paredes del horno por la generación de vapor de agua que se crea en el interior de la cavidad en una limpieza más fácil.
- Page 56 All manuals and user guides at all-guides.com تعليمات التشغيل الموقد والفرن عربي المحتويات عربی عربي ،التركيب اختيار الموضع واالرتفاع التوصيالت الكهربائية توصيالت الغاز الضبط مع أنواع مختلفة من الغاز جدول مواصفات المحرق والفوهة جدول الخصائص 6 ،وصف الجهاز A6TMH2F IL A6TMH2F IL A6TMH2F IL نظرة...
- Page 57 All manuals and user guides at all-guides.com ﻳﺼﺒﺢ هﺬا اﻟﺠﻬﺎز وﺟﻤﻴﻊ أﺟﺰاءﻩ اﻟﻤﻠﻤﻮﺳﺔ ﺳﺎﺧﻨﺔ ﺟ ﺪ ًا أﺛﻨﺎء اﻻﺳﺘﺨﺪام اﻧﺘﺒﻪ عربي ﻳﺠﺐ ﺗﻮﺧﻰ اﻟﺤﺬر وﺗﺠﻨﺐ ﻣﻼﻣﺴﺔ ﻋﻨﺎﺻﺮ اﻟﺘﺴﺨﻴﻦ . ﺳﻨﻮات ﻋﻦ اﻟﺠﻬﺎز إﻻ ﻓﻲ ﺣﺎﻟﺔ ﻣﺮاﻗﺒﺘﻬﻢ اﻟﻤﺴﺘﻤﺮة ﻗﻢ ﺑﺈﺑﻌﺎد اﻷﻃﻔﺎل اﻷﻗﻞ ﻣﻦ ﺳﻦ ﺳﻨﻮات...
- Page 58 All manuals and user guides at all-guides.com التثبيت التخلص من أدخنة االحتراق ! قبل تشغيل جهازك الجديد، يرجى قراءة نشرة المعلومات هذه عربي بعناية. إنها تحتوي على معلومات هامة فيما يتعلق بالتركيب يجب ضمان التخلص من أدخنة االحتراق باستخدام غطاء متصل .والتشغيل...
- Page 59 All manuals and user guides at all-guides.com • المقبس يصمد أمام الطاقة القصوى في الجهاز، المشار إليها إذا تم تركيب الجهاز أسفل • عربي .في لوحة البيانات خزانة حائطية، فإنه يجب أن • الجهد الكهربائي في نطاق يتراوح بين القيم المشار إليها في تكون...
- Page 60 All manuals and user guides at all-guides.com الضبط مع أنواع مختلفة من الغاز • ال يتالمس مع الحواف والزوايا الحادة أو األجزاء المتحركة عربي .وأنه غير مضغوط من الممكن مالءمة الجهاز بنوع من الغاز غير النوع المعتاد .• سهل الفحص بكامل طوله وبالتالي التأكد من حالته .)(المشار...
- Page 61 /59/6002 بتاريخ 60/21/21 (فولطيةEC /2004/108 منخفضة)، والتعديالت الالحقة بتاريخ 40/21/51 (تطابق المغناطيسيةEC 2004/142/EC الكهربائية) والتعديالت الالحقة بتاريخ 90/11/03 (غاز) 8002/5721 (نمط )االنتظار/اإلغالق TC A جدول مواصفات المحرق والفوهة A6TMH2AF EX A6TMH2AF EX A6TMH2AF EX 1 الجدول الغاز الطبيعي الغاز السائل *السعة الفوهة...
- Page 62 All manuals and user guides at all-guides.com الوصف الجهاز عربي نظرة عامة لوحة التحكم ﻣﻔﺘﺎح ﺳﺎﻋﺔ اﻟﺘﻮﻗﻴﺖ ﻣﺤﺮق ﻏﺎز زر اﻹﺷﻌﺎل .متوفر في طرازات معينة فقط...
- Page 63 All manuals and user guides at all-guides.com بدء التشغيل واالستخدام ّ استخدام الرف ! للطرازات المز و ّ دة بشبكة خفض، يجب استخدام األخيرة للمحارق عربي .اإلضافية فقط، بينما يكون قطر األواني المستخدمة أقل من 21 سم إشعال المحارق استخدام الفرن .يوجد...
- Page 64 All manuals and user guides at all-guides.com مصباح مؤشر الترموستات نمط الطهي المتعدد عربي عندما يضئ هذا، يقوم الفرن بإصدار الحرارة. سوف ينطفئ يتم تشغيل كافة عناصر التسخين (العلوية والسفلية والدائرية) وتبدأ عندما يصل داخل الفرن إلى درجة الحرارة المختارة. عندئذ ،المروحة...
- Page 65 All manuals and user guides at all-guides.com ﺍﻟﺸﻮﺍء عربي وضع إزالة الجليد • ﺃﺩﺧﻞ ﺍﻟﺼﻴﻨﻴﺔ ﻓﻲ ﺍﻟﻮﺿﻊ 3 ﺃﻭ 4. ﺿﻊ ﺍﻟﻄﻌﺎﻡ ﻓﻲ ﻣﺮﻛﺰ الغرفة حرارة درجة عند الھواء وزع ت الفرن أسفل الموجودة المروحة إن .ﺍﻟﺼﻴﻨﻴﺔ وعلى ،الطعام أنواع كافة...
- Page 66 All manuals and user guides at all-guides.com جدول نصائح الطهي في الفرن عربي وقت الطهي درجة الحرارة الموصى وقت اإلحماء وضع الصينية الوزن أطعمة أساليب الطهي )(دقائق بها )المسبق (بالدقائق )(بالكجم 65-75 بط 70-75 لحم خروف أو لحم بقري مشوي الفرن...
- Page 67 All manuals and user guides at all-guides.com وسائل حذر ونصائح .• ال تضع أغراضا ثقيلة على باب الفرن وهو مفتوح .! تم تصميم هذا الجهاز وتصنيعه طبقا لمواصفات األمان العالمية عربي )• يجب عدم تشغيل الجهاز من قبل أشخاص (بمن فيهم األوالد .يتم...
- Page 68 All manuals and user guides at all-guides.com العناية والصيانة إيقاف تشغيل الجهاز فحص مطاط الفرن عربي ،افحص مطاط الباب حول الفرن بشكل منتظم. إذا تلف المطاط .قم بفصل جهازك عن تزويد الطاقة قبل إنجاز أي عمل عليه الرجاء اتصل بأقرب مركز خدمة ما بعد البيع. نوصي بعدم .استخدام...
- Page 69 All manuals and user guides at all-guides.com فك وإعادة تركيب باب الفرن أنظ ر الج انبي العل وي وق م بف ك الج زء الج انبي عربي الصورة لتنظي ف كم ا فك اللوح الزجاجي، ثم اب دأ ف ي عملي ة ا أفتح...
- Page 70 All manuals and user guides at all-guides.com تجميع حزمة انزالق الحمالة يوصى باستخدام وضع التنظيف ھذا بعد طھي األطعمة الدھنية عربي المشاوي، اللحوم :لتجميع حماالت االنزالق 1. أزل اإلطارين بواسطة A رفعهما عن حافظي المسافة تنظيف الفرن بالبخار .) (أنظر الرسم يمكن...
- Page 71 All manuals and user guides at all-guides.com...
- Page 72 All manuals and user guides at all-guides.com XEROX FABRIANO 09/2013- 195111739.01 09/2013- 195111739.01 09/2013- 195111739.01...