Table des Matières
Publicité
Les langues disponibles
Les langues disponibles
Liens rapides
NL
Gebruiksaanwijzing
EN
Instruction manual
DE
Gebrauchsanleitung
FR
Mode d'emploi
ES
Instrucciones de uso
IT
Istruzioni per l'uso
DA
Instruktioner til brug
PL
Instrukcje użytkowania
CS
Návod k použití
SK
Návod na použitie
TGB0801S
Quality
since 1923
grind&brew koffiezetter
grind&brew coffee machine
Grind&Brew Kaffeemaschine
Machine à café Grind&Brew
cafetera con molinillo
Macchina da caffè Grind & Brew
grind&brew kaffemaskine
grind&brew ekspres do kawy
kávovar s mlýnkem grind&brew
Kávovar Grind & Brew
Excellent
service
Best
choice
Publicité
Table des Matières

Manuels Connexes pour tomado TGB0801S


Sommaire des Matières pour tomado TGB0801S
- Page 1 TGB0801S Gebruiksaanwijzing grind&brew koffiezetter Instruction manual grind&brew coffee machine Gebrauchsanleitung Grind&Brew Kaffeemaschine Mode d’emploi Machine à café Grind&Brew Instrucciones de uso cafetera con molinillo Istruzioni per l’uso Macchina da caffè Grind & Brew Instruktioner til brug grind&brew kaffemaskine Instrukcje użytkowania grind&brew ekspres do kawy Návod k použití...
- Page 3 NL Gebruiksaanwijzing pagina 4-10 EN Instruction manual page 11-17 DE Gebrauchsanleitung Seite 18-24 FR Mode d’emploi page 25-31 ES Instrucciones de uso página 32-38 Istruzioni per l’uso pagine 39-45 DA Instruktioner til brug side 46-52 PL Instrukcje użytkowania strona 53-59 CS Návod k použití strana 60-66 SK Návod na použitie strana 67-73...
- Page 4 VEILIGHEIDSVOORSCHRIFTEN – NL • Lees eerst de gebruiksaanwijzing aandachtig en geheel door voordat u het apparaat gaat gebruiken en bewaar deze zorgvuldig voor latere raadpleging. • Gebruik dit apparaat uitsluitend voor de in de gebruiksaanwijzing beschreven doeleinden. Let op! Vermijd het aanraken van de warme oppervlakken en/of stoom! Let op! Het maalsysteem in de koffiebonenhouder is erg scherp.
- Page 5 • Als het aansluitsnoer van dit apparaat beschadigd raakt, moet deze door de fabrikant, diens klantenservice of een vergelijkbaar gekwalificeerd persoon worden vervangen om gevaarlijke situaties te voorkomen. • Niet aan het snoer c.q. het apparaat trekken om de stekker uit de wandcontactdoos te halen.
- Page 6 • Het waterreservoir zal door heet water vervormen, dus alleen vullen met koud water. • Gebruik het koffiezetapparaat altijd met een gesloten filterhouder. • Schakel het apparaat niet in met een leeg waterreservoir. • Gebruik nooit een gebarsten glaskan of een glaskan met een losse of kapotte handgreep.
-
Page 7: Productomschrijving
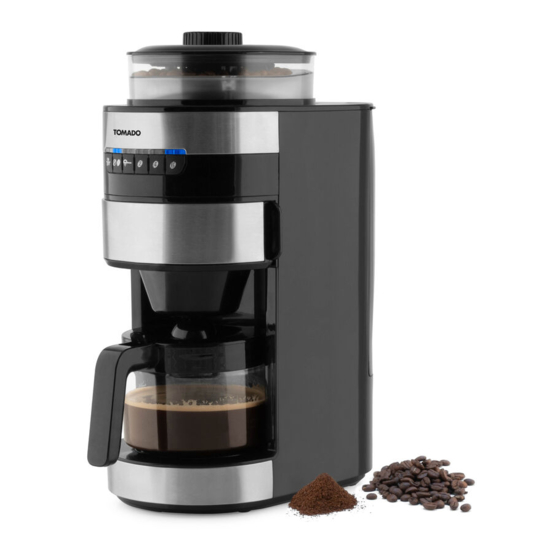
PRODUCTOMSCHRIJVING 1. Draaiknop fijne/grove maling 2. Deksel bonenhouder 3. Koffiebonenhouder 4. Bedieningspaneel 5. Filterhouder met deksel 6. Filteruitloop met druppelstop 7. Glaskan 8. Warmhoudplaat 9. Afneembaar waterreservoir 10. Maatschep VOOR HET EERSTE GEBRUIK Voordat u het koffiezetapparaat voor de eerste maal in gebruik neemt, dient u als volgt te werk te gaan: Pak het koffiezetapparaat voorzichtig uit en verwijder al het verpakkingsmateriaal en eventuele promotionele stickers. -
Page 8: Koffiezetten Met Koffiebonen
KOFFIEZETTEN MET KOFFIEBONEN 1. Til het waterreservoir van de koffiezetter, klap de deksel open en vul het reservoir onder de kraan met koud drinkwater tot het gewenste niveau (2, 4 of 6 kopjes). Vul het reservoir niet hoger dan de aanduiding 6. Plaats het reservoir terug in de koffiezetter. -
Page 9: Reinigen En Onderhoud
en er wordt koffie gezet zonder eerst bonen te malen. 9. Zodra het filterproces is beëindigd, klinken er 3 piepjes. Neem de glaskan van de warmhoudplaat en schenk de koffie uit. Na het koffiezetten zal de warmhoudplaat de gezette koffie gedurende 35 minuten warm houden, daarna schakelt deze automatisch uit. - Page 10 ONTKALKEN Uw koffiezetapparaat moet regelmatig ontkalkt worden. De ontkalkingtermijn is afhankelijk van de hardheid van het leidingwater en de frequentie waarmee het koffiezetapparaat gebruikt wordt. Door kalkafzetting kan het verwarmingselement verstopt raken. Deze kalkafzetting veroorzaakt oververhitting, waardoor het koffiezetapparaat door de ingebouwde beveiliging automatisch wordt uitgeschakeld en niet meer functioneert, reparatie is dan noodzakelijk.
- Page 11 SAFETY INSTRUCTIONS – EN • First carefully read the instruction manual in full prior to using the appliance and store the manual in a safe place for future reference. • Only use this appliance for the purposes described in the instruction manual.
- Page 12 • Never touch the appliance with wet or damp hands. • Keep the appliance out of reach of children. Children do not see the dangers associated with handling electrical appliances. Therefore, never allow children to operate electrical appliances without supervision. Keep the appliance and cord out of reach of children younger than 8 years of age.
- Page 13 • Do not place the glass jug containing hot liquid on a hot or cold surface. • Do not use the glass jug for other purposes than described here. • Do not place an empty glass jug back on the hot plate. •...
-
Page 14: Product Description
PRODUCT DESCRIPTION 1. Rotary knob fine/coarse grind 2. Cover bean holder 3. Coffee bean holder 4. Operating panel 5. Filter holder with cover 6. Filter outlet with drip stop 7. Glass jug 8. Hot plate 9. Removable water reservoir 10. Measuring spoon PRIOR TO FIRST USE Before using the coffee machine for the first time, proceed as follows: Carefully unpack your coffee machine and remove all packaging material and possible promotional stickers. -
Page 15: Making Coffee With Coffee Beans
MAKING COFFEE WITH COFFEE BEANS 1. Lift the water reservoir from the coffee machine, fold open the cover and fill the reservoir under the tap with cold drinking water up to the required level (2, 4 or 6 cups). Do not fill the reservoir above the 6 mark. Place the reservoir back in the coffee machine. -
Page 16: Switching Off The Coffee Machine
8. Press the button to switch off the grinding mode, the indicator light at the button lights up. Now press the button and coffee will be made without first grinding beans. 9. When the filtering process has been completed, 3 beeps will sound. Take the glass jug from the hot plate and pour the coffee. - Page 17 When using kitchen grade vinegar, proceed as follows: 1. Place the permanent filter or empty filter bag in the filter holder and make sure all loose parts are placed in the appliance correctly. Fill the water reservoir with clean, cold water and cold kitchen grade vinegar up to the 6 mark. The water and kitchen grade vinegar ratio should be 4 : 1.
- Page 18 SICHERHEITSVORSCHRIFTEN – DE • Lesen Sie die Gebrauchsanleitung vor der ersten Verwendung des Geräts vollständig und aufmerksam durch und bewahren Sie diese sorgfältig auf, damit Sie sie auch später noch zurate ziehen können. • Verwenden Sie dieses Gerät ausschließlich für die in der Gebrauchsanleitung beschriebenen Zwecke.
- Page 19 • Wenn das Anschlusskabel dieses Geräts beschädigt ist, muss es vom Hersteller, dessen Kundendienst oder einer Person mit einer vergleichbaren Qualifikation ausgetauscht werden, um gefährliche Situationen zu vermeiden. • Ziehen Sie nie am Kabel oder am Gerät selbst, um den Stecker aus der Wandsteckdose zu ziehen.
- Page 20 • Reparieren Sie das Gerät bei einer Störung niemals selbst; das Aktivieren der Sicherung in dem Gerät kann auf einen Defekt hindeuten, der durch das Entfernen oder Austauschen dieser Sicherung nicht behoben wird. Achten Sie darauf, dass immer ausschließlich originale Ersatzteile verwendet werden. •...
-
Page 21: Vor Dem Ersten Gebrauch
PRODUKTBESCHREIBUNG 1. Drehknopf für Mahlgrad (fein/grob) 2. Deckel des Bohnenbehälters 3. Kaffeebohnenbehälter 4. Bedienfeld 5. Filterhalter mit Deckel 6. Filterauslauf mit Tropfstopp 7. Glaskanne 8. Warmhalteplatte 9. Abnehmbarer Wasserbehälter 10. Messlöffel VOR DEM ERSTEN GEBRAUCH Bevor Sie die Kaffeemaschine zum ersten Mal verwenden, müssen Sie Folgendes tun: Packen Sie die Kaffeemaschine vorsichtig aus und entfernen Sie das gesamte Verpackungsmaterial und alle eventuellen Werbeaufkleber. - Page 22 KAFFEEKOCHEN MIT KAFFEEBOHNEN 1. Nehmen Sie den Wasserbehälter aus der Kaffeemaschine, klappen Sie den Deckel auf und füllen Sie den Behälter unter dem Wasserhahn bis zur gewünschten Menge mit kaltem Trinkwasser (2, 4 oder 6 Tassen). Füllen Sie den Behälter nicht höher als bis zur Markierung 6.
-
Page 23: Reinigung Und Wartung
7. Wählen Sie aus, wie viele Tassen Kaffee Sie kochen möchten. Drücken Sie die Taste für 2 Tassen Kaffee, für 4 Tassen Kaffee oder für 6 Tassen Kaffee. Passen Sie diese Anzahl an die Wassermenge an, die Sie in den Wasserbehälter gefüllt haben. - Page 24 ENTKALKEN Ihre Kaffeemaschine muss regelmäßig entkalkt werden. Die Entkalkungsintervalle sind von der Härte des Leitungswassers und der Frequenz bei der Verwendung der Kaffeemaschine abhängig. Durch Kalkablagerungen kann das Heizelement verstopfen. Diese Kalkablagerungen verursachen Überhitzung, wodurch die Kaffeemaschine durch die eingebaute Sicherung automatisch ausgeschaltet wird und nicht mehr funktioniert;...
- Page 25 CONSIGNES DE SÉCURITÉ – FR • Lisez attentivement et entièrement le mode d’emploi avant d’utiliser l’appareil pour la première fois, et conservez-le soigneusement pour une consultation future. • Utilisez cet appareil uniquement aux fins décrites dans ce mode d’emploi. Attention ! Évitez de toucher les surfaces chaudes et/ou la vapeur ! Attention ! Le système de broyage dans le bac à...
- Page 26 • Si le câble d'alimentation de l'appareil est endommagé, il doit être remplacé par le fabricant, son service après-vente ou une personne qualifiée équivalente, afin d'éviter des situations dangereuses. • Ne tirez pas sur le câble d’alimentation ou sur l’appareil pour retirer la fiche de la prise de courant murale.
- Page 27 • En cas de panne, ne réparez jamais l'appareil vous-même ; le déclenchement du disjoncteur peut signaler l'existence d'un défaut auquel l'enlèvement ou le remplacement de ce dispositif de sécurité ne remédie pas. Il est impératif que seules des pièces de rechange d'origine soient utilisées. •...
-
Page 28: Description Du Produit
DESCRIPTION DU PRODUIT 1. Bouton rotatif de mouture fine/grossière 2. Couvercle du bac à grains 3. Bac à grains 4. Panneau de commande 5. Porte-filtre avec couvercle 6. Orifice du filtre avec stoppe-gouttes 7. Verseuse en verre 8. Plaque chauffante 9. -
Page 29: Préparation De Café Avec Des Grains De Café
PRÉPARATION DE CAFÉ AVEC DES GRAINS DE CAFÉ 1. Soulevez le réservoir d’eau de la machine à café, ouvrez le couvercle et remplissez le réservoir sous le robinet avec de l’eau potable froide jusqu’au niveau souhaité (2, 4 ou 6 tasses). Ne remplissez pas le réservoir au-delà de l’indication 6. Replacez le réservoir dans la machine à... -
Page 30: Extinction De La Machine À Café
7. Sélectionnez le nombre de tasses pour lesquelles le café doit être préparé. Appuyez sur le bouton pour 2 tasses de café, pour 4 tasses de café ou pour 6 tasses de café. Ajustez ce nombre par rapport à la quantité d’eau que vous avez versée dans le réservoir d’eau. -
Page 31: Détartrage
DÉTARTRAGE Votre machine à café doit être régulièrement détartrée. La fréquence de détartrage dépend de la dureté de l’eau du robinet et de l’intensité d’utilisation de la machine à café. Le tartre peut boucher l’élément chauffant. Cet entartrage entraîne une surchauffe, ce qui cause l’arrêt automatique de la machine à... -
Page 32: Instrucciones De Seguridad - Es
INSTRUCCIONES DE SEGURIDAD - ES • Lea atenta e íntegramente el manual de instrucciones antes de empezar a utilizar el aparato y guárdelo bien para consultas futuras. • Utilice el aparato única y exclusivamente para los fines que se describen en el presente manual. ¡Atención! ¡Evite el contacto con las superficies calientes y el vapor! ¡Atención! El sistema de molienda integrado en el recipiente... - Page 33 • No toque nunca el aparato con las manos mojadas o húmedas. • Mantenga el aparato fuera del alcance de los niños. Los niños no comprenden el peligro que puede suponer utilizar aparatos eléctricos. Por esa razón, no deje nunca a los niños que usen aparatos eléctricos sin supervisión.
- Page 34 • No utilice la jarra de cristal para fines distintos a los que se describen aquí. • No coloque la jarra de cristal vacía sobre la base caliente. • No sumerja nunca el aparato, el cable o el enchufe en agua. •...
-
Page 35: Descripción Del Producto
DESCRIPCIÓN DEL PRODUCTO 1. Mando giratorio para molienda fina o gruesa 2. Tapa del recipiente para granos 3. Recipiente para granos de café 4. Panel de control 5. Portafiltro con tapa 6. Salida del filtro con sistema antig- oteo 7. Jarra de cristal 8. - Page 36 PREPARACIÓN DE CAFÉ CON GRANOS 1. Levante el depósito de agua de la cafetera, abra la tapa y llene el depósito con agua fría del grifo hasta el nivel deseado (2, 4 o 6 tazas). No llene el depósito por encima de la indicación 6. Vuelva a colocar el depósito en la cafetera. 2.
-
Page 37: Limpieza Y Mantenimiento
Sonarán 3 pitidos y el indicador luminoso situado junto al botón se apagará. Si quiere apagar por completo el aparato, tendrá que desenchufarlo de la toma de corriente. 10. El café sabe más rico justo después de prepararlo. Por eso, no espere mucho para servirlo. Inmediatamente después, vuelva a poner la jarra en la base o vierta el resto del café... -
Page 38: Consejos Para Preparar Un Buen Café
2. Enchufe el aparato a la corriente. Pulse el botón y ponga en marcha el aparato pulsando el botón 3. El proceso de descalcificación acabará cuando el depósito de agua y el filtro estén vacíos. Vacíe la jarra y saque el filtro permanente o el filtro desechable del portafiltro. -
Page 39: Avvertenze Di Sicurezza - It
AVVERTENZE DI SICUREZZA – IT • Leggere attentamente le istruzioni per l'uso prima di utilizzare l'apparecchio e conservarle per riferimento futuro. • Destinare l'apparecchio esclusivamente agli usi descritti nelle istruzioni per l'uso. ATTENZIONE! Evitare il contatto con le superfici calde e/o il vapore! ATTENZIONE! Il macinacaffè... - Page 40 • Qualora si sia danneggiato, il cavo di alimentazione di questo apparecchio dovrà essere sostituito dal produttore, dal suo servizio clienti o da una persona qualificata per evitare situazioni di pericolo. • Non tirare mai il cavo per scollegare la spina dalla presa di corrente. •...
- Page 41 • In caso di malfunzionamento, non riparare l'apparecchio da soli; qualora scatti la protezione dell'apparecchio, potrebbe esserci un difetto, che non potrà essere risolto rimuovendo o sostituendo tale protezione. È necessario utilizzare esclusivamente parti di ricambio originali. • Se riempito con acqua calda, il serbatoio dell'acqua si deformerà; pertanto, usare soltanto acqua fresca per la preparazione del caffè.
-
Page 42: Descrizione Del Prodotto
DESCRIZIONE DEL PRODOTTO 1. Selettore per la macinazione (grana fine/grossa) 2. Coperchio del contenitore del caffè in chicchi 3. Contenitore del caffè in chicchi 4. Pannello di controllo 5. Supporto per il filtro con coperchio 6. Erogatore con salvagoccia 7. Caraffa di vetro 8. - Page 43 COME PREPARARE IL CAFFÈ PARTENDO DAI CHICCHI 1. Estrarre il serbatoio dell’acqua, sollevare il coperchio e versare nel serbatoio la quantità desiderata di acqua fresca (per 2, 4 o 6 tazze). Non oltrepassare mai l’indicazione del livello 6. Riposizionare il serbatoio nell’apparecchio. 2.
-
Page 44: Spegnere La Macchina Da Caffè
si udiranno 3 segnali acustici e la spia di controllo del pulsante si spegnerà. Per spegnere del tutto l’apparecchio, scollegare la spina dalla presa di corrente. 10. Il caffè ha un sapore migliore se bevuto subito, quindi si raccomanda di servirlo appena terminata l’erogazione. Quindi, riposizionare subito la caraffa sulla piastra o travasare il caffè... -
Page 45: Suggerimenti Per Preparare Un Ottimo Caffè
1. Inserire il filtro riutilizzabile o un filtro monouso vuoto nel supporto per il filtro e riposizionare correttamente tutte le componenti rimovibili nell’apparecchio. Riempire il serbatoio fino all’indicazione 6 con acqua fresca e aceto per uso domestico freddo. Il rapporto tra acqua e aceto per uso domestico deve essere di 4: 1. 2. - Page 46 SIKKERHEDSFORSKRIFTER – DA • Læs først hele brugervejledningen grundigt igennem, inden apparatet tages i brug, og opbevar den derefter omhyggeligt til senere brug. • Benyt kun apparatet til det formål, der er angivet i brugervejledningen. Bemærk! Undgå kontakt med de varme overflader og dampen! Bemærk! Malesystemet i kaffebønnebeholderen er meget skarpt.
- Page 47 • Opbevar apparatet utilgængeligt for børn. Børn er ikke bevidste om de farer, der kan opstå ved håndteringen af elektriske apparater. Lad derfor aldrig børn bruge elektriske apparater uden opsyn. Sørg for, at børn under 8 år ikke kan komme i nærheden af apparatet og ledningen.
- Page 48 • Sæt ikke den tomme glaskande tilbage på varmepladen. • Nedsænk aldrig apparatet, ledningen eller stikket i vand eller anden væske. • Apparatet er beregnet til brug i husholdninger og lignende brug som f.eks.: - i personalekøkkener, butikker, kontorer og andre arbejdsmiljøer - af gæster på...
-
Page 49: Før Ibrugtagning
PRODUKTBESKRIVELSE 1. Drejeknap til fin/grov maling 2. Låg til kaffebønnebeholder 3. Kaffebønnebeholder 4. Betjeningspanel 5. Filtertragt med låg 6. Filterudløb med drypstop 7. Glaskande 8. Varmeplade 9. Aftagelig vandbeholder 10. Måleske FØR IBRUGTAGNING Inden kaffemaskinen tages i brug første gang: Pak forsigtigt kaffemaskinen ud, og fjern al emballage og eventuelle reklamemærkater. - Page 50 KAFFEBRYGNING MED KAFFEBØNNER 1. Løft vandbeholderen af kaffemaskinen, åbn låget, og fyld beholderen til det ønskede niveau (2, 4 eller 6 kopper) med koldt drikkevand fra hanen. Fyld ikke beholderen mere end til mærket 6. Sæt beholderen på plads i kaffemaskinen. 2.
-
Page 51: Rengøring Og Vedligeholdelse
SLUKNING AF KAFFEMASKINEN Hvis apparatet er tændt og ikke bliver brugt inden for 1 minut, går kontrollamperne ud. Tryk på en vilkårlig knap for at aktivere apparatets betjeningspanel igen. Bemærk! Hvis du vil slukke helt for apparatet, skal du tage stikket ud af stikkontakten. Varmepladen køler langsomt af efter slukningen og kan derfor forblive varm i et stykke tid. - Page 52 TIPS TIL BRYGNING AF GOD KAFFE 1. En ren kaffemaskine er en forudsætning for brygning af en rigtig god kop kaffe. Rengør og afkalk derfor kaffemaskinen regelmæssigt som beskrevet i afsnittene RENGØRING OG VEDLIGEHOLDELSE og AFKALKNING. 2. Brug koldt og rent drikkevand til kaffebrygningen. 3.
- Page 53 ZALECENIA BEZPIECZEŃSTWA – PL • Przed użyciem urządzenia należy najpierw uważnie przeczytać całą instrukcję obsługi i zachować ją na potrzeby późniejszego wykorzystania. • Tego urządzenia można używać wyłącznie do celów opisanych w niniejszej instrukcji obsługi. Uwaga! Unikaj kontaktu z ciepłymi powierzchniami i/lub parą! Uwaga! System mielenia w uchwycie do kawy ziarnistej jest bardzo ostry.
- Page 54 • Kiedy przewód przyłączeniowy urządzenia ulega uszkodzeniu, powinien on zostać wymieniony przez producenta, jego dział obsługi klienta lub porównywalnie wykwalifikowaną osobę, aby uniknąć wystąpienia niebezpiecznych sytuacji. • Nie należy ciągnąć za kabel ani urządzenie, aby odłączyć wtyczkę z gniazdka. • Urządzenia nie można dotykać mokrymi ani wilgotnymi rękami. •...
- Page 55 • W razie awarii nigdy nie podejmuj się naprawy; przebicie zabezpieczenia w urządzeniu może sygnalizować defekt, którego nie można naprawić poprzez usunięcie lub wymianę tego zabezpieczenia. Należy bezwzględnie stosować wyłącznie oryginalne części zamienne. • Zbiornik wody odkształca się pod wpływem gorącej wody. Można go więc napełniać...
-
Page 56: Opis Produktu
OPIS PRODUKTU 1. Pokrętło do dokładnego/zgrub- nego mielenia 2. Pokrywa pojemnika na ziarna 3. Pojemnik na ziarna kawy 4. Panel sterowniczy 5. Uchwyt na filtr z pokrywą 6. Wylot filtra z blokadą kapania 7. Dzbanek 8. Płyta do utrzymywania ciepła 9. - Page 57 PARZENIE KAWY ZIARNISTEJ 1. Wyciągnij zbiornik na wodę z ekspresu, otwórz pokrywę i napełnij zbiornik zimną wodą pitną z kranu do wymaganego poziomu (2, 4 lub 6 filiżanek). Nie napełniaj zbiornika powyżej oznaczenia 6. Umieść zbiornik na wodę z powrotem w urządzeniu.
-
Page 58: Czyszczenie I Konserwacja
9. Po zakończeniu procesu filtrowania rozlegają się 3 krótkie sygnały dźwiękowe. Zdejmij dzbanek z płyty do utrzymywania ciepła i przelej kawę. Po zaparzeniu kawy płyta do utrzymywania ciepła podgrzewa kawę przez 35 minut, po czym funkcja ta wyłącza się automatycznie. Rozlegają się wtedy 3 krótkie sygnały dźwiękowe, a kontrolka przy przycisku gaśnie. - Page 59 Jeśli używa się octu do czyszczenia, należy wykonać następujące czynności: 1. Umieścić filtr stały lub pusty woreczek filtracyjny w uchwycie filtra i upewnić się, że wszystkie luźne części są prawidłowo włożone. Napełnij zbiornik wody do oznaczenia 6 czystą, zimną wodą i zimnym octem spożywczym. Proporcja wody do octu powinna wynosić...
- Page 60 BEZPEČNOSTNÍ PŘEDPISY - CS • Před použitím spotřebiče si nejprve důkladně přečtěte celý návod k použití a pečlivě ho uschovejte k pozdějšímu nahlédnutí. • Spotřebič používejte pouze pro účely popsané v tomto návodu. Pozor! Nedotýkejte se teplých povrchů a/nebo páry! Pozor! Systém mletí...
- Page 61 • Spotřebič uchovávejte mimo dosah dětí. Děti si neuvědomují nebezpečí, které může vzniknout při práci s elektrickými spotřebiči. Proto dětem nikdy nedovolte manipulovat s elektrickými spotřebiči bez dohledu. Spotřebič a kabel uchovávejte mimo dosah dětí do 8 let. • Děti od 8 let a starší a osoby s omezenými fyzickými, smyslovými nebo duševními schopnostmi nebo nedostatečnými zkušenostmi nebo znalostmi smí...
- Page 62 • Spotřebič, kabel nebo zástrčku nikdy nenořte do vody. • Tento spotřebič je určen pro použití v domácnosti a podobné účely, jako například: - v zaměstnaneckých kuchyních, v obchodech, kancelářích a jiných pracovních prostředích; - hosty v hotelech, motelech a jiných obytných prostředích; - v ubytováních typu Bed &...
-
Page 63: Popis Výrobku
POPIS VÝROBKU 1. Otočný knoflík pro jemné/hrubé mletí 2. Víko zásobníku kávových zrn 3. Zásobník kávových zrn 4. Ovládací panel 5. Držák filtru s víkem 6. Výtok filtru s odkapávací zarážkou 7. Skleněná konvice 8. Ohřevná deska 9. Odnímatelná nádoba na vodu 10. - Page 64 VAŘENÍ KÁVY Z KÁVOVÝCH ZRN 1. Vyklopte nádobu na vodu z kávovaru, otevřete víko a naplňte nádobu pod kohoutkem studenou pitnou vodou na požadovanou úroveň (2, 4 nebo 6 šálků). Nádobu nikdy neplňte nad značku 6. Vložte nádobu na vodu zpět do kávovaru. 2.
-
Page 65: Čištění A Údržba
VYPNUTÍ KÁVOVARU Pokud je spotřebič zapnutý a není používán po dobu 1 minuty, kontrolky zhasnou. Stisknutím libovolného tlačítka na ovládacím panelu spotřebič znovu aktivujete. Pozor! Chcete-li spotřebič zcela vypnout, vytáhněte zástrčku ze zásuvky. Ohřevná deska se po vypnutí pomalu ochlazuje a může zůstat po určitou dobu horká. - Page 66 TIPY PRO PŘÍPRAVU CHUTNÉ KÁVY 1. Pro přípravu skvělé kávy je nezbytná čistota kávovaru. Kávovar pravidelně čistěte a odstraňujte z něj vodní kámen, jak je popsáno v části ČIŠTĚNÍ A ÚDRŽBA a v části ODVÁPNĚNÍ. 2. K přípravě kávy používejte studenou a čistou pitnou vodu. 3.
- Page 67 BEZPEČNOSTNÉ PREDPISY – SK • Skôr než začnete spotrebič používať, pozorne si prečítajte celý návod na použitie a uschovajte ho pre prípad ďalšej potreby. • Spotrebič používajte výlučne na účely uvedené v návode na použitie. Pozor! Nedotýkajte sa horúcich povrchov a/alebo pary! Pozor! Mlecí...
- Page 68 • Nikdy sa spotrebiča nedotýkajte mokrými ani vlhkými rukami. • Spotrebič uchovávajte mimo dosahu detí. Deti si neuvedomujú nebezpečenstvá, ktoré môžu vzniknúť pri manipulácii s elektrickými spotrebičmi. Z toho dôvodu nikdy nenechávajte deti pracovať s elektrickými spotrebičmi bez dozoru. Spotrebič a kábel uchovávajte mimo dosahu detí...
- Page 69 • Sklenenú kanvicu s horúcou tekutinou neklaďte na horúci ani studený povrch. • Sklenenú kanvicu nepoužívajte na iné účely, než ktoré sú tu opísané. • Prázdnu sklenenú kanvicu nedávajte späť na ohrevnú dosku. • Spotrebič, kábel ani zástrčku nikdy neponárajte do vody. •...
-
Page 70: Pred Prvým Použitím
POPIS VÝROBKU 1. Otočné tlačidlo na jemné/hrubé mletie 2. Veko zásobníka na kávové zrná 3. Zásobník na kávové zrná 4. Ovládací panel 5. Držiak filtra s vekom 6. Výpust filtra s poistkou proti odkvapkávaniu 7. Sklenená kanvica 8. Ohrevná doska 9. - Page 71 PRÍPRAVA KÁVY Z KÁVOVÝCH ZŔN 1. Odoberte z kávovaru zásobník vody, otvorte veko a do zásobníka napustite z vodovodného kohútika studenú pitnú vodu po požadovanú úroveň (2, 4 alebo 6 šálok). Zásobník nikdy neplňte nad značku 6. Zásobník vody vložte späť do kávovaru. 2.
-
Page 72: Čistenie A Údržba
10. Káva chutí najlepšie ihneď po uvarení, preto s podávaním nečakajte príliš dlho. Sklenenú kanvicu položte vzápätí späť na ohrevnú dosku alebo kávu prelejte do termosky. VYPNUTIE KÁVOVARU Keď je spotrebič zapnutý a nepoužije sa 1 minútu, svetelné indikátory zhasnú. Spotrebič opäť aktivujete stlačením ľubovoľného tlačidla na ovládacom paneli. - Page 73 4. Po odstránení vodného kameňa musíte spotrebič zapnúť ešte aspoň na 3 cykly so zásobníkom vody naplneným studenou čistou vodou, aby ste odstránili všetky odvápňovacie kvapaliny a zvyšky octu, a tým zabránili pachuti kávy. Pozor! Ak ste kávovar dlhší čas nepoužívali, napríklad počas dovolenky, je vhodné odobrať a vyčistiť všetky voľné komponenty. Následne vložte vyčistené...
-
Page 74: Garantievoorwaarden
BESTELLEN VON ZUBEHÖR Wenn Sie Zubehör oder Ersatzteile benötigen, besuchen Sie bitte unsere Webseite www.tomado.com/support. GARANTIEBESTIMMUNGEN Für dieses Produkt gewähren wir eine Garantie von 24 Monaten. Diese Garantie gilt jedoch nur, wenn das Produkt in Übereinstimmung mit den Anweisungen in der Gebrauchsanleitung und für den Zweck, für den es hergestellt wurde, verwendet wird. -
Page 75: Zamawianie Akcesoriów
Na tento výrobek se vztahuje záruka 24 měsíců. Vaše záruka je platná, pokud byl výrobek použit v souladu s návodem k použití a za účelem, pro který byl vyroben. Zároveň je nutné předložit původní doklad o koupi opatřený datem nákupu, jménem prodejce a číslem zboží. Podrobné záruční podmínky naleznete na našich webových stránkách: www.tomado.com/support OBJEDNÁVANIE PRÍSLUŠENSTVA Príslušenstvo alebo náhradné... - Page 76 TGB0801S Tomado Electric Appliances Postbus 159 6920 AD Duiven The Netherlands support@tomado.com www.tomado.com Wijzigingen en drukfouten voorbehouden/ Änderungen und Druckfehler vorbehalten/ Sous réserve de modification / Modifications and printing errors reserved/ Sujeto a cambios y errores de impresión/ Con riserva di modifiche ed errori di stampa/ Der tages forbehold for ændringer og trykfejl/ Zastrzega się prawo do zmian i błędów w druku/ Změny a tiskové chyby vyhrazeny/ Zmeny a tlačové chyby sú vyhradené TGB0801S/01.0621 TOMADO.COM...