Siemens Pure Manuel D'utilisation
Masquer les pouces
Voir aussi pour Pure:
- Guide d'utilisation (17 pages) ,
- Manuel d'utilisation (160 pages)
Table des Matières
Publicité
Les langues disponibles
Les langues disponibles
Liens rapides
Publicité
Table des Matières

Manuels Connexes pour Siemens Pure


Sommaire des Matières pour Siemens Pure
- Page 1 All manuals and user guides at all-guides.com English Magyar Română Français Deutsch ﻋﺮﺑﻲ Pure User Guide • Használati utasítás • Instrucţiuni de utilizare • Manuel d’utilisation • Bedienungs- anleitung • ﺗﻌﻠﻴﻤﺎت اﻻﺳﺘﺨﺪام...
- Page 2 All manuals and user guides at all-guides.com English Magyar Română Français Deutsch ﻋﺮﺑﻲ...
- Page 3 All manuals and user guides at all-guides.com Content Content Your RIC hearing instrument Intended use General notes on safety Handling batteries Inserting and removing your hearing instrument Turning your hearing instrument on and off Changing the hearing program Changing the volume Functionalities Maintenance and care Troubleshooting...
-
Page 4: Your Ric Hearing Instrument
All manuals and user guides at all-guides.com Your RIC hearing instrument Your RIC hearing instrument Pure SE Pure Carat (battery type 10) (battery type 13) ① Receiver Unit ⑤ Microphone cover ② Dome ⑥ Microphone openings ③ Charging contacts ⑦ Push button ④... - Page 5 All manuals and user guides at all-guides.com Your RIC hearing instrument Pure Active (battery type 312) (battery type 13) ① Receiver Unit ⑤ Microphone cover ② Dome ⑥ Microphone openings ③ Charging contacts ⑦ Push button ④ Battery compartment...
- Page 6 All manuals and user guides at all-guides.com Your RIC hearing instrument ① Custom shell ② Dome ③ Receiver mold ④ Serial number ⑤ Type of hearing instrument Your Hearing Care Professional offers an assortment of receiver lengths and dome sizes to best fit your ear.
-
Page 7: Intended Use
All manuals and user guides at all-guides.com Intended use Intended use Hearing instruments are intended to improve the hearing of hearing impaired persons. Diagnosis and prescription of a hearing instrument must be performed by hearing health specialists, e.g. ENT doctors, audiologists or acousticians. -
Page 8: General Notes On Safety
All manuals and user guides at all-guides.com General notes on safety General notes on safety NOTICE Your hearing instruments are sensitive to extreme heat, high humidity, strong magnetic fields (> 0.1T), X-rays and mechanical stress. Do not expose your hearing instruments to ... - Page 9 36 months or mentally disabled persons. For suitable products please refer to your Hearing Care Professional. Siemens offers special hearing instruments for the fitting of infants and small children. Ask your Hearing Care Professional for further ...
- Page 10 All manuals and user guides at all-guides.com General notes on safety NOTICE Leaking batteries damage the hearing instruments. Turn the hearing instruments off when not in use to preserve the battery. Remove batteries when the instruments are not in use for a prolonged period of time.
-
Page 11: Handling Batteries
All manuals and user guides at all-guides.com Handling batteries Handling batteries Battery type original size If the sound becomes fainter or you hear alerting signals, change the standard battery or charge the rechargeable battery. Always use the right battery size. ... -
Page 12: Inserting And Removing Your Hearing Instrument
All manuals and user guides at all-guides.com Inserting and removing your hearing instrument Inserting and removing your hearing instrument For side recognition ask your Hearing Care Professional to apply colored markers in the bat- tery compartment. If the marker in the battery compartment is in red, the hearing instrument is intended for the right ear. -
Page 13: Turning Your Hearing Instrument On And Off
All manuals and user guides at all-guides.com Turning your hearing instrument on and off Turning your hearing instrument on and off Via battery compartment Close the battery compartment. Open the battery compartment. Via push button Press the push button for ... - Page 14 All manuals and user guides at all-guides.com Turning your hearing instrument on and off Via slider Push the slider up or down for 2 seconds. Push the slider up or down for 2 seconds. Via remote control Refer to the remote control user guide. ...
-
Page 15: Changing The Hearing Program
All manuals and user guides at all-guides.com Changing the hearing program Changing the hearing program Via push button Press the push button. The hearing instrument changes to the next program. Via slider Push the slider up once to switch to the next program. -
Page 16: Changing The Volume
All manuals and user guides at all-guides.com Changing the volume Changing the volume The volume of your hearing instruments is controlled automatically and there is no need to manually adjust it. Should you prefer manual volume control, your Hearing Care Professional can program the hearing instrument for manual adjustment. - Page 17 All manuals and user guides at all-guides.com Functionalities Functionalities Your Hearing Care Professional can activate the following functionalities. e2e wireless Allows the use of a remote control. ■ Automatically adjusts both hearing instruments ■ simultaneously to change the instrument set- tings, e.g.
- Page 18 (*) AutoPhone magnet accessory Not all telephones produce a magnetic field strong enough to activate the AutoPhone function. In this case, use the Siemens AutoPhone magnet, which is available as accessory, and attach it to the telephone receiver to activate the AutoPhone function.
- Page 19 All manuals and user guides at all-guides.com Functionalities See the AutoPhone magnet user guide for instructions on how to position the magnet. Use only the Siemens magnet. Ask your Hearing Care Professional for this accessory. NOTICE Magnets can disturb electrical devices and delete stored data.
-
Page 20: Maintenance And Care
All manuals and user guides at all-guides.com Maintenance and care Maintenance and care Your hearing instruments are highly sensitive systems. Proper care and handling will ensure the best possible performance. Clean instruments regularly to prevent damage to the hearing instruments and to avoid health problems. NOTICE Do not put the hearing ... - Page 21 All manuals and user guides at all-guides.com Maintenance and care Domes and receiver molds CAUTION Risk of injury caused by incorrect use of receiver unit and domes/receiver molds/custom shells. Always wear the receiver unit with a dome or receiver mold. Make sure that the dome/receiver mold is com- ...
- Page 22 All manuals and user guides at all-guides.com Maintenance and care Your hearing instruments have one of the following ear pieces: Single Double Receiver Custom shell dome dome mold Cleaning ear pieces Cerumen (ear wax) on the dome/ receiver mold/custom shell affects sound quality.
- Page 23 All manuals and user guides at all-guides.com Maintenance and care Exchanging single domes The packaging of your dome has a slot on one side to remove the dome from the receiver. Insert the receiver. Hold the dome tight while tilting ...
- Page 24 All manuals and user guides at all-guides.com Maintenance and care Exchanging double domes Remove the used dome from the receiver. Click the tip of the receiver unit into the new dome. Exchanging receiver molds Ask your Hearing Care Professional for assistance. ...
- Page 25 All manuals and user guides at all-guides.com Maintenance and care Exchanging the receiver unit The receiver unit can be changed as needed by your Hearing Care Professional. If you need to replace the receiver unit by yourself follow these directions carefully. Turn receiver unit 45°...
- Page 26 All manuals and user guides at all-guides.com Troubleshooting Troubleshooting Problem Possible solution Sound is weak. Replace empty battery. Clean dome/receiver mold/custom shell. Exchange microphone cover. Increase volume. Hearing instru- Reinsert dome/receiver mold/custom shell ment emits until it fits securely. whistling Decrease volume.
-
Page 27: Technical Information
Siemens Pure 700, Pure 500, Pure 300 Siemens Pure 701, Pure 501, Pure 301, Pure 101 Siemens Pure SE 701, Pure SE 501 Siemens Pure Carat 701, Pure Carat 501, Pure Carat 301 Impact R FCC ID: SGI-WL002BTE IC: 267AB-WL002 Operating frequencies: F =3.28 MHz... - Page 28 All manuals and user guides at all-guides.com Technical information This equipment has been tested and found to comply with the limits for a Class B digital device, pursuant to Part 15 of the FCC Rules. These limits are designed to pro- vide reasonable protection against harmful interference in a residential installation.
-
Page 29: Disposal Information
With the CE marking Siemens confirms compliance with the European Directive 93/42/EEC concerning medical devices. For the products with e2e wireless 2.0 Siemens addition- ally confirms compliance with the European Directive 99/5/EC (R&TTE) concerning radio and telecommunica- tions terminal equipment. - Page 30 All manuals and user guides at all-guides.com...
- Page 31 All manuals and user guides at all-guides.com Tartalom Tartalom A RIC hallókészülék Felhasználási terület Általános biztonsági megjegyzések Az elemek kezelése Hallókészülékének behelyezése és eltávolítása A hallókészülék be- és kikapcsolása Hallóprogram módosítása A hangerő megváltoztatása Funkciók Karbantartás és ápolás Hibaelhárítás Hulladékelhelyezési tudnivalók...
- Page 32 All manuals and user guides at all-guides.com A RIC hallókészülék A RIC hallókészülék Pure SE Pure Carat (elem típusa 10) (elem típusa 13) ① Vevőkészülék ⑤ Mikrofonburkolat ② Füldugó ⑥ Mikrofonnyílások ③ Töltőcsatlakozók ⑦ Nyomógomb ④ Elemtartó rekesz ⑧ Csúszka...
- Page 33 All manuals and user guides at all-guides.com A RIC hallókészülék Pure Active (elem típusa 312) (elem típusa 13) ① Vevőkészülék ⑤ Mikrofonburkolat ② Füldugó ⑥ Mikrofonnyílások ③ Töltőcsatlakozók ⑦ Nyomógomb ④ Elemtartó rekesz...
- Page 34 All manuals and user guides at all-guides.com A RIC hallókészülék ① Egyedi ház ② Füldugó ③ Vevőegység ④ Sorozatszám ⑤ A hallókészülék típusa A hallókészülék-specialista többféle méretű vevőkészülé- ket és füldugót mutat, hogy kiválaszthassa azt, amelyik az ön füléhez a legjobban illik.
-
Page 35: Felhasználási Terület
All manuals and user guides at all-guides.com Felhasználási terület Felhasználási terület A hallókészülék célja, hogy a halláskárosodottaknak jobb hallást biztosítson. A diagnózis felállítását és a hallókészü- lék felírását fülspecialistának, pl. fül-orr-gégésznek, fülész szakorvosnak vagy akusztikusnak kell végeznie. A sérülések és a hallókészülék károsodásának elkerülése érdekében olvassa el és kövesse a jelen használati útmu- tató... -
Page 36: Általános Biztonsági Megjegyzések
All manuals and user guides at all-guides.com Általános biztonsági megjegyzések Általános biztonsági megjegyzé- MEGJEGYZÉS A hallókészülék érzékeny a nagy hőre, a magas pá- ratartalomra, az erős mágneses mezőkre (> 0,1 T), a röntgensugarakra és a mechanikai behatásokra. Ne tegye ki a hallókészüléket szélsőséges hő- ... - Page 37 Ez a hallókészülék nem alkalmas 36 hónapnál fiatalabb gyermekek és szellemi fogyatékkal élő személyek általi használatra. A megfelelő termékekkel kapcsolatban érdeklődjön hallóké- szülék-specialistájától. A Siemens kínálatában speciális, kifejezetten a csecsemők és kisgyermekek füléhez illeszkedő hallókészülékek is megtalálhatók. A további tudnivalókkal kapcsolatban forduljon hallókészülék-specialistájához.
- Page 38 All manuals and user guides at all-guides.com Általános biztonsági megjegyzések MEGJEGYZÉS A szivárgó elemek károsíthatják a hallókészüléket. Az elemek kímélése céljából kapcsolja ki a halló- készüléket, ha használaton kívül van. Ha hosszabb ideig nem használja a készüléket, vegye ki belőle az elemeket. MEGJEGYZÉS Az akkumulátorok környezetszennyező, káros anyagokat tartalmaznak.
-
Page 39: Az Elemek Kezelése
All manuals and user guides at all-guides.com Az elemek kezelése Az elemek kezelése Elemtípus valós mérete Ha a hang halkabb lesz, vagy figyelmeztető jelzést hall, cserélje ki a normál elemeket, vagy töltse fel az újratölthető akkumulátorokat. Mindig a megfelelő méretű elemet használja. ... -
Page 40: Hallókészülékének Behelyezése És Eltávolítása
All manuals and user guides at all-guides.com Hallókészülékének behelyezése és eltávolítása Hallókészülékének behelyezése és eltávolítása Az oldalak felismerése érdekében kérje meg hal- lókészülék-specialistáját, hogy helyezzen el színes jelzéseket az elemtartóban. Ha a jelzés az elem- tartóban piros, akkor a hallókészülék a jobb fülhöz való. - Page 41 All manuals and user guides at all-guides.com A hallókészülék be- és kikapcsolása A hallókészülék be- és kikapcsolá- Az elemtartóval Zárja be az elemtartót. Nyissa ki az elemtartót. A nyomógombbal Nyomja meg és tartsa lenyomva a gombot 2 másodpercig. Nyomja meg és tartsa lenyomva ...
- Page 42 All manuals and user guides at all-guides.com A hallókészülék be- és kikapcsolása Csúszka segítségével Nyomja felfelé vagy lefelé a csúszkát 2 mp-ig. Kikapcsolva Nyomja felfelé vagy lefelé a csúszkát 2 mp-ig. A távirányítóval Lásd a távirányító használati útmutatóját. ...
- Page 43 All manuals and user guides at all-guides.com Hallóprogram módosítása Hallóprogram módosítása A nyomógombbal Nyomja meg a gombot. A hallókészülék a következő programra vált. Csúszkával A következő programra történő váltáshoz tolja a csúszkát egyszer felfelé. Az előző programra történő ...
-
Page 44: A Hangerő Megváltoztatása
All manuals and user guides at all-guides.com A hangerő megváltoztatása A hangerő megváltoztatása A hallókészülék hangerő-szabályozása automatikus, így nincs szükség kézi beállításra. Ha mégis szeretné kézzel beállítani, kérje meg hallókészü- lék-specialistáját, hogy kézi beállításhoz programozza a készüléket. Automatikus A készülék a hangerőt a használat közben automati- kusan beállítja. - Page 45 All manuals and user guides at all-guides.com Funkciók Funkciók A hallókészülék-specialista a következő funkciókat engedélyezheti. e2e wireless Lehetővé teszi távvezérlő használatát. ■ Mindkét készülék beállításait egyszerre, auto- ■ matikusan módosítja, például a hangerő vagy a program módosításakor. A e2e wireless működés teljesítményét befolyásolhatja az elektromágneses –...
- Page 46 (4 hüvelyknél) nagyobb távolságban használja a távvezérlőt. (*) AutoPhone mágneses tartozék Nem minden telefon generál olyan mágneses teret, amely elég erős az AutoPhone funkció bekapcsolásához. Ilyen esetekben használja a tartozékként kapható Siemens AutoPhone mágnest, és az AutoPhone funkció bekapcso- lásához csatlakoztassa a telefonkagylóhoz.
- Page 47 All manuals and user guides at all-guides.com Funkciók A mágnes elhelyezésével kapcsolatban lásd az AutoPhone mágnes használati útmutatóját. Kizárólag Siemens típusú mágnest használjon. A tartozékot kérje hallókészülék-specialistájától. MEGJEGYZÉS A mágnesek megzavarhatják az elektronikus eszközök működését, és a tárolt adatok törlését okozhatják.
-
Page 48: Karbantartás És Ápolás
All manuals and user guides at all-guides.com Karbantartás és ápolás Karbantartás és ápolás A hallókészülék rendkívül érzékeny rendszer. A megfelelő gondozás és kezelés biztosítja a lehető legjobb teljesít- ményt. A készülék károsodásának és az egészségügyi problé- máknak az elkerülése érdekében rendszeresen tisztítsa a készüléket. - Page 49 All manuals and user guides at all-guides.com Karbantartás és ápolás Füldugók és vevőegységek FIGYELEM A vevőkészülék és a füldugó/vevőegység/egyedi ház helytelen használata sérülést okozhat. A vevőkészüléket mindig a füldugóval vagy vevőegységgel együtt viselje. Ügyeljen, hogy a füldugó/vevőegység megfele- lően rögzítve legyen a vevőkészülékhez.
- Page 50 All manuals and user guides at all-guides.com Karbantartás és ápolás Az Ön hallókészüléke az alábbi illesztékek egyikével ren- delkezik: Egyszerű Dupla Vevőegység Egyedi ház füldugó füldugó Az illesztékek tisztítása A füldugóra/vevőegységre/egyedi házra került cerumen (fülzsír) befo- lyásolja a hangminőséget. A füldugó/vevőegység/egyedi ház ...
- Page 51 All manuals and user guides at all-guides.com Karbantartás és ápolás Szimpla füldugók cseréje A füldugó külső borításán az egyik oldalon található egy nyílás, amelynek segítségével a füldugó eltávolítható a vevőegységről. Helyezze be a vevőegységet. Tartsa erősen a füldugót, miköz- ...
- Page 52 All manuals and user guides at all-guides.com Karbantartás és ápolás Dupla füldugók cseréje Távolítsa el a használt füldugót a vevőegységből. Kattintsa be a vevőegység végét az új füldugóba. A vevőegységek cseréje Kérje hallókészülék-specialistája segítségét. Fülzsírvédők A fülzsírvédő megakadályozza, hogy a fülzsír bejusson a vevőegységbe.
- Page 53 All manuals and user guides at all-guides.com Karbantartás és ápolás A hangszóró cseréje A hangszórót a audiológusa/akusztikusa igény szerint ki tudja cserélni. Ha saját kezűleg kell kicse- rélnie a hangszórót, gondosan kövesse az alábbi utasításokat. Fordítsa el a hangszórót 45°-kal az ...
-
Page 54: Hibaelhárítás
All manuals and user guides at all-guides.com Hibaelhárítás Hibaelhárítás Probléma Lehetséges megoldás Gyenge Cserélje ki a lemerült elemet. hang. Végezze el a füldugó/vevőegység/egyedi ház tisztítását. Cserélje le a mikrofon védőburkolatát. Növelje a hangerőt. A hallóké- Próbálja meg újra felhelyezni a füldugót/ szülék sípoló... -
Page 55: Hulladékelhelyezési Tudnivalók
A CE-jelöléssel a Siemens igazolja, hogy a készülék megfelel az orvosi készülékekre vonatkozó, 93/42/EEK jelű irányelv követelményeinek. Az e2e wireless 2.0 technológiával rendelkező termékek esetében a Siemens emellett igazolja a 99/5/EK jelű, rá- dió- és távközlési végberendezésekre vonatkozó (R&TTE) európai irányelvnek való megfelelőséget. - Page 56 All manuals and user guides at all-guides.com...
- Page 57 All manuals and user guides at all-guides.com Cuprins Cuprins Instrumentul dumneavoastră auditiv RIC Destinaţie de utilizare Note generale privind siguranţa Manevrarea bateriilor Introducerea şi scoaterea instrumentului dumneavoastră auditiv Pornirea şi oprirea instrumentului dumneavoastră auditiv Schimbarea programului auditiv Modificarea volumului Optiuni Întreţinere şi îngrijire Depanare Informaţii privind depunerea la deşeuri...
- Page 58 All manuals and user guides at all-guides.com Instrumentul dumneavoastră auditiv RIC Instrumentul dumneavoastră au- ditiv RIC Pure SE Pure Carat (tip baterie 10) (tip baterie 13) ① Unitatea receptorului ⑤ Capacul microfonului ② Dom ⑥ Orificii microfon ③ Contacte de încărcare ⑦...
- Page 59 All manuals and user guides at all-guides.com Instrumentul dumneavoastră auditiv RIC Pure Active (tip baterie 312) (tip baterie 13) ① Unitatea receptorului ⑤ Capacul microfonului ② Dom ⑥ Orificii microfon ⑦ Buton ③ Contacte de încărcare ④ Compartimentul bateriei...
- Page 60 All manuals and user guides at all-guides.com Instrumentul dumneavoastră auditiv RIC ① Înveliş personalizat ② Dom ③ Mulaj de receptor ④ Număr de serie ⑤ Tip al instrumentului auditiv Audiologul dumneavoastră oferă un sortiment de lungimi de receptor şi mărimi de dom pentru a se potrivi cel mai bine urechii dumneavoastră.
-
Page 61: Destinaţie De Utilizare
All manuals and user guides at all-guides.com Destinaţie de utilizare Destinaţie de utilizare Instrumentele auditive sunt concepute în scopul de a ajuta persoanele cu deficienţe de auz să audă mai bine. Diagnosticarea şi prescrierea unui instrument auditiv trebuie efectuate de specialişti în probleme auditive, de exemplu, medici specialişti în ORL, audiologi sau acustici- eni. - Page 62 All manuals and user guides at all-guides.com Note generale privind siguranţa Note generale privind siguranţa NOTĂ Instrumentele dumneavoastra auditive sunt sensi- bile la caldura extrema, umiditate ridicata, câmpuri magnetice puternice (> 0,1 T), raze X si socuri mecanice. Nu expuneti aparatele auditive la temperaturi ...
- Page 63 36 de luni sau persoanelor cu dizabilităţi psihice. Pentru produse adecvate, vă rugăm să vă consultaţi cu audiologul dumnea- voastră. Siemens oferă instrumente auditive speciale pen- tru a fi montate la bebeluşi şi copii mici. Solicitaţi audiologului dumneavoastră informaţii ...
- Page 64 All manuals and user guides at all-guides.com Note generale privind siguranţa NOTĂ Bateriile care curg pot deteriora aparatele auditive. Opriti aparatele auditive atunci când nu sunt utilizate pentru a economisi bateria. Scoateti bateriile când aparatele nu sunt utiliza- te pentru o perioada mai mare de timp.
-
Page 65: Manevrarea Bateriilor
All manuals and user guides at all-guides.com Manevrarea bateriilor Manevrarea bateriilor Tip baterie mărime originală Dacă sunetul devine mai slab sau auziţi semnale alar- mante, schimbaţi bateria standard sau încărcaţi bateria reîncărcabilă. Utilizaţi întotdeauna o baterie de mărime potrivită. ... -
Page 66: Introducerea Şi Scoaterea Instrumentului Dumneavoastră Auditiv
All manuals and user guides at all-guides.com Introducerea şi scoaterea instrumentului dumneavoastră auditiv Introducerea şi scoaterea instru- mentului dumneavoastră auditiv Pentru recunoaştere laterală, solicitaţi audiologu- lui dumneavoastră să aplice marcatoare colorate în compartimentul bateriei. Dacă marcatorul din compartimentul bateriei are culoarea roşie, instru- mentul auditiv este destinat urechii drepte. -
Page 67: Pornirea Şi Oprirea Instrumentului Dumneavoastră Auditiv
All manuals and user guides at all-guides.com Pornirea şi oprirea instrumentului dumneavoastră auditiv Pornirea şi oprirea instrumentu- lui dumneavoastră auditiv De la compartimentul bateriei On (Pornire) Închideţi compartimentul bateriei. Off (Oprire) Deschideţi compartimentul bateriei. De la butonul de comandă On (Pornire) Apăsaţi butonul de comandă... - Page 68 All manuals and user guides at all-guides.com Pornirea şi oprirea instrumentului dumneavoastră auditiv Prin glisor On (Pornire) Împingeţi glisorul în sus sau în jos timp de 2 secunde. Off (Oprire) Împingeţi glisorul în sus sau în jos timp de 2 secunde. De la telecomandă...
-
Page 69: Schimbarea Programului Auditiv
All manuals and user guides at all-guides.com Schimbarea programului auditiv Schimbarea programului auditiv De la butonul de comandă Apăsaţi butonul de comandă. Instrumentul auditiv trece la următorul program. Prin glisor Apăsaţi glisorul în sus o dată pentru a trece la următorul program. - Page 70 All manuals and user guides at all-guides.com Modificarea volumului Modificarea volumului Volumul instrumentelor auditive este controlat automat şi nu este necesar controlul manual al acestuia. Dacă preferaţi controlul manual al volumului, solicitaţi audiologului dumneavoastră să programeze instrumentul auditiv pentru reglare manuală. Automatic (Automat) Volumul este reglat automat în timpul utilizării.
- Page 71 All manuals and user guides at all-guides.com Optiuni Optiuni Audiologul dumneavoastră poate activa următoarele functii. e2e wireless Permite utilizarea unei telecomenzi. ■ Ajustează automat şi simultan ambele aparate ■ auditive pentru a modifica setarile aparatului, de exemplu volumul sau programul. Operarea funcţiei e2e wireless poate fi...
- Page 72 10 cm (4 inci). (*) Accesoriu magnet AutoPhone Nu toate telefoanele produc un câmp magnetic suficient de puternic pentru a activa funcţia AutoPhone. În acest caz, utilizaţi magnetul Siemens AutoPhone, disponibil ca accesoriu, şi ataşaţi-l la receptorul telefonului pentru a activa funcţia AutoPhone.
- Page 73 All manuals and user guides at all-guides.com Optiuni Consultaţi ghidul utilizatorului magnetului AutoPhone pentru instrucţiuni privind modul de poziţionare al magnetului. Utilizaţi doar magnetul Siemens. Solicitaţi audi- ologului dumneavoastră acest accesoriu. NOTĂ Magneţii pot perturba dispozitivele electrice şi pot duce la ştergerea datelor stocate.
-
Page 74: Întreţinere Şi Îngrijire
All manuals and user guides at all-guides.com Întreţinere şi îngrijire Întreţinere şi îngrijire Aparatele auditive sunt sisteme extrem de sensibile. O îngrijire şi manipulare adecvate vor asigura cele mai bune performanţe posibile. Curăţaţi în mod regulat aparatele pentru a preveni deteriorarea aparatelor auditive şi a evita problemele de sănătate. - Page 75 All manuals and user guides at all-guides.com Întreţinere şi îngrijire Domuri şi mulaje de receptor ATENŢIE Risc de accidentare cauzat de utilizarea incorectă a unităţii receptor şi domurilor/mulajelor de recep- tor/învelişurilor personalizate. Purtaţi întotdeauna unitatea receptor cu un dom sau mulaj de receptor. Asiguraţi-vă...
- Page 76 All manuals and user guides at all-guides.com Întreţinere şi îngrijire Instrumentele dumneavoastră auditive includ unul din următoarele elemente de receptor: Mulaj de Înveliş perso- simplu dublu receptor nalizat Curăţarea elementelor care intră în ureche Cerumenul (ceara din urechi) pe dom/mulaj de receptor/ înveliş...
- Page 77 All manuals and user guides at all-guides.com Întreţinere şi îngrijire Schimbarea domurilor simple Ambalajul domului dumneavoastră are un slot pe o parte pentru scoaterea domului din receptor. Introduceţi receptorul. Ţineţi domul strâns în timp ce înclinaţi receptorul (consultaţi imaginea).
- Page 78 All manuals and user guides at all-guides.com Întreţinere şi îngrijire Schimbarea domurilor duble Scoateţi domul utilizat din recep- tor. Introduceţi vârful unităţii recep- tor în noul dom. Schimbarea mulajelor de receptor Solicitaţi asistenţă din partea audiologului dumnea- voastră.
- Page 79 All manuals and user guides at all-guides.com Întreţinere şi îngrijire Schimbarea unităţii receptorului Unitatea receptorului poate fi schimbată după cum este necesar de către audiologul dumneavoastră. Dacă trebuie să înlocuiţi singuri unitatea recepto- rului, urmaţi cu atenţie aceste instrucţiuni. Rotiţi unitatea receptorului la 45° în ...
- Page 80 All manuals and user guides at all-guides.com Depanare Depanare Problemă Soluţie posibilă Sunetul Înlocuiţi bateria descărcată. este slab. Curăţaţi domul/mulajul de receptor/învelişul personalizat. Schimbaţi capacul microfonului. Măriţi volumul. Instrumen- Reintroduceţi domul/mulajul de receptor/ tul auditiv învelişul personalizat până la fixarea acestuia emite în siguranţă.
- Page 81 All manuals and user guides at all-guides.com Depanare Problemă Soluţie posibilă Instrumen- Porniţi instrumentul auditiv. tul auditiv Închideţi complet compartimentul bateriei, cu nu funcţio- atenţie. nează. Înlocuiţi bateria descărcată. Asiguraţi-vă că bateria este introdusă corect. Funcţia de pornire cu întârziere este activă. Aşteptaţi 18 secunde şi verificaţi din nou.
-
Page 82: Informaţii Privind Depunerea La Deşeuri
Prin marcajul CE, Siemens confirmă conformita- tea aparatului cu Directiva Europeană 93/42/CEE privind dispozitivele de uz medical. Pentru produse cu e2e wireless 2.0, Siemens confirmă adiţional conformitatea acestora cu Directiva Europeană 99/5/EC (R&TTE) privind echipamentele terminale radio şi de telecomunicaţii. - Page 83 All manuals and user guides at all-guides.com Sommaire Sommaire Votre aide auditive RIC Utilisation prévue Consignes générales de sécurité Manipulation des piles Mise en place et retrait de votre aide auditive Mise en marche et arrêt de votre aide auditive Changement de programme d'écoute Réglage du volume Fonctionnalités...
-
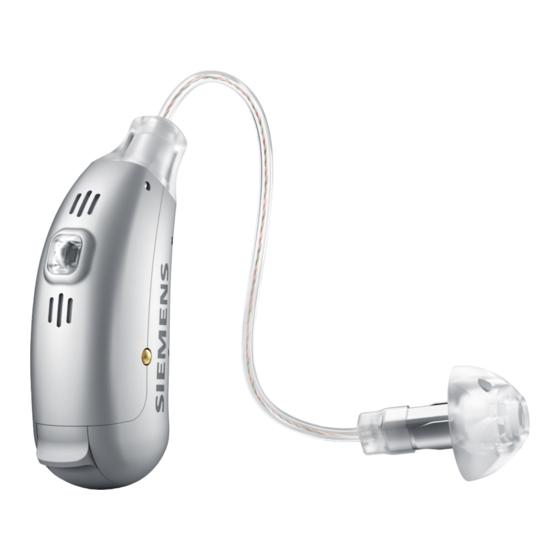
Page 84: Votre Aide Auditive Ric
All manuals and user guides at all-guides.com Votre aide auditive RIC Votre aide auditive RIC Pure SE Pure Carat (pile de type 10) (pile de type 13) ① Ecouteur ⑤ Protège-micros ② Dôme ⑥ Entrées du microphone ③ Contacts de charge ⑦... - Page 85 All manuals and user guides at all-guides.com Votre aide auditive RIC Pure Active (pile de type 312) (pile de type 13) ① Ecouteur ⑤ Protège-micros ② Dôme ⑥ Entrées du microphone ③ Contacts de charge ⑦ Bouton-poussoir ④ Tiroir pile...
- Page 86 All manuals and user guides at all-guides.com Votre aide auditive RIC ① Coque sur mesure ② Dôme ③ Embout écouteur ④ Numéro de série ⑤ Type d'aide auditive Votre audioprothésiste pourra vous proposer plusieurs longueurs d'écouteur et plusieurs tailles de dôme adap- tées à...
-
Page 87: Utilisation Prévue
All manuals and user guides at all-guides.com Utilisation prévue Utilisation prévue Les aides auditives sont destinées à permettre aux personnes souffrant de pertes auditives de mieux entendre. Seuls des spécialistes de l’audition (par ex. : médecins ORL, audiologistes ou audioprothésistes) sont habilités à... -
Page 88: Consignes Générales De Sécurité
All manuals and user guides at all-guides.com Consignes générales de sécurité Consignes générales de sécurité REMARQUE Vos aides auditives sont sensibles à une chaleur extrême, à une forte humidité, à des champs magnétiques élevés (> 0,1 T), aux rayons X et à la pression mécanique. - Page 89 de moins de 36 mois ni aux personnes handica- pées intellectuelles. Pour connaître les produits adaptés, consultez votre audioprothésiste. Siemens propose des aides auditives spécialement adaptées aux bébés et aux jeunes enfants. Renseignez-vous auprès de votre audioprothé- siste.
- Page 90 All manuals and user guides at all-guides.com Consignes générales de sécurité REMARQUE Si les piles présentent une fuite, elles risquent d'endommager vos aides auditives. Lorsque vous ne l'utilisez pas, éteignez votre aide auditive afin de préserver la pile. Retirez les piles si vous n'utilisez pas vos aides ...
-
Page 91: Manipulation Des Piles
All manuals and user guides at all-guides.com Manipulation des piles Manipulation des piles Taille réelle Si le son faiblit ou si vous entendez des signaux d'alerte, remplacez la pile standard ou rechargez la pile rechargeable. Utilisez toujours le type de pile approprié. ... -
Page 92: Mise En Place Et Retrait De Votre Aide Auditive
All manuals and user guides at all-guides.com Mise en place et retrait de votre aide auditive Mise en place et retrait de votre aide auditive Pour identifier les côtés, demandez à votre au- dioprothésiste d'apposer des repères de couleur dans le tiroir pile. Si le repère dans le tiroir pile est rouge, l'aide auditive est destinée à... -
Page 93: Mise En Marche Et Arrêt De Votre Aide Auditive
All manuals and user guides at all-guides.com Mise en marche et arrêt de votre aide auditive Mise en marche et arrêt de votre aide auditive Par le tiroir pile Marche Fermez le tiroir pile. Arrêt Ouvrez le tiroir pile. ... - Page 94 All manuals and user guides at all-guides.com Mise en marche et arrêt de votre aide auditive A l'aide de l'interrupteur Marche Poussez l'interrupteur vers le haut ou vers le bas pendant 2 secondes. Arrêt Poussez l'interrupteur vers le haut ...
-
Page 95: Changement De Programme D'écoute
All manuals and user guides at all-guides.com Changement de programme d'écoute Changement de programme d'écoute Avec le bouton-poussoir Appuyez sur le bouton. L'aide auditive passe au programme suivant. A l'aide de l'interrupteur Poussez l'interrupteur une fois vers le haut pour passer au programme suivant. -
Page 96: Réglage Du Volume
All manuals and user guides at all-guides.com Réglage du volume Réglage du volume Le volume de votre aide auditive se règle automatique- ment, il n'est donc pas nécessaire de l'ajuster manuelle- ment. Si vous préférez régler le volume manuellement, votre audioprothésiste peut programmer votre aide auditive pour un réglage manuel. -
Page 97: Fonctionnalités
All manuals and user guides at all-guides.com Fonctionnalités Fonctionnalités Votre audioprothésiste peut activer les fonctionnalités suivantes. La fonction e2e wireless Cette fonction permet d‘utiliser une télécom- ■ mande. Cette fonction synchronise automatiquement ■ les réglages de vos deux aides auditives aux changements de réglage, par exemple volume ou programme. - Page 98 All manuals and user guides at all-guides.com Fonctionnalités Programme automatique pour le téléphone Approchez un combiné téléphonique de votre aide auditive (*). L'aide auditive bascule automatiquement sur le programme téléphone. Eloignez le combiné de votre aide auditive. L'aide auditive rebascule sur le programme pré- cédemment utilisé.
- Page 99 All manuals and user guides at all-guides.com Fonctionnalités Pour la mise en place de l’aimant, consultez le guide d’utilisation de l’aimant AutoPhone. Utilisez exclusivement l’aimant Siemens. Procu- rez-vous cet accessoire auprès de votre audio- prothésiste. REMARQUE Les aimants sont susceptibles d’endommager les équipements de stockage électroniques et magné-...
-
Page 100: Maintenance Et Entretien
La nuit, placez vos aides auditives dans une pochette étanche avec une pastille asséchante (kit de dessicca- tion). Votre audioprothésiste peut vous fournir les produits d'entretien Siemens et de plus amples informations pour vous aider à maintenir vos aides auditives en parfait état de marche. - Page 101 All manuals and user guides at all-guides.com Maintenance et entretien Dômes, embouts, coques sur mesure ATTENTION Risque de blessure causée par une utilisation incorrecte de l'écouteur et des dômes / embouts / coques sur mesure. Portez toujours l'écouteur avec un dôme ou un ...
- Page 102 All manuals and user guides at all-guides.com Maintenance et entretien Vos aides auditives comportent un des éléments intra-au- riculaires suivants : Dôme Dôme Embout Coque sur simple double écouteur mesure Nettoyage des éléments intra-auriculaires L'accumulation de cérumen sur le dôme, l'embout ou la coque sur mesure altère la qualité...
- Page 103 All manuals and user guides at all-guides.com Maintenance et entretien Remplacement des dômes simples L'emballage de votre dôme est muni d'une encoche sur le côté qui permet de retirer le dôme de l'écouteur. Insérez l'écouteur. Tenez bien le dôme pendant que ...
- Page 104 All manuals and user guides at all-guides.com Maintenance et entretien Exchanging double-dômes Retirez le dôme usagé de l'écou- teur. Encliquetez la pointe de l'écou- teur dans le nouveau dôme. Remplacement des embouts Faites appel à l'aide de votre audioprothésiste. ...
- Page 105 All manuals and user guides at all-guides.com Maintenance et entretien Remplacement de l'écouteur En cas de besoin, votre audioprothésiste peut remplacer l'écouteur. Si vous devez remplacer vous-même l'écouteur, observez les instructions suivantes. Tournez l'écouteur à 45° vers la gauche. Retirez l'écouteur.
-
Page 106: Dépannage
All manuals and user guides at all-guides.com Dépannage Dépannage Problème Solutions envisageables Le son est Remplacez la pile vide. faible. Nettoyez le dôme / l'embout / la coque sur mesure. Remplacez le protège-micros. Augmentez le volume. L'aide Réintroduisez le dôme / l'embout / la coque auditive sur mesure jusqu'à... -
Page 107: Informations Techniques
Siemens Pure 700, Pure 500, Pure 300 Siemens Pure 701, Pure 501, Pure 301, Pure 101 Siemens Pure SE 701, Pure SE 501 Siemens Pure Carat 701, Pure Carat 501, Pure Carat 301 Impact R FCC ID: SGI-WL002BTE IC: 267AB-WL002 Fréquences de fonctionnement : F... - Page 108 All manuals and user guides at all-guides.com Informations techniques cet appareil doit supporter toutes les interférences ■ reçues, y compris celles susceptibles de perturber son bon fonctionnement. Cet appareil a été testé et déclaré conforme aux valeurs limites d'un appareil numérique de classe B selon la partie 15 des règlements FCC.
-
Page 109: Informations Relatives À La Mise Au Rebut
Par le marquage CE, Siemens certifie la conformité du produit avec la directive européenne 93/42/CEE relative aux dispositifs médicaux. Pour les produits avec e2e wireless 2.0, Siemens certi- fie en outre la conformité du produit avec la directive européenne 99/5/CE (R&TTE) concernant les équipements hertziens et les équipements terminaux de télécommuni-... - Page 110 All manuals and user guides at all-guides.com...
- Page 111 All manuals and user guides at all-guides.com Inhaltsverzeichnis Inhaltsverzeichnis Ihre RIC Hörsysteme Bestimmungsgemäßer Gebrauch Allgemeine Sicherheitshinweise Handhabung der Batterien Hörsysteme einsetzen/entnehmen Hörsysteme ein-/ausschalten Hörprogramm wechseln Lautstärkeregelung Funktionen Wartung und Pflege Problembehandlung Entsorgungshinweis...
-
Page 112: Ihre Ric Hörsysteme
All manuals and user guides at all-guides.com Ihre RIC Hörsysteme Ihre RIC Hörsysteme Pure SE Pure Carat (Batterietyp 10) (Batterietyp 13) ① Externer Hörer ⑤ Mikrofonabdeckung ② Ohrstück ⑥ Mikrofonöffnungen ③ Ladekontakte ⑦ Programmtaster ④ Batteriefach ⑧ Schiebetaster... - Page 113 All manuals and user guides at all-guides.com Ihre RIC Hörsysteme Pure Active (Batterietyp 312) (Batterietyp 13) ① Externer Hörer ⑤ Mikrofonabdeckung ② Ohrstück ⑥ Mikrofonöffnungen ⑦ Programmtaster ③ Ladekontakte ④ Batteriefach...
- Page 114 All manuals and user guides at all-guides.com Ihre RIC Hörsysteme ① Im-Ohr-Passstück ② Ohrstück ③ Ohrpassstück ④ Seriennummer ⑤ Hörsystem-Typ Bei Ihrem Hörgeräteakustiker können Sie aus einer Aus- wahl von Lautsprechern und Ohrpassstücken verschiede- ner Größe das für Sie passende Modell auswählen.
-
Page 115: Bestimmungsgemäßer Gebrauch
All manuals and user guides at all-guides.com Bestimmungsgemäßer Gebrauch Bestimmungsgemäßer Gebrauch Hörsysteme dienen zur Verbesserung des Hörvermögens hörgeschädigter Menschen. Die Diagnose und die Verordnung eines Hörsystems muss durch Gehörspezialis- ten erfolgen, z. B. durch Fachärzte für Hals-, Nasen- und Ohrenheilkunde, Audiologen oder Hörgeräteakustiker. Lesen und befolgen Sie diese Gebrauchsanweisung, um Verletzungen oder Beschädigungen der Hörsysteme zu vermeiden. -
Page 116: Allgemeine Sicherheitshinweise
All manuals and user guides at all-guides.com Allgemeine Sicherheitshinweise Allgemeine Sicherheitshinweise HINWEIS Ihre Hörsysteme reagieren empfindlich auf ext- reme Hitze, hohe Luftfeuchtigkeit, starke mag- netische Felder (> 0,1T), Röntgenstrahlen und mechanische Beanspruchung. Setzen Sie Ihre Hörsysteme nicht extremen Temperaturen oder starker Feuchtigkeit aus. Lassen Sie sie nicht in der Sonne liegen. - Page 117 Dieses Hörsystem ist nicht für Kinder unter 36 Monaten oder geistig behinderte Personen ge- eignet. Ihr Hörgeräteakustiker berät Sie bei der Auswahl eines geeigneten Hörsystems. Siemens bietet spezielle Hörsysteme für Säuglinge und kleine Kinder an. Fragen Sie Ihren Hörgeräteakustiker nach weite- ren Informationen.
- Page 118 All manuals and user guides at all-guides.com Allgemeine Sicherheitshinweise HINWEIS Auslaufende Batterien beschädigen die Hörsyste- Schalten Sie die Hörsysteme aus, wenn Sie sie nicht verwenden, um die Batterien zu schonen. Entnehmen Sie die Batterien, wenn Sie die Hör- systeme längere Zeit nicht nutzen.
-
Page 119: Handhabung Der Batterien
All manuals and user guides at all-guides.com Handhabung der Batterien Handhabung der Batterien Originalgröße des Batterietyps Wenn das Hörsystem immer leiser wird oder Sie einen Signalton hören, tauschen Sie die Hörgerätebatterie aus oder laden Sie den Akku auf. Achten Sie immer auf die richtige Größe der Batterie. ... -
Page 120: Hörsysteme Einsetzen/Entnehmen
All manuals and user guides at all-guides.com Hörsysteme einsetzen/entnehmen Hörsysteme einsetzen/entnehmen Für die Kennzeichnung der Seiten in den Hörsyste- men bringt Ihr Hörgeräteakustiker farbige Markie- rungen im Batteriefach an. Eine rote Markierung im Batteriefach kennzeichnet das rechte Hörsys- tem, eine blaue Markierung kennzeichnet das linke Hörsystem. -
Page 121: Hörsysteme Ein-/Ausschalten
All manuals and user guides at all-guides.com Hörsysteme ein-/ausschalten Hörsysteme ein-/ausschalten Mit Batteriefach Schließen Sie das Batteriefach. Öffnen Sie das Batteriefach. Mit Programmtaster Drücken Sie den Programmtaster 2 Sekunden lang. Drücken Sie den Programmtaster 2 Sekunden lang. - Page 122 All manuals and user guides at all-guides.com Hörsysteme ein-/ausschalten Mit Schiebetaster Schieben Sie den Taster für 2 Sekunden nach oben oder nach unten. Schieben Sie den Taster für 2 Sekunden nach oben oder nach unten. Mit Fernbedienung Siehe Gebrauchsanweisung der Fernbedienung. ...
-
Page 123: Hörprogramm Wechseln
All manuals and user guides at all-guides.com Hörprogramm wechseln Hörprogramm wechseln Über Programmtaster Drücken Sie den Programmtaster. Das Hörsystem wechselt zum nächsten Programm. Mit Schiebetaster Schieben Sie den Taster einmal nach oben, um in das nächste Programm zu wechseln. Schieben Sie den Taster einmal ... - Page 124 All manuals and user guides at all-guides.com Lautstärkeregelung Lautstärkeregelung Die Lautstärke Ihrer Hörsysteme wird automatisch geregelt. Es ist normalerweise nicht notwendig, dass Sie die Lautstärke von Hand ändern. Wenn Sie manuelle Bedienung bevorzugen, kann Ihr Hör- geräteakustiker Ihre Hörsysteme auf manuelle Bedienung umstellen.
- Page 125 All manuals and user guides at all-guides.com Funktionen Funktionen Ihr Hörgeräteakustiker kann die folgenden Funktionalitä- ten aktivieren. e2e wireless Erlaubt die Verwendung einer Fernbedienung. ■ Stellt automatisch beide Hörsysteme gleichzeitig ■ ein, wenn Sie die Geräteeinstellungen ändern, z. B. Lautstärke oder Hörprogramm. Die Leistungsfähigkeit der e2e wireless -Funktion kann durch elektromagnetische Strahlung beeinträchtigt werden, z.
- Page 126 (*) AutoPhone-Magnet-Zubehör Nicht alle Telefone erzeugen ein Magnetfeld, das stark genug ist, um die AutoPhone-Funktion zu aktivieren. In diesem Fall verwenden Sie den Siemens AutoPhone- Magneten, der als Zubehör erhältlich ist, und befestigen ihn am Telefonhörer, um die AutoPhone-Funktion zu...
- Page 127 All manuals and user guides at all-guides.com Funktionen Bei Fragen zur Positionierung des Magneten lesen Sie die Benutzerhinweise für den Auto- Phone-Magneten. Verwenden Sie ausschließlich den Siemens- Magneten. Fragen Sie Ihren Hörgeräteakustiker nach diesem Zubehör. HINWEIS Magnete können elektrische Geräte stören und gespeicherte Daten löschen.
-
Page 128: Wartung Und Pflege
All manuals and user guides at all-guides.com Wartung und Pflege Wartung und Pflege Ihre Hörsysteme enthalten empfindliche Technik. Mit sachgemäßer Pflege und Handhabung erhalten Sie die Leistungsfähigkeit Ihrer Hörsysteme. Reinigen Sie Ihre Hörsysteme und Ohrpassstücke regel- mäßig, um Beschädigungen an den Hörsystemen vorzu- beugen und gesundheitliche Probleme zu vermeiden. - Page 129 All manuals and user guides at all-guides.com Wartung und Pflege Ohrstücke, Ohrpassstücke, Im-Ohr-Passstücke VORSICHT Verletzungsgefahr durch falsche Benutzung des externen Hörers (Lautsprecher) und der Ohrstücke/ Ohrpassstücke/Im-Ohr-Passstücke. Tragen Sie den externen Hörer immer mit einem Ohrstück oder Ohrpassstück. Stellen Sie sicher, dass das Ohrstück/Ohrpass- ...
- Page 130 All manuals and user guides at all-guides.com Wartung und Pflege Ihre Hörsysteme verfügen über eines der folgenden Ohrstücke: Ohrstück Doppel- Ohrpass- Im-Ohr-Pass- (Single Ohrstück stück stück Dome) (Double Dome) Reinigung der Ohrstücke/Ohrpassstücke/Im-Ohr- Passstücke Cerumen (Ohrenschmalz) auf dem Ohrstück/Ohrpass- stück/Im-Ohr-Passstück beeinträchtigt die Klangqualität.
- Page 131 All manuals and user guides at all-guides.com Wartung und Pflege Austauschen der Ohrstücke (Single Domes) Die Verpackung Ihres Ohrstücks hat eine Aussparung auf einer Seite zum Entfernen des Ohrstücks vom externen Hörer. Fügen Sie den externen Hörer in die Aussparung ein. Halten Sie das Ohrstück fest, ...
- Page 132 All manuals and user guides at all-guides.com Wartung und Pflege Austauschen der Doppel-Ohrstücke Entfernen Sie das gebrauchte Doppel-Ohrstück vom externen Hörer. Klicken Sie die Spitze des exter- nen Hörers in das neue Doppel- Ohrstück. Austauschen der Ohrpassstücke Wenden Sie sich an Ihren Hörgeräteakustiker. ...
- Page 133 All manuals and user guides at all-guides.com Wartung und Pflege Austauschen des externen Hörers Der externe Hörer kann bei Bedarf von Ihrem Hör- geräteakustiker ausgetauscht werden. Sollten Sie den Hörer selbst austauschen müssen, befolgen Sie genau die folgenden Anweisungen. Drehen Sie den externen Hörer um 45° ...
- Page 134 All manuals and user guides at all-guides.com Problembehandlung Problembehandlung Problem Lösungsmöglichkeit Der Ton ist Batterie auswechseln. sehr leise. Ohrstück/Ohrpassstück/Im-Ohr-Passstück reinigen. Mikrofonabdeckung auswechseln. Lautstärke erhöhen. Das Hörsys- Ohrstück/Ohrpassstück/Im-Ohr-Passstück tem pfeift. erneut einsetzen. Lautstärke verringern. Ohrstück/Ohrpassstück/Im-Ohr-Passstück reinigen. Der Ton ist Lautstärke verringern. verzerrt.
- Page 135 Vorschriften. Mit der CE-Kennzeichnung bestätigt Siemens die Übereinstimmung mit der europäischen Richtlinie 93/42/EWG über Medizinprodukte. Für Produkte mit e2e wireless 2.0 bestätigt Siemens die Übereinstimmung mit der europäischen Richtlinie 99/5/EC (R&TTE) über Funk und Telekommunikationssys- teme.
- Page 136 All manuals and user guides at all-guides.com...
- Page 137 .(EC" (WEEE/١٠٨/٢٠٠٣ واﻟﻤﻌﺪل "ﺑﺎﻟﺘﻮﺟﻴﻪ ﻗﻢ ﺑﺈﻋﺎدة ﺗﺪوﻳﺮ أﺟﻬﺰة اﻟﺴﻤﻊ واﻟﺒﻄﺎرﻳﺎت .واﻟﻤﻠﺤﻘﺎت وﻓﻘﺎ ً ﻟﻠﻮاﺋﺢ اﻟﻮﻃﻨﻴﺔ اﻟﺘﺰاﻣﻬﺎ ﺑﺎﻟﺘﻮﺟﻴﻪ اﻷوروﺑﻲCE ﺑﻌﻼﻣﺔSiemens ﺗﺆﻛﺪ . اﻟﺨﺎص ﺑﺎﻷﺟﻬﺰة اﻟﻄﺒﻴﺔEEC/٤٢/٩٣ Directive ٢٫٠ e٢e wireless ﺑﺎﻟﻨﺴﺒﺔ ﻟﻠﻤﻨﺘﺠﺎت اﻟﻤﺠﻬﺰة ﺑﺘﻘﻨﻴﺔ ﺧﻀﻮﻋﻬﺎ ﻟﻠﺘﻮﺟﻴﻪ اﻷوروﺑﻲSiemens، ﺗﺆﻛﺪ ﺷﺮﻛﺔSiemens ( اﻟﺨﺎص...
- Page 138 All manuals and user guides at all-guides.com ﺣﻞ اﻟﻤﺸﺎﻛﻞ ﺣ ﻞ ا ﻟ ﻤ ﺸ ﺎ ﻛ ﻞ اﻟﺤﻞ اﻟﻤﻤﻜﻦ اﻟﻤﺸﻜﻠﺔ .ﻗﻢ ﺑﺎﺳﺘﺒﺪال اﻟﺒﻄﺎرﻳﺔ اﻟﻔﺎرﻏﺔ .اﻟﺼﻮت ﺿﻌﻴﻒ /ﻗﻢ ﺑﺘﻨﻈﻴﻒ اﻟﻘﺒﺔ/ﻗﺎﻟﺐ ﺟﻬﺎز اﻻﺳﺘﻘﺒﺎل .اﻟﻘﺎﻟﺐ اﻟﻤﺨﺼﺺ .ﻗﻢ ﺑﺈﻋﺎدة ﻏﻄﺎء اﻟﻤﻴﻜﺮوﻓﻮن .ﻗﻢ ﺑﺰﻳﺎدة ﻣﺴﺘﻮى اﻟﺼﻮت أﻋﺪ...
- Page 139 All manuals and user guides at all-guides.com ا ﻟ ﺼ ﻴ ﺎ ﻧ ﺔ و ا ﻟ ﻌ ﻨ ﺎ ﻳ ﺔ ﺗﺒﺪﻳﻞ وﺣﺪة ﺟﻬﺎز اﻻﺳﺘﻘﺒﺎل ﻳﻤﻜﻦ ﺗﻐﻴﻴﺮ وﺣﺪة ﺟﻬﺎز اﻻﺳﺘﻘﺒﺎل ﻋﻨﺪ اﻟﺤﺎﺟﺔ ﺑﻮاﺳﻄﺔ أﺧﺼﺎﺋﻲ رﻋﺎﻳﺔ اﻟﺴﻤﻊ اﻟﺨﺎص ﺑﻚ. إذا ﻛﻨﺖ ﺗﺮﻳﺪ اﺳﺘﺒﺪال...
- Page 140 All manuals and user guides at all-guides.com ا ﻟ ﺼ ﻴ ﺎ ﻧ ﺔ و ا ﻟ ﻌ ﻨ ﺎ ﻳ ﺔ ﺗﻐﻴﻴﺮ اﻟﻘﺒﺎب اﻟﻤﺰدوﺟﺔ ﻗﻢ ﺑﺈﺧﺮاج اﻟﻘﺒﺔ اﻟﻤﺴﺘﻌﻤﻠﺔ ﻣﻦ .ﺟﻬﺎز اﻻﺳﺘﻘﺒﺎل اﻧﻘﺮ ﻋﻠﻰ ﻃﺮف وﺣﺪة ﺟﻬﺎز اﻻﺳﺘﻘﺒﺎل...
- Page 141 All manuals and user guides at all-guides.com ا ﻟ ﺼ ﻴ ﺎ ﻧ ﺔ و ا ﻟ ﻌ ﻨ ﺎ ﻳ ﺔ ﺗﺒﺎدل اﻟﻘﺒﺎب اﻟﻔﺮدﻳﺔ ﺗﻮﺟﺪ ﻓﺘﺤﺔ ﻓﻲ ﻋﺒﻮة اﻟﻘﺒﺔ اﻟﺨﺎﺻﺔ ﺑﻚ .ﻹزاﻟﺔ اﻟﻘﺒﺔ ﻣﻦ ﺟﻬﺎز اﻻﺳﺘﻘﺒﺎل .إدﺧﺎل وﺣﺪة اﻻﺳﺘﻘﺒﺎل ...
- Page 142 All manuals and user guides at all-guides.com ا ﻟ ﺼ ﻴ ﺎ ﻧ ﺔ و ا ﻟ ﻌ ﻨ ﺎ ﻳ ﺔ :ﻳﻮﺟﺪ ﻓﻲ أﺟﻬﺰة اﻟﺴﻤﻊ أﺣﺪ اﻷﺟﺰاء اﻟﺘﺎﻟﻴﺔ ﻗﺎﻟﺐ ﻣﺨﺼﺺ ﻗﺎﻟﺐ ﺟﻬﺎز ﻗﺒﺔ ﻗﺒﺔ ﻣﻔﺮدة اﻻﺳﺘﻘﺒﺎل ﻣﺰدوﺟﺔ ﺗﻨﻈﻴﻒ ﻗﻄﻊ اﻷذن ﻳﺆﺛﺮ...
- Page 143 All manuals and user guides at all-guides.com ا ﻟ ﺼ ﻴ ﺎ ﻧ ﺔ و ا ﻟ ﻌ ﻨ ﺎ ﻳ ﺔ اﻟﻘﺒﺎب وﻗﻮاﻟﺐ ﺟﻬﺎز اﻻﺳﺘﻘﺒﺎل اﻟﺘﻨﺒﻴﻪ ﻳﺘﻮاﺟﺪ ﺧﻄﺮ اﻹﺻﺎﺑﺔ ﺑﺴﺒﺐ اﻻﺳﺘﺨﺪام ﻏﻴﺮ اﻟﺼﺤﻴﺢ ﻟﻮﺣﺪة ﺟﻬﺎز اﻻﺳﺘﻘﺒﺎل وﻗﻮاﻟﺐ اﻟﻘﺒﺔ/ﺟﻬﺎز اﻻﺳﺘﻘﺒﺎل .واﻟﻘﻮاﻟﺐ...
- Page 144 All manuals and user guides at all-guides.com اﻟﺼﻴﺎﻧﺔ واﻟﻌﻨﺎﻳﺔ ا ﻟ ﺼ ﻴ ﺎ ﻧ ﺔ و ا ﻟ ﻌ ﻨ ﺎ ﻳ ﺔ إن أﺟﻬﺰة اﻟﺴﻤﻊ اﻟﺨﺎﺻﺔ ﺑﻚ أﺟﻬﺰة ﺣﺴﺎﺳﺔ ﻟﻠﻐﺎﻳﺔ وﺗﻀﻤﻦ اﻟﻌﻨﺎﻳﺔ اﻟﺼﺤﻴﺤﺔ واﻟﺘﻌﺎﻣﻞ اﻟﺠﻴﺪ ﻣﻌﻬﺎ اﻟﺤﺼﻮل ﻋﻠﻰ أﻓﻀﻞ .ﻣﺴﺘﻮى...
- Page 145 All manuals and user guides at all-guides.com ا ﻟ ﻮ ﻇ ﺎ ﺋ ﻒ اﻹﻧﺬار ﻗﺪ ﺗﺸﻮش ﻗﻄﻊ اﻟﻤﻐﻨﺎﻃﻴﺲ ﻋﻠﻰ اﻷﺟﻬﺰة اﻟﻜﻬﺮﺑﺎﺋﻴﺔ أو .ﺗﺤﺬف اﻟﺒﻴﺎﻧﺎت اﻟﻤﺨﺰوﻧﺔ ﻗﻢ ﺑﺈﺑﻌﺎد ﻗﻄﻊ اﻟﻤﻐﻨﺎﻃﻴﺲ ﻋﻦ أﺟﻬﺰة اﻟﻜﻤﺒﻴﻮﺗﺮ واﻟﺸﺎﺷﺎت اﻟﻤﻠﻮﻧﺔ وأﺟﻬﺰة اﻟﺘﻠﻔﺰﻳﻮن واﻷﻗﺮاص اﻟﻤﺮﻧﺔ...
- Page 146 .telecoil ﺑﻚ ﻓﻲ وﺿﻊ AutoPhone )*( ﻣﻠﺤﻖ ﻣﻐﻨﺎﻃﻴﺲ ﻻ ﺗﻨﺘﺞ ﺟﻤﻴﻊ اﻟﻬﻮاﺗﻒ ﻣﺠﺎﻻ ﻣﻐﻨﺎﻃﻴﺴﻴﺎ ﻗﻮﻳﺎ ﺑﻤﺎ ﻳﻜﻔﻲ ﻟﺘﻔﻌﻴﻞ . اﺳﺘﺨﺪم ﻓﻲ ﻫﺬه اﻟﺤﺎﻟﺔ ﻣﻐﻨﺎﻃﻴﺲAutoPhone وﻇﻴﻔﺔ ، اﻟﻤﺘﺎح ﻛﻤﻠﺤﻖ، وﺗﻮﺻﻴﻠﻪ ﺑﺠﻬﺎز اﺳﺘﻘﺒﺎلSiemens AutoPhone .AutoPhone اﻟﻬﺎﺗﻒ ﻟﺘﻔﻌﻴﻞ وﻇﻴﻔﺔ AutoPhone اﻧﻈﺮ دﻟﻴﻞ اﺳﺘﺨﺪام ﻣﻐﻨﺎﻃﻴﺲ ...
- Page 147 All manuals and user guides at all-guides.com اﻟﻮﻇﺎﺋﻒ ا ﻟ ﻮ ﻇ ﺎ ﺋ ﻒ ﻳﺴﺘﻄﻴﻊ أﺧﺼﺎﺋﻲ رﻋﺎﻳﺔ اﻟﺴﻤﻊ اﻟﺨﺎص ﺑﻚ ﺗﻔﻌﻴﻞ اﻟﻮﻇﺎﺋﻒ .اﻟﺘﺎﻟﻴﺔ e٢e wireless .ﻳﺴﻤﺢ ﺑﺎﺳﺘﺨﺪام ﺟﻬﺎز اﻟﺮﻳﻤﻮت ﻛﻨﺘﺮول ■ ﻳﻀﺒﻂ ﺗﻠﻘﺎﺋﻴﺎ ﺟﻬﺎزي اﻟﺴﻤﻊ ﻓﻲ ﻧﻔﺲ اﻟﻮﻗﺖ ﻟﺘﻐﻴﻴﺮ ■...
- Page 148 All manuals and user guides at all-guides.com ﺗﻐﻴﻴﺮ ﻣﺴﺘﻮى اﻟﺼﻮت ﺗ ﻐ ﻴ ﻴ ﺮ ﻣ ﺴ ﺘ ﻮ ى ا ﻟ ﺼ ﻮ ت ﻳﺘﻢ اﻟﺘﺤﻜﻢ ﺗﻠﻘﺎﺋﻴﺎ ً ﻓﻲ ﻣﺴﺘﻮى ﺻﻮت أﺟﻬﺰة اﻟﺴﻤﻊ وﻻ ﺣﺎﺟﺔ .ً ﻟﻀﺒﻄﻬﺎ ﻳﺪوﻳ ﺎ وإذا...
- Page 149 All manuals and user guides at all-guides.com ﺗ ﻐ ﻴ ﻴ ﺮ ﺑ ﺮ ﻧ ﺎ ﻣ ﺞ ا ﻟ ﺴ ﻤ ﻊ ﺗ ﻐ ﻴ ﻴ ﺮ ﺑ ﺮ ﻧ ﺎ ﻣ ﺞ ا ﻟ ﺴ ﻤ ﻊ ﻣﻦ ﺧﻼل اﻟﺰر اﻟﻀﺎﻏﻂ .اﺿﻐﻂ...
- Page 150 All manuals and user guides at all-guides.com ﺗﺸﻐﻴﻞ وإﻳﻘﺎف ﺟﻬﺎز اﻟﺴﻤﻊ اﻟﺨﺎص ﺑﻚ ﺗ ﺸ ﻐ ﻴ ﻞ و إ ﻳ ﻘ ﺎ ف ﺟ ﻬ ﺎ ز ا ﻟ ﺴ ﻤ ﻊ ا ﻟ ﺨ ﺎ ص ﺑ ﻚ ﻣﻦ...
- Page 151 All manuals and user guides at all-guides.com ﺗﺸﻐﻴﻞ وإﻳﻘﺎف ﺟﻬﺎز اﻟﺴﻤﻊ اﻟﺨﺎص ﺑﻚ إ د ﺧ ﺎ ل و إ ﺧ ﺮ ا ج ﺟ ﻬ ﺎ ز ا ﻟ ﺴ ﻤ ﻊ ا ﻟ ﺨ ﺎ ص ﺑ ﻚ ﻟﻠﺘﻌﺮف...
- Page 152 All manuals and user guides at all-guides.com اﻟﺘﻌﺎﻣﻞ ﻣﻊ اﻟﺒﻄﺎرﻳﺎت ا ﻟ ﺘ ﻌ ﺎ ﻣ ﻞ ﻣ ﻊ ا ﻟ ﺒ ﻄ ﺎ ر ﻳ ﺎ ت ﻧﻮع اﻟﺒﻄﺎرﻳﺔ اﻟﻤﻘﺎس اﻷﺻﻠﻲ ﻗﻢ ﺑﺘﻐﻴﻴﺮ اﻟﺒﻄﺎرﻳﺔ اﻟﻘﻴﺎﺳﻴﺔ أو ﺗﻐﻴﻴﺮ اﻟﺒﻄﺎرﻳﺔ اﻟﻘﺎﺑﻠﺔ ﻹﻋﺎدة ...
- Page 153 All manuals and user guides at all-guides.com ﻣ ﻼ ﺣ ﻈ ﺎ ت ﻋ ﺎ ﻣ ﺔ ﻋ ﻦ ا ﻻ ﻣ ﺎ ﻧ ﺔ أﺟﻬﺰة ﺳﻤﻊ ﺧﺎﺻﺔ ﺗﻨﺎﺳﺐ اﻟﺮﺿﻊSiemens ﺗﻘﺪم ﺷﺮﻛﺔ .واﻷﻃﻔﺎل اﻟﺼﻐﺎر اﻃﻠﺐ ﻣﺰﻳ ﺪ ً ا ﻣﻦ اﻟﻤﻌﻠﻮﻣﺎت ﻣﻦ أﺧﺼﺎﺋﻲ رﻋﺎﻳﺔ...
- Page 154 All manuals and user guides at all-guides.com ﻣﻼﺣﻈﺎت ﻋﺎﻣﺔ ﻋﻦ اﻻﻣﺎﻧﺔ ﻣ ﻼ ﺣ ﻈ ﺎ ت ﻋ ﺎ ﻣ ﺔ ﻋ ﻦ ا ﻻ ﻣ ﺎ ﻧ ﺔ اﻹﻧﺬار أﺟﻬﺰة اﻟﺴﻤﻊ ﺣﺴﺎﺳﺔ ﻟﻠﺤﺮارة اﻟﺸﺪﻳﺪة واﻟﺮﻃﻮﺑﺔ (T١٫٠ اﻟﻌﺎﻟﻴﺔ واﻟﻤﺠﺎﻻت اﻟﻤﻐﻨﺎﻃﻴﺴﻴﺔ اﻟﻘﻮﻳﺔ )أﻛﺒﺮ ﻣﻦ .وأﺷﻌﺔ...
- Page 155 All manuals and user guides at all-guides.com اﻻﺳﺘﺨﺪام اﻟﻤﻘﺼﻮد ا ﻻ ﺳ ﺘ ﺨ ﺪ ا م ا ﻟ ﻤ ﻘ ﺼ ﻮ د أﺟﻬﺰة اﻟﺴﻤﻊ ﻣﺼﻤﻤﺔ ﻟﻤﺴﺎﻋﺪة اﻷﺷﺨﺎص اﻟﻤﺼﺎﺑﻴﻦ ﺑﺎﻟﺼﻤﻢ ﻋﻠﻰ اﻟﺴﻤﻊ ﺑﺸﻜﻞ أﻓﻀﻞ. ﻳﺠﺐ أن ﻳﻘﻮم ﺑﺘﺸﺨﻴﺺ ﺟﻬﺎز اﻟﺴﻤﻊ وإﺻﺪار...
- Page 156 All manuals and user guides at all-guides.com RIC ﺟ ﻬ ﺎ ز ا ﻟ ﺴ ﻤ ﻊ ① ﻗﺎﻟﺐ ﻣﺨﺼﺺ ② اﻟﻘﺒﺔ ③ ﻗﺎﻟﺐ ﺟﻬﺎز اﻻﺳﺘﻘﺒﺎل ④ اﻟﺮﻗﻢ اﻟﻤﺴﻠﺴﻞ ⑤ ﻧﻮع ﺟﻬﺎز اﻟﺴﻤﻊ ﻳﻘﺪم أﺧﺼﺎﺋﻲ رﻋﺎﻳﺔ اﻟﺴﻤﻊ اﻟﺨﺎص ﺑﻚ ﻣﺠﻤﻮﻋﺔ ﻣﺘﻨﻮﻋﺔ ﻣﻦ أﻃﻮال...
- Page 157 All manuals and user guides at all-guides.com RIC ﺟ ﻬ ﺎ ز ا ﻟ ﺴ ﻤ ﻊ Pure Active (٣١٢ )ﺑﻄﺎرﻳﺔ ﻣﻦ اﻟﻨﻮع (١٣ )ﺑﻄﺎرﻳﺔ ﻣﻦ اﻟﻨﻮع ⑤ ﻏﻄﺎء اﻟﻤﻴﻜﺮوﻓﻮن ① وﺣﺪة ﺟﻬﺎز اﻻﺳﺘﻘﺒﺎل ⑥ ﻓﺘﺤﺎت اﻟﻤﻴﻜﺮوﻓﻮن ② اﻟﻘﺒﺔ ⑦ زر ﺿﺎﻏﻂ...
- Page 158 All manuals and user guides at all-guides.com RIC ﺟﻬﺎز اﻟﺴﻤﻊ RIC ﺟ ﻬ ﺎ ز ا ﻟ ﺴ ﻤ ﻊ Pure SE Pure Carat (١٠ )ﺑﻄﺎرﻳﺔ ﻣﻦ اﻟﻨﻮع (١٣ )ﺑﻄﺎرﻳﺔ ﻣﻦ اﻟﻨﻮع ⑤ ﻏﻄﺎء اﻟﻤﻴﻜﺮوﻓﻮن ① وﺣﺪة ﺟﻬﺎز اﻻﺳﺘﻘﺒﺎل ⑥ ﻓﺘﺤﺎت اﻟﻤﻴﻜﺮوﻓﻮن...
- Page 159 All manuals and user guides at all-guides.com اﻟﻤﺤﺘﻮﻳﺎت ﺍﶈﺘﻮﻳﺎﺕ ١٣٧ ﻣﻌﻠﻮﻣﺎت اﻟﺘﺨﻠﺺ ﻣﻦ اﻟﺠﻬﺎز ١٣٨ ﺣﻞ اﻟﻤﺸﺎﻛﻞ ١٤٤ اﻟﺼﻴﺎﻧﺔ واﻟﻌﻨﺎﻳﺔ ١٤٧ اﻟﻮﻇﺎﺋﻒ ١٤٨ ﺗﻐﻴﻴﺮ ﻣﺴﺘﻮى اﻟﺼﻮت ١٤٩ ﺗﻐﻴﻴﺮ ﺑﺮﻧﺎﻣﺞ اﻟﺴﻤﻊ ١٥٠ ﺗﺸﻐﻴﻞ وإﻳﻘﺎف ﺟﻬﺎز اﻟﺴﻤﻊ اﻟﺨﺎص ﺑﻚ ١٥١ إدﺧﺎل وإﺧﺮاج ﺟﻬﺎز اﻟﺴﻤﻊ اﻟﺨﺎص ﺑﻚ ١٥٢...
- Page 160 All manuals and user guides at all-guides.com © Siemens AG, 04.2011 · FB Document No. A91SAT-00197-99T6-76V6 Order/Item No. 101 75 434 Printed in Germany Siemens Audiologische Technik GmbH Gebbertstrasse 125 91058 Erlangen Germany Phone +49 9131 308 0 www.siemens.com /hearing...