Télécharger Imprimer la page

Publicité

Les langues disponibles
  • FR

Les langues disponibles

  • FRANÇAIS, page 6

Liens rapides

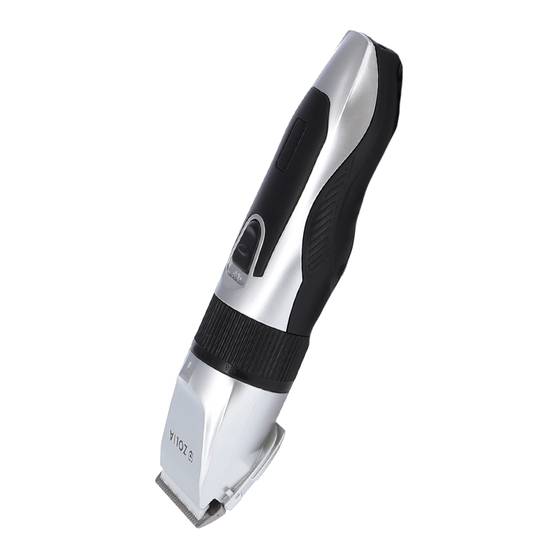
❏ Powerful cutting performance for all kinds of dog/cat
❏ Running time over 300 minutes in a fully charge
❏ Detachable ceramic blade for cleaning or replacement easily
❏ Little noise prevent from frightening pet during trimming
❏ Indication light recharging or using
❏ Ergonomic design provide an easily grip
❏ Cord/cordless using
​ U SAGE
❏ The usage of direct plugging in
Insert the wired plug of charge into the rabbet in the electric hair cutter
Insert the plug of charge into the outlet after you turn off the clipper
Turn on and use the clipper
❏ The usage of charging
Insert the wired plug of the charge into the rabbet in the electric hair cut
Insert the plug of the charge into the outlet after you turn off the clipper
Pull out plug after it is fully charged and then you can turn on and use the clipper
❏ Charge description
The best environment temperature to use is 5°C to 40°C
Just need to charge it for about 3 hours . After you will have fully charge or discharge for 3 or 4 times,
the battery capacity will reach its optimal state
If the charging idle timeout is too long, the service life of the batteries will be shorten
Just charge it for a low battery or low battery caused by the lack of use. It will influence battery
performance to charge it when it's fully charged
Please charge it before you use it
EN- Zolia Hair Pet Clipper HANDSOME

Publicité

loading

Sommaire des Matières pour Zolia HANDSOME

  • Page 1 EN- Zolia Hair Pet Clipper HANDSOME ❏ Powerful cutting performance for all kinds of dog/cat ❏ Running time over 300 minutes in a fully charge ❏ Detachable ceramic blade for cleaning or replacement easily ❏ Little noise prevent from frightening pet during trimming ❏...
  • Page 2 ❏ Installation and uninstallation method of the comb The installation method of the comb : grasp two side of the comb aim at the button placement and then impel (pay attention : the comb should be tight) The uninstallation method : shove the two sides of the comb which are buckled (pay attention : do not press the broach of the comb, which will damage it)
  • Page 3 ❏ The direction of shearing with a comb Use the clipper to shave in the suitable pet’s hair direction showed by the arrow Clean up the remaining hair surrounding the comb at any moment (the remaining hair may affect the shearing effect) The shearing methods of different parts of your pet ❏...
  • Page 4 ● The Anus Shave lightly from the anus center to outward Pay attention : shave in the opposite direction of the pet’s hair ❏ Clean Method Shove with the thumb and then take out the bit tool Clean up the bit tool with the cleaning brush like the over picture , you should press the top of the kniferest to clean up the remaining hair between the upper blade and the lower knife (please do not disassemble the spring in the bit tool in order not to cause malfunction)
  • Page 5 After clean it up you should drop in 3-4 drops of lubricating oil and then enclose the removed bit tool again (do remember : you must aim at slot position when you hear click , you can make sure you have assembled it correctly) ❏...
  • Page 6 FR - Tondeuse pour animaux Zolia HANDSOME ❏ Haute performance de coupe pour tous les types de chiens / chats ❏ Durée de fonctionnement de plus de 5 heures avec une charge complète ❏ Lame en céramique amovible pour un nettoyage ou un remplacement facile ❏...
  • Page 7 Il suffit de la charger pendant environ 3 heures. Une fois que vous aurez complètement chargé ou déchargé la batterie de votre tondeuse 3 ou 4 fois, la capacité de la batterie atteindra son état optimal. Si le délai d'inactivité de charge est trop long, la durée de vie des batteries sera raccourcie Chargez-la simplement quand la batterie est faible ou quand elle a été...
  • Page 8 Démêlez les poils qui forment des noeuds. S'ils ne peuvent pas être démêlez, rasez une partie de ces poils ❏ Dans quel sens tondre les poils de votre compagnon Utilisez la tondeuse pour raser dans le sens des poils de l'animal comme indiqué par la flèche Nettoyez les poils restants entourant le sabot à...
  • Page 9 ● La patte Rasez dans le sens de la cheville de l’animal, dans le cou-de-pied et autour de la patte. Au niveau du talon, attention de tondre avec délicatesse Faites attention aux coussinets (montré sur la photo) afin de ne pas blesser votre animal ●...
  • Page 10 Nettoyez la tête de coupe avec la brosse de nettoyage comme sur l'image ci-dessus, vous devez appuyer sur le haut pour nettoyer les poils restants entre la lame supérieure et celle inférieure (veuillez ne pas démonter le ressort de la tête de coupe afin de ne pas provoquer un dysfonctionnement) Après l'avoir nettoyé, déposez 3 à...
  • Page 11 ES - Máquina cortapelo para animales Zolia HANDSOME ❏ Eficacidad de corte para todo tipo de perro y gato ❏ Autonomía de 5 horas con una carga completa ❏ Lámina de cerámica amovible para una limpieza y recambio fácil ❏ Poco ruidosa; impide que el animal tenga miedo durante el corte ❏...
  • Page 12 Simplemente cargar cuando la batería esté baja o cuando no se haya utilizado durante un cierto tiempo. No cargues de nuevo cuando la batería ya esté completamente cargada, ya que esto acortará la vida de la batería. ❏ Instrucciones para poner y quitar el peine Poner el peine: agarrar dos lados del, apuntar al lugar, luego empujar (atención: el peine debe estar bien insertado).
  • Page 13 Desenredar los pelos que forman nudos. Si no se pueden desenredar, afeita algunos de esos pelos... ❏ En qué dirección cortar el pelo de tu mascota Para afeitarse hazlo en la dirección del pelo del animal como indica la flecha. Limpia constantemente el pelo restante alrededor del peine (el pelo restante puede afectar la eficiencia del corte).
  • Page 14 ● Abdomen Cortar de abajo a arriba. Presta atención al pecho (pezón) o al órgano reproductor. ● La pata Afeitar en dirección al tobillo, el empeine y alrededor de la pata del animal. En el talón, ten cuidado al cortar Presta atención a las almohadillas (mostradas en la foto) para no lastimar a tu mascota.
  • Page 15 Empuja con el pulgar y luego retira la cabeza de corte. Limpia el cabezal de la cortadora con el cepillo de limpieza como se muestra en la imagen de arriba, tienes que presionar la parte superior para limpiar las cerdas restantes entre la cuchilla superior e inferior (por favor, no quites el muelle del cabezal de la cortadora para no causar un mal funcionamiento).
  • Page 16 ❏ Precauciones de empleo No desmontes el cortapelo tú mismo. No limpies el cortacésped con agua ni lo guardes en lugares húmedos. Por favor, límpiala con un pequeño paño húmedo o una solución jabonosa suave. No cargues a temperaturas superiores a 40°C o inferiores a cero. Es normal que el cortapelo emita un poco de calor al recargarse.
  • Page 17 DE- Schermaschine für Tiere Zolia HANDSOME ❏ Hohe Schneidleistung für alle Arten von Hunden / Katzen ❏ Betriebszeit von über 5 Stunden wenn voll aufgeladen ❏ Abnehmbare Keramikklinge zur einfachen Reinigung oder zum Austausch ❏ Leise: Verhindert, dass das Tier während Angst bekommt ❏...
  • Page 18 Die beste Umgebungstemperatur für die Verwendung und Aufladung der Schermaschine liegt zwischen 5 ° C und 40 ° C. Laden Sie es einfach für ca. 3 Stunden auf. Sobald Sie die Batterie der Schermaschine 3-4 Mal vollständig aufgeladen oder entladen haben, erreicht die Batteriekapazität ihren optimalen Zustand. Wenn die Inaktivitätszeit des Ladevorgangs zu lang ist, wird die Akkulaufzeit verkürzt Laden Sie es einfach auf, wenn der Akku fast leer ist oder wenn es längere Zeit nicht benutzt wurde.
  • Page 19 Entwirren Sie das Fell und lösen Sie Knoten. Wenn sie nicht entwirrt werden können, rasieren Sie einige dieser Haare ab ❏ In welche Richtung schneiden Sie die Haare Ihres Haustieres? Verwenden Sie die Schermaschine nicht gegen den Strich, wie durch den Pfeil angezeigt Reinigen Sie die verbleibenden Haare, die den Kamm umgeben, jederzeit (verbleibende Haare können die Effizienz des Geräts...
  • Page 20 ● Pfoten Rasieren Sie sich entlang des Knöchels und um die Pfote des Tieres. Achten Sie an der Ferse darauf, vorsichtig zu rasieren Achten Sie auf die Ballen (siehe Foto), um Ihr Haustier nicht zu verletzen ● After Schneiden Sie leicht vom Mittelteil in der Nähe des Anus nach außen Seien Sie vorsichtig: Schneiden Sie gegen die Wuchsrichtung der Tierhaare...
  • Page 21 Reinigen Sie den Trimmerkopf mit der Reinigungsbürste wie in der Abbildung oben. Sie müssen auf die Oberseite drücken, um die verbleibenden Haare zwischen der oberen und unteren Klinge zu reinigen (bitte zerlegen Sie die Feder des Trimmerkopfs nicht um keine Fehlfunktion verursachen) Geben Sie nach der Reinigung 3-4 Tropfen Schmieröl darauf und setzen Sie den Trimmerkopf wieder auf (denken Sie daran: Sie müssen auf den vorgesehenen Ort legen, und wenn Sie ein Klicken hören, können Sie dies sicherstellen.
  • Page 22 IT - Tosatrice per animali Zolia HANDSOME ❏ Elevate performance di taglio per tutti i cani / gatti ❏ Durata di funzionamento di oltre 5 ore con una carica completa ❏ Lama in ceramica amovibile per facilitare la pulizia o la sostituzione ❏...
  • Page 23 Basta caricarla per circa 3 ore. Dopo avere ricaricato o scaricato completamente la batteria della tosatrice 3 o 4 volte, la capacità della batteria raggiungerà il suo stato ottimale. Se il tempo di inattività della ricarica è troppo lungo, la durata di vita delle batterie sarà ridotta. Ricaricarla semplicemente quando la batteria è...
  • Page 24 Districare i peli annodati. Se non possono essere districati, tosari parzialmente ❏ In quale senso tosare i peli del vostro cane Usare la tosatrice per tosare nella direzione del pelo dell'animale, come indicato dalla freccia Pulire prontamente i peli rimanenti che circondano la testina (i peli rimanenti possono influire sull'efficacia del taglio) Metodi di rasatura sulle diverse parti del corpo del vostro animale...
  • Page 25 ● La zampa Tosare seguendo la caviglia, il collo del piede e intorno alla zampa dell'animale. A livello del tallone, fare attenzione a tosare delicatamente Prestare attenzione ai cuscinetti (mostrati nella foto) per non ferire il vostro animale domestico ● L’ano Tosare delicatamente dalla parte centrale vicino all'ano verso l'esterno...
  • Page 26 Pulire la testina di taglio con la spazzola di pulizia come mostrato nell’immagine sopra; è necessario premere la parte superiore per pulire i peli rimanenti tra la lama superiore e quella inferiore (non smontare la molla della testina di taglio, per non causare un malfunzionamento) Dopo averla pulita, mettere 3-4 gocce di olio lubrificante, poi ricollocare la testina di taglio (Nota: mirare la posizione prevista a tal fine e, quando si sente un clic, assicurarsi di averla rimontata correttamente tirandola leggermente)
  • Page 27 PT - Máquina de tosquia para animais Zolia HANDSOME ❏ Alto desempenho de corte para todos os tipos de cães / gatos ❏ Duração de funcionamento de 5 horas com carga completa ❏ Lâmina de cerâmica removível para facilitar a limpeza ou substituição ❏...
  • Page 28 Se a máquina permanecer muito tempo sem ser utilizada, a bateria pode descarregar. Basta colocar a carregar novamente. Não deve colocar a bateria a carregar se estiver totalmente carregada, isso pode fazer com que a bateria perca em autonomia. ❏ Como colocar e retirar o pente O método de colocação do pente: segure nas laterais do pente e deslize para o local indicado, basta fazer um pouco de...
  • Page 29 ❏ Em que sentido deve cortar o pêlo do animal de estimação Utilize a máquina de tosquia no sentido do crescimento dos pêlos do animal conforme indicado pela seta na imagem. Limpe constantemente durante o processo de tosquia os pêlos que ficam fixos em excesso na máquina.
  • Page 30 ● Ânus Corte devagar com cuidado da parte do meio perto do ânus para fora Atenção: corte no sentido contrário ao crescimento do pêlo. Limpeza ❏ Empurre com o polegar e remova a cabeça (local onde se encontram as lâminas)
  • Page 31 Limpe a cabeça com a escova de limpeza como indicado na imagem acima, pressione a parte superior para limpar os pêlos restantes entre a lâmina superior e a lâmina inferior (por favor, não desmonte a mola da cabeça de corte para não gerar nenhum tipo de mau funcionamento) Depois de limpar, coloque 3-4 gotas de óleo lubrificante e, em seguida, coloque a cabeça de corte novamente no seu lugar (deslize no sentido do local correto para colocação e quando ouvir um clique, quer dizer que está...
  • Page 32 NL - Tondeuse Zolia HANDSOME ❏ Hoge prestaties voor alle honden / katten ❏ Gebruiksduur van meer dan 5 uur bij volledig opladen ❏ Afneembaar keramisch mes voor eenvoudige reiniging of vervanging ❏ Laag geluidsniveau: voorkomt dat het dier bang wordt tijdens het knippen ❏...
  • Page 33 Laad het ongeveer 3 uur op. Nadat je de accu van de tondeuse 3-4 keer volledig hebt opgeladen of ontladen, bereikt de accucapaciteit zijn optimale toestand. Als de oplaadtijd te lang is, wordt de levensduur van de batterij verkort. Laad hem gewoon op als de batterij bijna leeg is of als hij een tijdje niet is gebruikt. Laad hem niet weer op als de batterij al volledig is opgeladen, dit verkort de levensduur van de batterij.
  • Page 34 Ontwar de haren die knopen vormen. Als ze niet kunnen worden ontward, scheer dan wat van dat haar af ❏ Scheerrichting Gebruik de trimmer om in de richting van het haar van het dier te scheren, zoals aangegeven door de pijl Reinig de resterende haren rondom het mesje op elk moment (resterende haren kunnen de efficiëntie van het knippen beïnvloeden)
  • Page 35 ● Poten Scheer langs de enkel, wreef en rond de poot van het dier. Wees voorzichtig bij het scheren van de hiel Besteed aandacht aan de kussens (weergegeven op de foto) om je huisdier geen pijn te doen ● Anus Snijd lichtjes vanaf het middengedeelte bij de anus naar buiten Pas op: knip tegen de richting van het...
  • Page 36 Maak de snijkop schoon met het schoonmaakborsteltje zoals op de foto hierboven, je moet op de bovenkant drukken om de resterende haren tussen het bovenmesje en het ondermes schoon te maken (demonteer de veer van de snijkop dus niet om geen storing te veroorzaken) Doe er na het schoonmaken 3-4 druppels smeerolie op en plaats de trimmerkop er weer op (denk eraan: je moet op de beoogde plek mikken en als je een klik hoort, zorg er dan voor dat je correct monteert door er lichtjes aan te trekken)