
Sommaire des Matières pour Mountain Lab Gear SCOUT 2W
- Page 1 MOUNTAIN LAB GEAR SCOUT 2W 2-WAY RADIO OPERATING INSTRUCTIONS Note: Please read the operating instructions carefully before using the device.
-
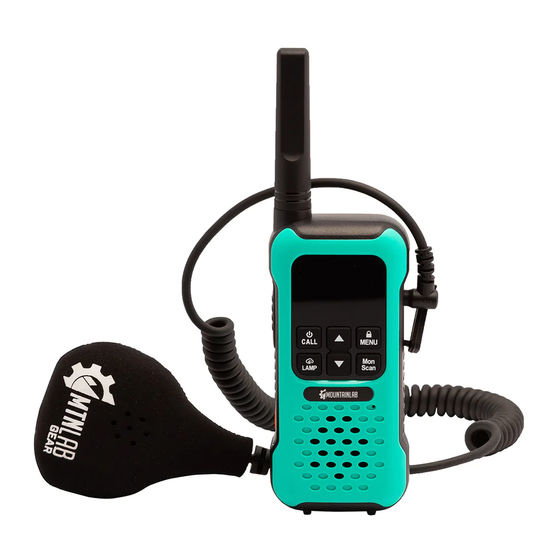
Page 2: Key Functions
KEY FUNCTIONS Push-To-Talk (PTT) Power/Call Tone Lamp/Weather Signal Light Button LED Light Signal Light Speaker Microphone Monitor/Scan Lock/Menu Speaker Microphone Accessory Port... -
Page 3: Getting Started
DISPLAY SCREEN GUIDE Channel Number Sub-code Status Dual Channel (Transmit/Receive) Scan Volume Mut e Keypad Lock Battery Life Weat her Alert GETTING STARTED Install the AA NiMH Rechargeable Batteries 1. Remove the belt clip by inserting a finger under the tab at the top and sliding the belt clip up. -
Page 4: Battery Life
3. Install the included AA NiMH batteries according to the orientation shown in the battery compartment. Insert 3 AA NiMH batteries. 4. Close the battery compartment cover and replace the screws, turning clockwise until snug. Close the battery cover. Battery Life A fully charged battery is indicated by three solid bars When the battery is low, the display will show one blinking bar and the radio will emit a low battery warning beep after each... -
Page 5: Basic Operation
Using the Charging Dock The Micro-USB charging dock allows you to conveniently charge the NiMH battery of your SCOUT radio in the dedicated dock, using the included certified charging adaptor (5V, ≥1A). Note: Do not attempt to charge alkaline batteries. How To Charge the Battery 1. -
Page 6: Setting The Channel
Setting the Channel 1. Press the button. The channel number will start to flash. 2. Press to change the channel number. 3. Press the PTT button to select the channel and exit the menu, or press again to proceed to the sub-code selection menu. -
Page 7: Transmitting And Receiving
Setting the Sub-Code 1. Press the button until the sub-code number starts to flash. 2. Press to change the sub-code number. 3. Press the PTT button to exit the menu. Note: When sub-code “0” is selected, the radio can receive transmissions from any radio on the same channel, regardless of sub-code. -
Page 8: Keypad Features
KEYPAD FEATURES Call Tone To transmit a call tone, press the button. Setting the Call Tone 1. To select the call tone to be used, press the button until the call tone menu “CA” appears. The flashing number indicates the current call tone. 2. - Page 9 2. When activity is detected, the radio will stop scanning and receive the transmission. At the end of transmission, press the PTT button within five seconds to respond. Otherwise the radio will resume scanning. 3. If the PTT button is pressed while the device is scanning, the transmission will be sent on the main selected channel.
- Page 10 Weather Setting the Weather Channel 1. In weather mode, press the button until the weather channel number flashes. 2. Press to select the appropriate channel for your area. 3. Press the PTT button to set the channel and exit the menu. Setting the Weather Alert You radio can be set to respond to NOAA Weather Radio emergency messages.
-
Page 11: Menu Features
Signal Light (SOS) The signal light button can be used to emit an emergency call tone and SOS flashing light. This feature should only be used in a real emergency to increase visibility. Note: This device does not have the capability to contact emergency services or provide any location information, and should not be confused with a dedicated personal locator device that is designed to do so. - Page 12 Dual Channel Monitor (2CH) Dual channel monitor allows the user to listen for transmissions on two channels at the same time—the main channel and sub-code as set on in the main menu, and a second channel and sub-code. 1. Press the button until the dual channel monitor menu “2CH”...
-
Page 13: Additional Features
2. Press to select the flashing “HI” or “LO” power. Note: High power (2 watts) is only available on channels 1-7 and 15-22. Channels 8-14 are restricted to Low power (0.5 watts) only, in accordance with governmental regulation. 3. Press the PTT button to exit the menu. High power is indicated on the main display (indicated by “HI”) when channels 1-7 or 15-22 are selected. -
Page 14: Radio Frequencies
RADIO FREQUENCIES Code Frequency Code Frequency Code Frequency Code Frequency (Hz) (Hz) (Hz) (Hz) 97.4 136.5 192.8 71.9 141.3 203.5 74.4 103.5 146.2 210.7 107.2 151.4 218.1 79.7 110.9 156.7 225.7 82.5 114.8 162.2 233.6 85.4 118.8 167.9 241.8 88.5 173.8 250.3 91.5... -
Page 15: Safety And General Information
CDCSS 83 Code Code Code Code SAFETY AND GENERAL INFORMATION FCC Warning Any changes or modifications not expressly approved by the party responsible for compliance could void the user's authority to operate the equipment. This device complies with part 15 of the FCC Rules. Operation is subject to the following two conditions: (1) This device may not cause harmful interference, and (2) this device must accept any interference received, including interference that may... -
Page 16: Important
of the FCC Rules. These limits are designed to provide reasonable protection against harmful interference in a residential installation. This equipment generates, uses and can radiate radio frequency energy and, if not installed and used in accordance with the instructions, may cause harmful interference to radio communications. - Page 17 Normal Position Hold the transmitter approximately 25 mm from your face and speak in a normal voice, with the antenna pointed up and away. Warnings Product safety and RF Exposure for two way radio: Before using this two way radio, please read the manual which contains important operating instructions for safe usage, RF Energy Awareness, control information and operational instructions for...
- Page 18 3. Attempting to alter or replace the antenna will affect performance and void the warranty. 4. DO NOT use any portable radio that has a damaged antenna. If a damaged antenna comes into contact with your skin, a minor burn can result. WARNING Batteries All batteries can cause property damage and/or bodily injury...
- Page 19 CAUTION Battery Charger Safety Instructions 1. Turn the radio off when charging the battery. 2. Do not expose the charger to outside environment. Chargers should only be used indoors. 3. Do not operate or disassemble the charger. Do not use a charger that has been dropped or damaged in any way.
- Page 20 • The extension cord is properly wired and in good condition. 10. The supply cord of the AC adaptor cannot be replaced. If the cord is damaged, call customer service. WARNING The information listed below provides the user with the information needed to make him or her aware of RF exposure, and what to do to as-sure that this radio operates with the FCC RF exposure limitsof this radio.
- Page 21 Medical Devices – Pacemakers, Defibrillators or other Implanted Medical Devices Persons with pacemakers, implantable cardioverter defibrillators (ICDs) or other active implantable medical devices (AIMD) should: • Consult with their physicians regarding the potential risk of interference from radio frequency transmitters, such as portable radios (poorly shielded medical devices may be more susceptible to interference).
- Page 22 For Vehicle with Air Bags Refer to the vehicle manufacturer’s manual prior to installation of electronic equipment to avoid interference with air bag wiring. Do not place a portable radio in the area over an air bag or in the air bag deployment area.
- Page 23 Blasting Caps and Areas To avoid possible interference with blasting operations, turn off your radio when you are near electrical blasting caps, in a blasting area, or in areas posted “Turn off two-way radios”. Obeyall signs and instructions. Warning: CHOKING HAZARD – Small Parts. Not for children under 3 years.
- Page 24 Technical specifications and warnings (US) Technical specifications (US) Technical Parameters (US) Operating frequency: 462~467MHz Output Power: ≤2.0W Channels: 22 FRS Modulation type: F3E Power source: AA Alkaline 4.5V DC / NiMH battery 3.6V DC 2500mAh Channel and frequency correspondence list (US) Frequencies Power Frequencies...
- Page 25 Warnings (US) WARNING Your Retevis radio is designed to comply with the following national and international standards and guidelines regarding exposure ofhuman beings to radio frequency electromagnetic energy: · United States Federal Communications Commission, Code of Federal Regulations: 47 CFR part 2.1093 ·...
- Page 26 WARNING SAFETY INFORMATION Your wireless hand-held portable transceiver contains a low power transmitter. This product sends out radio frequency (RF) signals when the Push-to-Talk (PTT) button is pressed. The device is authorized to operate at a duty factor not to exceed 50% In August 1996, the Federal Communications Commis- sions (FCC) adopted RF exposure guidelines with safety levels for hand-heldwireless devices.To control your exposure and...
- Page 27 Note: Use of this radio outside the country where it was intend to be distributed is subject to government regulations and may be prohibited. WARNING Body-Worn Operation To maintain compliance with FCC’s RF exposure guidelines, for body-worn operation, this radio has been tested and meets the FCC RF exposure guidelines when used with accessories supplied or designated for this product.
- Page 28 Technical specifications and warnings (Canada) Technical Parameters (Canada) Operating frequency: 462~467MHz Output Power: ≤2.0W Channels: 22 FRS/GMRS Modulation type: F3E Power source: AA Alkaline 4.5V DC / NiMH battery 3.6V DC 2500mAh Channel and frequency correspondence list (Canada) Frequencies Power Frequencies Power Channel...
- Page 29 Warnings (Canada) WARNING This device complies with Industry Canada licence-exempt RSS standard(s). Operation is subject to the following two conditions (1) This device may not cause interference, and (2) This device must accept any interference, including interference that may cause undesired operation of the device. CAUTION Compliance with RF Exposure Standards This radio is designed to comply with the following national and...
- Page 30 CAUTION IC Radiation Exposure Statement This EUT is compliance with SAR for controlled exposure limits in IC RSS-102 and had been tested in accordance with the measurement methods and procedures specified in IEEE 1528 and IEC 62209, this equipment should be installed and operated with minimum distance 25 mm between the radiator and your body.
- Page 31 MOUNTAIN LAB GEAR RADIO BIDIRECTIONNELLE SCOUT 2W MANUEL DE L'UTILISATEUR FRANÇAIS Remarque: Veuillez lire attentivement le mode d'emploi avant d'utiliser l'appareil.
-
Page 32: Fonctions Clés
FONCTIONS CLÉS Push-To-Talk (PTT) Tonalité d'Alimentation/d'Appel Lampe/Météo Bouton De Signal Lumineux Lumière DEL Signal Lumineux Haut-Parleur Micro Surveiller/Balayage Verrouiller/Menu Port Pour Accessoires de Microphone Haut-Parleur... -
Page 33: Écran D'affichage
ÉCRAN D'AFFICHAGE Numéro De Canal Sous-code Double Canal État (Émission/Réception) Balayage Volume/Muet Verrouillage Du Clavier Autonomie De La Pile Alerte Météo POUR COMMENCER Installez les Piles Rechargeables AA NiMH 1. Enlevez le clip de ceinture en insérant un doigt sous la languette en haut et en faisant glisser le clip de ceinture vers le haut. -
Page 34: Autonomie De La Pile
3. Installez les piles AA NiMH fournies selon Insérez les l'orientation indiquée piles AA NiMH dans le compartiment des piles. 4. Fermez le couvercle du compartiment des piles et remettez les vis en place, en les tournant dans le sens horaire Fermez le jusqu'à... -
Page 35: Utilisation De La Station De Chargement
Utilisation de la Station De Chargement La station de chargement Micro-USB vous permet de charger facilement la pile NiMH de votre radio SCOUT dans la station d'accueil dédiée, en utilisant l'adaptateur de charge certifié inclus (5V, ≥1A). Remarque: N'essayez pas de charger des piles alcalines. Comment Charger La Pile 1. -
Page 36: Réglage Du Canal
Réglage Du Canal 1. Appuyez sur le bouton . Le numéro de canal commencera à clignoter. 2. Appuyez sur pour changer le numéro de canal. 3. Appuyez sur le bouton PTT pour sélectionner le canal et quitter le menu, ou appuyez à nouveau sur pour passer au menu de sélection de sous-code. -
Page 37: Réglage Du Sous-Code
Réglage Du Sous-Code 1. Appuyez sur le bouton jusqu'à ce que le numéro de sous-code se mette à clignoter. 2. Appuyez sur pour changer le numéro de sous-code. 3. Appuyez sur le bouton PTT pour quitter le menu. Remarque: Quand le sous-code "0" est sélectionné, la radio peut recevoir des transmissions de n'importe quelle radio sur le même canal, peu importe le sous-code. -
Page 38: Caractéristiques Du Clavier
CARACTÉRISTIQUES DU CLAVIER Tonalité d'Appel Pour tranmettre une tonalité d'appel, appuyez sur le bouton Réglage de la Tonalité d'Appel 1. Pour sélectionner la tonalité d'appel à utiliser, appuyez sur le bouton jusqu'à ce que le menu de tonalité d'appel "CA" apparaisse. - Page 39 2. Lorsqu'une activité est détectée, la radio arrêtera de balayer et recevra la transmission. À la fin de la transmission, appuyez sur le bouton PTT dans les cinq secondes pour répondre. Sinon, la radio reprendra le balayage. 3. Si le bouton PTT est enfoncé pendant que l'appareil balaye, la transmission sera envoyée sur le canal principal sélectionné.
-
Page 40: Canal Météo Et Fréquences
Réglage du Canal Météo Votre radio peut être réglée pour répondre aux messages d'urgence de la Radio Météo de la NOAA. 1. En mode météo, appuyez sur le bouton jusqu'à ce que le numéro de canal météo clignote. 2. Appuyez sur pour sélectionner le canal approprié... -
Page 41: Signal Lumineux (Sos)
Signal Lumineux (SOS) Le bouton de signal lumineux peut être utilisé pour émettre une tonalité d'appel d'urgence et un voyant clignotant SOS. Cette fonction ne doit être utilisée qu'en cas d'urgence réelle pour augmenter la visibilité. Remarque: Cet appareil n'a pas la capacité de contacter les services d'urgence ou de fournir des informations de localisation, et ne doit pas être confondu avec un dispositif de localisation personnel dédié... -
Page 42: Moniteur Double Canal (2Ch)
Moniteur Double Canal (2CH) Le moniteur double canal permet à l'utilisateur d'écouter les transmissions sur deux canaux en même temps - le canal principal et sous-code comme défini dans le menu principal, et un deuxième canal et sous-code. 1. Appuyez sur le bouton jusqu'à... -
Page 43: Caractéristiques Supplémentaires
2. Appuyez sur pour sélectionner la puissance clignotante "HI" ou "LO". Remarque: la puissance élevée (2 watts) n'est disponible que sur les canaux 1 à 7 et 15 à 22. Les canaux 8 à 14 sont limités à faible puissance (0.5 watts) uniquement, conformément à la réglementa- tion gouvernementale. -
Page 44: Fréquences Radio
FRÉQUENCES RADIO Code Fréquence Code Fréquence Code Fréquence Code Fréquence (Hz) (Hz) (Hz) (Hz) 97.4 136.5 192.8 71.9 141.3 203.5 74.4 103.5 146.2 210.7 107.2 151.4 218.1 79.7 110.9 156.7 225.7 82.5 114.8 162.2 233.6 85.4 118.8 167.9 241.8 88.5 173.8 250.3 91.5... -
Page 45: Sécurité Et Informations Générales
CDCSS 83 Code Code Code Code SÉCURITÉ ET INFORMATIONS GÉNÉRALES Avertissement ISEDC Le présent matériel est conforme aux specifications techniques applicables d’Industrie Canada. Le présent appareil est conforme aux CNR d'ISEDC applicables aux appareils radio exempts de licence. L'exploitation est autorisée aux deux conditions suivantes: (1) l'appareil ne doit pas produire de brouillage, et (2) l'utilisateur de l'appareil doit accepter tout brouillage radioélectrique subi, même si le brouillage est susceptible d'en compromettre le... -
Page 46: Avertissements
Avertissements Sureté du produit et exposition aux radiofréquences pour les radios bidirectionnelles : Sureté du produit et exposition aux radiofréquences pour les radios bidirectionnelles : Avant d’utiliser cette radio bidirectionnelle, veuillez lire attentivement le mode d’emploi. Celui-ci contient d’importantes informations sur l’utilisation sécuritaire, la sensibilisation à... - Page 47 3. Modifier ou changer l’antenne aura un impact sur la performance de votre radio et annulera la garantie. 4. NE PAS utiliser une radio portable dont l’antenne est endommagée. Si une antenne endommagée vient à être en contact avec votre peau, cela peut causer une brulure mineure. ATTENTION Piles Toutes les piles peuvent causer des dommages matériels ou des...
- Page 48 7. L’usage d’accessoires non-recommandés ou vendus par Mountain Lab Gear peut entrainer des risques de feu, électrocution et dommages corporels. 8. Assurez-vous que le câble est positionné de manière à ce que personne ne puisse marcher ou trébucher dessus, ou qu’il...
- Page 49 fiche du chargeur. • La rallonge électrique est correctement connectée et en bon état. 10. Le câble ne peut pas être remplacé. Si celui-ci est endommagé, veuillez contacter le service à la clientèle. ATTENTION Les informations ici-bas sont fournies afin que l’usager soit informé...
- Page 50 Les personnes avec un stimulateur cardiaque, défibrillateur automatique implantable (DAI) ou tout autre dispositif médical implantable actif (DMIA) devraient :• Consulter leur médecin concernant les risques potentiels d’interférence avec les appareils émetteurs de radiofréquences, tels que les radios portables (les dispositifs médicaux peu protégés sont potentiellement à...
- Page 51 un appel, si les conditions de conduite ou les lois et régulations l’exigent. Véhicules avec sacs gonflables Référez-vous au manuel du fabricant du véhicule avant l’installation d’équipement électronique afin d’éviter les interférences avec le câblage des sacs gonflables. Ne pas placer de radio portable sur un sac gonflable ou dans la région de déploiement de celui-ci.
- Page 52 Détonateurs et zone de dynamitage Afin d’éviter tout potentiel d’interférence avec des opérations de dynamitage, veuillez éteindre votre radio lorsque vous vous rapprochez de détonateurs, d’une zone de dynamitage ou d’une région demandant l’extinction des radios bidirection- nelles (Two-Way Radios). Respectez toute signalisation et instruction.
- Page 53 Spécifications techniques et avertissement (Canada) Paramètres techniques (Canada) Fréquence d’opération : 462~467MHz Puissance de sortie : ≤2.0W Canaux : 22 FRS/GMRS Type de modulation : F3E Source d’énergie : AA Alkaline 4.5V DC / NiMH battery 3.6V DC 2500mAh Listes des canaux et fréquences correspondantes (Canada) Frequencies Power...
- Page 54 Avertissement (Canada) ATTENTION Cet appareil est conforme aux normes CNR d’Industrie Canada applicables aux appareils radio exempts de licence. L’exploitation est soumise aux deux conditions suivantes : 1. Cet appareil ne doit pas causer d’interférence, et 2. Cet appareil doit accepter les interférences, même celles susceptibles d'en compromettre le bon fonctionnement.
- Page 55 ATTENTION Déclaration d’IC d’exposition au radiation Cet appareil est conforme aux limites d'exposition contrôlée DAS pour de la norme CNR-102 d'Industrie Canada et a été testé en conformité avec les méthodes de mesure et les procédures spécifiées dans IEEE 1528 et IEC 62209. Cet appareil doit être installé...