Table des Matières
Publicité
Les langues disponibles
Les langues disponibles
Liens rapides
Publicité
Table des Matières

Sommaire des Matières pour Fisher-Price 3032
- Page 1 3032 fisher-price.com...
-
Page 2: Consumer Information
Consumer Information DO NOT DISCARD: IMPORTANT LITERATURE. KEEP THIS INSTRUCTION FOR FUTURE REFERENCE. PLEASE READ AND FOLLOW INSTRUCTIONS CAREFULLY AND IDENTIFY ALL PARTS BEFORE ASSEMBLY. WARNING CAUTION TO AVOID SERIOUS INJURY: • CHOKING HAZARD – Small parts. This product contains small parts and sharp DO NOT install this product on a hard points which are necessary for assembly. -
Page 3: Parts List
Parts Note: Illustrations not to scale. PARTS LIST DESCRIPTION Wall R Wall L Storage Panel Seat Panel Arm R Arm L Seat Back / Table Screw - M4 x 1.57 inch / 40 mm - 4 Screw FASTENER SHOWN ACTUAL SIZE Hinge Block... - Page 4 Assembly Press Down Storage Panels (C) Wall L (B) • Align pegs and holes to attach the Storage Panels (C) to the Wall L (B). • Press down firmly to place each peg into position. Wall R (A) • Repeat Step 1, place and slot the Wall R (A) onto the aligned piece to complete the bottom storage.
- Page 5 Assembly Seat Back/Table (G) Arm R (E) Arm L (F) Press Down • Join R/L Arms (E&F) to the Seat Back/Table (G) by aligning the pegs through the holes. • Push the pegs downward to lock the panels together. Cap (I) Screw (H) •...
- Page 6 Assembly Hinge Block (J) Hinge Block (J) • Install the Hinge Block (J) through holes from the arm to the storage wall. Ensure the Hinge Block is press-locked to the assembled cap in Step 5. Repeat this for the other side. Seat (D) •...
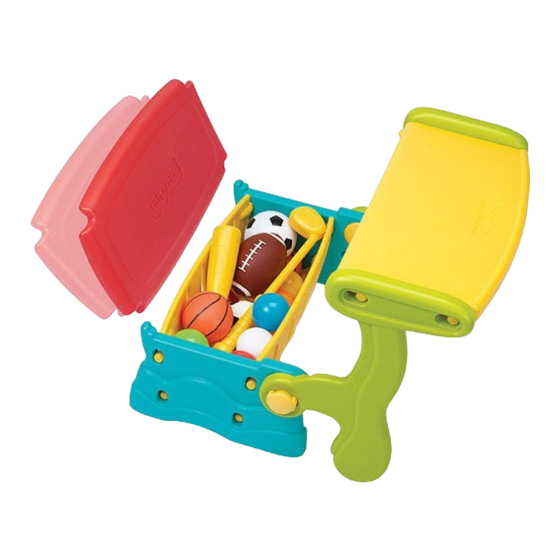
- Page 7 Assembly Gently Pull to Release Lock Press to Lock • Pictures show the completely assembled product. • To convert Picnic Table to Sitting Bench: Pull both Hinge Blocks gently to loosen the lock from the Caps. DO NOT pull out the Hinge Block completely.
- Page 8 CONSUMER ASSISTANCE service@grow-n-up.com www.grow-n-up.com FISHER-PRICE and associated trademarks are owned by Mattel, Inc. and used under license from Mattel Europa B.V. ©2012 Mattel, Inc. All Rights Reserved. Manufactured for and designed by Grow’n Up Ltd. MADE IN CHINA Room 808B, New Mandarin Plaza, Tsim Sha Tsui East, Kowloon, Hong Kong.
-
Page 9: Renseignements Pour Les Consommateurs
Renseignements pour les consommateurs NE PAS JETER: LITTÉRATURE IMPORTANT. GARDEZ CETTE INSTRUCTION POUR FUTURE RÉFÉRENCE. VEUILLEZ LIRE ET SUIVRE LES INSTRUCTIONS ATTENTIVEMENT ET IDENTIFIER TOUTES LES PIÈCES AVANT L'ASSEMBLAGE. AVERTISSEMENT ATTENTION POUR EVITER LES BLESSURES GRAVES: • RISQUE DE SUFFOCATION – Petites pièces. -
Page 10: Attache Grandeur Réelle
Pièces Remarque: Illustrations pas à l'échelle. LISTE DES COMPOSANTS N° DESCRIPTION QTÉ Mur D Mur G Panneaux de rangements Siège les Panneaux Bras D Bras G à l'arrière du Siège / la Table Écrous - M4 x 1.57 inch / 40 mm - 4 Écrous l'Embout ATTACHE GRANDEUR RÉELLE... -
Page 11: Montage
Montage Panneaux de Appuyez rangements (C) Mur G (B) • Alignez les trous et les piquets pour attacher les Panneaux de rangements (C) au Mur G (B). • Appuyez fermement pour placer chaque piquet en place. Mur D (A) • Refaites l'Étape 1, placez et glisser dans la fente le Mur D (A) sur la pièce alignée pour compléter le rangement inférieur. - Page 12 Montage à l'arrière du Siège / la Table (G) Bras D (E) Bras G (F) Appuyez • Joignez les Bras D/G (E et F) à l'arrière du Siège/la Table (G) en alignant les trous et les piquets. • Poussez les piquets à l'envers pour verrouiller les panneaux ensemble. l'Embout (I) Écrous (H) •...
- Page 13 Montage Pivot de blocage (J) Pivot de blocage (J) • Installez les trous du Pivot de blocage (J) du Bras au Mur de rangement. Assurez-vous que le Pivot de blocage soit verrouillé par pression à l'Embout à l'Étape 5. Refaire l'opération de l'autre côté. Siège les Panneaux (D) •...
-
Page 14: Tirez Doucement Pour Déverrouiller
Montage Tirez doucement pour déverrouiller Appuyez pour verrouiller • L'illustration montre l'assemblage complet du produit. • Pour convertir le Banc de siège en Table de pique-nique : Tirez les deux Pivots de blocage doucement afin de déverrouiller l'embout. NE PAS tirez sur le bloc charnière complètement. •... -
Page 15: Garantie Limitée
FISHER-PRICE ainsi que les marques y afférentes et leur représentation sont des marques de Mattel Europa B.V., qui sont utilisées avec autorisation. © 2012 Mattel, Inc. Tous droits réservés. Fabrication et conception par Grow’n Up Ltd. FABRIIQUÉ IN CHINE...


