Table des Matières
Publicité
Les langues disponibles
Les langues disponibles
Liens rapides
Publicité
Chapitres
Table des Matières
Dépannage

Manuels Connexes pour SPORTSTECH F17


Sommaire des Matières pour SPORTSTECH F17
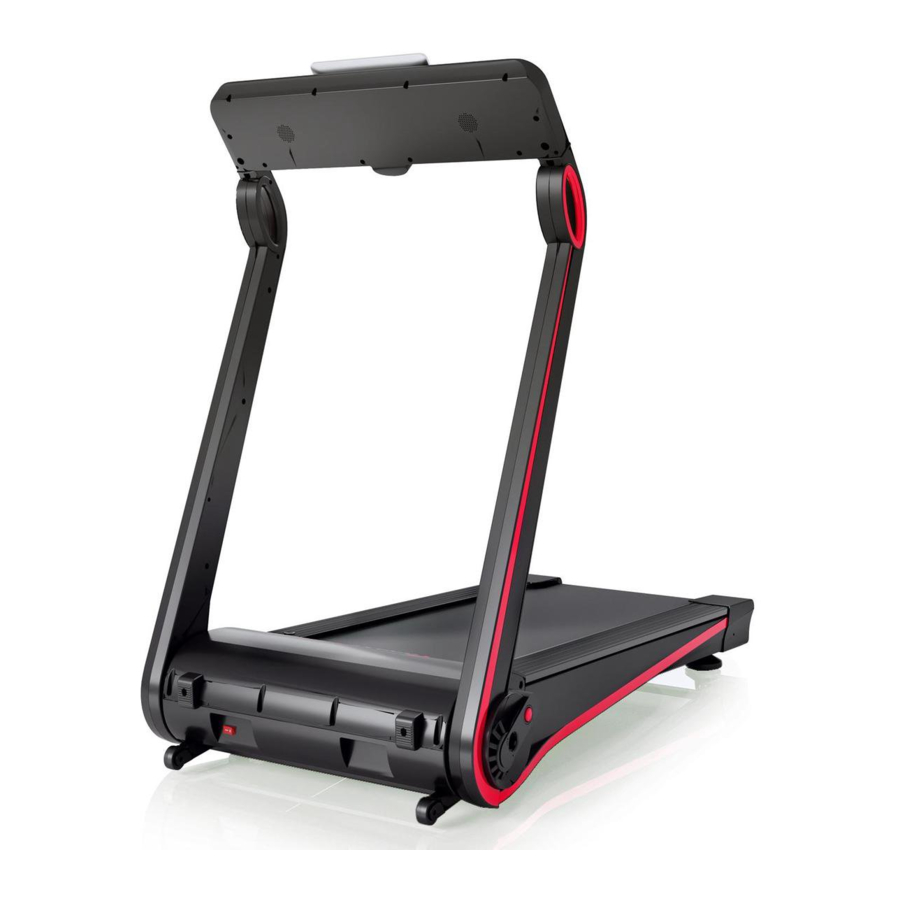
- Page 1 Motorized Treadmill...
-
Page 2: Deutsch
BENUTZERHANDBUCH DEUTSCH... - Page 3 Video Tutorials Unsere für dich! Aufbau Benutzung Abbau In 3 einfachen Schritten zum schnellen und sicheren Start: 1. QR-Code scannen 2. Videos anschauen 3. schnell und sicher starten Link zu den Videos: https://sportstech.de/qr/f17.html...
- Page 4 SEHR GEEHRTER KUNDE, wir freuen uns, dass Sie sich für ein Gerät aus der SPORTSTECH Produktpalette entschieden haben. SPORTSTECH Sportgeräte bieten Ihnen höchste Qualität und neueste Technologie. Um die Leistungsfähigkeit des Gerätes voll nutzen zu können und viele Jahre Freude an Ihrem Gerät zu haben, lesen Sie bitte vor der Inbetriebnahme und dem Beginn des Trainings dieses Benutzerhandbuch sorgfältig durch und verwenden...
-
Page 5: Table Des Matières
INHALT DEUTSCH Sicherheitshinweise Explosionszeichnung Teileliste Liste der Baugruppenteile Accessory Bag Montageschritte Technische Parameter Trainingssanleitung Dehnungsübungen Trainings-Leitfaden Bedienungsanleitung Weitere Funktionen Wartung Anleitung zur Fehlerbehebung Passende Fitness-Anwendung... -
Page 6: Sicherheitshinweise
SICHERHEITSHINWEISE WICHTIG - BITTE VOLLSTÄNDIG DURCHLESEN, BEVOR SIE MIT DER MONTAGE ODER BENUTZUNG BEGINNEN Um das Risiko schwerer Verletzungen zu verringern, lesen Sie die gesamte Anleitung, bevor Sie Ihr Gerät zusammenbauen oder benutzen. Beachten Sie insbesondere die folgenden Vorsichtsmaßnahmen. MONTAGE •... - Page 7 eine Garage, ein Nebengebäude, auf eine überdachte Terrasse oder in die Nähe von Wasser. • Wenn Kinder das Gerät unter Aufsicht benutzen dürfen, sollte der jeweilige Stand ihrer geistigen und körperlichen Entwicklung berücksichtigt werden. Sie sollten dabei kontrolliert und angewiesen werden, das Gerät sachgemäß zu benutzen.
-
Page 8: Explosionszeichnung
EXPLOSIONSZEICHNUNG... -
Page 10: Teileliste
TEILELISTE Teil Beschreibung Anzahl Teil Beschreibung Anzahl Zusammenbau der Kreuzschlitz-Senk- Justagevorrichtung Blechschraube, ST4*15 Montage des Hauptrahmens Kreuzschlitz-Rundkopfschraube mit Unterlegscheibe, M4*12 Montage des senkrechten Rahmens - links Kreuzschlitz-Rundkopfschraube M5*15 Montage des senkrechten Rahmens - rechts Kreuzschlitz-Blechschraube, ST3,5*15 Montage des Display-Rahmens Kreuzschlitz-Blechschraube, Motorhalterung ST4*16 Lautsprecher-Platte... - Page 11 Teil Beschreibung Anzahl Teil Beschreibung Anzahl Strom-Verbindungsleitung, oberer Seitenträger, 200mm 85*17,3*989,5 Netzkabel, 1800MM, 0,75 m Buchse, Ø42,8*38 Schalter, 6A/250V Schraubenabdeckung, Ø30*13 Stromanschluss Transportrad, Ø42*T22 Ölleitung Fußauflage, M8*80*75 Laufdeck, T12*1080*540 Verbindung für Griff, 51*48*5 Laufband, T1,6*2425*410 Gummipuffer, Ø20*M6*20, 70-75 Rahmen Fußauflage, 20*40*19 Mehrfachrillenband, PJ-140*4 Sicherheitsverriegelung, 61,5*16*14...
-
Page 12: Liste Der Baugruppenteile
LISTE DER BAUGRUPPENTEILE Bezeichnung der Teile Anzahl Laufbandrahmen Konsolen-Säule Konsole Einstellungsrahmen... -
Page 13: Accessory Bag
ACCESSORY BAG Werkzeug Schlüssel 13-17 M8*45 Schraube*2 M8*45 Schraube*4 Ø8 Unterlegscheibe*8 Inbusschlüssel 5mm Inbusschlüssel 6mm Doppel-Schraubendreher Sicherheitsverriegelung... -
Page 14: Montageschritte
MONTAGESCHRITTE 1) Nach dem Öffnen der Verpackung nehmen Sie bitte die Baugruppenteile heraus und breiten Sie flach auf dem Boden aus. 2) Zum Aufrichten der Säule drücken Sie den Knopf, so dass er herausspringt, danach ziehen Sie das Säulenrohr hoch und drücken dann jeweils den Knopf auf der linken und rechten Seite, wodurch Sie die Säule fixieren können. -
Page 15: Technische Parameter
3) Positionieren Sie den Sicherheitsschalter in der richtigen Position auf der Konsole. TECHNISCHE PARAMETER Spannung AC110V, 50/60 Hz Maximale Belastbarkeit 120 kg Abmessungen Geklappter Zustand: 408*720*1418 (mm) Größe in ausgeklapptem Zustand: 1440*720*1238 (mm) Effektive Lauf-Fläche 400*1110 (mm) maximaler Leistungswert des Motors 1 PS Geschwindigkeit 1,0 - 12,0 km/h Funktion... -
Page 16: Dehnungsübungen
DEHNUNGSÜBUNGEN Bevor Sie das Laufband benutzen, ist es am besten, 5 bis 10 Minuten zum Aufwärmen Stretching- Übungen durchzuführen. Dehnen vor dem Training hilft die Flexibilität zu verbessern und das Verletzungsrisiko zu mindern. MIT DEM KOPF ROLLEN Drehen Sie den Kopf nach rechts für eine Sekunde, fühlen Sie die Streckung auf der linken Seite des Nackens, dann drehen Sie den Kopf zurück für eine Sekunde, recken Sie Ihr Kinn nach oben und lassen Ihren Mund geöffnet. - Page 17 TRAININGSZONEN-ÜBUNG Nach dem Aufwärmen erhöhen Sie bitte die Intensität entsprechend Ihrem gewünschten Trainingsprogramm. Achten Sie darauf, Ihre Intensität für maximale Leistung beizubehalten. Atmen Sie regelmäßig und tief während des Trainings - halten Sie keinesfalls den Atem an. ABKÜHLEN Beenden Sie jedes Training mit einem leichten Joggen oder Gehen Sie mindestens 1 Minute lang. Zur Vervollständigung machen Sie über 5 bis 10 Minuten hinweg Dehnungsübungen, um ganz abzukühlen.
-
Page 18: Trainings-Leitfaden
TRAININGS-LEITFADEN ZIELZONE Herzfrequenz Maximal Abkühlen SO SOLLTE SICH IHR PULS WÄHREND NORMALER FITNESS-ÜBUNG VERHALTEN. DENKEN SIE DARAN, SICH JEWEILS ÜBER EIN PAAR MINUTEN HINWEG AUFZUWÄRMEN UND ABZUKÜHLEN. Der entscheidende Faktor hier ist, wieviel Anstrengung Sie einbringen. Je härter und länger Sie trainieren, desto mehr Kalorien werden Sie verbrenne. -
Page 19: Bedienungsanleitung
BEDIENUNGSANLEITUNG Die in der Spezifikation verwendeten Begriffe sind: Laufbandparameter: Werte für "speed" [Geschwindigkeit], "slope" [Steigung] Bewegungsparameter: Entfernungswert, Kalorienwert, Zeitwert, Herzschlagwert Bewegungsmodus: Manuell, Modus, Programm Vollständig manueller Bewegungsmodus: kein Bewegungsmodus für die Einstellung des Trainingsumfangs. Countdown-Bewegungsmodus: Ein Bewegungsmodus mit einem bestimmten Umfang an Bewegungen. Bewegungsmodus mit automatischem Programm: Laufband-interne Einstellung aus den verschiedenen Sportprogrammen;... - Page 20 1.START: Das Laufband befindet sich im Stopp-Zustand, drücken Sie die START-Taste, um das Laufband in Bewegung zu setzen. Die Ausgangsgeschwindigkeit beträgt 1,0 km/h. 2.STOPP: Das Laufband befindet sich im laufenden Betrieb, drücken Sie die STOPP-Taste, um den Lauf anzuhalten, und drücken Sie die Taste erneut, um den Lauf vollends zu stoppen.
-
Page 21: Weitere Funktionen
WEITERE FUNKTIONEN 1. VORBEREITUNG 1) Schließen Sie die Stromleitung an und schalten Sie das Gerät ein. Wenn Sie das Gerät über längere Zeit hinweg nicht benutzen, sollten Sie es vom Stromnetz trennen. 2) Bringen Sie den roten Sicherheitsschlüssel an. Wenn der Sicherheitsschlüssel nicht richtig positioniert ist, wird das Gerät nicht starten. -
Page 22: Wartung
WARTUNG LUBRICATION: Das Laufband wurde vor dem Versand bereits ausreichend mit Silikon-Öl geschmiert. Silikon-Öl verflüchtigt sich nicht und verteilt sich nach und nach gleichmäßig über die Lauffläche und die Innenseite des Laufgurts. Die Schmierung sollte alle 50 Betriebsstunden erfolgen. HINWEIS: Nutzen Sie ausschließlich "Silikon-Öl"-Produkte um dieses Gerät zu schmieren. Mischen Sie zudem keine anderen Öle bei, da Sie das Laufband so beschädigen. -
Page 23: Passende Fitness-Anwendung
PASSENDE FITNESS-ANWENDUNG Hierzu müssen Sie sich die App auf Ihr Smartphone laden. Starten Sie die App und verbinden Sie Laufband und Smartphone per Bluetooth. Zu einer erfolgreichen Verbindung müssen sich beide Geräte in unmittelbarer Umgebung befinden. Anschließend lässt sich das Laufband über das Smartphone steuern. Hinweis: Android Geräte benötigen Android 4.3 oder höher. - Page 24 USER MANUAL ENGLISH...
- Page 25 3 simple steps for a fast and safe start: 1. scan the QR code 2. watch videos 3. start fast and safely Link to the videos: https://sportstech.de/qr/f17.html...
- Page 26 DEAR CUSTOMER, We are pleased you chose a device from the SPORTSTECH product range. With sports equipment from SPORTSTECH you get the highest quality and latest technology. In order to fully use the potential of your device and be able to enjoy it for many years, please read this manual carefully before starting up and beginning of training, and use the device according to the instructions.
- Page 27 INDEX ENGLISH Safety Information Explosion Diagram Parts List Assembly Parts List Accessory Bag Assembly Steps Technical Parameter Exercise Guide Stretch exercise Workout Guidelines Operation Guide More Operations Maintenance Troubleshooting Guide Compatible Fitness Application...
-
Page 28: Safety Information
SAFETY INFORMATION IMPORTANT – PLEASE READ FULLY BEFORE ASSEMBLY OR USE To reduce the risk of serious injury, read the entire manual before you assemble or use your bench. In particular, note the following safety precautions. ASSEMBLY • Check you have all the components and tools listed in the parts list, bearing in mind that, for ease of assembly, some components are pre-assembled. - Page 29 • Free area shall be not less than 0.6m greater than the training area in the directions from which the equipment is accessed. The free area must also include the area for emergency dismount. Where equipment is positioned adjacent to each other the value of the free area may be shared. Keep unsupervised children away from the equipment.
-
Page 30: Explosion Diagram
EXPLOSION DIAGRAM... -
Page 32: Parts List
PARTS LIST Part Description Qty. Part Description Qty. alignment jig assembly Cross round head screw, M5*15 main frame assembly Cross head self-tapping screw, ST3.5*15 upright frame assembly-Left Cross head self-tapping screw, upright frame assembly-right ST4*16 Display frame assembly Cross head self-tapping screw, motor holder ST4*14 speaker pressing plate... - Page 33 Part Description Qty. Part Description Qty. frame foot pad, 20*40*19 display sticker, F1 safety lock, 61.5*16*14 safety lock sticker, F1 sidebar-Right, 1037*148*81 tube plug, 19*T1.5 Sidebar-Left, 1037*148*81 cable clip display upper cover, 683*203*50 display lower cover, 683*203*45.5 back angle bead-Right, 178*103*103 back angle bead-left, 178*103*103...
-
Page 34: Assembly Parts List
ASSEMBLY PARTS LIST No. Part name Qty. Treadmill Frame Console Mast Console Adjustment frame... -
Page 35: Accessory Bag
ACCESSORY BAG No. Tool Wrench 13-17 M8*45 Screw*2 M8*45 Screw*4 Ø8 Flat washer*8 Allen wrench 5mm Allen wrench 6mm Double screw driver Safety lock... -
Page 36: Assembly Steps
ASSEMBLY STEPS 1) open the package, remove the assembly materials from the box, and put these flat on the ground; 2) Erect the column by pressing the button, so that the button bounces, and then pull up the column tube, then press the left and right sides of the button, to fix the column. -
Page 37: Technical Parameter
3) Place the safety switch in the correct position on the console. TECHNICAL PARAMETER Voltage AC110V, 50/60Hz Maximum load 120 Kg Dimensions Folded: 408*720*1418 (mm) Expand size:1440*720*1238 (mm) An effective area of 400*1110 (mm) Motor maximum power Speed 1.0 - 12.0Km/h Function Running EXERCISE GUIDE... -
Page 38: Stretch Exercise
STRETCH EXERCISE No matter how you do sports, please do some stretch at first, The warm muscle will extend easily, so warm up yourself with 5-10minutes, Then We suggest the following stretch exercise, five times.10 counts for each time or longer do these exercise again after sports. HEAD ROLLS Rotate your head to the right for one count, feeling the stretch up the left side of your neck, then rotate your head back for one count, stretching your chin to the ceiling and letting your mouth open. - Page 39 TRAINING ZONE EXERCISE After warming up, increase the intensity to your desired exercise programme. Be sure to maintain your Intensity for maximum performance. Breathe regularly and deeply as you exercise -never hold your breath. COOL DOWN Finish each workout with a light jog or walk for at least 1 minute. Then complete 5 to 10 minutes of stretching to cool down.
-
Page 40: Workout Guidelines
WORKOUT GUIDELINES TARGET ZONE Heart rate Maximum Cool down THIS IS HOW YOUR PULSE SHOULD BEHAVE DURING GENERAL FITNESS EXERCISE. REMEMBER TO WARM UP AND COOL DOWN FOR A FEW MINUTES. The most important factor here is the amount of effort you put in. The harder and longer you work the more calories you will burn. -
Page 41: Operation Guide
OPERATION GUIDE The terms used in the specification are: Treadmill parameters: "speed" value, "slope" value Motion parameters: Distance value, Calorie value, Time value, Heartbeat value. Movement mode: manual, mode, rogramme Full manual movement mode: no movement mode for setting the amount of exercise. Countdown mode Movement mode: A motion mode with a specific amount of motion. - Page 42 2.STOP: The treadmill is in running state, press STOP key, pause running and press it again to stop it. 3.SPEED SHORTCUT KEY (3, 6): When the machine is running, you can press a number to adjust incline. 4. SAFETY KEY: Emergency stop function, used for preventing runner from falling because of the fast speed.
-
Page 43: More Operations
MORE OPERATIONS 1. PREPARATION 1) Plug in the power line, turn on the power in the below of treadmill if you will not use the treadmill for a long time you can close the power first 2) Attach the red safety key. If the safety key is not right position, it will not start. 2. -
Page 44: Maintenance
MAINTENANCE LUBRICATION: The treadmills have already been spread with "Silicone Oil" in advance before leaving the manufacturing plant. Silicone oil is without volatility and has gradually permeated through the running belt. Lubrication must be applied all 50 working hours. NOTE: Only use "Silicone Oil" lubricants for this equipment. In addition, do not add any other oil ingredient;... -
Page 45: Compatible Fitness Application
COMPATIBLE FITNESS APPLICATION The first you need to download the bluetooth APP on your phone,then open the APP and connected the treadmill near the treadmill,the connection is successful,next you can control treadmill by your phone. Note: Android System phone must be android 4.3 above. Apple OS phone must be iso 7.0 APP DOWNLOAD ADDRESS AS BELOW: Apple OS:enter applestore search "SMART TREADMILL"... - Page 46 MANUAL DE USUARIO ESPAÑOL...
- Page 47 Nuestros para usted! Construcción Utilizar Reducción En 3 sencillos pasos para un arranque rápido y seguro: 1. Escanear el código QR 2. Ver vídeos 3. Comienza rápido y seguro Enlace a los videos: https://sportstech.de/qr/f17.html...
- Page 48 ESTIMADO CLIENTE, Nos complace que haya elegido un dispositivo de la línea de productos SPORTSTECH. Con el equipo deportivo de SPORTSTECH usted obtiene la más alta calidad y la mejor tecnología. Con el fin de usar todo el potencial de su dispositivo y para que pueda disfrutarlo durante muchos años, por favor lea este manual cuidadosamente antes de comenzar a ejercitarse, y use el dispositivo de acuerdo a las instrucciones.
- Page 49 CONTENIDOS ESPAÑOL Información de seguridad Diagrama en despiece Lista de piezas Assembly Parts List Accesorios Pasos de ensamblaje Especificaciones técnicos Guía de ejercicios Ejercicios de estiramiento Lineamientos del ejercicio Guía de funcionamiento Más funciones Mantenimiento Solución de problemas Aplicación deportiva compatible...
-
Page 50: Información De Seguridad
INFORMACIÓN DE SEGURIDAD IMPORTANTE – POR FAVOR LEA CUIDADOSAMENTE ANTES DE EN- SAMBLAR O USAR EL DISPOSITIVO Para reducir el riesgo de lesiones serias, lea todo el manual antes de ensamblar o usar su banco de ejercicios. En particular, tenga en cuenta las siguientes precauciones de seguridad. ENSAMBLAJE •... - Page 51 Deben recibir instrucciones para un uso adecuado del dispositivo. Bajo ninguna circunstancia debe considerarse al dispositivo como un juguete. • Este producto es apto para usuarios con un peso máximo de: 120 kgs. • Este producto no es apto para fines terapéuticos. •...
-
Page 52: Diagrama En Despiece
DIAGRAMA EN DESPIECE... -
Page 54: Lista De Piezas
LISTA DE PIEZAS Pieza Descripción Ctd. Pieza Descripción Ctd. dispositivo de ajuste tornillo autorroscante, ST4*25 estructura principal tornillo autorroscante, ST5.0*20 estructura vertical-Izquierda tornillo autorroscante, ST4*16 estructura vertical-Derecha resorte tensor, Ø14*Ø2.0*43 soporte de pantalla pin fijo, Ø16*Ø12*40 soporte del motor resorte, Ø15*Ø1.0*45 placa de presión del altavoz rodillo frontal, Ø80*Ø42*Ø15*485*506... - Page 55 Pieza Descripción Ctd. Pieza Descripción Ctd. ángulo posterior-Derecho, conector del tubo, 19*T1.5 178*103*103 clip para el cable ángulo posterior-Izquierdo, 178*103*103 botón de desbloqueo, Ø27.5*18 soporte de desbloqueo, 40*40*28 cubierta de la estructura vertical- interior-derecha, 1103*314*36 cubierta de la estructura vertical- exterior-derecha, 1103*314*54 cubierta de la estructura vertical- interior-izquierda, 1103*314*36...
-
Page 56: Assembly Parts List
ASSEMBLY PARTS LIST Pieza Nombre de la pieza Ctd. Estructura de la caminadora Soporte de la consola Consola Estructura de ajuste... -
Page 57: Accesorios
ACCESORIOS No. Herramienta Llave 13-17 Tornillo M8*45x2 Tornillo M8*45x4 Arandela plana Ø8x8 Llave allen 5mm Llave allen 6mm Destornillador doble Cierre de seguridad... -
Page 58: Pasos De Ensamblaje
PASOS DE ENSAMBLAJE retire el material de empaque, saque las piezas de la caja y póngalas sobre una superficie plana; 2) la primera columna alrededor del botón haciendo presión, de manera que el botón rebote y después levante el tubo de la columna, después presione el lado izquierdo y derecho del botón, podrá... -
Page 59: Especificaciones Técnicos
3) Ubique el interruptor de seguridad en posición correcta en la consola. ESPECIFICACIONES TÉCNICOS Voltaje AC110V, 50/60Hz Carga máxima 120 Kg Dimensiones Plegado: 408*720*1418 (mm) Tamaño expandido:1440*720*1238 (mm) Correr una zona efectiva de 400*1110 (mm) Valor de potencia máximo del motor 1HP Velocidad 1.0 - 12.0Km/h Función... -
Page 60: Ejercicios De Estiramiento
EJERCICIOS DE ESTIRAMIENTO No importa cómo se ejercite, siempre haga algo de estiramiento primero. El calentamiento muscular hará que sus músculos se extiendan fácilmente, así que caliente al menos 5-10 minutos. Luego le sugerimos hacer los siguientes ejercicios de estiramiento cinco veces. El estiramiento antes del ejercicio le ayuda a mejorar la flexibilidad y reduce los riesgos de lesiones. - Page 61 INTENSIDAD DEL EJERCICIO Después de calentar, aumente la intensidad de su programa de ejercicio deseado. Asegúrese de mantener su intensidad para un máximo rendimiento. Respire de manera constante y profunda mientras se ejercita-nunca aguante la respiración. ENFRIAMIENTO Termine cada ejercicio con un trote ligero o camine durante al menos 1 minuto. Después complete de 5 a 10 minutos de estiramiento para el enfriamiento.
-
Page 62: Lineamientos Del Ejercicio
LINEAMIENTOS DEL EJERCICIO ZONA OBJETIVO Frecuencia cardíaca Máximo Enfriamiento SU PULSO DEBERÍA COMPORTARSE DE ESTA MANERA DURANTE EL ENTRENAMIENTO GENERAL RECUERDE CALENTAR Y ENFRIAR DURANTE UNOS MINUTOS. El factor más importante aquí es la cantidad de esfuerzo que ponga. Entre más duro y prolongado se ejercite, más calorías quemará. -
Page 63: Guía De Funcionamiento
GUÍA DE FUNCIONAMIENTO Los términos usados en la especificación son: Parámetros de la caminadora: valor "speed"-velocidad, valor "slope"-inclinación Parámetros de movimiento: Valor "Distance"-Distancia, valor "Calorie"-Calorías, valor "Time"-Tiempo, valor "Heartbeat"- Pulsaciones. Modo de movimiento: manual, modo, programa Modo de movimiento completamente manual: ningún modo de movimiento para configurar la cantidad de ejercicio. Modo de cuenta regresiva-Modo de movimiento: Un modo de movimiento con una cantidad especifica de movimiento. - Page 64 1.ENCENDER: La caminadora está detenida, presione la tecla START, encienda la caminadora. La velocidad inicial es 1.0km/h. 2.DETENER: La caminadora está funcionando, presione la tecla STOP, deje de correr y presione STOP de nuevo para detenerla. 3.TECLA DE ATAJO PARA VELOCIDAD (3, 6): Cuando la máquina esté...
-
Page 65: Más Funciones
MÁS FUNCIONES 1. PREPARACIÓN 1) Conecte el cable eléctrico, encienda la energía en la parte baja de la caminadora, si no va a usar la caminadora durante un buen tiempo puede desconectar el cable eléctrico. 2) Conecte la llave de seguridad. Si la llave de seguridad no está en la posición correcta, la caminadora no arrancará. 2. -
Page 66: Mantenimiento
MANTENIMIENTO LUBRICACIÓN: La caminadora ya ha sido lubricada con “aceite de silicona” con antelación antes de dejar la planta de fabricación. El aceite de silicona no es volátil y ha sido extendido gradualmente por toda la cinta. La lubricación se debe aplicar todas las 50 horas de trabajo. NOTA: Solamente use lubricantes de “aceite de silicona”... -
Page 67: Aplicación Deportiva Compatible
APLICACIÓN DEPORTIVA COMPATIBLE Primero necesita descargar la aplicación para Bluetooth en su teléfono, luego abra la aplicación y conecte el teléfono cerca de la caminadora, si la conexión es exitosa a continuación podrá controlar la caminadora desde su teléfono. Nota: Los teléfonos con sistema Android deben ser Android 4.3 o superior, con sistema Apple deben ser iso 7.0 DIRECCIÓN DE DESCARGA DE LA APLICACIÓN COMO SE MUESTRA A CONTINUACIÓN:... - Page 68 MANUEL FRANÇAIS...
- Page 69 3 étapes simples pour un démarrage rapide et sécurisé: 1. Scannez le code QR 2. Regarder les vidéos 3. Démarrez rapidement et en toute sécurité. Lien vers les vidéos: https://sportstech.de/qr/f17.html...
- Page 70 CHER CLIENT, Nous sommes ravis que vous ayez choisi un appareil de la gamme de produits SPORTSTECH. Avec les équipements sportifs de SPORTSTECH, vous obtenez la plus haute qualité et la meilleure technologie. Afin d'utiliser pleinement le potentiel de votre appareil et de pouvoir l'apprécier pendant de nombreuses années, lisez attentivement ce manuel avant l'utilisation et le début de votre entraînement et utilisez l'appareil conformément aux...
- Page 71 CONTENU FRANÇAIS Informations de sécurité Vue en éclaté Liste des pièces Liste des pièces d'assemblage Sac d'accessoires Etapes d'assemblage Réglages techniques Guide d'exercice Excercice d'étirement Directives d'entraînement Guide d'utilisation Plus d'opérations Entretien Guide de dépannage Application de Fitness compatible...
-
Page 72: Informations De Sécurité
INFORMATIONS DE SÉCURITÉ IMPORTANT - VEUILLEZ LIRE ENTIÈREMENT AVANT TOUT ASSEM- BLAGE OU UTILISATION Pour réduire le risque de blessure grave, lisez le manuel en entier avant d'assembler ou d'utiliser votre banc. En particulier, notez les précautions de sécurité suivantes. ASSEMBLAGE •... - Page 73 garage, une dépendance, une terrasse couverte ou près de l'eau. • Si les enfants sont autorisés à utiliser l'équipement sous surveillance, leur développement mental et physique devrait être pris en compte. Ils devraient être contrôlés et instruits à l'utilisation correcte de l'équipement. L'équipement ne peut en aucun être considéré...
-
Page 74: Vue En Éclaté
VUE EN ÉCLATÉ... -
Page 76: Liste Des Pièces
LISTE DES PIÈCES Pièce Description Qté Pièce Description Qté assemblage de gabarit écrou hexagonal, M8 / d'alignement Vis autotaraudeuse à tête fraisée, assemblage du cadre principal ST4 * 15 assemblage du cadre vertical- Vis à tête ronde ronde avec gauche rondelle M4 * 12 assemblage du cadre vertical- Vis à... - Page 77 Pièce Description Qté Pièce Description Qté Port USB couvercle latéral-gauche, 270 * 199 * 74.5 Ligne de raccordement AC, 250MM, capot supérieur du moteur, 580 * 248 * 105 Ligne de raccordement AC, 200mm capot inférieur du moteur, 580 * 262 * 105 câble d'alimentation, 1800MM, 0.75m...
-
Page 78: Liste Des Pièces D'assemblage
LISTE DES PIÈCES D'ASSEMBLAGE N° Nom de la pièce Qty. Châssis du tapis de course Mât de console Console Cadre de réglage... -
Page 79: Sac D'accessoires
SAC D'ACCESSOIRES N° Outil Clé 13-17 M8 * 45 Vis * 2 M8 * 45 Vis * 4 Ø8 Rondelle plate * 8 Clé Allen 5mm Clé Allen 6mm Double tournevis Verrou de sécurité... -
Page 80: Etapes D'assemblage
ETAPES D'ASSEMBLAGE emballage, retirez l'ensemble dans la boîte de matériel, et l'hôte à plat sur le sol; 2) la première colonne autour du bouton en appuyant, de sorte que le bouton rebondisse, puis tirez vers le haut le tube de colonne, puis appuyez sur les côtés gauche et droit du bouton, vous pouvez fixer la colonne. -
Page 81: Réglages Techniques
3) Placez l'interrupteur de sécurité dans la bonne position sur la console. RÉGLAGES TECHNIQUES Tension AC110V, 50/60Hz Charge maximale 120 kg Dimensions Pliage: 408 * 720 * 1418 (mm) Taille augmentée: 1440 * 720 * 1238 (mm) Exécuter une zone efficace de 400*1110 (mm) Puissance maximale du moteur Vitesse... -
Page 82: Excercice D'étirement
EXCERCICE D'ÉTIREMENT Peu importe comment vous pratiquez le sport, Veuillez faire quelques étirements avant de commencer votre entraî-nement, le muscle chaud s’étendra facilement, donc réchauffez vous durant 5-10minutes, nous suggérons l'exercice d'étirement suivant : 5 fois ,10 comptes pour chaque fois ou plus, faire ces exercices à... -
Page 83: Exercice Dans La Zone D'entraînement
EXERCICE DANS LA ZONE D'ENTRAÎNEMENT Après l'échauffement, augmentez l'intensité de votre programme d'exercice désiré. Assurez-vous de maintenir votre intensité pour une performance maximale. Respirez régulièrement et profondément pendant que vous faites un exercice - ne retenez jamais votre respiration. REFROIDIR Terminez chaque entraînement avec un jogging léger ou marchez pendant au moins 1 minute. -
Page 84: Directives D'entraînement
DIRECTIVES D'ENTRAÎNEMENT ZONE CIBLE Fréquence cardiaque Maximum Refroidir C'EST AINSI QUE VOTRE POULS DEVRAIT SE COMPORTER PENDANT LA REMISE EN FORME GÉNÉRALE EXERCICE. N'OUBLIEZ PAS DE VOUS ECHAUFFER ET DE REFROIDIR PENDANT QUELQUES MINUTES. Le facteur le plus important ici est la quantité d'effort que vous mettez. Plus vous travaillerez dur et long, plus vous brûlerez de calories. -
Page 85: Guide D'utilisation
GUIDE D'UTILISATION Les termes utilisés dans la spécification sont: Paramètres du tapis roulant: valeur "vitesse", valeur "pente" Paramètres de mouvement: valeur de distance, valeur de calorie, valeur de temps, valeur de pulsation. Mode de mouvement: manuel, mode, programme Mode de mouvement manuel complet: Aucun mode de mouvement pour régler la quantité d'exercice. Mode de compte à... - Page 86 1.START: Le tapis de course est à l'arrêt, appuyez sur la touche START, démarrez le tapis de course. La vitesse initiale est de 1,0 km / h. 2.STOP: Le tapis de course est en état de fonctionnement, appuyez sur la touche STOP, faites une pause et appuyez à nouveau pour l'arrêter.
-
Page 87: Plus D'opérations
PLUS D'OPÉRATIONS 1. PRÉPARATION 1) Branchez la ligne d'alimentation, allumez dans le dessous du tapis de course si vous n'utilisez pas le tapis de course pendant une longue période, vous pouvez arrêter l'appreil en premier 2) Attachez la clé de sécurité rouge. Si la clé de sécurité n'est pas correctement positionnée, elle ne démarrera pas. 2. -
Page 88: Entretien
ENTRETIEN LUBRIFICATION: Les tapis roulants ont déjà été répandus avec "l'huile de silicone" à l'avance avant de quitter l'usine de fabrication. L'huile de silicone est sans volatilité et pénétre progressivement à travers la bande de roulement. La lubrification doit être appliqué toutes les 50 heures de travail. REMARQUE: Utilisez uniquement des lubrifiants "huile de silicone"... -
Page 89: Application De Fitness Compatible
APPLICATION DE FITNESS COMPATIBLE Tout d’abord, vous devez télécharger l'application bluetooth sur votre téléphone, puis ouvrez l’APP et connectez la au tapis roulant, une fois que la connexion est établie, vous pourrez contrôler votre tapis roulant par votre téléphone. REMARQUE: Le système Android téléphone doit être au moins android 4.3, pour la version Apple OS: elle doit être IOS 7.0 POUR TROUVER L’ADRESSE DE TÉLÉCHARGEMENT DE L’APPLICA- TION IL FAUT:... - Page 90 MANUALE D’USO ITALIANO...
- Page 91 Video Tutorial Il nostro per te! Montaggio Utilizzo Smontaggio 3 semplici passaggi per un inizio veloce e sicuro: 1. Scannerizza il QR-Code 2. Guarda il Video 3. Inizia ad allenarti! Link per il Video: https://sportstech.de/qr/f17.html...
- Page 92 GENTILE CLIENTE, Siamo lieti che abbiate scelto un dispositivo della gamma SPORTSTECH. Con le attrezzature sportive di SPORSTECH potrete usufruire della più alta qualità e della più recente tecnologia. Per sfruttare a pieno il potenziale del dispositivo e poterlo utilizzare per molti anni, raccomandiamo di leggere attentamente questo manuale prima di iniziare l’allenamento e di utilizzare il dispositivo seguendo le istruzioni.
- Page 93 INDICE ITALIANO Informazioni di Sicurezza Diagramma Esploso Lista delle parti Lista Parti per Assemblaggio Borsa per Accessori Procedimento per l'Assemblaggio Parametri tecnici Guida agli Esercizi Esercizi di stretching Indicazioni generali per l'Allenamento Guida all'uso Più Operazioni manutenzione Risoluzione dei Problemi Frequenti Applicazioni per il Fitness Compatibili...
-
Page 94: Informazioni Di Sicurezza
INFORMAZIONI DI SICUREZZA IMPORTANTE: PER FAVORE LEGGI ATTENTAMENTE PRIMA DE- LL'ASSEMBLAGGIO O DELL'USO Per ridurre il rischio di farsi male, leggere l'intero manuale prima di assemblare o utilizzare la panca. In particolare, presta attenzione alle seguenti precauzioni di sicurezza. ASSEMBLAGGIO •... - Page 95 preso in considerazione. Essi devono essere controllati e istruiti sull'utilizzo corretto dell'attrezzatura. L'attrezzatura non è mai considerabile come un giocattolo. • Il prodotto è adatto a un peso utente massimo di: 120 kg. • Il prodotto non è adatto per scopi terapeutici. •...
-
Page 96: Diagramma Esploso
DIAGRAMMA ESPLOSO... -
Page 98: Lista Delle Parti
LISTA DELLE PARTI Parte Descrizione Quantità Parte Descrizione Quantità assemblaggio maschera di Vite autofilettante a testa svasata allineamento con taglio a croce, ST4*15 assemblaggio telaio principale Vite con testa tonda, taglio a croce e rondella, M4*12 assemblaggio telaio verticale - destra Vite con testa tonda e taglio a croce, M5*15... - Page 99 Parte Descrizione Quantità Parte Descrizione Quantità linea di connessione AC, copertura inferiore del motore, 250MM, 580*262*105 linea di connessione AC, fuso regolatore, Ø27.5*22 200mm piano pedonale frontale, cavo di alimentazione, 59*35*32 1800MM,0.75m barra laterale superiore, Interruttore, 6A/250V 85*17.3*989.5 presa di corrente boccola, Ø42.8*38 tubo dell'olio copertura vite, Ø30*13...
-
Page 100: Lista Parti Per Assemblaggio
LISTA PARTI PER ASSEMBLAGGIO Num. Nome parte Quantità Struttura Tapis Roulant Asta della Console Console Struttura di regolazione... -
Page 101: Borsa Per Accessori
BORSA PER ACCESSORI Num. Attrezzo Chiave inglese 13-17 M8*45 Vite*2 M8*45 Vite*4 Ø8 Rondella piatta*8 Chiave a brugola 5mm Chiave a brugola 6mm Cacciavite doppio Fermo di sicurezza... -
Page 102: Procedimento Per L'assemblaggio
PROCEDIMENTO PER L'ASSEMBLAGGIO prendere il pacco, rimuovere i pezzi dalla scatola e posizionarli per terra; 2) sistemare la prima colonna intorno al pulsante premendo, affinché il pulsante rimbalzi, quindi tirare il tubo della colonna e premere i lati destro e sinistro del pulsante per aggiustare la colonna. -
Page 103: Parametri Tecnici
3) Posizionare il fermo di sicurezza nella corretta posizione sulla console. PARAMETRI TECNICI Voltaggio AC110V, 50/60Hz Carico massimo 120 Kg Dimensioni Ripiegato: 408*720*1418 (mm) Dimensioni per esteso:1440*720*1238 (mm) Percorre un'area effettiva di 400*1110 (mm) Valore di potenza massima del motore Velocità... -
Page 104: Esercizi Di Stretching
ESERCIZI DI STRETCHING Non importa la ragione per cui fai sport, fai in modo di fare sempre esercizi di stretching prima di cominciare. Il uscolo riscaldato si allungherà facilmente, quindi scaldati con degli esercizi per 5-10 minuti. Ti suggeriamo di eseguire i seguenti esercizi cinque volte conta fino a dieci ogni volta o anche più a lungo quando ripeti l’esercizio dopo aver praticato sport. - Page 105 ESERCIZIO PER ZONA DI ALLENAMENTO Dopo il riscaldamento, aumenta l'intensità del tuo programma di esercizio desiderato. Assicurati di mantenere la tua intensità per ottenere una migliore performance. Respira regolarmente e profondamente durante i tuoi esercizi, non trattenere mai il respiro. RAFFREDDAMENTO Termina ogni allenamento con una corsa o una camminata breve di almeno 1 minuto.
-
Page 106: Indicazioni Generali Per L'allenamento
INDICAZIONI GENERALI PER L'ALLENAMENTO ZONA OBIETTIVO Battito cardiaco Massimo Raffreddamento QUESTO È COME IL TUO BATTITO DOVREBBE COMPORTARSI DURANTE UN GENERICO ESERCIZIO DI ALLENAMENTO. RICORDATI DI RISCALDARTI E RAFFREDDARTI PER UN PAIO DI MINUTI. In questo caso, il fattore più importante è la quantità di sforzo che impieghi. Più ti alleni a lungo e duramente, più calorie brucerai. -
Page 107: Guida All'uso
GUIDA ALL'USO I termini utilizzati nello specifico sono: Parametri del tapis roulant: valore "velocità", valore "pendenza" Parametri di movimento: valore Distanza, valore Calorie, valore Tempo, valore Battito Cardiaco. Modalità di movimento: manuale, modalità, programma Modalità movimento completamente manuale: nessuna modalità di movimento per l'impostazione della quantità di esercizio. - Page 108 1. AVVIO: Il tapis roulant è fermo, premi la chiave START ed inizierà a funzionare. La velocità iniziale è di 1.0km/h. 2. FERMATA: Il tapis roulant è in corsa, premere la chiave STOP, la corsa andrà in pausa, premere nuovamente per bloccarla. 3.
-
Page 109: Più Operazioni
PIÙ OPERAZIONI 1. PREPARAZIONE 1) Inserire il cavo per l'alimentazione, accendere il tapis roulant dal basso, se non userai il tapis roulant per un lungo periodo di tempo puoi prima spegnere poi togliere il cavo 2) Inserire la chiave di sicurezza rossa. Se la chiave di sicurezza non è nella giusta posizione, il tapis roulant non si avvierà. 2. -
Page 110: Manutenzione
MANUTENZIONE LUBRIFICAZIONE: Prima di lasciare lo stabilimento di produzione, il tapis roulant viene già lubrificato con Olio di silicone. L’olio di silicone non è volatile e ha permeato gradualmente il nastro da corsa. La lubrificazione deve essere applicata tutte le 50 ore di lavoro. NOTA: Utilizzare solo lubrificanti a base di Olio di silicone per questo dispositivo. -
Page 111: Applicazioni Per Il Fitness Compatibili
APPLICAZIONI PER IL FITNESS COMPATIBILI Prima è necessario scaricare l’APP per Bluetooth sul telefono, aprire l’APP e collegare il tapis roulant, se la connessione avviene con successo, allora potrete controllare il tapis roulant attraverso il telefono. Nota: Il sistema operativo del vostro telefono dev’essere Android 4.3 o superiore , il telefono Apple OS dev’essere iso 7.0 L’APP PUÒ... - Page 112 Declare under our sole responsibility that the following product Erklären in alleiniger Verantwortung, dass das weiter unten genannte Produkt Type of product / Geräteart: Motorized Treadmill Name / Handelsbezeichnung: Treadmill F17 Trade mark / Handelsmarke: Sportstech Model /Modell: F17 Meets the essential requirements of the following EC directives: Die grundlegenden Anforderungen der aufgeführten EG Richtlinien erfüllt:...
- Page 114 Verkauf durch / Distributed by / Distribuido por / Distribué / Distribuito da InnovaMaxx GmbH Potsdamer Platz 11 10785 Berlin +49 30-220 66 35 69 service@innovamaxx.de http://www.sportstech.de...